Scrappy Tails – Nutcracker Tunnel Card

Welcome to Day 10 of my Nutcracker series using a variety of stamps and die sets to make some nutcracker themed cards. My card today uses dies by Scrappy Tails – Nutcracker , Snowflake Pop-Up Tunnel Card and Train Station Pop-Up Tunnel Card die sets.

Watch the process video below to learn how this card was made.

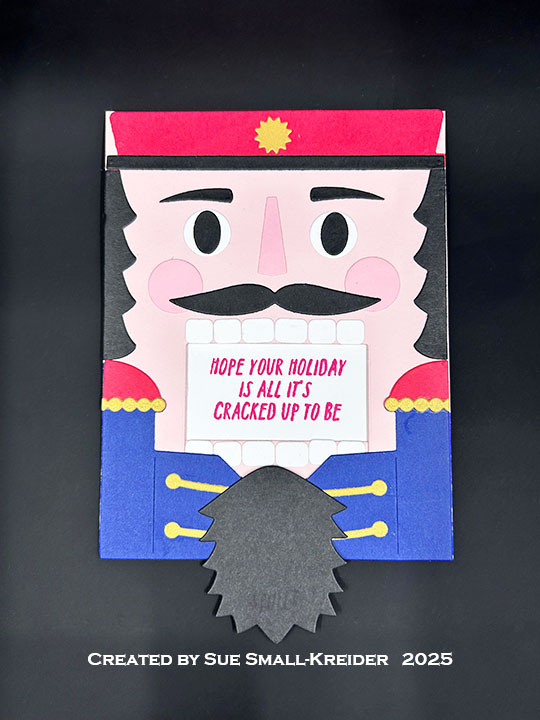
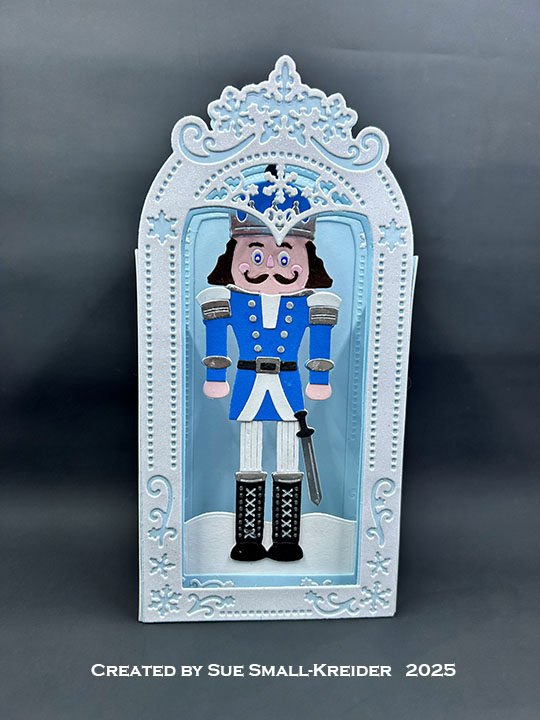
Nutcracker: Referring to the images of the nutcrackers on the packaging for the Nutcracker die set and the video above, cut out all the pieces using your own color scheme. (I cut out the entire body from flesh colored cardstock and then dressed the nutcracker.) The nutcracker is glued into the second layer of the tunnel card at the hat (onto the lattice work of the frame) and at the boots onto the snow piece. (The snow piece is glued to the back side of the frame. )

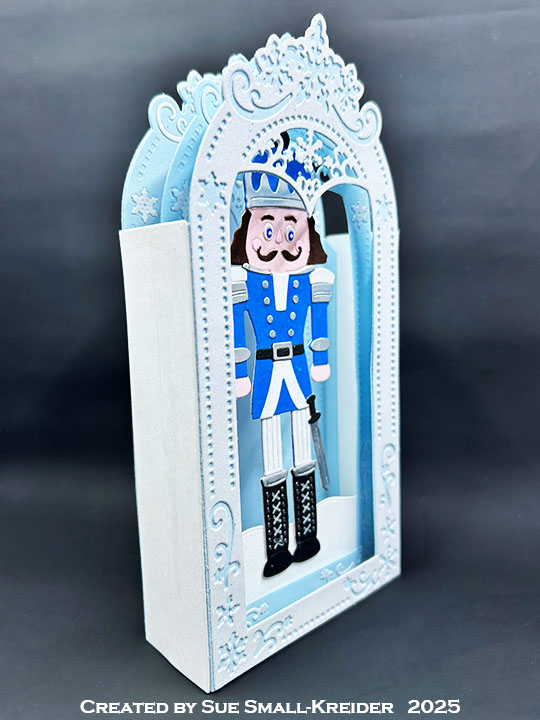
Tunnel Card: Using a pale blue cardstock, cut three of the tabbed frame pieces and one large solid arched piece from the Snowflake Pop-Up Tunnel Card die set. Cut from white, one frame without tabs, one arch with snowflakes and one snow piece. From white glitter cardstock cut one frame without tabs. Punch out all the decorative pieces from all the white frames and save for decorating the blue embossed frames. Glue the plain white frame onto the solid blue arch piece and then glue the smaller snowflake arch onto the blue arch inside the white frame. Glue the white glitter frame onto one of the embossed blue frames. Decorated the other two blue embossed frames with the snowflakes and swirls from the white frames. For the first and second frames fold the tabs toward the back and then fold the third frame’s tabs toward the front. Add 1/8 to 1/4-inch wide double-sided tape to the sides of the tabs that will be adhered to the side pieces. Cut two side pieces from white using the side piece from the Train Station Pop-Up Tunnel Card die set. (If you don’t have the Train Station set, cut two 1.25×5-inch rectangles.) Assemble the tunnel card as shown in the video.

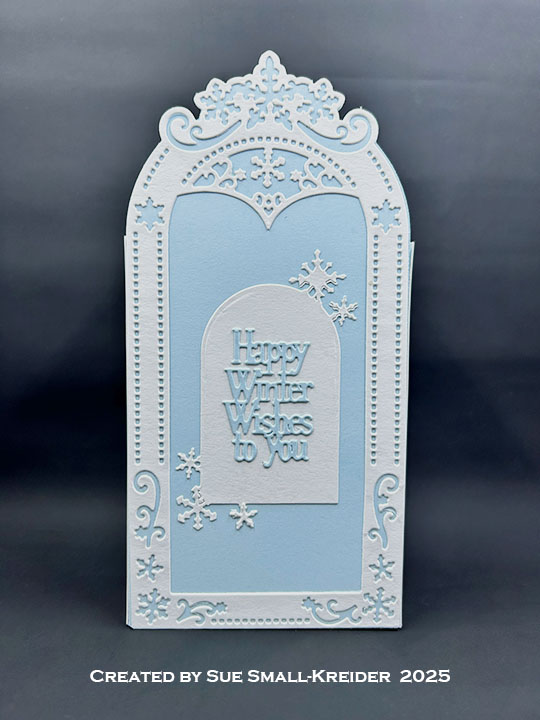
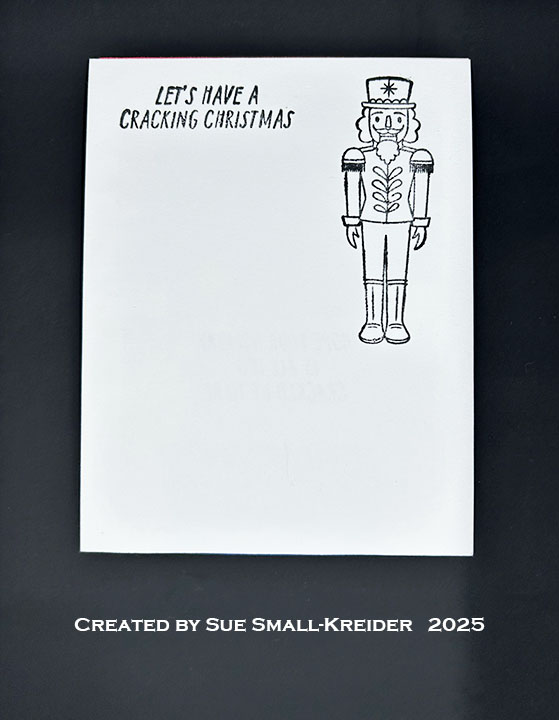
Sentiments: The back sentiment of “Happy Winter Wishes to you” comes from the Snowflake Pop-Up Tunnel Card die set.

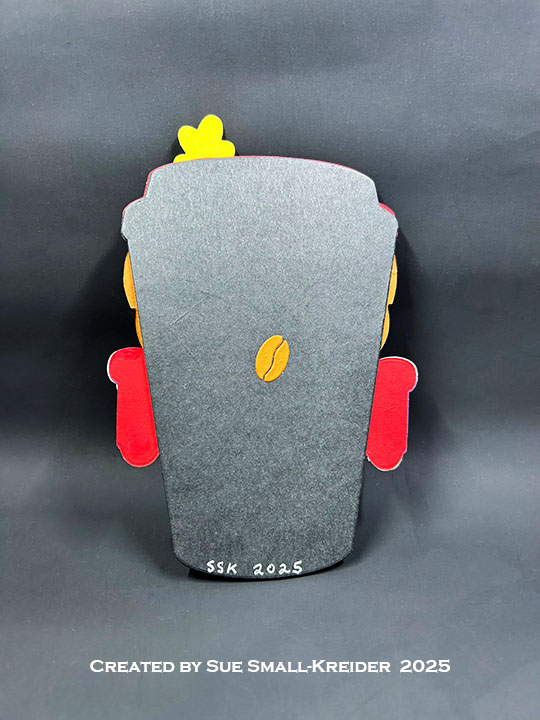
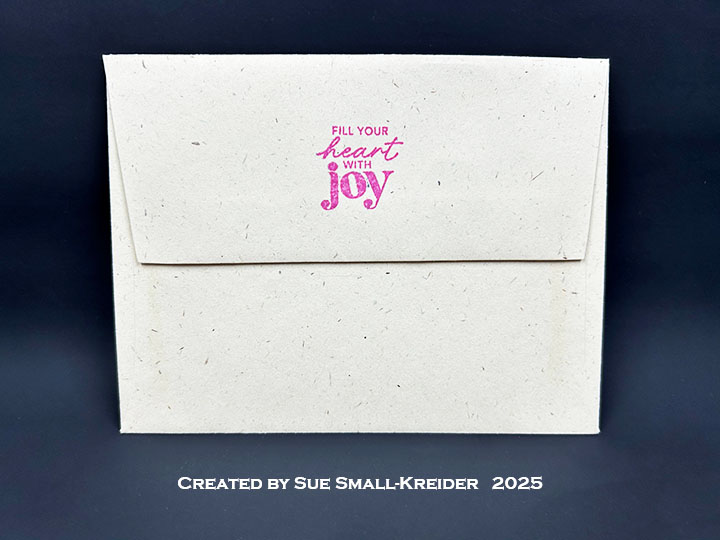
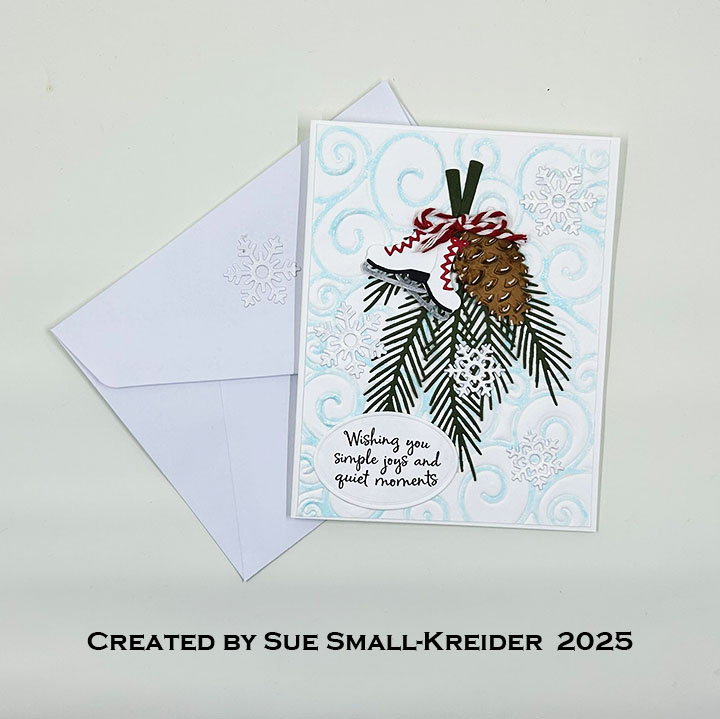
Envelope: The panel card fits into an A7 (5×7-inch) size envelope with the back flap decorations of snow from the Snowflake Pop-Up Tunnel Card die set.

___________________________________

Thank you for experiencing this blog post.

I hope this inspires you and makes you smile.

Please subscribe, like and leave comments 😊

___________________________________

Disclaimer: Karen Burniston products are provided free of charge by the manufacturer for review and use. All other items were personally purchased. Compensated affiliate links used where or when possible, meaning I will receive a small percentage commission from these manufacturers at no cost to you. This will allow me to add more content to my YouTube channel and help out a lot. Thank you.

Materials Used:

Dies

  • Scrappy Tails – Dies – Slimline Nutcracker Spinner
  • Scrappy Tails – Dies – Snowflake Pop-Up Tunnel Card
  • Scrappy Tails – Dies – Train Station Pop-Up Tunnel Card

Papers

  • Concord & 9th – 8.5Γ—11 Cardstock – Powder
  • Gina K. – 8.5Γ—11 100lb. Cardstock – Blue Raspberry
  • Pen + Gear – 8.5Γ—11 104lb. Diamond Print Glitter Cardstock – White
  • Silver Matte Cardstock.
  • Black, Pink and White Cardstock
  • A7 (5×7-inches) Envelope – Cream

Ink

  • American Crafts – Metallic Marker – Silver
  • Nuvo – Aqua Simmer Brush – Glitter Gloss
  • Nuvo – Marker – 430 Ultramarine
  • OLO – Marker – Cotton Candy
  • Sakura – Gelly Roll Pen – Medium – White
  • Sharpie – Permanent Marker – Chisel Tip – Black
  • Stampin’ Up – Stampin’ Write Marker – Chocolate Chip

Adhesives

Tools

  • Die Cutting Machine
  • Scrapbook.com – Magic Mat
  • Paper Trimmer
  • Stamping Block as Paperweight
  • Bone Folder
  • Tweezers
  • Scrapbook.com – Mint Tape
  • We R Memories – QuickStick

Frantic Stamper- Nutcracker Trio Card

Welcome to Day 9 of my Nutcracker series using a variety of stamps and die sets to make some nutcracker themed cards. My card today uses dies by Frantic Stamper Inc. – Nutcracker and Spellbinders – Happy Holidays as well as the Hero Arts’ A Little Nuts stamp set.

Watch the process video below to learn how this card was made.

Cardbase: I used a purchased thank you cardbase with matching envelope and covered the card front with a patterned paper.

Nutcracker: Referring to the images of the nutcrackers on the packaging for the Nutcracker die set, cut out all the pieces using your own color scheme. (I cut out the face from pink and colored the eyes green with a white dot. The teeth were cut from white and the bottom colored with a pink marker. The belts, boots, drum and hat visors were colored with markers to change colors or to add trim to the boots.)

Sentiments: Using the Happy Holidays die set, cut from red the words “Happy Holidays” and glue inside the card.

Envelope: The panel card fits into an A2 size envelope with a nutcracker and “Nutcracker is my favorite season” on the envelope back using the Hero Arts’ A Little Nuts stamp set and blue ink.

___________________________________

Thank you for experiencing this blog post.

I hope this inspires you and makes you smile.

Please subscribe, like and leave comments 😊

___________________________________

Disclaimer: Karen Burniston products are provided free of charge by the manufacturer for review and use. All other items were personally purchased. Compensated affiliate links used where or when possible, meaning I will receive a small percentage commission from these manufacturers at no cost to you. This will allow me to add more content to my YouTube channel and help out a lot. Thank you.

Materials Used:

Dies

  • Frantic Stamper Inc. – Precision Cutting Dies – Nutcracker – FRA-DIE-10902
  • Spellbinders –Cutting Dies – Happy Holidays – S2-330

Stamps

  • Hero Arts – Clear Stamps & Dies- A Little Nuts

Papers

  • Matte Gold Cardstock
  • Craft Consortium – 12Γ—12 Double-Sided 200gsm Papers – Tis The Season by Linsey Kelly
  • Black, Blue, Pink, Red and White Cardstock
  • Purchased Gingham A2 (4.25×5.5-inches) cardbase and white envelope

Ink

  • Memento – Fade Resistant Dye ink – Paris Dusk
  • American Crafts – Metallic Marker – Gold
  • OLO – Marker – Cotton Candy
  • Sakura – Gelly Roll Pen – Medium – White
  • Sharpie – Permanent Marker – Fine Tip – Black & Red
  • Sharpie – Permanent Marker – Ultra Fine Tip – Blue & Green

Adhesives

Tools

Spellbinders – Dancing Nutcracker Card

Welcome to Day 4 of my Nutcracker series using a variety of stamps and die sets to make some nutcracker themed cards. My card today uses products by Spellbinders – Dancin’ Nutcracker Fritz and Happy Holidays die sets and Honey Bee Stamps Soulful Season 3D embossing folder as well as Hero Arts’ A Little Nuts stamp set.

Watch the process video below to learn how this card was made.

Cardbase: Emboss a 5.5-8.5 piece of white 65lb. cardstock using the Honey Bee Stamps Soulful Season 3D embossing folder following the directions in the video above. Trim down to a 5×7-inch panel. Glue to the front of an A7 (5×7-inch) cardbase. (I used a purchased cardbase and envelope.)

Nutcracker & Drum: Referring to the image of the nutcracker on the packaging for the Spellbinders Dancin’ Nutcracker Fritz die set, cut out all the pieces using your own color scheme. Cut a black strip to go behind the face for the eyes. (I cut two drums – one for the front and one for the card back along with drum sticks.) Assemble nutcracker and drums as shown in video above.

Sentiments: Using the Spellbinders Happy Holidays die set, cut from red paper. (I upcycled a red envelope.)

Envelope: The panel card fits into an A7 size envelope with a nutcracker and “Nutcracker is my favorite season” on the envelope back using the Hero Arts’ A Little Nuts stamp set and blue ink.

___________________________________

Thank you for experiencing this blog post.

I hope this inspires you and makes you smile.

Please subscribe, like and leave comments 😊

___________________________________

Disclaimer: Karen Burniston products are provided free of charge by the manufacturer for review and use. All other items were personally purchased. Compensated affiliate links used where or when possible, meaning I will receive a small percentage commission from these manufacturers at no cost to you. This will allow me to add more content to my YouTube channel and help out a lot. Thank you.

Materials Used:

Dies

  • Spellbinders –Cutting Dies – Dancin’ Nutcracker Fritz – S5-644
  • Spellbinders –Cutting Dies – Happy Holidays – S2-330

Embossing Folders

  • Honey Bee – 3D Embossing Folder – Soulful Season

Stamps

  • Hero Arts – Clear Stamps & Dies- A Little Nuts

Papers

  • Spellbinders – 8.5×11 100 lb. Cardstock – Cosmic Sky
  • The Paper Studio – 8.5×11 65 lb. Cardstock – White
  • Gold Mirror Cardstock
  • Black, Pinks,Red and Yellow Cardstock
  • Park Lane Paperie – A7 Cardbase and Envelope – White

Ink

  • Memento – Fade Resistant Dye ink – Paris Dusk
  • Pigma – Mircon 01 Fine Tip Pen – Black
  • Ranger – Tim Holtz – Distress Ink- Lost Shadow
  • Stampin’ Up – Stampin’ Blends Marker – Dual Tip – Light Copper Clay
  • Sakura – Gelly Roll Pen – Medium – White

Adhesives

Tools

  • Die Cutting Machine
  • Paper Trimmer
  • Stamping Platform
  • Stamping Blocks
  • Sponge Blending Tool
  • Tweezers
  • Spellbinders – Mighty Mister Spray Bottle
  • We R Memories – QuickStick

Miscellaneous

  • Large Eyed Needle
  • Vivant – Cord/Thread – Gold

Trinity Stamps – Nutcracker Slider Card

Welcome to Day 3 of my Nutcracker series using a variety of stamps and die sets to make some nutcracker themed cards. My card today uses products by Trinity Stamps – Nutcracker Cup Character, Take-Out Coffee Cup Shaped Card and Sundae Swirl Alphabet dies sets and Hero Arts’ A Little Nuts stamp set.

Watch the process video below to learn how this card was made.

Cardbase: Using the large die from the Take-Out Coffee Cup Shaped Card, cut out a card base from a 7.5×5.5-inch piece of black cardstock.

Nutcracker Front: Referring to the image of the nutcracker on the packaging for the Nutcracker Cup Character die set, cut out all the pieces using your own color scheme. (I used black for the eyes, teeth, hat bill/visor and belt, flesh color hands and nose, blue for sleeves, gold for belt buckle, sleeve cuffs, epaulets and button cording, red for jacket and hat, copper brown for hair, eyebrows and mustache, and yellow for the feather in hat.) Cut a white square to fit the back of the teeth. Cut from Flesh color, a cup holder using the die in the Take-Out Coffee Cup Shaped Card set to use as the face. Assemble as shown in video.

Sentiments: Using the Sundae Swirl Alphabet die set, cut from red the words “Happy Holidays” and glue together as directed in the video above. Cut from white a cup holder using the die in the Take-Out Coffee Cup Shaped Card set.

Envelope: The panel card fits into an A2 size envelope with a nutcracker and “Nutcracker is my favorite season” on the envelope back using the Hero Arts’ A Little Nuts stamp set.

___________________________________

Thank you for experiencing this blog post.

I hope this inspires you and makes you smile.

Please subscribe, like and leave comments 😊

___________________________________

Disclaimer: Karen Burniston products are provided free of charge by the manufacturer for review and use. All other items were personally purchased. Compensated affiliate links used where or when possible, meaning I will receive a small percentage commission from these manufacturers at no cost to you. This will allow me to add more content to my YouTube channel and help out a lot. Thank you.

Materials Used:

Dies

  • Trinity Stamps – Dies – Nutcracker Cup Character
  • Trinity Stamps – Dies – Sundae Swirl Alphabet
  • Trinity Stamps – Dies – Take-Out Coffee Cup Shaped Card

Stamps

  • Hero Arts – Clear Stamps & Dies- A Little Nuts

Papers

  • Park Lane – 8.5×11 80 lb. Shimmer Sheets – Gold
  • Recollections – 8.5×11 100 lb. Cardstock – Flesh
  • Recollections – 8.5×11 80 lb. Cardstock – White
  • Stampin’ Up – 8.5×11 80 lb. Cardstock – Copper Clay
  • Black, Blue, Red and Yellow Cardstock
  • Fraser Papers for William House – A2 Envelope – Genesis Text Milkweed Smooth

Ink

Adhesives

Tools

  • Die Cutting Machine
  • Paper Trimmer
  • Stamping Platform
  • Stamping Block
  • Blending Brush
  • Pencil
  • Tweezers
  • Riley and Company – Pick & Poke Tool
  • We R Memories – QuickStick

Miscellaneous

  • Trinity Stamps – Sparkle Spots Embellishments – Sampler

Concord & 9th Nutcracker Cards

Welcome to Day 2 of my Nutcracker series using a variety of stamps and die sets to make some nutcracker themed cards. My card today uses products by Concord & 9th along with stamps from Scrapbook and Cards Todayβ€˜s Christmas in July – Jolly Holiday 2024 event.

Watch the process video below to learn how this card was made.

Cardbase: Cut from white light-to-medium weight cardstock one 4.25 x 11-inch rectangle and folded in half to form an A2 (4.25×5.5-inch) cardbase. Cover with outer two panels with patterned paper. (Do this for card 1 or card 2. For the blue card 1, use the smaller oval die in the Nutcracker Dies set to cut a window aperture into the card front. Save cut-out oval and glue to card inside to fit into the window. Use both oval dies to cut out a red frame and glue to front of card around the window. I also adhered clear glitter to the inside oval using Glossy Accents.)

Nutcrackers: Follow the video above for assembly or look at packaging for ideas. (I used the coordinating enamel shapes for the hat feather, belt, shoulder epaulets and boots, but there are dies to cut these pieces as well.)

Sentiments: Using the banner and word dies included in the Nutcracker Dies, cut a banner from white cardstock and either “merry” or “JOY” from colored or patterned paper and glue to banner. Add to the card front. Decorate with holly or leafy stems from the die set or use enamel holly leaves and berries. Inside the green card 2, stamp “everything” in black to match the die-cut “merry” from the card front. Then, using ink to coordinate with the card front paper, stamp a pine branch on the top inside panel and in black on the outside back panel. The stamps I used were from Scrapbook and Cards Todayβ€˜s Christmas in July – Jolly Holiday 2024 event.

Envelope: The cards fit into an A2 size envelope with “Fill your heart with joy” stamped on the back flap in coordinating ink.

___________________________________

Thank you for experiencing this blog post.

I hope this inspires you and makes you smile.

Please subscribe, like and leave comments 😊

___________________________________

Disclaimer: Karen Burniston products are provided free of charge by the manufacturer for review and use. All other items were personally purchased. Compensated affiliate links used where or when possible, meaning I will receive a small percentage commission from these manufacturers at no cost to you. This will allow me to add more content to my YouTube channel and help out a lot. Thank you.

Materials Used:

Dies

  • Concord & 9th – Dies – Nutcracker Dies

Stamps

  • Scrapbook and Cards Todayβ€˜s Christmas in July – Jolly Holiday 2024 event – Clear Stamps

Papers

  • Concord & 9th – 8.5×11 Cardstock – Sea Glass
  • Graphic 45 – 8×8 Double-sided Paper – Let It Snow
  • My Mind’s Eye – 6×6 Paper Pad – Jingle All The Way
  • Black, Blue, Pink, and Red Cardstock
  • Fraser Papers for William House – A2 Envelope – Genesis Text Milkweed Smooth

Ink

  • Concord & 9th – Premium Dye Ink – Tidepool
  • Memento – Fade Resistant Dye ink – Tuxedo Black & Rose Bud
  • Sharpie – Permanent Marker – Fine Tip – Green

Adhesives

Tools

Miscellaneous

  • Concord & 9th – Enamel Stickers – Nutcracker Shapes
  • Ranger – Tim Holtz Distress – Rock Candy Clear Glitter

Hero Arts – Nutcracker Slider Card

Welcome to Day 1 of my Nutcracker series using a variety of stamps and die sets to make some nutcracker themed cards. My card today uses products by Hero Arts – Big Mouth Nutcracker Bundle of dies and A Little Nuts stamp set.

Watch the process video below to learn how this card was made.

Cardbase: Cut from white light-to-medium weight cardstock one 4.25 x 5.5-inch rectangle. Also cut one pink 4.25 x 5.5-inch rectangle.

Slider Mechanism: Cut three of the large mechanism from the Big Mouth Slider die set from light-to-medium weight cardstock. Cut one “T” interactive sliding piece from pink. Using the upside-down “U” die cut out an opening as shown in the video above from the center bottom pink panel.

Sentiments: Stamped sentiments are from the Stamp & Cut A Little Nuts set. Inside the mouth is “Hope your holiday is all it’s cracked up to be.” On the card back is a nutcracker and “Let’s have a cracking Christmas.”

Envelope: The panel card fits into an A2 size envelope with a nutcracker and “Peace, Love & Pecans” on the envelope back.

___________________________________

Thank you for experiencing this blog post.

I hope this inspires you and makes you smile.

Please subscribe, like and leave comments 😊

___________________________________

Disclaimer: Karen Burniston products are provided free of charge by the manufacturer for review and use. All other items were personally purchased. Compensated affiliate links used where or when possible, meaning I will receive a small percentage commission from these manufacturers at no cost to you. This will allow me to add more content to my YouTube channel and help out a lot. Thank you.

Materials Used:

Dies

  • Hero Arts – Dies – Big Mouth Nutcracker
  • Hero Arts – Dies – Big Mouth Slider

Stamps

  • Hero Arts – Clear Stamps & Dies- A Little Nuts

Papers

  • Park Lane – 8.5×11 80 lb. Shimmer Sheets – Gold
  • Recollections – 8.5×11 100 lb. Cardstock – Pink
  • Recollections – 8.5×11 80 lb. Cardstock – White
  • Black, Blue, Brown, Pink, Red and Yellow Cardstock
  • Fraser Papers for William House – A2 Envelope – Genesis Text Milkweed Smooth

Ink

  • Memento – Fade Resistant Dye ink – Tuxedo Black & Rose Bud
  • Sharpie – Permanent Marker – Fine Tip – Blue

Adhesives

Tools

A Snowy Pines Card

It’s Sneak Peek Week for Karen Burniston’s November 2025 Release of new dies and stamps.

Today’s card uses a new die and a new stamp set – Pine Cone and Quiet Forest. It also uses the previously release dies of Pattern Plate – Swirls and Snow Charms. The new dies and stamps will be available for pre-order starting November 24, 2025.

Cardbase: I cut an 8.5×11 sheet of white 65lb. cardstock in half to create two 5.5×8.5-inch rectangles that I fold in half to make side-fold A2 cardbases. Cut one cardbase into two 4.25×5.5 panels.

Swirls Background: Tape a white 4.25×5.5 panel of cardstock to the Pattern Plate – Swirls die and using the embossing sandwich for your die cutting machine, and emboss the pattern into the cardstock. Color the swirls with a glitter marker of icy blue. Trim panel down to 4×5.25-inches. Glue panel to card front.

Pine Cones: Watch the video above to see how I made the pine cones using Karen Burniston’s Pine Cone dies.

Skates and Snowflakes: The skates and snowflakes were cut out using the Snow Charms die set. The three skate dies were cut from white cardstock and colored with markers before gluing together. The snowflakes were cut from white gold shimmer cardstock.

Sentiments: All the sentiments come from the Quiet Forest stamp set and are cut out with the Greeting Labels die set.

Envelope: The card fits in an A2 (4.25×5.5-inch) size envelope with a snowflake glued to the back flap.

Materials Used:

Dies

Stamps

  • Karen Burniston in cahoots with Riley and Company – Clear Stamps – Quiet Forest

Papers

  • Bazzill – 8.5×11 Cardstock – Rain Forest
  • Recollections – 8.5×11 65 lb. Shimmer Cardstock – White Gold
  • Brown and White Cardstock
  • A2 Envelope – White

Ink

  • American Crafts – Metallic Marker – Silver
  • Memento – Fade Resistant Dye ink – Tuxedo Black
  • Ranger – Tim Holtz – Distress Ink- Vintage Photo
  • Pigma – Mircon 01 Fine Tip Pen – Black
  • Sakura – Gelly Roll Pen – Medium – White
  • Scrapbook.com – Shimmer Glitter Brush Marker – Frosty Blue
  • Sharpie – Permanent Marker – Chisel Tip – Black
  • Sharpie – Permanent Marker – Fine Tip – Red

Adhesives

Tools

  • Die Cutting Machine
  • Paper Trimmer
  • Bone Folder
  • Score Board
  • Stamping Platform
  • LDRS – Stampendable Stamping Tool
  • Stamping Blocks used as paperweights
  • Scissors
  • Tweezers
  • We R Memories – QuickStick

Miscellaneous

  • Red & White Bakers Twine

Jolly Snowmen Birthday Postcard

This card was made for CRAFT ROULETTE #291 whose parameters included a postcard, Easter colors,  pack(s)/(ing) element, and shiny.

Watch the process video to see how I made these cards.

Cardbase: I used a 5×7-inch 220lb. cotton card panel to print the snowmen and sentiment onto the postcard front using a light blue ink.

Snowmen: Printed using the BetterPress system with the Spellbinders press plate Made with Snowflakes and colored glitter brush markers in pastel colors.

Sentiments: β€œMade with love & snowflakes” is in the Made with Snowflakes press plate set. The postmark was stamped in red ink using elements from two Purple Onion Designs red rubber stamp sets.

Envelope: The card fits into an A7 (5x 7-inch) size envelope.

___________________________________

Thank you for experiencing this blog post.

I hope this inspires you and makes you smile.

Please subscribe, like and leave comments 😊

___________________________________

Disclaimer: Karen Burniston products are provided free of charge by the manufacturer for review and use. All other items were personally purchased. Compensated affiliate links used where or when possible, meaning I will receive a small percentage commission from these manufacturers at no cost to you. This will allow me to add more content to my YouTube channel and help out a lot. Thank you.

Materials Used:

Press Plates

  • Spellbinders – BetterPress Of The Month – Made with Snowflakes – BPOM-OCT25

Stamps

  • Purple Onion Designs – Red Rubber Stamps – Vintage Birthday Postmark Set
  • Purple Onion Designs – Red Rubber Stamps – Vintage Holiday Postmarks

Paper

  • Spellbinders – 5×7-inch 220 lb. Double Weight Cotton Card Panels – Porcelain

Ink

  • Spellbinders – BetterPress Ink – French Blue
  • Memento – Fade Resistant Dye ink – Rose Bud
  • Pigma – Mircon 01 Fine Tip Pen – Black
  • Scrapbook.com – Shimmer Glitter Brush Marker – Frosty Blue, Key Lime Green, Orange Juice, Pretty Pink, Royal Purple, Sunshine Yellow

Tools

  • Die Cutting Machine
  • Stamping Block
  • Scissors
  • Best Ever Craft Tape

Stampin’ Up Gingerbread Man Card

Warm gingerbread smells wonderful on a cold Autumn day fresh from the oven. This card tries to capture that yummy feeling of holiday baking using the new dies and stamps from Stampin’ Up.

Watch the video below to see how the card was made.

___________________________________

Thank you for experiencing this blog post.

I hope this inspires you and makes you smile.

Please subscribe, like and leave comments 😊

___________________________________

Disclaimer: Karen Burniston products are provided free of charge by the manufacturer for review and use. All other items were personally purchased. Compensated affiliate links used where or when possible, meaning I will receive a small percentage commission from these manufacturers at no cost to you. This will allow me to add more content to my YouTube channel and help out a lot. Thank you.

Materials Used:

Dies

  • Stampin’ Up – Stampin’ Cut & Emboss – Gingerbread Man

Stamps

  • Stampin’ Up – Photopolymer Stamps – Gingerbread Man

Papers

  • Rainbow Splash – 8.5×11 100lb Cardstock – Carmel

Ink

Adhesives

Tools

  • Die Cutting Machine
  • Paper Trimmer
  • Stamping Platform
  • Stamping Blocks
  • Scissors
  • Heat Gun
  • Kat Scrappiness – Anti-Static Tool
  • Paper Masking Tape