Rainbow Flowers Birthday

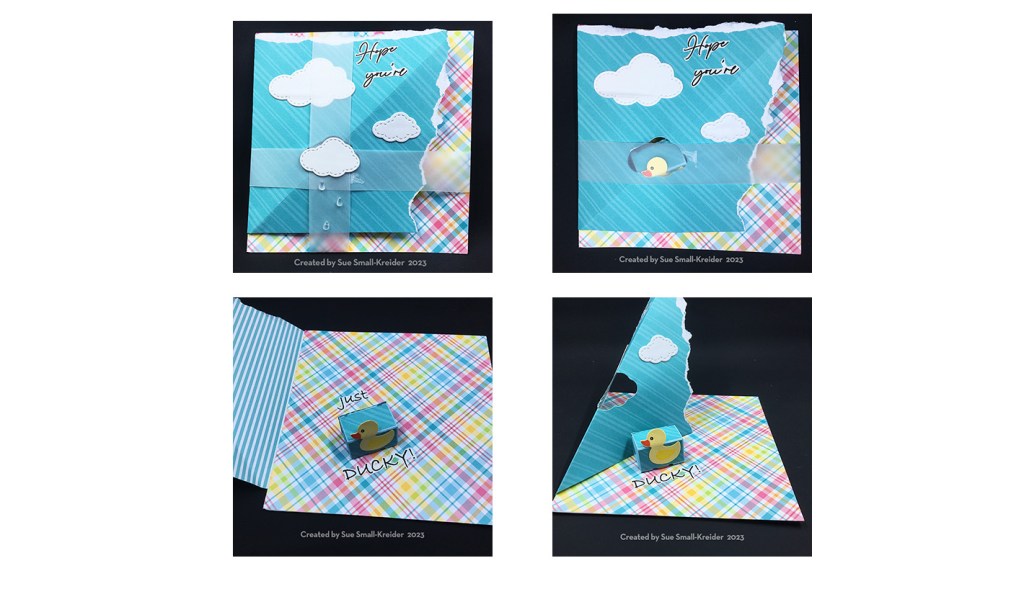
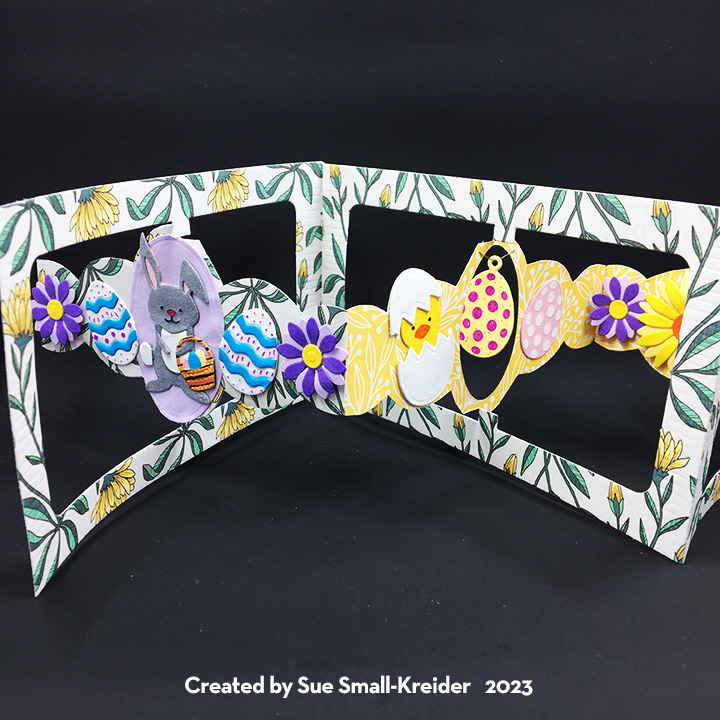
April showers bring May flowers and this birthday card delivers on a rainbow of colorful wishes and flowers.

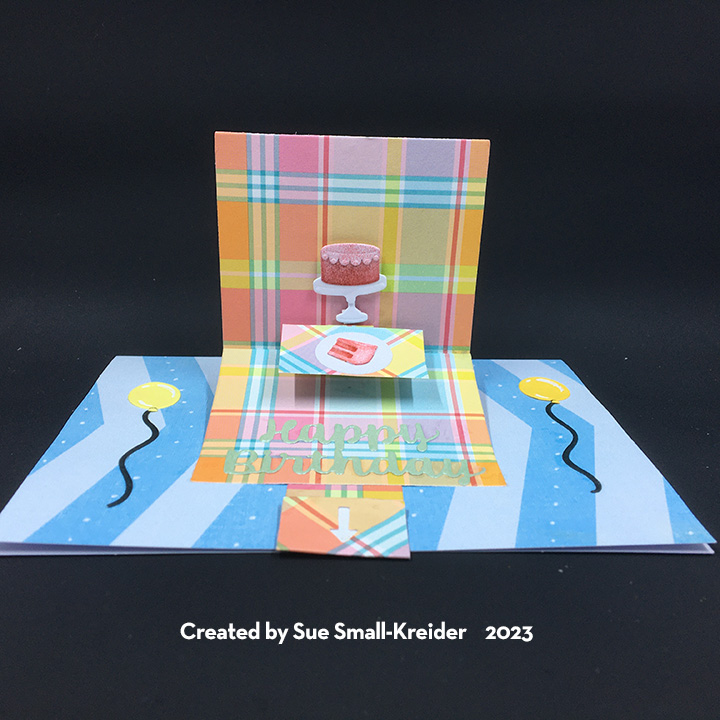
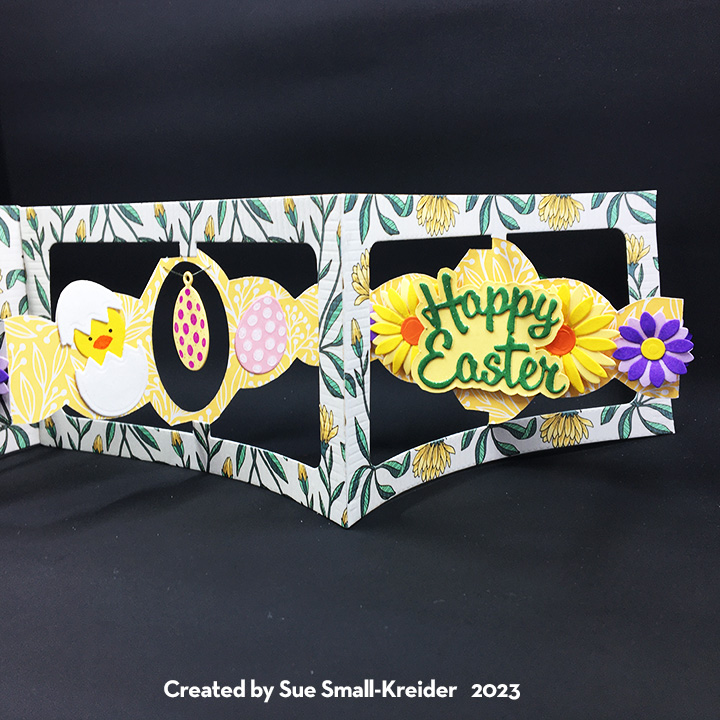
This pop-up twist and pivot card features dies by Karen Burniston and papers by Honey Bee Stamps. A white cardstock rectangle of 10 x 6 3/8-inches folded in half was used to create a 5 x 6 3/8- inches top-fold cardbase.

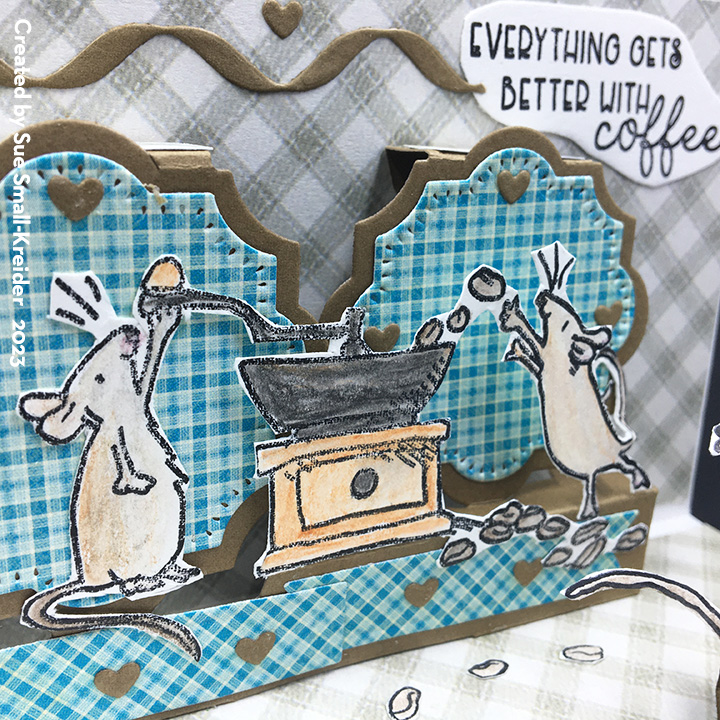
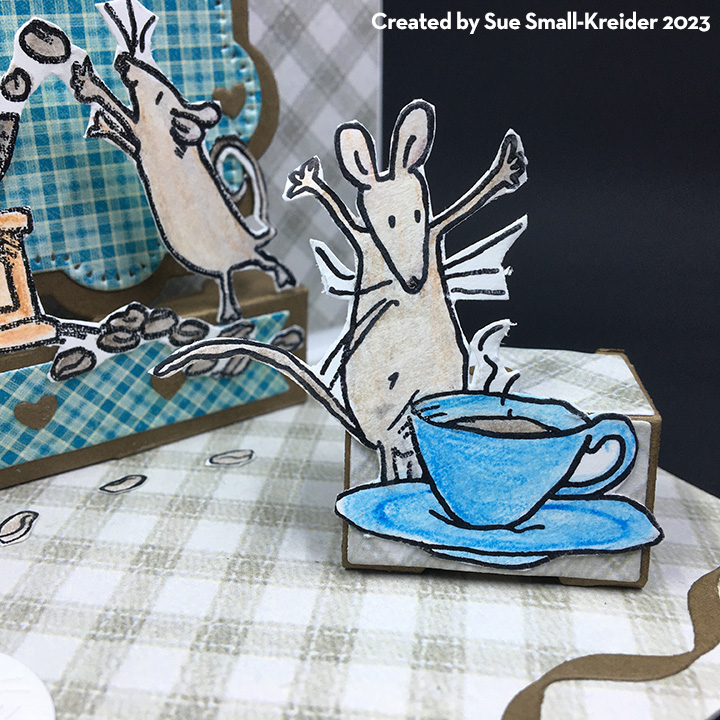
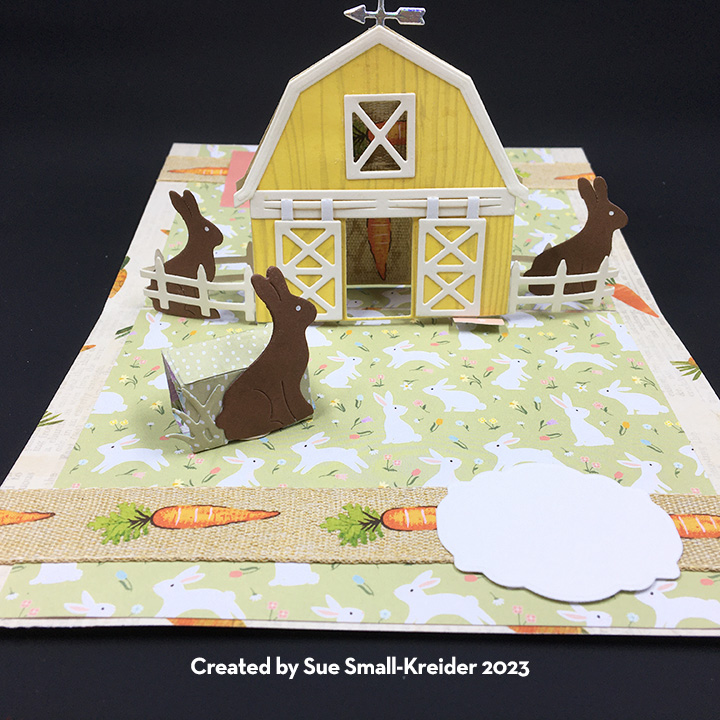
To create the twist and pivot panels, I first watched several assembly videos to understand how to combine the two mechanical mechanisms. (The flower and train pivot panels are similar and the directions for adding the pivot panels to the twist panel pop-up starts about two-thirds through in this assembly video. The assembly video for the Twist Panel Pop-up is here towards the bottom of the page.)

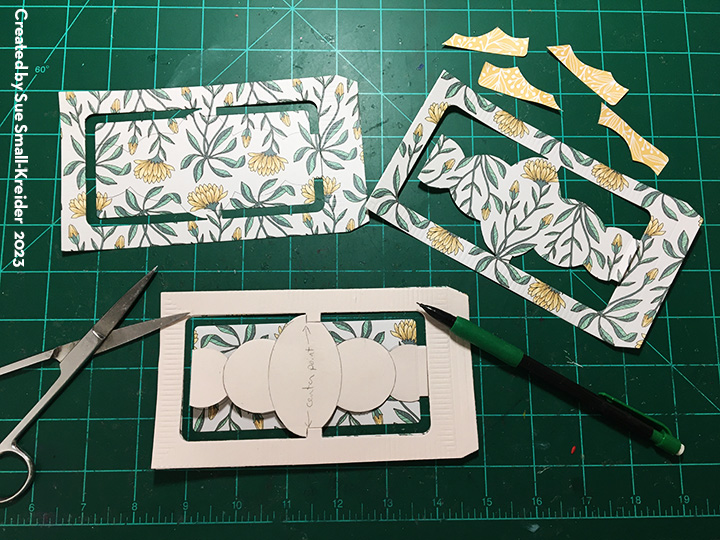
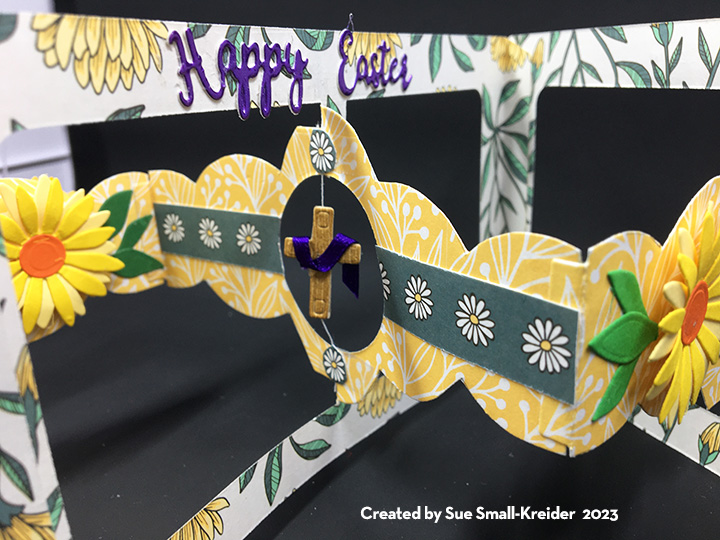
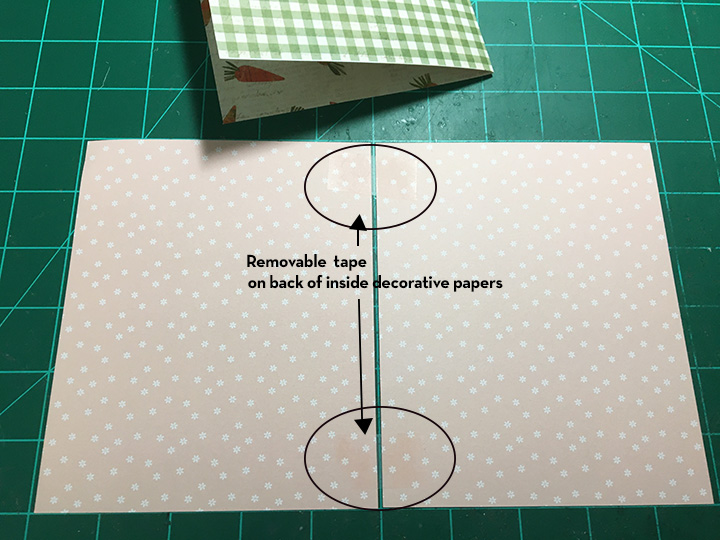
Pop-Up Panels: Because I was limited to using paper from a single 6×6-inch paper pad, I found that the largest die was the flower pivot panel which had to be cut diagonally from the square of double-sided paper. Once this was cut, all other pieces had to be cut based off the direction of the stripes. Two dotted 6×6 squares were joined together with clear removable tape on their backsides and die-cut using the X mechanism die from the twist panel pop-up set.  I used the excess strip of 1-inch cut from both the square dot panels to fill-in the holes where the mechanism folds up. Next, I glued the dotted panels into the card base with the clear tape joint going into the fold. The arms of the mechanism were die-cut from purple and glued to the X mechanism.

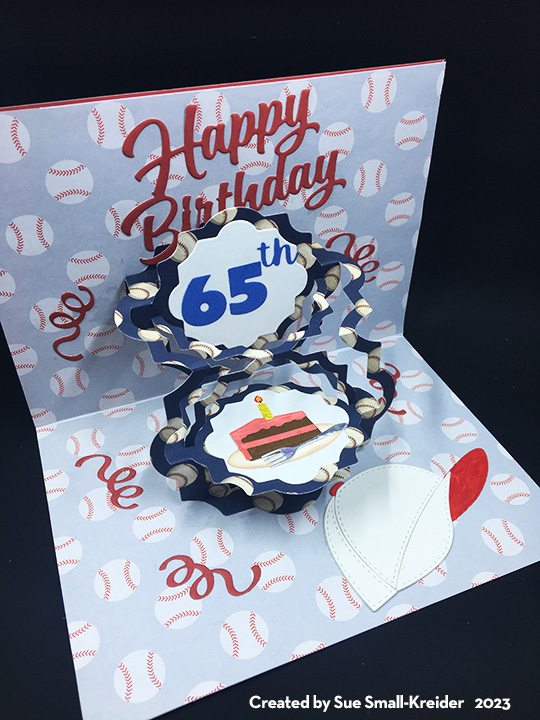
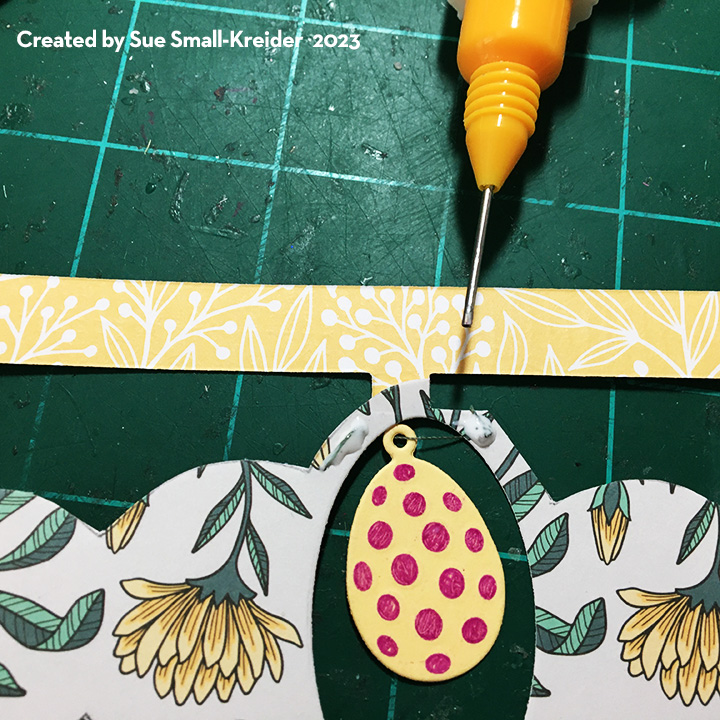
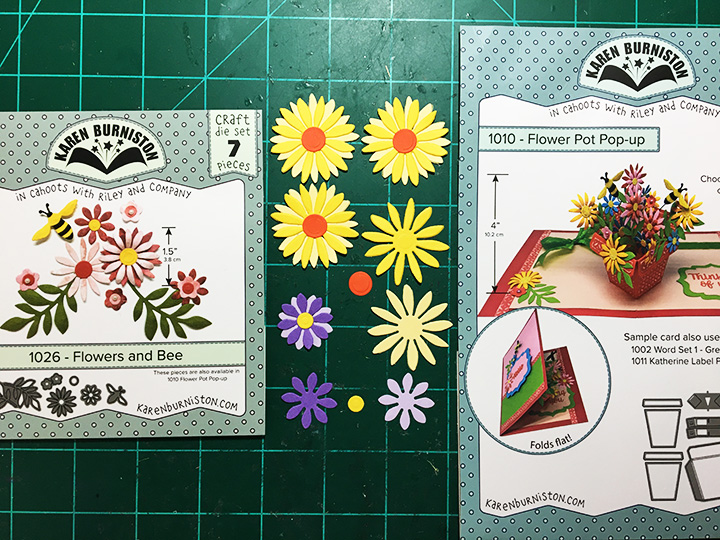
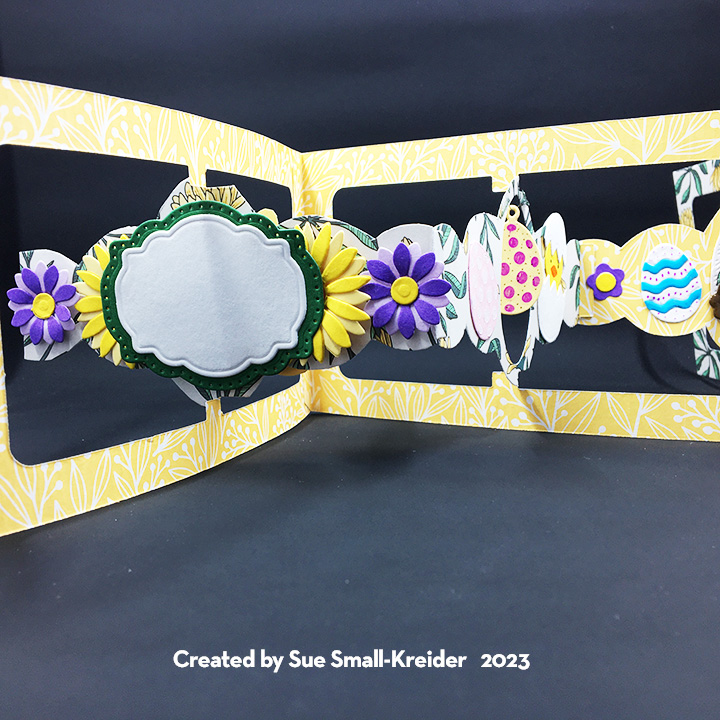
Flowers: There are dies in the flower pivot panel that can create three different large flower heads and one smaller flower. I created six of the white daisy, three of the yellow flower, three of the red flower, four of the purple flower and one small purple flower with leaves. I attached the two panels die-cut from the twist panel set to the flower pivot panel as shown in the assembly video. Decorating all the panels when they are flat is the easiest. Once decorated, attach panels as directed in the twist panel assembly video.

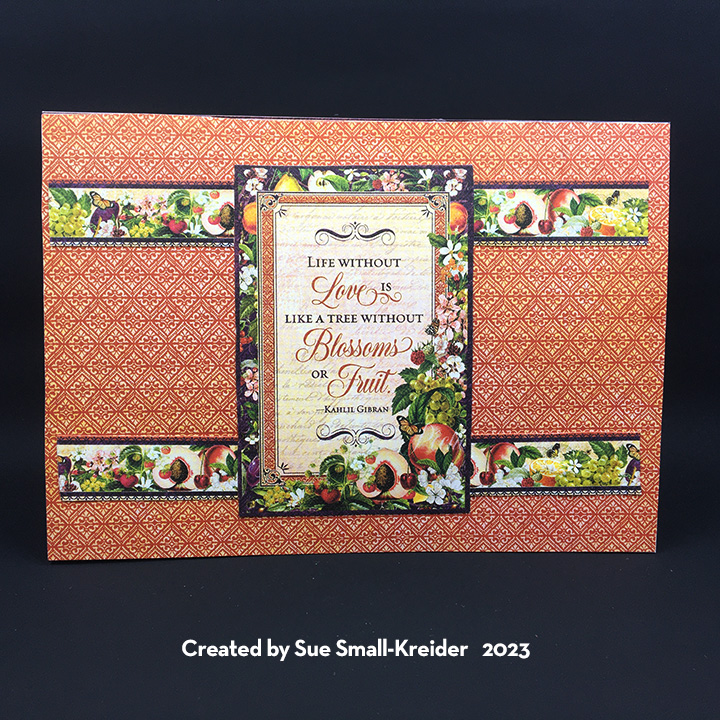
Decorations: The card front and back panels were covered with single sheets of patterned paper. The front features rain and clouds cut from the back of the double-sided paper while the back features a stained glass effect sunset. Grass edging was cut from the excess green strip cut from the back panel paper and used with the extra flowers to decorate the front and back of the card.

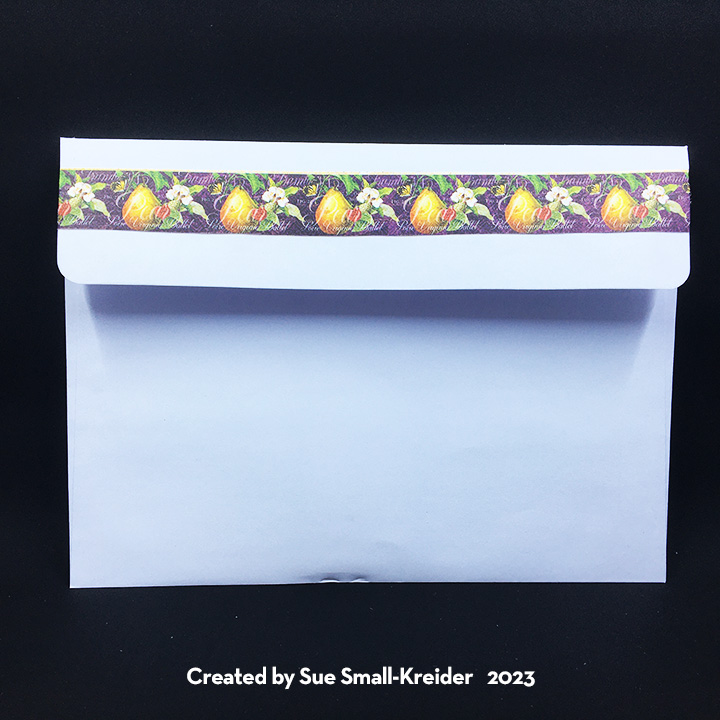
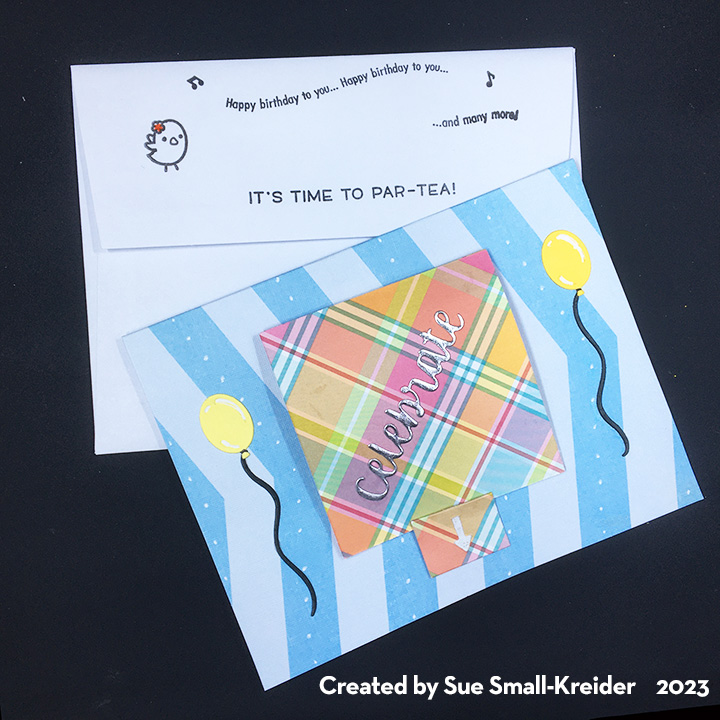
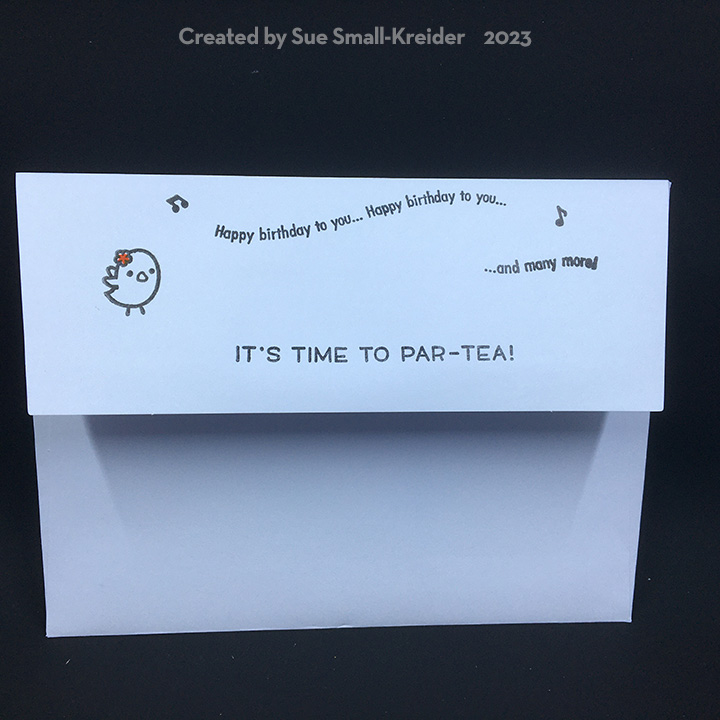
Sentiments: A large shadowed “Happy Birthday” was die cut from red and yellow to standout on the dark front. Stamped Funny Bones sentiments from Riley and Company grace the inside of the card and the envelope’s back flap.

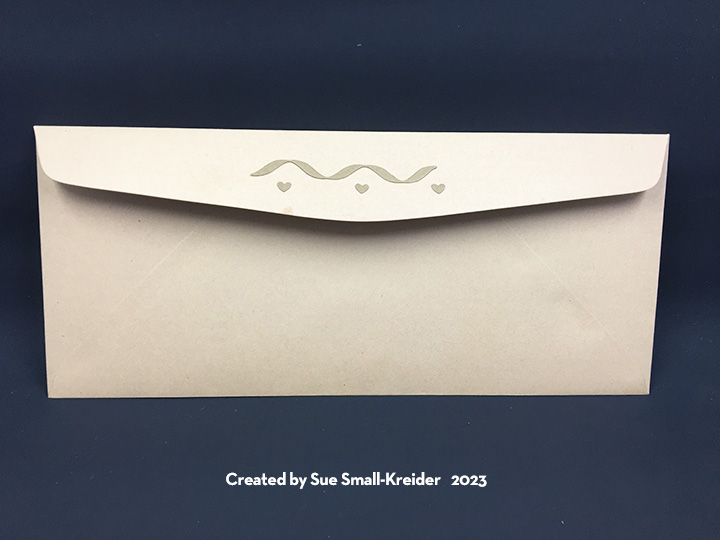
Envelope: The tiny purple flower with leaves finishes the envelope flap. The card fits into an A7 envelope.

Thank you for reading this blog post. I hope this inspires you and makes you smile. Please like and leave comments 😊

Materials Used:

Dies

Stamps

  • Riley & Company – Funny Bones – A Year Older-RWD-1144
  • Riley & Company – Funny Bones – This Is An Annual Reminder -RWD-1142

Papers

  • Honey Bee Stamps -6×6 Double-Sided Cardstock Pad- Over the Rainbow
  • White cardstock 10 x 6 3/8-inches
  • A7 white Envelope

Ink

  • Simon Says Stamp – Premium Dye Ink – Slate

Adhesives

Tools

  • Die Cutting Machine
  • Stamping Platform
  • LDRS – Stampendable Stamping Tool
  • Stamping Cloth
  • Ruler
  • Scissors
  • Pencil

A Strawberry Loving Friend

This card was made for Craft Roulette #159 whose parameters included a card type of my choice (5×7 pop-up), strawberry fields colors, plaid or gingham and a chair. It has a conservatory or fancy potting shed feel to it.

Karen Burniston’s Adirondack Chair die set is the basis for this pop-up card that uses a slipcover to convert it into an overstuffed chair. (See this video for technique.) I made a template that I can used to quickly create the slipcover.

First I glue strips of paper to the from of the legs and then glue the arms on pushing down the over hang tips to form the rounded arm fronts. Glue the slip cover to the chair base.

The plants are die cut from the Garden Charms set while the dog is from the Doghouse die set. All are popped-up using cubes made from strips of matching cardstock. The tiny bright strawberries are clay shaker elements adhered with dots of glue.

I like being able to use one paper collection for an entire card for coordinating colors and designs. The Graphic 45 Fruits & Flora set was perfect for this in the 8×8-inch size. It had journaling tags and border that were just the right scale for this card and envelope flap.

For more chair and seating blog posts click here.

Thank you for reading this blog post. I hope this inspires you and makes you smile. Please like and leave comments 😊

Materials Used:

Dies

Papers

  • Graphic 45 – 8×8 Double-Sided Paper – Fruit & Flora Collection
  • Terra Cotta and Green Cardstock
  • Paper Lane Paperie – A7 Cardbase and Envelope – White

Inks

Adhesives

Tools

  • Die Cutting Machine
  • Scissors

Miscellaneous

  • Dress My Craft – Clay Shaker Elements – Strawberry Slices

A Poppin’ Birthday Card From Cats

A Poppin’ Birthday Card From Cats

Every so often, I get a commission’s from cats for cards for their human family. This card was a birthday card for their cat mom.

My inspiration for the card is from the stamped image on the back of the card by Dominic Phillips called Bad Cats Club which has a preciously stacked set of wooden crates with cats perched on them. (I also drew engineering inspiration from Karen Burniston’s March 4, 2023 virtual class for the stacked cubes.) To recreate this image in a 3D form, I used Karen Burniston’s Surprise Cube Pop-Up and Bam-Box Pop-Up dies and cats cut from paper and washi tape. The card is a gusseted slimline card with string wrapped closure.

Card Base: Because I was using specialty cardstocks that were 5 1/2 x 8 1/2-inches, I cut two 3 3/4 x 8 1/2-inches pieces and one gusset strip of 3/4×8 1/2-inches. The gusset strip was scored and folded lengthwise at 1/4-inch and 1/2-inch. The 1/4-inch tabs on the gusset strip were glued to the long backsides of the bronze metallic piece and woodgrain piece. Next, I worked on the flap closure. The inside of the card base is covered with a wide map pattern washi tape.

Flap: I watched the assembly video for the Long Flap and Closure before I began the flap assembly. A long flap and six spacers were cut from brown cardstock using Karen Burniston’s Long Flap and Closure die set. A decorative flap inset piece was cut from the woodgrain cardstock and another for the inside of the flap from brown cardstock. I used two long brass brads that I had to trim the legs to make them fit the card using metal cutting snips. The star decorative piece under the brads is from the Surprise Cube Pop-Up and pushed up from the cardbase by three spacers glued together. (Remember to think through the assembly of the card so that you have papers to cover over the brad legs. Also remember to add your string before covering the brad legs with a decorative paper.)

Tower of Crates: For the pop-up cubes I watched the Surprise Cube assembly video and Bam Box assembly video before starting. From discussion with Karen Burniston on her Pop-Up Peeps Facebook page, I learned that as long as the cubes would fit into the cardbase when folded flat, you could glue the cubes in any manner. (Let the glue set-up before you test your cube tower opening….I had to glue my tower a few times because I was impatient and the power of three rubber bands was pretty strong.) I cut the decorative woodgrain papers from scraps I had in my stash. The cats were fussy cut from some printed papers in my stash and from some washi tape. The top cat is glued to a Bam Box which is glued to the top cube. (I attached the tower with a brad through the bottom cube and card base, much like you would for a ball pop-up animal that you want to be able to turn.)

Sentiments: I used the Happy Birthday die set by Karen Burniston and the paw prints from the Doghouse Tiny House Add-ons for the inside sentiments. The stamped sentiments outside came from the Bad Cats Club set and a Happy Meowther’s Day set.

This card will be delivered in person, so no envelope was created for it.

Thank you for reading this blog post. I hope this gives you inspiration and makes you smile. Please like and leave comments 😊

Materials Used:

Dies

Stamps

  • AALL & CREATE – Designed by Dominic Phillips – Bad Cats Club – #793
  • Simon Says Stamp – Clear Stamps – Happy Meowther’s Day – sss202293c

Papers

Ink

  • Stampin’ Up – Classic Stampin’ Pad – Early Espresso

Adhesives

Tools

  • Die Cutting Machine
  • Scoring Board and Tool
  • Stamping Platform
  • Scissors
  • Piercing Tool
  • Metal Cutting Snips
  • Small Crafting Clips

Miscellaneous

  • #8 Rubber Bands
  • Fun Stampers Journey – Journey Thread – Beach Breeze
  • Washi Tape – Old Maps – 2 3/8-Inches Wide
  • Washi Tape – Cat Life – 1 3/8-Inches Wide

Let’s Coffee Soon

Fresh ground coffee smells amazing and to share it with a friend is even better.

This slimline card features mice making coffee as drawn by Anita Jeram. These delightful illustrations are popped-up on dies by Karen Burniston.

I did some test layouts with the stamps and dies before stamping the images on to white 110lb. cardstock with permanent black ink. I find stamping several of the needed images is useful to test colors. The images were colored with watercolor pencils and then water brushed to blend. Using fine-tipped surgical scissors, I fussy cut the images out. For delicate cuts and enclosed spaces, I used a craft knife to cut away excess cardstock.

I covered the four panels of 7×8 1/2-9nch white cardstock cardbase that was folded in half with 3 1/2×8 1/2-inch rectangles of tan plaid paper.

Watching the assembly video for the Little Labels Pop-Up die set before I determined what cardstock to use saved me time. I die cut the largest of the fancy labels that are in the pop-up set from blue plaid cardstock and then glued them onto the brown pop-up mechanism. I also cut out the three ribbon pieces from blue plaid paper and adhered them to the lower half of the mechanism before attaching the mechanism to the card base.

Decorating the card with the images was the fun part, but feeling the card was lacking some grounding lines, I cut from the same brown cardstock as the mechanism some of Karen Burniston’s ribbon borders from her Border Blends Trims that also include tiny hearts. These ribbons were glued to the top and bottom of the card front and inside with the tiny hearts scattered along the ribbon. Additional tiny hearts were added to the mechanism and labels inside.

Because I didn’t like the look of the brown top arms of the three mechanism labels, I cut pieces of tan plaid paper to cover them and added a tiny heart to each.

Two Bam Box, rubber band powered, pop-up mechanisms were used to animate the Coffee press image and a second coffee cup. (Go to assembly video on Bam Box shop page.) Because the coffee press image is almost 3×3-inches, I had to install the Bam Box at almost a 100-degree angle from the label pop-up mechanism to fit the image inside the card. To fix some catchpoints with both Bam Box images, I glued tails to the labels and trimmed the coffee press handle some. The bottom mouse tail of the coffee press is folded against the label pop-up platform, but not glued.

A white label from the crosshatch labels die set was adhered to the center of the inside of the card for a personal message. The stamped sentiments came from the coffee stamps and one was fussy cut with scissors while the other used a circle die from the crosshatch circles set.

For the card back, I used off-cuts from the ribbon borders and stamped Anita Jeram’s name onto white cardstock and then die-cut a heart around it using a heart from Karen Burniston’s Hearts – Crosshatch set. Using a black pen, I credited Karen Burniston on the heart and added my initials and the year to the heart.

As is my style, I glued a leftover piece of ribbon border and three hearts to the envelope flap to hint at what is inside.

I like to enclose instructions on how to close the Bam Box. You can download the instructions below.

Thank you for reading this blog post. I hope this inspires you and makes you smile. Please like and leave comments 😊

Materials Used:

Dies

Stamps

  • Colorado Craft Company – Clear Stamps – Coffee House by Anita Jeram – AJ483

Papers

  • Crafter’s Companion – NitWit Collections 12×12 Double-Sided Sheets – Paws-itivity
  • Graphic 45 – 8×8 Paper Pad – Double-Sided Cardstock – Life’s A Bowl of Cherries Collection -Homemade Goodness
  • My Favorite Things – 8.5×11 Smooth 110lb. Cardstock – White
  • Brown Cardstock
  • #10 Business Envelope – Brown

Inks/Pens

  • StazOn – Solvent Ink – Jet Black
  • Rangerv- Tim Holtz Distress Watercolor Pencils – Sets 1-3
  • American Crafts – Metallic Marker – Silver – 62212
  • Pigma – Mircon 01 – Black

Adhesives

Tools

Miscellaneous

A Party Without Cake Is Just A Meeting

This card was made for Crafting Roulette #159 whose parameters included a card on a card, sky view colors, a table and white dots or spots.

For the pop-up card on the purchased printed cardbase, I used Karen Burniston’s Frame Pull Pop-Up die set with a Lawn Fawn double-sided plaid paper. (This card is similar to some cards I made a few years ago but simplified.) The balloons and inked cake die cuts are from a set by Courtney Chilson. (I could have also used Karen Burniston’s Big Birthday Charms for a cake plate with a fork.) A floating table was formed by gluing a rectangle of plaid paper onto the pop-up cube in the Frame Pull set.

Once the pop-up card was installed on the printed cardbase, I added white dots to the blue chevrons with a gel pen. Leftover yellow balloons that I had made for another card were used to finish the card front. the “celebrate” and “Happy Birthday” are all from the Karen Burniston’s Word Set 2 – Birthday.

Inside the card, the red sentiment is a rubber stamp by Impression Obsession while the critters sharing cake are by Lawn Fawn.

For the envelope’s back flap, I used the same Lawn Fawn stamp set and colored the bird’s tiny flower red as I did inside the card.

Thank you for reading this blog post. I hope this inspires you and makes you smile. Please like and leave comments 😊

Materials Used:

Dies

Stamps

  • Lawn Fawn – Photopolymer Clear Stamps – Tea-rrific Day Add-On- LF2858
  • Impression Obsession – Rubber Stamp by Dina Kowal -A Party Without Cake -C13786

Papers

  • Lawn Fawn – 12×12 Double-Sided Paper – Perfectly Plaid Remix-Nadia Remix-LF2487
  • White, Yellow and Black Cardstock
  • Green Pearlescent and Silver Foil Scraps
  • DCWV – Textured Printed Blue Chevron A2 Cardbase and White Envelope

Inks

  • Ranger – Tim Holtz – Distress Ink – Saltwater Taffy and Aged Mahogany
  • StazOn – Solvent Ink – Jet Black
  • Nuvo – Hybrid Ink Pad – Poppy Red
  • Sakura – Gelly Roll Pen – Medium – Black
  • Sakura – Gelly Roll Pen – Medium – White
  • Red Gel Pen
  • Pigma Micron 05 – Brown
  • Pigma Micron 01 – Black

Adhesives

Tools

  • Die Cutting Machine
  • Stamping Platform
  • LDRS – Stampendable Stamping Tool
  • Stamping Cloth
  • Sponge Dauber
  • Craft Mat
  • Scissors

Just Ducky!

This card was designed for Craft Roulette #158 whose parameters were a peek-a-boo card using first grader colors featuring rain and distressed edges.

This card is a 5 7/8-inch square easel card with a bam box stopper. The Bam Box Pop-Up with its duck are made using dies by Karen Burniston.

The card base was made by trimming a 6×6-inch plaid paper in primary colors to 5 7/8-inch square. The blue stripe easel is made from another 6×6 piece of double-sided patterned paper that was cut to 5 1/4 x 6 inches.  Two edges were torn, and a tab scored and folded on the left short edge of one inch.  The diagonal fold was made after the panel was glued to the plaid card base. A 5 7/8-inch square piece of white cardstock was glued to the back of the plaid panel over the striped tab. 

View the assembly video for the bam box. Cut decorator panels from blue stripe paper. Die-cut duck and use stencil feature on die to add duck’s bill, eye and wing.

White clouds were cut from some shiny white packaging. The rule of three was followed for laying out the clouds which was based off where the cloud shaped window was placed.

Using a computer word processing program, the sentiment of “Hope you’re just DUCKY!” was created and fussy cut.  Placement of the words were based on where the fold of the easel happens and what area is covered by the easel panel closed and open.

To keep the bam box flattened, two clear vellum bands were made. The third white cloud was glued to the top band along with three clear plastic raindrops. The cloud covers the peek-a-boo cloud window.

The card fits into a 6×9 catalog envelope.

Thank you for reading this blog post. I hope this inspires you and makes you smile. Please like and leave comments 😊

Materials Used:

Dies

Papers

  • Lawn Fawn – 6×6 Doubled-Sided – Primary Plaid
  • Queen & Co. – 6×6 Double-Sided – Simple Stripes
  • White Glossy Recycled Cardboard Packaging
  • White Computer Paper
  • Clear Vellum

Ink

  • Black Computer Printer Ink

Adhesives

Tools

  • Die Cutting Machine
  • Scissors
  • Computer & Printer

Miscellaneous

  • Sunny Studio Stamps – Clear Rain Drops – SSEMB-209

Happy Birthday Baseball Pop-Up Card

This is a 65th birthday card for a baseball pitching coach using Karen Burniston’s Paper Frames Pop-Up, Sports Charms, Big Birthday Charms, Numbers and “Celebrate!” and “Happy Birthday” sentiment dies.

Watch the assembly video for the Paper Frames Pop-Up before starting. I used a purchased A7 (5×7 inches) card base and envelope for this card and covered the inside panels with decorative paper (4 7/8x 7-inches) and the outside panels with colored cardstock and journaling cards.

The Paper Frames Pop-Up is designed to be opened horizontally, but having seen a card made by Nicky Foden that used the frames opening vertically, I decided to try the vertical top fold cardbase with vertical frames. (Installation is the same as the assembly video, but I found that the weight of the frames didn’t allow for a full pop-up of the frames, so I added strips of the navy-blue patterned cardstock behind the four arms near the top and bottom tabs that are glued to the cardbase.)

The decorative panels on the pop-up frames use the Numbers die set which has the “th” in it, and the cake slice is from the Big Birthday Charms set. The red streamers around the pop-up frames are also from the Big Birthday Charms. “Happy Birthday” was die cut in red. The white baseball cap is a die cut by Waffle Flower and serves as a place to write a personal message.

From the Sports Charms set, I die-cut and stenciled 11 of the baseball charms and snipped off their charm loops. Along with the larger baseball die cut using a Waffle Flower die set, ten of the baseball charms were glued to the card front. “Celebrate!” was die cut from some of the solid color red cardstock that is part of the Echo Park Baseball paper collection.

The last baseball charm is on the envelope flap.

Thank you for reading this blog post. I hope this inspires you and makes you smile. Please like and leave comments 😊

Materials Used:

Dies

Papers

  • Echo Park –- 12 x 12 Double-Sided Cardstock – Baseball Collection by Steven Duncan
  • American Crafts – 12 x 12 Single-Sided Paper – #341325 Baseballs
  • Brown, White and Silver Cardstock Scraps
  • Park Lane Paperie – A7 Cardbase and Envelope – White

Pens/Inks

  • Pigma – Mircon 01 – Black
  • Sharpie – Permanent Marker – Ultra Fine Point – Red
  • Sharpie – Permanent Marker – Fine Point – Yellow
  • Staples – Liquid Stix Highlighter – Orange
  • Ranger – Tim Holtz Distress Oxide – Tea Dye and Barn Door

Adhesives

Miscellaneous

  • Pokey Tool
  • Die Cutting Machine
  • Scrapbook.com – Magic Mat
  • Scissors

Easter Bunny Accordion Style

I’ve been experimenting with taking Karen Burniston’s Landscape Rectangle Accordion and cutting the pivot panel into a smaller string of shapes. For this card I used dies from her crosshatch circle and oval sets.

I made a template from heavy cardstock (110 lb) by first cutting a panel and then tracing around the dies to create a pattern. For the pattern, I used the second smallest oval for the center and the two smallest circles. (Make sure you don’t cut away the pivot mechanism at the top and bottom of the panel. The center point of the rectangle is the scored fold-line.) I fussy cut the pattern and then used it to trace onto my die-cut panels of double-sided medium-weight, patterned cardstock.

Now for the fun part – deciding what decorations to add. I pulled all my Easter and Spring dies out and tired various layouts to see what would fit.

after deciding to add a frame to dangle a charm from, I used the smallest crosshatch oval to die-cut the opening. Because the frame top was so thin, I used a needle and thread to create a string to dangle an egg charm. (The charm is made from two charms glued together.) The knotted thread ends were finished with dots of glue. (In hindsight, I would probably make the opening with a smaller circle so that the frame would be wider near the pivot points. See below, photos of another card that I cut a circle aperture.)

For the sentiment (in the Easter Charms Set), I traced around the outside of the die and fussy out to create a shadow for the words. I cut two of the sentiment and glued them together before attaching them to the shadow. To add some pizazz to words, I coated it with a glitter gloss and popped it up on foam squares over the flowers.

The flowers come from two different die sets, but the flowers are all the same. (This makes for quicker die-cutting when you two of the same die.) I find putting two flowers of similar colors together you get a fuller, more pleasing flower. I shaped my flowers using my fingers to curl the petal ends down while pushing the flower center down as well.

I mostly followed the packaging examples for the eggs, bunnies and chicks, but you can view the assembly video for the Easter Charms. I coated the chocolate bunny with a glossy clear gel after I had used the die to ink in the bunny’s eye with a white gel pen. I also added a tiny red grosgrain ribbon at his neck. For the Easter Bunny, I used a grey suede paper so he was fuzzy to the touch. (Here is the assembly video for the Spring Animals.)

After all the panels were decorated, I attached the frames and panels using there tabs as directed in their assembly video.

As you plan where your decorations will go, think about how thick they will be, if they will be attached using foam squares and if they will become catchpoints for the pivot mechanism or folds where the panels are joined. (I popped up a purple flower at an inside fold that some of the petals ended up creased and folded back.) I chose to keep the middle section as flat as I could, only popping up items on the outside panels/last panel.

The front panel introduces the Easter bunny theme while the back panel has a matted label popped up on foam squares for a personal message.

The card folds to fit into an A6 (4×6 inches) or larger envelope. It may require extra postage because of its thickness to post in the USA.

Below are photos of a similar string accordion card using the same papers, but with a religious theme and a circle aperture rather than an oval aperture in the center panel.

Thank you for reading this blog post. I hope this inspires you and makes you smile. Please like and leave comments 😊

For more Accordion Fold cards click here.

Materials Used:

Dies

Papers

  • Dare2BArtzy – 12×12 Double-Sided Paper – Honey Bloomz by Andie Hanna – Buds & Bloomz-PP1049
  • Hot Off The Press – 8.5×11 Faux Suede Paper – Smoke Suede – HOTP-10434
  • Colored Cardstock and Paper Scraps
  • A6 Envelope – Ivory

Pens/Gels

  • Gelly Roll – Gel Pen – White
  • Pigma – Mircon 01 – Black
  • Pigma – Mircon 05 – Brown
  • INC – Scented Gel Pen .08 – Grape
  • Orange and Pink Fine-Tipped Makers
  • Nuvo – Aqua Shimmer Brush Pen – Glitter Gloss
  • Ranger – Glossy Accents

Miscellaneous

Cottontail Farms

It’s time for the Karen Burniston April 2023 Design Team Challenge with the theme of BUNNIES.

Ever wonder where chocolate bunnies come from? A chocolate bunny farm – of course!

This is a fun, tongue in cheek sort of card using Karen Burniston’s Barn Pop-Up Stand, Easter Charms, Farm Edges, a Bam Box and a fancy label from the Rectangles and Labels – Crosshatch die sets. My inspiration comes from the Echo Park papers and sentiments, chocolate adverts and the on-going tradition in the Sally Worth comic strip where the mother always eats the daughter’s chocolate bunny ears before the daughter has a chance to unwrap the bunny.

I recommend watching the assembly video for the barn pop-up before starting. My woodgrain paper was only one-sided, so I cut four barns and glued two together for woodgrain inside and out. (Because I had limited woodgrain paper, I had to piece together the backside of the barn front before cutting the door openings into it.) I also cut two fences from the Farm Edges die set which were folded in half and one fence post trimmed off each side to make them fit inside the card when glued to the inside of the barn.

After laying out the placement of the white bunnies on green grass paper, I used clear removable tape to hold them together when I die-cut them for the pop-up stand tabs. Make sure you get your die perfectly centered over the fold line. (I was just a little off-kilter on my die placement and this messed-up the right front tab that attaches to the barn back. You can see this pink tab poking through on a few of the photos. I ended-up cutting off the tab as the other three tabs where functioning.)

For the chocolate bunnies, I cut seven from brown cardstock using the bunny die in the Easter Charms. The die has a stencil hole for marking the eye with a white gel pen.

Two chocolate bunnies are on the front of the card surrounding the “Cottontail Farms – Every Bunny Welcome” sign. Another two chocolate bunnies are in the fenced in paddocks by the barn inside, while a third bunny is loose in the yard popped-up on a Bam Box with a piece of grass from the barn die set. The sixth chocolate bunny is on the back of the card with one of its ears having been nibbled on.

Decorating touches include carrot ribbon that wrapped about the card base on the front and back with the ends covered on the inside with a sentiment “I’m just here for the chocolate bunny” and a white fancy label for a personal message.

The last bunny is on the envelope flap with a pink ribbon and carrots fussy cut from extra cardbase paper. I like to enclose instructions on how to close the Bam Box. You can download the instructions below.

For more Bam Box projects click here.

Thank you for reading this blog post. I hope this inspires you and makes you smile. Please like and leave comments 😊

Materials Used:

Dies

Papers

  • Photoplay – 12×12 Double-Sided Cardstock – Bunnies & Blooms – Spring Carrots
  • Echo Park – 6×6 Paper Pad – Double-Sided Cardstock – It’s Easter Time
  • Ms. Sparkle & Co. – 5.5×7.5 Paper Pad – Woodgrain Color – Yellow
  • Colored Cardstock and Paper Scraps
  • A7 Envelope – White

Pens/Gels

Adhesives

Miscellaneous

  • Pokey Tool
  • Die Cutting Machine
  • Scrapbook.com – Magic Mat
  • Scissors
  • Time & Place – Easter Ribbon – 7/8-inch wide