
When does a cupcake become a bushel of apples with a gift card? When rain cancelled my afternoon plans and the idea, I had been tossing around for a few days with a new die beckoned.

I started with Karen Burniston’s Cupcake Pop-Up die and since the cupcake liner dies cut slits in the design, I cut a liner and some thin strips from brown paper and embossed the liner using Stampin’ Up’s Sizzix Big Shot Basket Weave Dynamic Textured Impressions Embossing Folder to give texture to the bushel basket. Next, I wove three strips alternating between liner slots with each strip. For the smaller liners I texture embossed and wove two thinner strips to form the woven baskets.

Next, I cut a sheet of glittered craft cardstock 6 inches x 10 inches scoring in half at 5 inches. I folded with the glitter side inside and opened it again centered the Pop-Up cupcake die following Karen Burniston’s directions on the package and assembly video. After measuring a gift card and the width of the frosting on the cupcake, I knew there was just enough space to cut a slot in the frosting for a gift card slider. I also had to cut small extension slots at the base of the cupcake liner. (The yellow pencil and silver scissors point to the two slots cut with an X-Acto knife.) I traced the outline of the cupcake on the back of a piece of the glitter craft cardstock as well as the outline of the gift card overlapping it with the frosting and finally cut the card outline with some of the frosting on top. The gift card slider resembles a tag shape with straight sides and a decorative top.

I found I needed to reinforce the cupcake shape by backing the shape with another cupcake cut from the craft cardstock. Next, I cut a square the width of the frosting and traced where the slot needed to be cut. Once the slot was cut, I glued it to the front of the cupcake. I tested the gift card slider moving it up and down with the gift card taped to it. I found that I needed to clean-up the slot cuts to get a smooth slide. Once satisfied with the slider slots I glued the large basket to the square over the cupcake liner leaving the top edge unglued so I could tuck corn stalks and apples under it.
To decorate the Pop-Up, I used the large cherry die from the cupcake set and cut approximately 20 with short stems from thick red Hero Arts cardstock. A black Sharpie marker and a white gel pen were used to color the apple stems and shiny patches. I cut four corn stalks using the leaf dies from Karen Burniston’ Flowers and Bee die set. And I cut eight of the tiny flowers from the same set in a maroon cardstock and another eight in a bright yellow cardstock. I fringe cut around four each color flower and pushed the fringe up and glued them to the center of the remaining cut flowers.

Test arranging the four corn stocks to hide the slider slot and act as the backing to glue the pile of apples, I then glued the base stem and first two leaves to the square, tucking the stems under the edge of the basket. Starting from the top edge of the basket I put a dot of glue on the back of each apple and then placed them as one would when stacking real apples in a basket. The top few apples I rounded between my fingers to add dimension and glued the edges, but not the centers down.

The small baskets of chrysanthemums use the fringed flowers glued to a scrape of craft cardstock adhered to the basket. The leaves are scrape green cardstock from my stash. I used Stampin’ Up Mini Stampin’ Dimensionals to adhere the three loose apples which were rounded between my fingers.
Using red double-sided-sticky tape, I adhered on side of the glitter craft cardstock Pop-Up to an A7 size heavy craft card (5in x7in) and then the other side of the pop-up as recommended by Karen Burniston in her assembly videos.
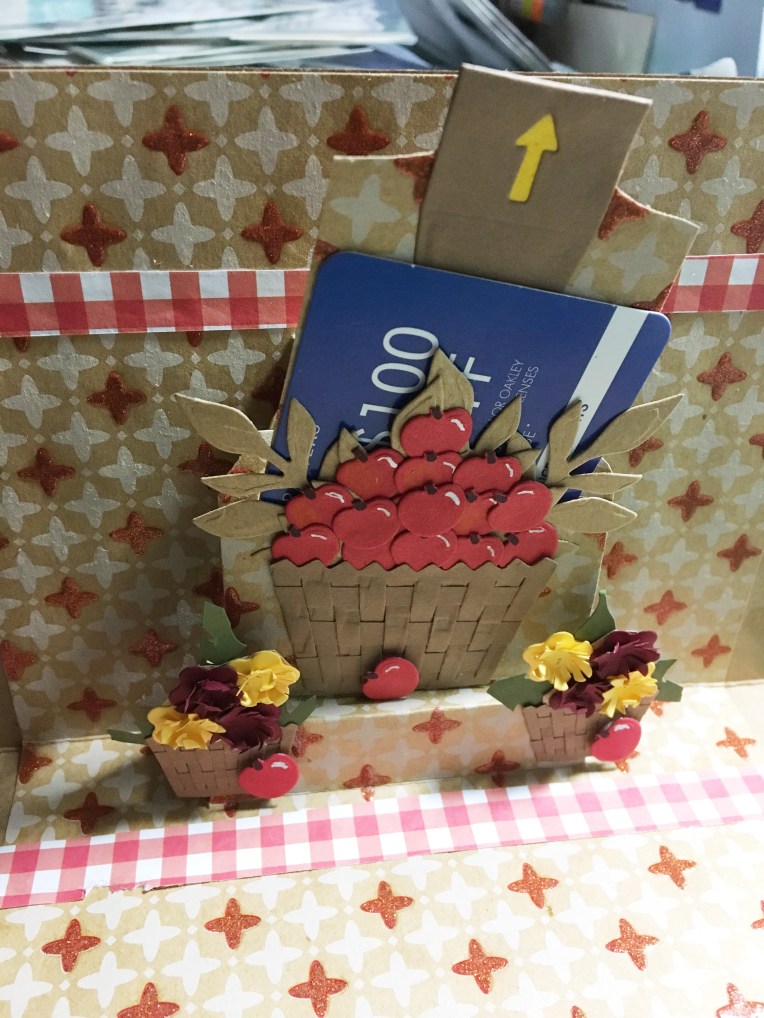
To have good CRX (card recipient experience), I used the arrow tab from Karen Burniston’s Frame Pull Pop-Up Die and cut it from brown paper, adding a part of a yellow sticky note for the arrow color and folding it over the tip of the gift card slider tag and adhering with glue. I trimmed the excess of the brown tab off.
I found two stripes of red and white gingham-checked paper in my scrapes and pasted them onto the card. Because I didn’t have a specific person in mind to give this card to, I’ll leave it unfinished until autumn when I can finish it up for a wedding card or a birthday card.
SUPPLIES USED:
Dies
- Karen Burniston in Cahoots with Riley and Company – Cupcake Pop-Up Die #1008
- Karen Burniston in Cahoots with Riley and Company – Flowers and Bee #1026
- Karen Burniston in Cahoots with Riley and Company – Frame Pull Pop-Up Die #1070
Embossing Folder:
Paper:
- American Crafts Cardstock card A7 card and envelope
- Colorbok Glitter Craft Card Stock 8.5in x 11in
- Neenah Creative Collection Premium Paper – Brown
- Assorted cardstock purchased from JoAnn Fabric, Michaels and Hero Arts
Miscellaneous:
