It’s no joke that I’ve created a video tutorial for a fancy fold card. (Warning it is a long video. more like a live video than a short teaching reel.) Click here for video.
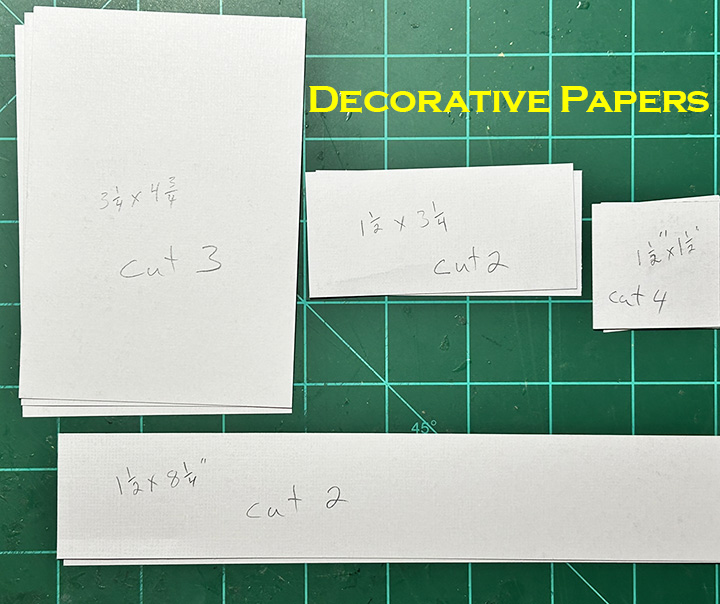
Below are photos of the cardbase measurements and the decorative paper layers measurements.
Thank you for reading this blog post. I hope this inspires you and makes you smile. Please like and leave comments 😊
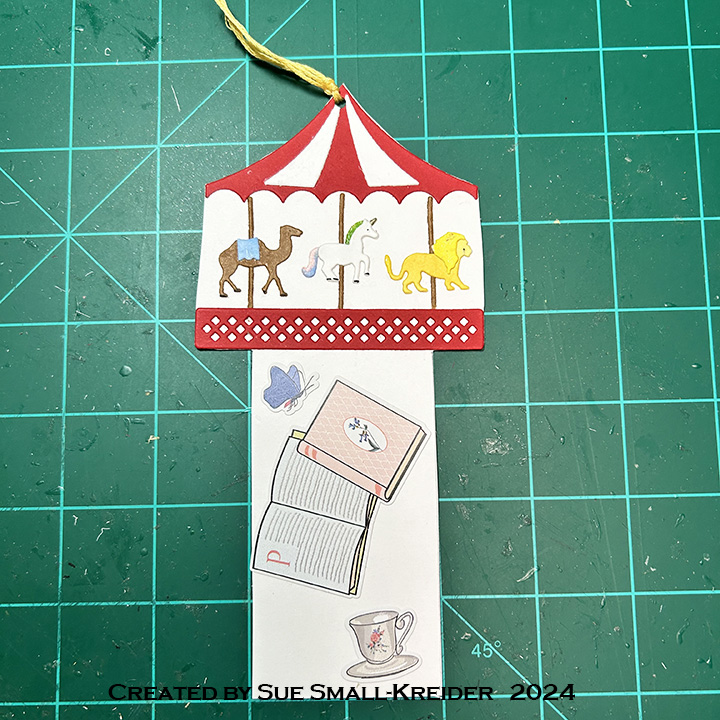
This birthday card was made for Craft Roulette #199 whose parameters included card with a bookmark, bakery colors, large animal element and horizontal lines.
For this card I used dies from two of my favorite crafting companies – Karen Burniston Pop-Ups and Rubbernecker Stamps (rebranded as Brass & Bliss). The front carousel, as well as the animals and lattice work used on the inside cake are from Rubbernecker’s retired Carousel set. The other dies used are Karen Burniston’s Happy Birthday Shadow, Happy Birthday, Cake Trims and Cake Pop-Up.
Cardbase: I used a purchased A7 (5×7-inch) cardbase and envelope. Cut four 5×7 panels of decorative paper. Glue two to the outside and two to the inside of the cardbase leaving the center fold uncovered. (I used two panels of a London park map paper inside the card, matching up the design at the fold.)
Card Front: The background paper, green border and journaling quote card are all from a Mary Poppins themed paper collection. The carousel is a bookmark tucks into the journaling card pocket. To create the pocket, I used thin strips of foam tape on three sides of the journaling card.
Bookmark: Because the carousel die is one piece, I cut it three times from white cardstock and once from red cardstock. For the animals I used markers to color them and glitter markers to add some magic to each critter. Once all the elements for the carousel were cut, colored and assembled, I glued them together at the top of a 4×8-inch rectangle of heavy white cardstock. Using a ruler, draw with a pencil the bookmark base as a 2-inch wide column centered at the bottom of the carousel. Fussy cut around the carousel and bookmark base. Punch a hole in the top point of the carousel. Thread two 6-strand pieces of yellow embroidery floss through hole for a bookmark pull. Decorate base and back with stickers from the paper collection.
Card Back: keeping with the bookmark theme, more of the collection paper was used to cover the card back featuring books and a sticker related to reading.
Pop-Up Cake: Watch the assembly video at the bottom of the link page for the Cake Pop-Up before die cutting. I wanted the cake to resemble the carousel, so the middle layer is white with the animals from the carousel die attached. The base layer is red and uses the carousel base cut in white trimmed to fit the sides of the cake. The top layer uses the Cake Trims set’s scalloped swag trim and the candle from the Cake Pop-Up set to suggest the roof and flag of the carousel.
Sentiments: Happy birthday uses two dies – the shadow cut in pink patterned paper and the words cut in matte gold.
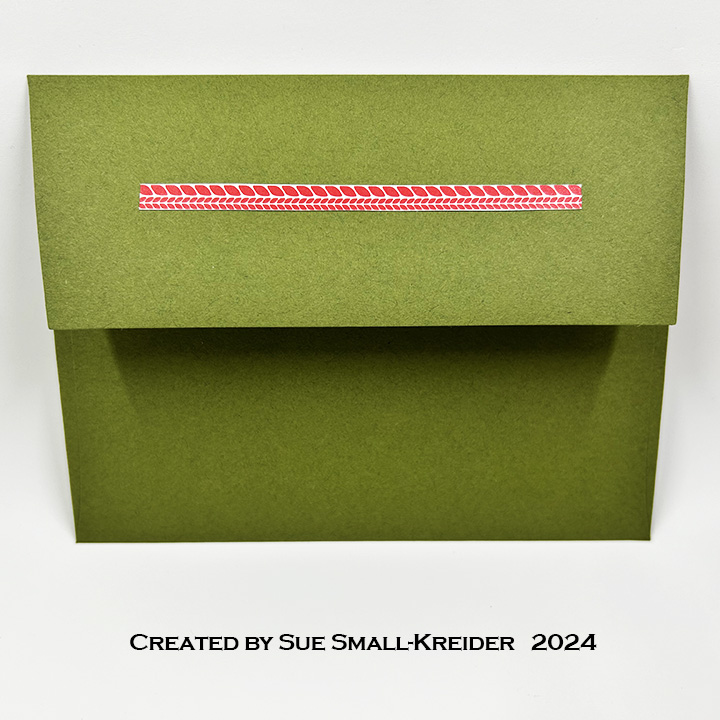
Envelope: The back flap of the envelope has a carousel tent top.
Thank you for reading this blog post. I hope this inspires you and makes you smile. Please like and leave comments 😊
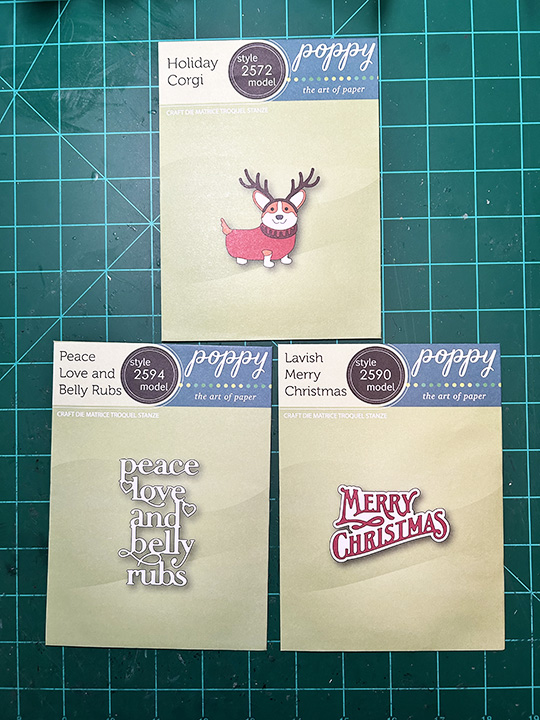
I have a neighbor who has the happiest small dog that when I saw this PoppyStamps die set, I thought of this dog in his winter vest.
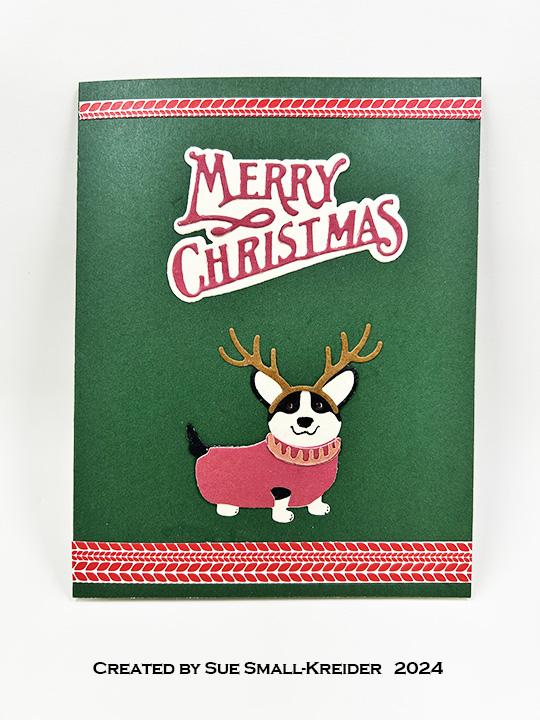
I cut all the pieces from cardstock in my scrap bin. I think the patterned papers are from Photoplay while the other solids are a mixture of weights and textures.
Using a prescored A2 card base in my stash that is green outside and white inside, the die cuts were glued in place including all the sentiments. Strips were added to the front and back of the card and envelope flap for decoration.
Thank you for reading this blog post. I hope this inspires you and makes you smile. Please like and leave comments 😊
Materials Used:
Dies
PoppyStamps – Craft Die – Peace Love and Belly Rubs -2594
PoppyStamps – Craft Die – Lavish Merry Christmas -2590
PoppyStamps – Craft Die – Holiday Corgi -2572
Paper
Photoplay – Tulla & Norbert’s Christmas Party 6×6 paper Pad
Craft Consortium – A4 Solids Double-Sided Paper Pad – Candy Christmas – Reds
The box is cut in one piece. (I used patterned paper which the striped paper had a white backside while the egg paper had stripes inside.) Before assembling, cut out the window with the square or hearts decorator dies in the set and back it with a scrap of clear acetate or plastic packaging. Then, adhere a contrasting frame cut with the same dies. Thin double-sided tape works well to adhere the plastic the inside of the box and for the long side tab, but glue will work as well.
I used stickers from the paper collection as well as “Happy” and the bunny from Word Set 2 and Spring Animals to decorate the boxes.
Thank you for reading this blog post. I hope this inspires you and makes you smile. Please like and leave comments 😊
This tag birthday card was made for Craft Roulette #197 whose parameters included a card with two tags, happy colors, nail(s) and “outside the line.”
I followed the directions on Karen Burniston’s assembly video for making this Circle Tag Book Pop-Up (which is on the bottom of the linked page for this die set.)
The Nuvo Dream Drops that I used were fairly easy to apply as finger nails on the hands that were die-cut using a set by Karin Joan’s Missees collection.
For sentiments, I used Karen Burniston’s Happy Birthday with its shadow cut from a holographic pink paper. I added heart hands cut from the same die set as the inside hands. The back white label is a place for a personal message. A gift card could be tucked inside for a manicure.
Thank you for reading this blog post. I hope this inspires you and makes you smile. Please like and leave comments 😊
Celebrating Valentine’s Day often brings up visions of candy hearts and chocolate. This is a special display style Valentine card with coordinating candy hearts box and mini gift bag with a ladybug theme.
Before starting, watch assembly videos for the linked die sets. The videos are towards the bottom of the linked pages.
Accordion Frames: Cut four accordion frames using the Fancy Label Accordion die set. They will be decorated AND THEN they will be assembled. It is much harder to decorate a fully assembled accordion card when you cannot flatten the various moving panels and frames.
Hearts Add-Ons: The Hearts Add-On cut a pivot panel that attaches to two Fancy Label Accordion panels. It also has dies to cut decorative hearts in three sizes. Cur one hearts panel from a double-sided decorative paper. Train the folds on the panel as directed on the packaging. Decorate the heart panels on the front and back sides.
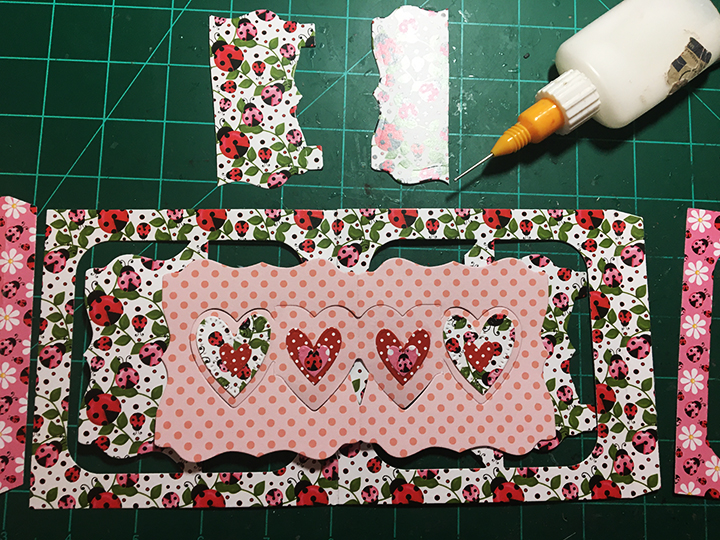
Once the panel is fully decorated, work on the accordion frames that it will be glued onto. Glue two frames together using the outer long tab. From one panel cut the label panel along the pivot point making sure to keep the label attached to the pivot bar. Cut the other label, but the cut will look different than the other panel. See photo below. Add glue to the back side of the hearts panel and attach it to one of the label panels. Add glue to the other end of the hearts panel and attach it to the other label panel. (I die-cut one pivot panel from ladybug paper to go over the back of the pivot panels as a decorative feature and to cover over the tabs from the other panels.)
End Frames: Cut two of the largest decorative labels from the Fancy Label Accordion set for use on the end frame panels. Using the stitched heart die from the Candy Heart Box, cut hearts out of the labels. Add labels to the end frame panels. Once the end frames are decorated, attach the end accordion frames to the center hearts frames. Cut off unused tab from accordion panel and glue over contrasting tab on back of card. Cut another tab to cover other contrasting tab. Glue the fancy labels together. (I die-cut one pivot panel from ladybug paper to go over the back of the pivot panels as a decorative feature and to cover over the tabs from the other panels.)
Sentiments: “Happy Valentine’s Day!” is made by cutting the shadow from white cardstock and using contrasting patterned paper for the words. The space for a personal message is on the right back panel and it uses the second largest label with dotted edge in the Fancy Label Accordion set.
Box: The Candy Heart Box is cut in one piece from double-sided decorative paper. Before the box is assembled, a large heart needs to be cut out of the front of the box. Using double-sided tape, adhere a piece of clear acetate or plastic to the inside of the box over the opening. Assemble the box as directed on packaging. (I used glue to assemble the box.) Decorate with hearts and add a scalloped white square folded over for a personal message.
Bag: (Watch assembly video) Using coordinating decorative paper, cut the two Mini Gift Bag pieces and assemble as directed on the packaging. (I used glue to assemble the bag.) Add ribbon or pom-pom string for handles. Decorate with leftover hearts from other pieces in the set.
Thank you for reading this blog post. I hope this inspires you and makes you smile. Please like and leave comments 😊
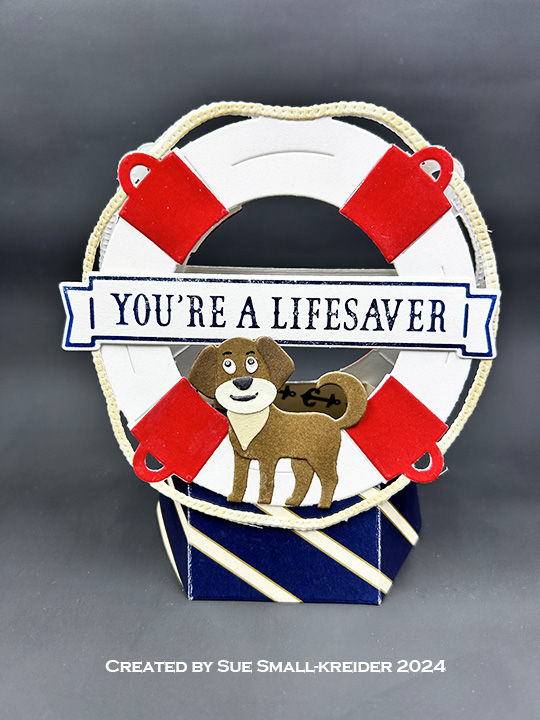
This pop-up display card sail-ebrating life was made for Craft Roulette #196 whose parameters were a celebration project with apple farm colors, preserve(s) element and a dog.
This mini album was made for Craft Roulette #195 whose parameters included Project type of Encouragement, calm colors, stuffed element and ticket(s).
I have made one other journal similar to this one in a virtual workshop by Kim Hein from Art Impressions using their Mini Journal Template and stamps. In thinking about the layout, I decided that I wanted a positive affirmation for the center back page and all the interleaving pages to it to be wintery and joyful. The theme is chasing the winter blues away.
Watch a painting tutorial before coloring any of the watercolor pieces.
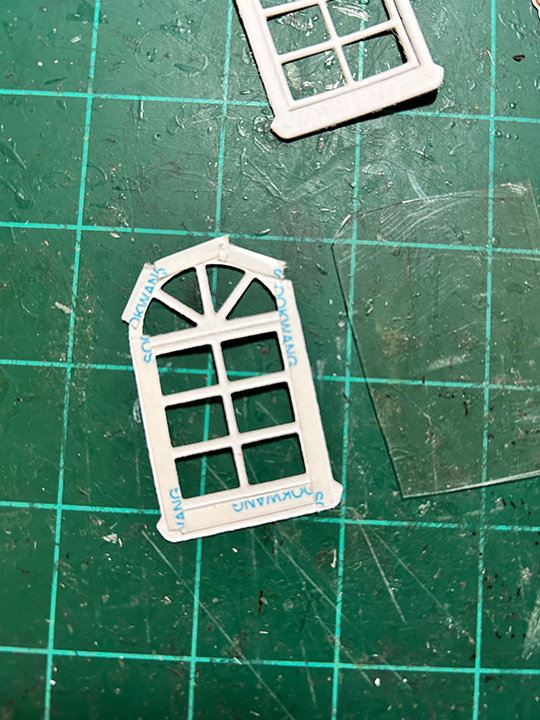
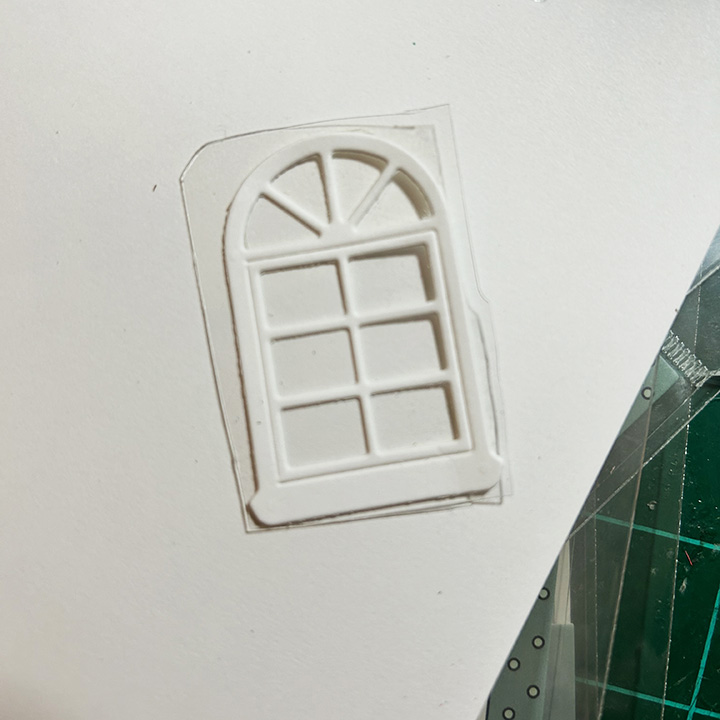
Window Journal Cover: Using the window frame and window arch dies from the Mini Journal template set, cut the arch opening into the left album cover and two of the window frames from white cardstock.
Cut a piece of clear acetate/plastic slightly larger than the window frame. Using narrow double-sided tape on the backside of one window frame, adhere the frame to the acetate piece. (Hint: If the double-sided tape is wider than the frame, peel off the backing paper and fold the tape over on itself to fit the frame.) Trim off the excess acetate around the frame. Add double sided tape to the back of the acetate and adhere over the cover opening. Attach the second frame to the back of the cover over the opening.
Room Scene Journal Cover: Stamp onto patterned paper the chair from the Matchbook Den stamp and die set. Cut out using the matching die and trim off the tab with scissors. Stamp the fireplace onto watercolor paper using a alcohol based ink and color using water-soluble inks with a water brush. Die cut fireplace and trim off tabs. Die cut picture frame and color with ink. Write the word “JOY” in the frame’s picture area with a fine-tipped blue marker. Cut a scalloped edge rectangle from a wallpaper-like patterned paper using die from the Mini Journal Template set. Assemble room scene onto the right cover panel.
Pocket of Encouragement and Ticket Pages: The blue ticket was computer generated. The yellow tags with affirming statements were from my stash of batch foiling using Spellbinder Glimmer System products. A large needle was used to pierce and thread the embroidery floss through the tags. The scalloped background piece and white lacy pocket were die cut using dies from the Mini Journal Template set.
Joy and Snowman Twister Pages: Stamp the fronts and backs of the twister Joy and snowman using the Mini Christmas Twister stamp and die set. Watercolor them. (I used glitter gloss and glitter brush markers on the twisters.) Watch a twister assembly video before assembling. Die cut two of the rectangles from patterned paper for each page using the large straight edge rectangle die in the Mini Journal Template set. Position the decorative papers onto the white page base pieces making sure not to cover the tabs. Secure the papers to page with removable tape and tape in place the smaller of the twister oval dies. Die cut through all three layers. (I had to recut the bottom layer of decorative paper, but the impression of the die was there to show me the position.) Glue patterned paper to page. (I die cut two oval frames for the “JOY” page using the two twister oval dies. They made the opening too thick to get good action with the twister, so I had to trim some of the notch away. I would not use frames unless they were from very thin paper.)
Snowman and House Pages: Using the WC Snow Globe stamp and die set, stamp the house and snowman on to 2×2 1/2-inch rectangles of watercolor paper. (I watercolored the images after viewing a number of the Art Impression painting videos.) Use the frame die in the Mini Journal Template set to cut out the images. (You can use the rest of the image that is die cut as I did with the house, or die cut a frame from decorative paper as I did with the snowman.)
Little Birds Pages: Die cut two scalloped circles using the die from the Mini Journal Template set. Stamp two birds from the Matchbook Garden set. Watercolor as shown in the opening video of this blog post. Using two of the oval cut outs from the patterned papers used for the Joy Twister page, and two scalloped rectangles of patterned paper, assemble the two bird pages. Stamp and die-cut the “hello Sunshine” banner from the Matchbook Garden set to place on the back center page.
Back Message and Ribbon Closure: I computer generated the back cover sentiment and used dies from the Mini Journal Template set to cut it out, frame and mat it. This panel is glued over the 24-inch piece of ribbon to hold it in place. Trim ribbon as needed once tied into a bow.
Thank you for reading this blog post. I hope this inspires you and makes you smile. Please like and leave comments 😊
Materials Used:
Dies
Art Impressions – Steel Dies – Mini Journal Template – 5718
Art Impressions – Steel Dies – Mini Christmas Twister Set – 5815
Art Impressions – Steel Dies – Matchbook Den Set – 5322
Stamps
Art Impressions – Clear Stamps – Mini Christmas Twister Set – 5815
Art Impressions – Clear Stamps – Matchbook Den Set – 5322
Art Impressions – Clear Stamps – Matchbook Garden – 5444
Art Impressions – Clear Stamps – WC Snow Globe Set – 5791
Foiling Plates
Spellbinders – Glimmer Hot Foil Plate – Mini Everyday Sentiments
Papers
Art Impressions – 6×6 Double-Sided 80lb Cardstock – Mini Journal Series -Mini PP -5835
Studio Light – 6×6 inch/15.2×15.2 cm Single-Sided Papers – Let it Snow