Halloween means so many different things to different people, but my favorite person to make Halloween cards for is a cat lover, likes to see children in their Halloween costumes, but hates to dress-up for the day. So, this vintage pumpkin card is perfect for them.
My spouse and I joke that neither of us can remember our wedding anniversary. We know it is in late October but we always have to look it up. This year I decided to just make a sweet Halloween card for my spouse for our anniversary.
I used the Spellbinders’ Dancin Mummy dies as well as the stamp set from the Boo Dance Party collection to make the card. The card base is a mini-slimline card made from double-sided cardstock from a 2013 Martha Stewart 12 x 12 paper pad called Gothic Manor. The legs swing on circle foam dot.
Thank you for reading this blog post. Please like and leave comments 😊 You can also follow this site.
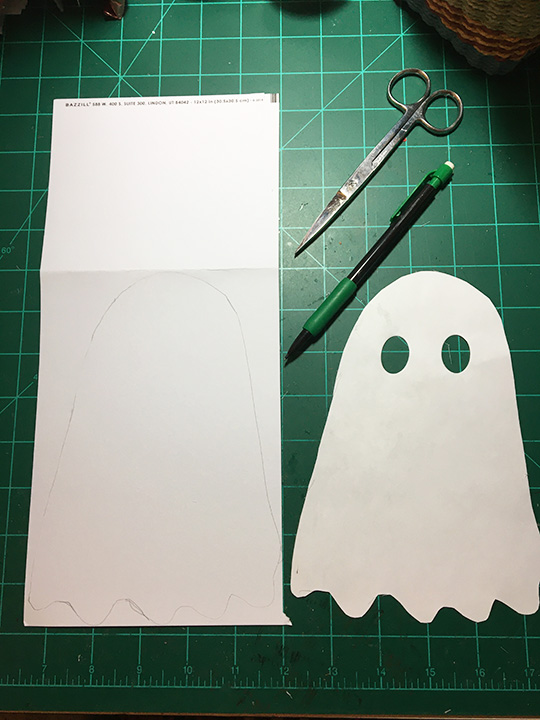
Pop-up ball cards always remind me of the jack-in-the-box toy when you open them and something pops up to make you smile. This pop-up ghost card was designed for a three-year-old boy for Halloween.
The card front and easel base are my design. (You can download the full-size scan I made of the ghost card front for free.)
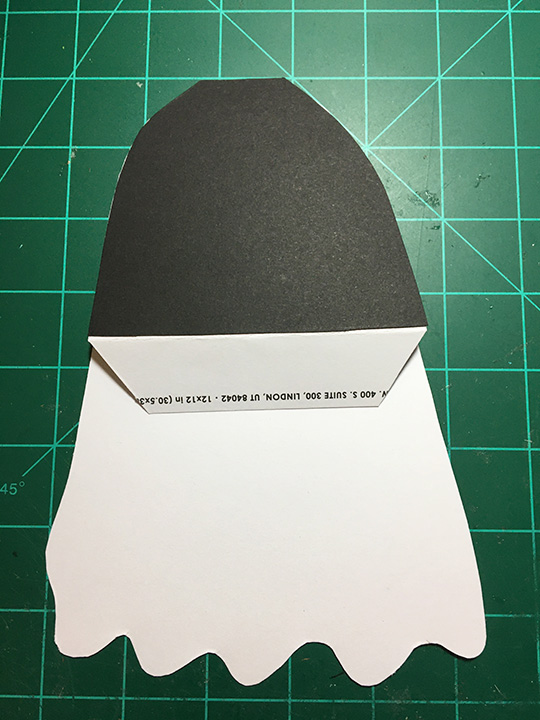
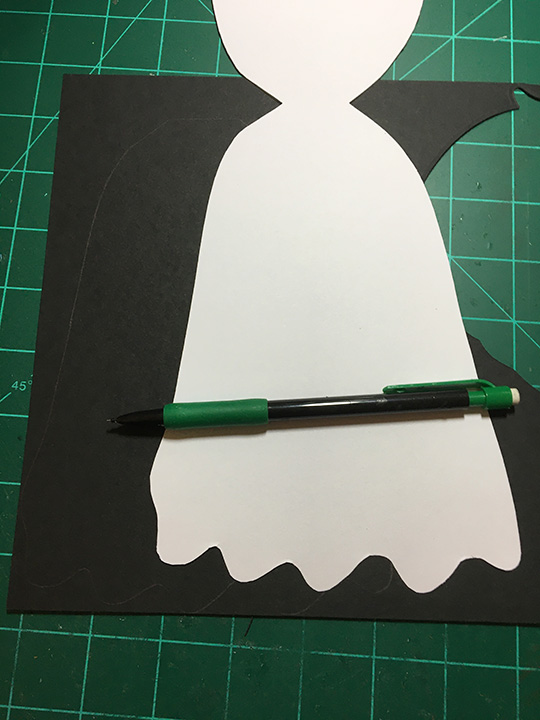
I traced the ghost onto a 12 x 12 inch sheet of cardstock twice. Next, I cut the cardstock between the ghosts and fold the card stock at the top of the ghost’s head and cut out two layers of the ghost leaving the top of the ghost’s head attached as a fold.
This will be the card base and easel prop. The second ghost I cut all the way around and used the largest oval die from the Karen Burniston Bitty Ball die set to cut out the eyes for the card front ghost.
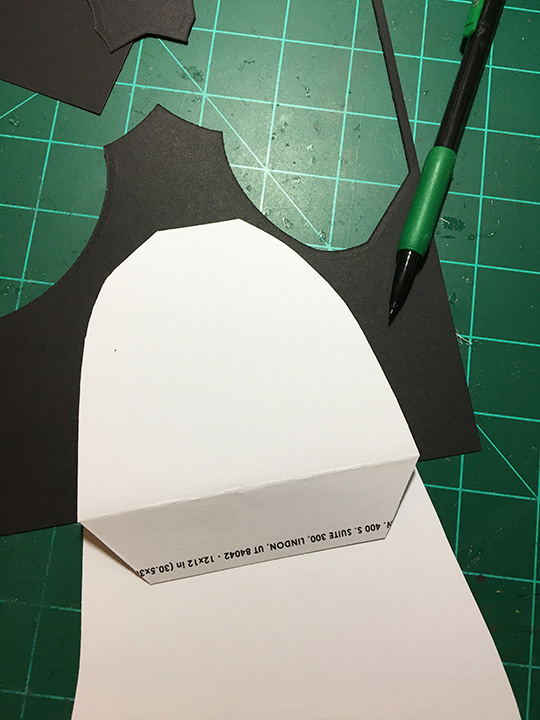
I traced the easel piece as well as the whole ghost back onto black cardstock and cut both pieces out. The easel back piece needs to be glued so that when the white ghost card front is glued onto easel flap the eyes show through as black.
(Don’t glue the whole black ghost shape onto the back of the card until after the pop-up balls have been attached to the card base. This piece hides the brad legs.)
For the pop-up ghost inside I covered two mini pop-up balls (made using dies by Karen Burniston) with four layers of cheesecloth cut into a 6-inch circle and glued to the top pop-up ball. (Follow the assembly video for the pop-up balls.) Cut all pieces from white cardstock. Cut two black eyes using the same oval die used for card front ghost.
I made a band to hold the card closed from a leftover piece of white cardstock. The “BOO!” on the ghost as well as the band sentiment are by Karen Burniston from the two Halloween die sets listed below.
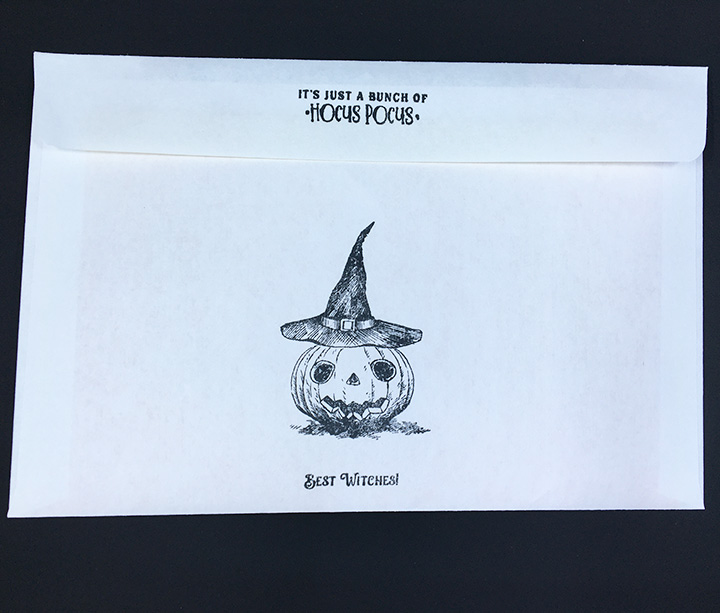
The card fits into a 6 x 9 inch envelope. I stamped the front and back of the envelope with ghost stamps by Julie Ebersole.
I often add a CRX slip that helps the card recipient know how to open the interactive card. (You can download the sheet with four slips on it. for free.)
Thank you for reading this blog post. Please like and leave comments
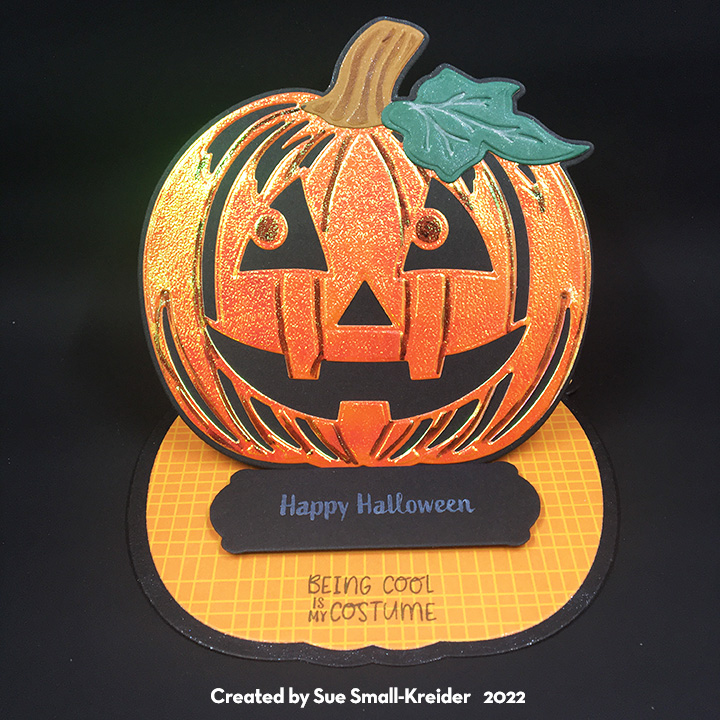
Pop-up ball cards always remind me of the jack-in-the-box toy when you open them and something pops up to make you smile. This pop-up pumpkin card was designed for a baby’s first Halloween.
The card front pumpkin and easel base are a die set by Anna Griffin and the pop-up pumpkin inside is made using dies by Karen Burniston.
I often add a CRX slip that helps the card recipient know how to open the interactive card. (You can download the sheet with four slips on it. for free.)
Thank you for reading this blog post. Please like and leave comments
These two cards are for a 12-year-old girl and her 14-year-old brother. The card sender requested that they be money holders as well as interactive Halloween cards.
Both cards are variations of previous Halloween cards I’ve done this year, but with money holders. They also show how adding a second Karen Burniston pop-up mechanism and reversing the direction of it can really make a card jump for joy or reveal hidden treasure.
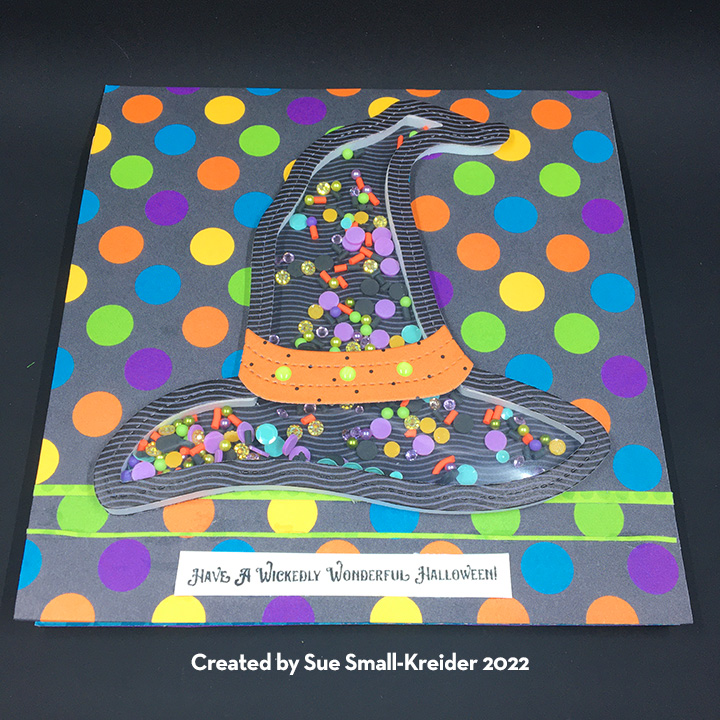
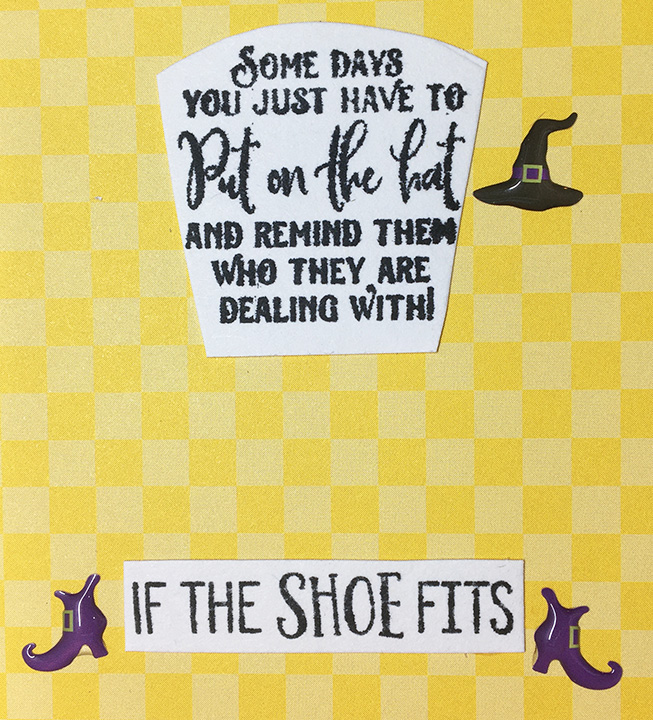
The original card called Witchy Shoes and this card are made with dies and papers from Queen & Co. Halloween collections – Fright Fest (shoes, pumpkin & papers) and Witch Hat die.
The money holder is an orange jack-o-lantern Trick or Treat pail intended as a shaker, but I taped the pumpkin frame to the center cutout and used the matching foam frame behind the jack-o-lantern, cutting off the top bar, so rolled paper money could be placed in it.
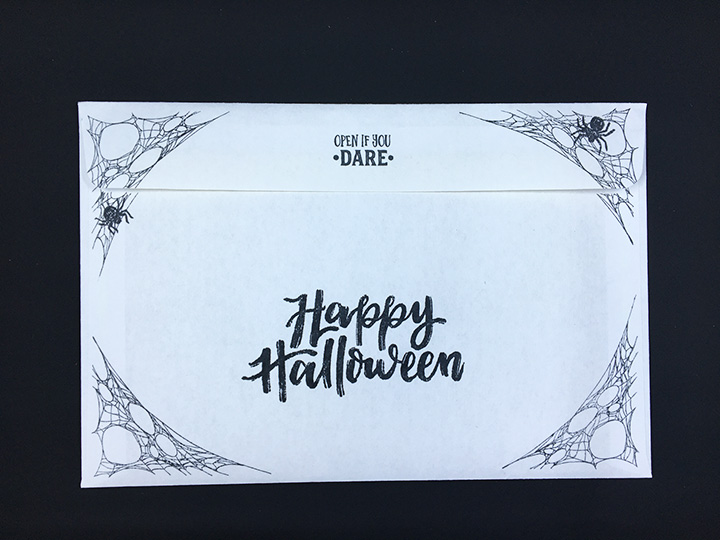
The envelope uses image stamps by Tim Holtz and sentiment stamps From Queen & Co.
Card front and front of envelope
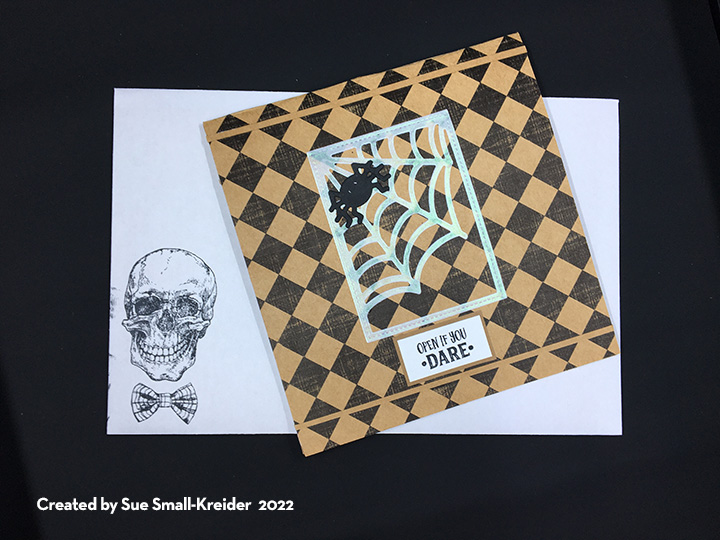
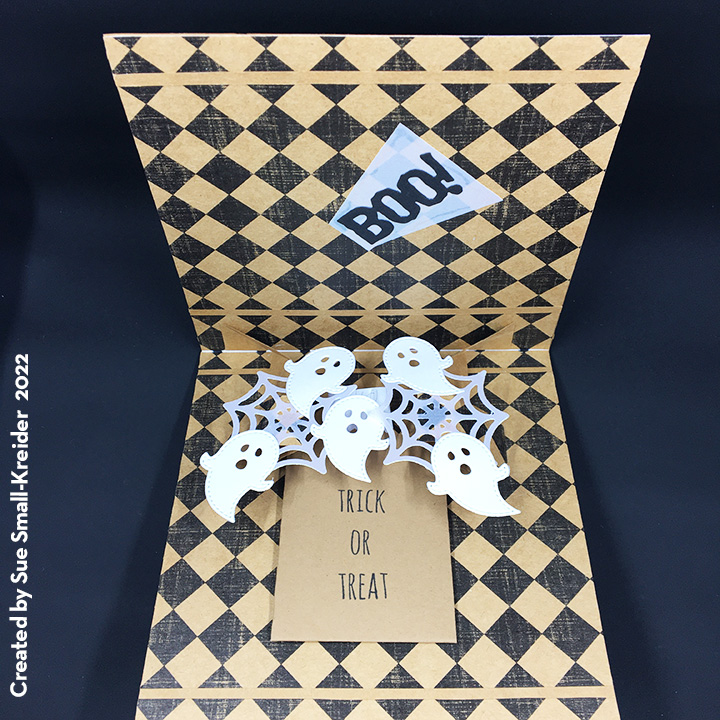
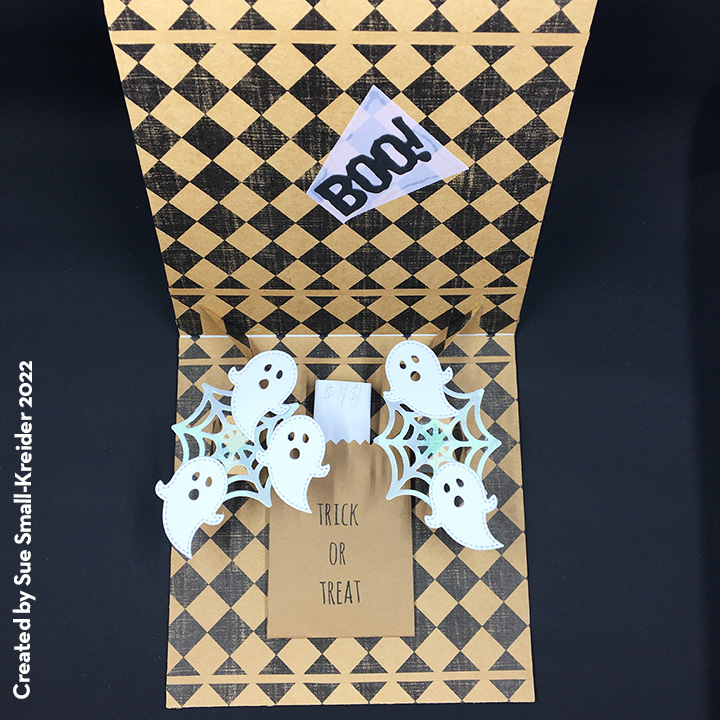
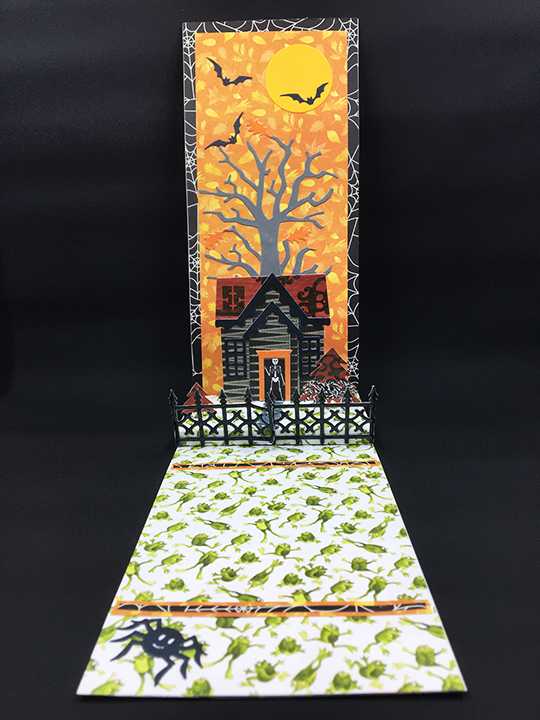
For the Open If You Dare card I based it off the card Do What Brings You Joy using two of the pop-up mechanisms from the Katherine Label Pop-Up die set by Karen Burniston (assembly video). I reversed the direction of one of the mechanisms to make them move away from each other.
The ghosts and spiderwebs are from the Queen & Co Halloween Foundation Dies and the Paper Studio checkerboard brown craft paper has been in my stash for a while.
The Trick or Treat bag is a rectangle that was accordion folded at the sides and the bottom edge folded up into a tab. The edge of the bag was cut with pinking shears and then the bag was stamped in black using a stamp by Tim Holtz.
Card back
All other stamps used on the card are from the Queen & Co Fright Fest collection.
Envelope back
The envelope uses image stamps by Tim Holtz and sentiment stamps From Queen & Co. and Peebles.
Sometimes there are crafting elements that just take you under their spell and make you play with them.
Queen & Co. Halloween shaker kits have me under their spell This card is made up of elements from two kits – Fright Fest (shoes and papers) and Witch Hat. These kits have the dies, foam shaker frames and acetate windows. Some come with the shaker elements (I added to them from my stash) and/or matching paper (Fright Fest for this card.)
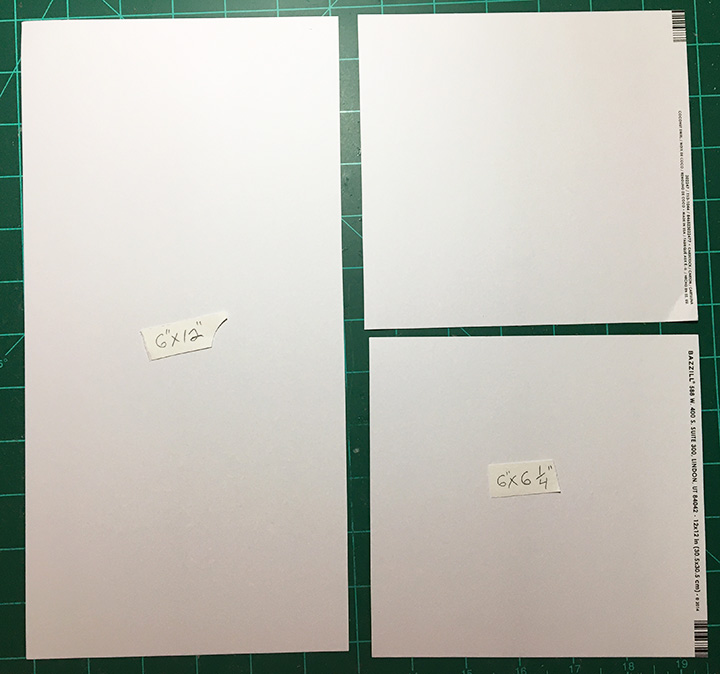
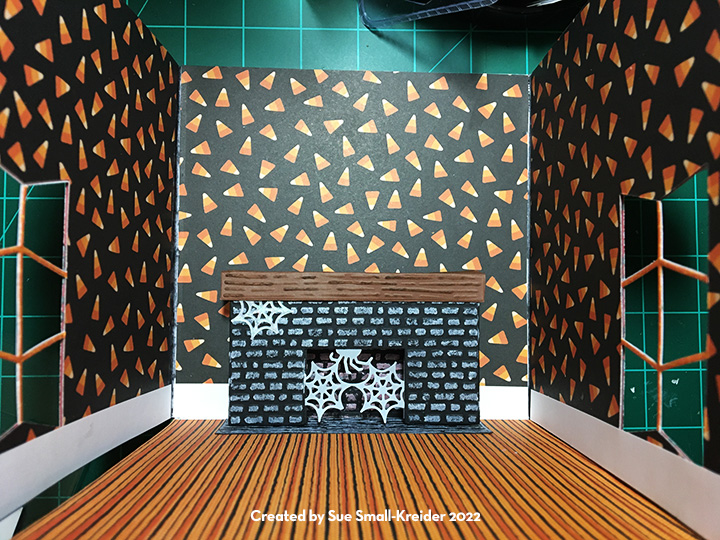
Card Base: There are three pieces that need to be cut and assembled to make the card base. Lightweight to medium weight cardstock is ideal as there will be decorative papers glued to all sides of the card which will strengthen the base. Cut one piece 6×12 inches and fold at center into a 6×6 card. Cut two 6 x 6 1/4 inch squares. Score and fold 1/4 inch to make the squares into 6 x 6 inches.
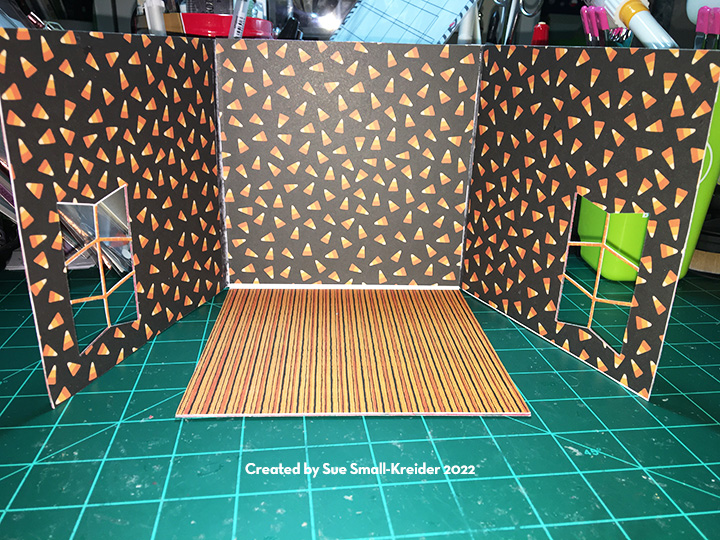
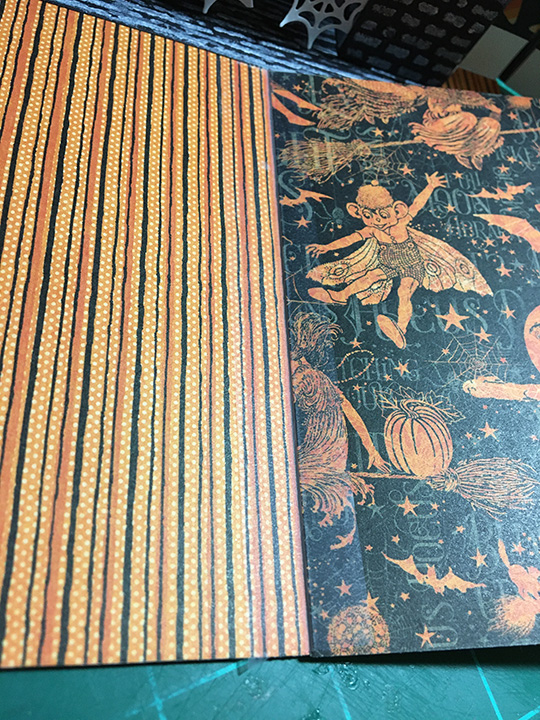
Cut nine decorative papers 6×6 inches to cover the inside and outside of the card. (Three of the same pattern for the inside walls and three of the same pattern for the outside walls, two of the inside floor and one for the Back of the card.)
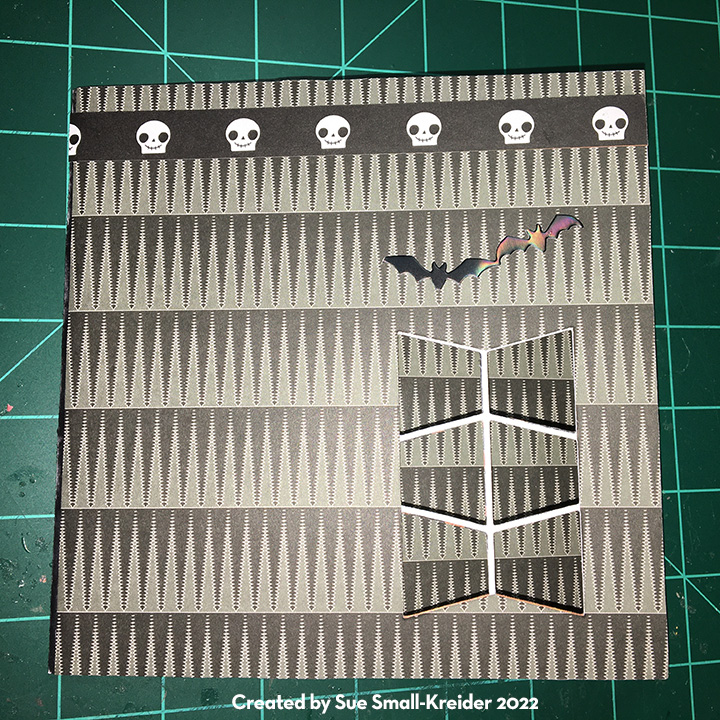
Glue the thinnest of the papers that will cover the side squares and cut the windows into these pieces using the six-trapezoid cutting die from the Mini Ball Pop-up Double-Ups. Use the side panels to mark the location to cut the window in the thickest of the decorative papers. Glue all the decorative papers onto the side squares. Glue the flaps on to the top half of the folded card base. Glue the remaining decorative papers onto the card base. (I made a mistake when I glued the decorative bat pattern plate onto the orange back of the card and ended up with them upside down. The glue set before I noticed my mistake.)
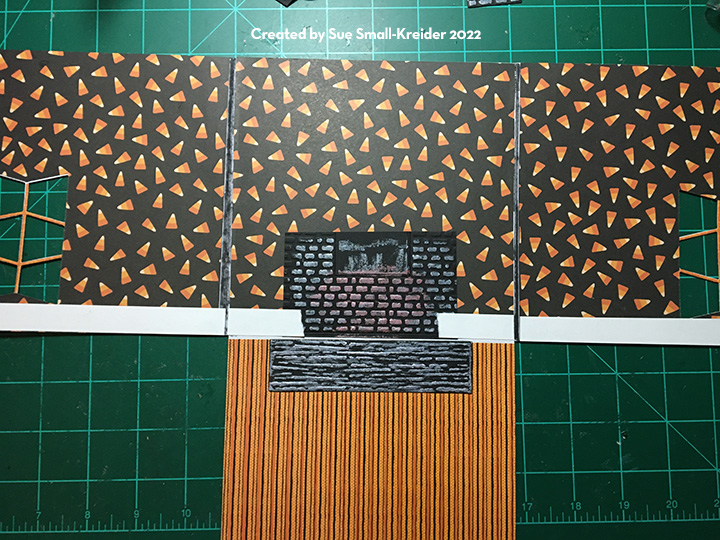
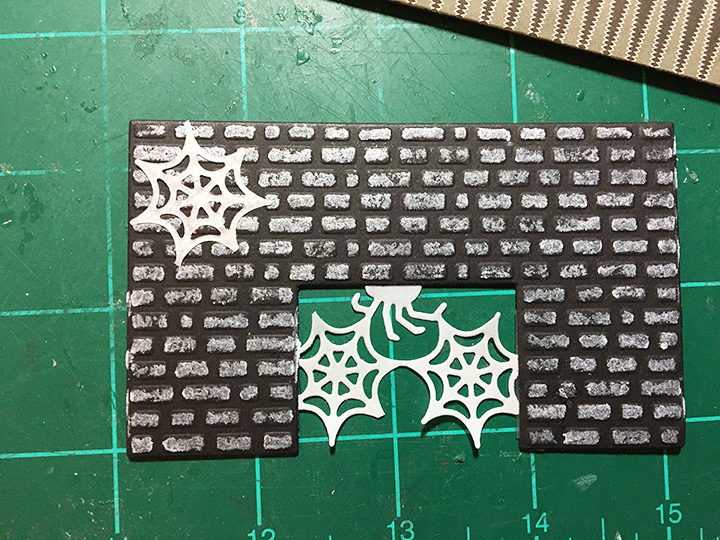
Fireplace: Watch the assembly video before assembling. Cut one of the fireplace fronts and a rectangle the size of the fireplace front. Emboss them both to show the bricks. Use a white crayon to highlight the bricks on both pieces. Trim the rectangle to be a 1/8 inch shorter on each side. Turn the rectangle upside down and glue to the back wall of the card base. Die cut and emboss one health/mantel in a stone color. Color the heath stone and glue to the floor of the card base. Glue the fireplace mechanism as directed in the assembly video to the fireplace back.
Die cut a partial patterned plate of spiders and webs of vellum. Separate some webs and spiders. To decorate the fireplace and other parts of the room. (I used some thin foam squares to make the mantel standout over a web.)
Floor Flap: Take the remaining floor square of decorative paper and cut it in half. I had to match the pattern on my card’s floor. (Because I glued two pieces together, I was able to attach a ribbon loop to act as a pull tab for the floor flap.) The flap is cut to stop just at the fireplace heath. Use STRONG clear tape to attach the flap to the card base floor. (I made the mistake of using removable tape which broke when the card was being opened by the card recipient.)
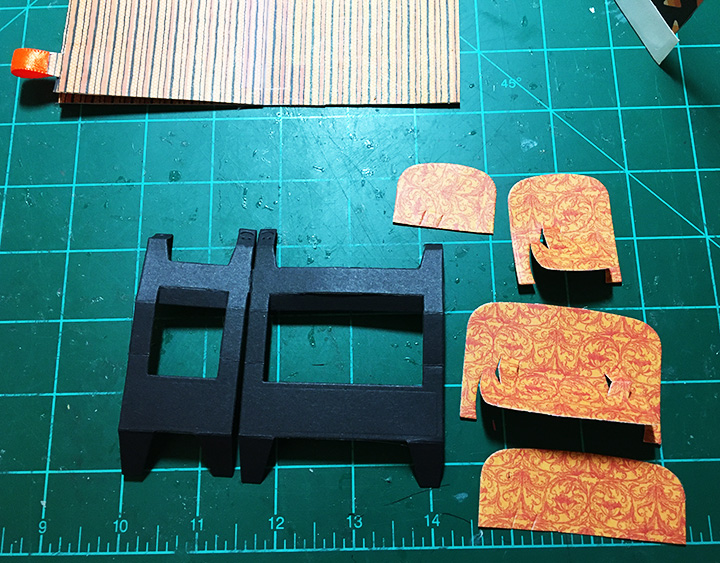
Furniture: Watch the assembly video for the furniture before assembling. (Once I had assembled the sofa and chair, used double-sided removable tape to find the best placement of the furniture on the floor flap so that when closed no parts of the furniture can be seen. Also, you may want to temporarily tape a skeleton to the back o the furniture as you figure out the placement of the furniture.)
Skeletons: Cut nine whole skeletons and the heads of three more. Use the die as a stencil to color the skeletons faces with a fine-tipped black marker. Use the tiny accessories die sets to dress out the skeletons. For the seated skeletons, bend them at the hips. Glue an extra head piece to the back if the skeleton if the marker has bled through. Glue the seated skeletons to the pop-ups on the sofa and chair and the feet to the seat. You can raise an arm to the armrest as well. Glue other skeletons to walls, fireplace, window frames and backs of furniture. (I used double-sided, removable tape to do a layout of the skeletons before gluing them, to make sure they didn’t hinder any mechanism.)
Banner: The “Happy Halloween” banner is made from black glitter cardstock and thinner orange and yellow papers. The mini alphabet die set and the flag bunting from the Twist Panel Pop-Up die set are used to cut the banner pieces. Two strands of baker’s twine are threaded with the letters.
Envelope: While the card is 6 x 6 inches, its thickness makes it too thick to fit into a stand envelope. An envelop was created from a 12 x12 inch sheet of double-sided paper from the Martha Stewart paper pad. The center point of each edge was marked in pencil, scored and folded using a metal straight edge. The seams were glued and a Velco fastener covered with a flat back gem.
Thank you for reading this blog post. Please like and leave comments 😊