This special card was made for the October Halloween themed Karen Burniston Designer Team challenge.
When the wind goes “Woo!” and the leaves begin to stir, Halloween can’t be far off. Last year I made a slimline Halloween card depicting a lonely cottage in the woods with a skeleton at the door. (Photo below) This year I have made the interior of the cottage.
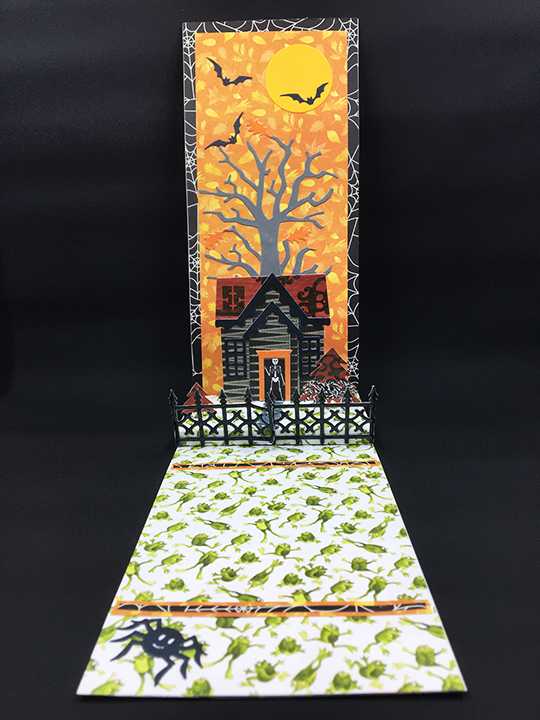
Both cards use dies made by Karen Burniston. This year’s uses dies from her August 2022 release featuring a fireplace, skeletons, and mini-ball pop-up trapezoids, as well as, pattern plates of bats, spiders and webs.
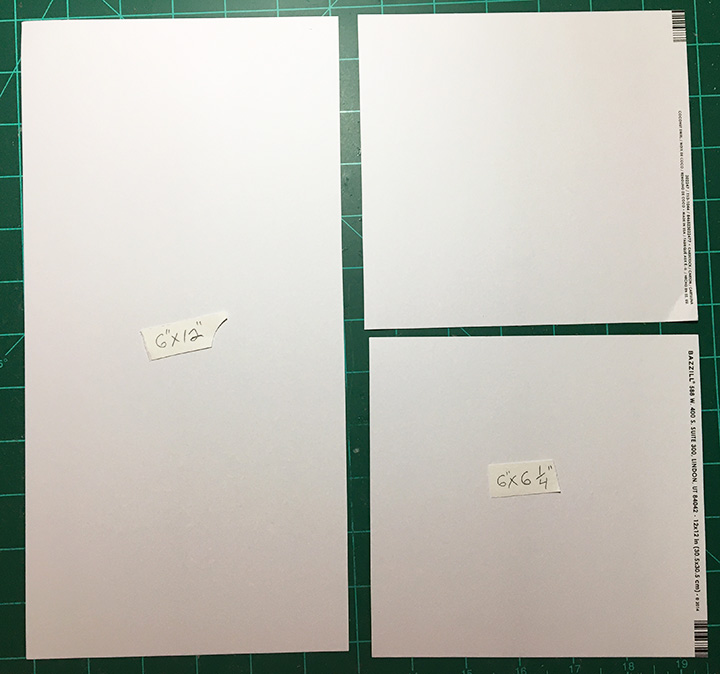
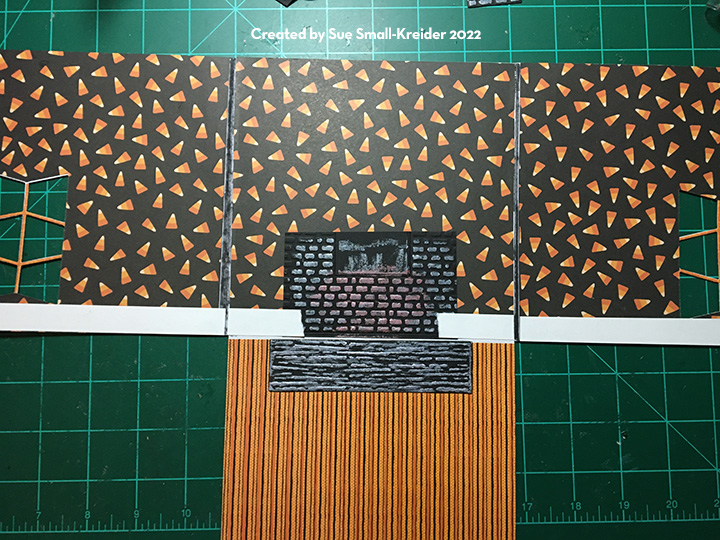
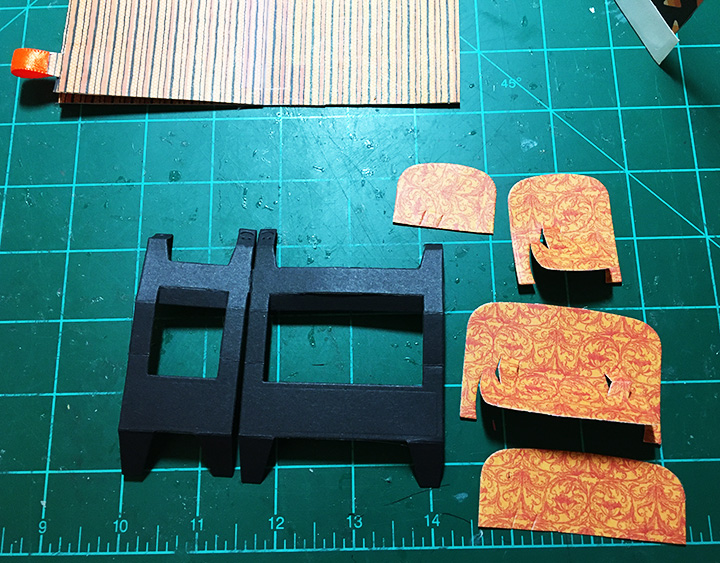
Card Base: There are three pieces that need to be cut and assembled to make the card base. Lightweight to medium weight cardstock is ideal as there will be decorative papers glued to all sides of the card which will strengthen the base. Cut one piece 6×12 inches and fold at center into a 6×6 card. Cut two 6 x 6 1/4 inch squares. Score and fold 1/4 inch to make the squares into 6 x 6 inches.

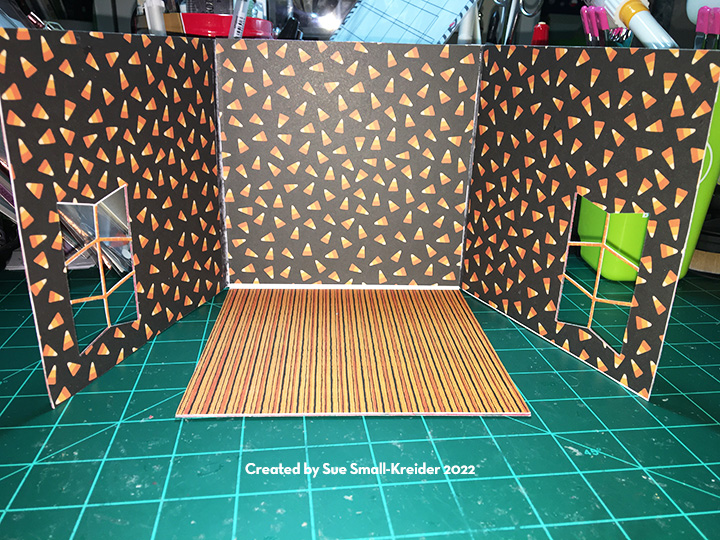
Cut nine decorative papers 6×6 inches to cover the inside and outside of the card. (Three of the same pattern for the inside walls and three of the same pattern for the outside walls, two of the inside floor and one for the Back of the card.)


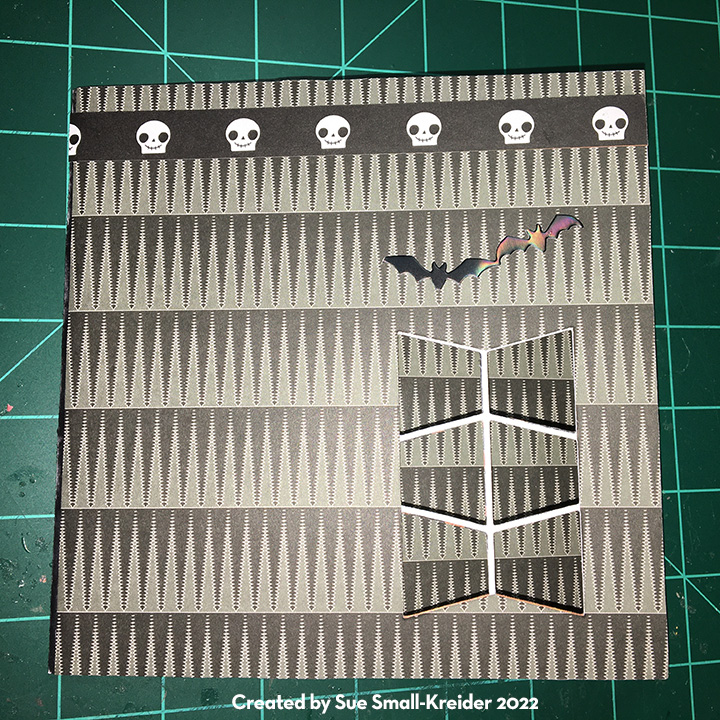
Glue the thinnest of the papers that will cover the side squares and cut the windows into these pieces using the six-trapezoid cutting die from the Mini Ball Pop-up Double-Ups. Use the side panels to mark the location to cut the window in the thickest of the decorative papers. Glue all the decorative papers onto the side squares. Glue the flaps on to the top half of the folded card base. Glue the remaining decorative papers onto the card base. (I made a mistake when I glued the decorative bat pattern plate onto the orange back of the card and ended up with them upside down. The glue set before I noticed my mistake.)


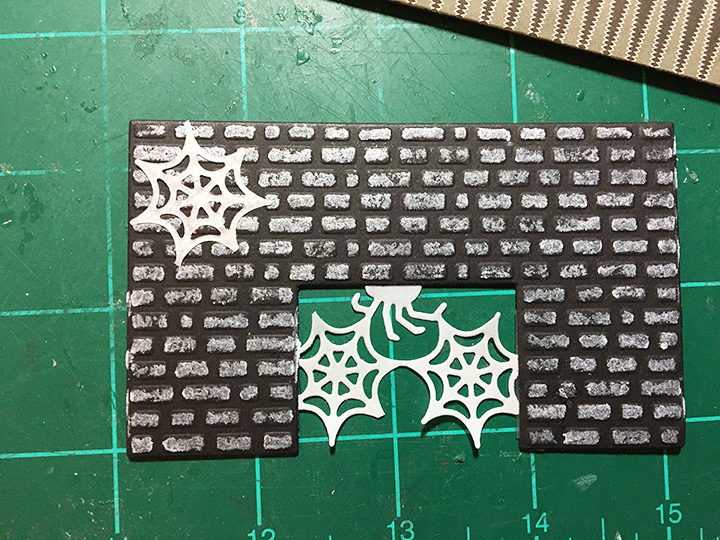
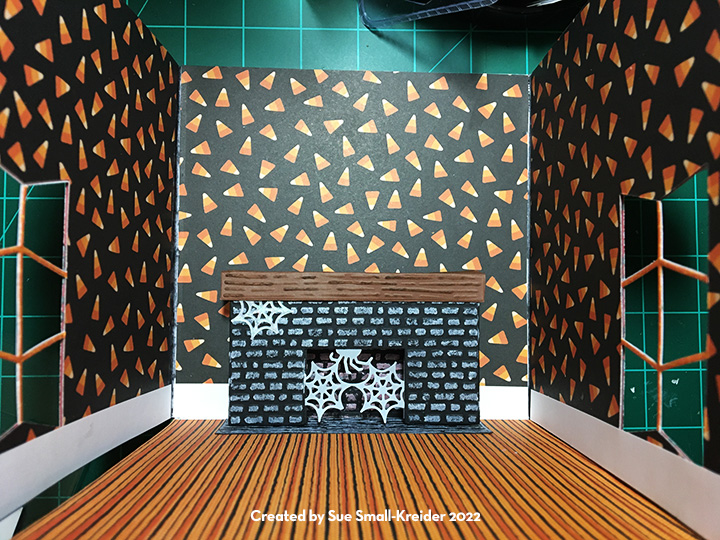
Fireplace: Watch the assembly video before assembling. Cut one of the fireplace fronts and a rectangle the size of the fireplace front. Emboss them both to show the bricks. Use a white crayon to highlight the bricks on both pieces. Trim the rectangle to be a 1/8 inch shorter on each side. Turn the rectangle upside down and glue to the back wall of the card base. Die cut and emboss one health/mantel in a stone color. Color the heath stone and glue to the floor of the card base. Glue the fireplace mechanism as directed in the assembly video to the fireplace back.


Die cut a partial patterned plate of spiders and webs of vellum. Separate some webs and spiders. To decorate the fireplace and other parts of the room. (I used some thin foam squares to make the mantel standout over a web.)


Floor Flap: Take the remaining floor square of decorative paper and cut it in half. I had to match the pattern on my card’s floor. (Because I glued two pieces together, I was able to attach a ribbon loop to act as a pull tab for the floor flap.) The flap is cut to stop just at the fireplace heath. Use STRONG clear tape to attach the flap to the card base floor. (I made the mistake of using removable tape which broke when the card was being opened by the card recipient.)


Furniture: Watch the assembly video for the furniture before assembling. (Once I had assembled the sofa and chair, used double-sided removable tape to find the best placement of the furniture on the floor flap so that when closed no parts of the furniture can be seen. Also, you may want to temporarily tape a skeleton to the back o the furniture as you figure out the placement of the furniture.)


Skeletons: Cut nine whole skeletons and the heads of three more. Use the die as a stencil to color the skeletons faces with a fine-tipped black marker. Use the tiny accessories die sets to dress out the skeletons. For the seated skeletons, bend them at the hips. Glue an extra head piece to the back if the skeleton if the marker has bled through. Glue the seated skeletons to the pop-ups on the sofa and chair and the feet to the seat. You can raise an arm to the armrest as well. Glue other skeletons to walls, fireplace, window frames and backs of furniture. (I used double-sided, removable tape to do a layout of the skeletons before gluing them, to make sure they didn’t hinder any mechanism.)

Banner: The “Happy Halloween” banner is made from black glitter cardstock and thinner orange and yellow papers. The mini alphabet die set and the flag bunting from the Twist Panel Pop-Up die set are used to cut the banner pieces. Two strands of baker’s twine are threaded with the letters.

Envelope: While the card is 6 x 6 inches, its thickness makes it too thick to fit into a stand envelope. An envelop was created from a 12 x12 inch sheet of double-sided paper from the Martha Stewart paper pad. The center point of each edge was marked in pencil, scored and folded using a metal straight edge. The seams were glued and a Velco fastener covered with a flat back gem.


Thank you for reading this blog post. Please like and leave comments 😊
Materials Used:
Dies
- Karen Burniston in cahoots with Riley and Company – Mini-Ball Double-Ups – 1214
- Karen Burniston in cahoots with Riley and Company – Fireplace Pop-Up – 1210
- Karen Burniston in cahoots with Riley and Company – Slim Pattern Plate – Bats – 1208
- Karen Burniston in cahoots with Riley and Company – Slim Pattern Plate – Spiders – 1207
- Karen Burniston in cahoots with Riley and Company – Skeleton Bat – 1206
- Karen Burniston in cahoots with Riley and Company – Mini Alphabet and number – 1197
- Karen Burniston in cahoots with Riley and Company – Family Room Pop-Up – 1099
- Karen Burniston in cahoots with Riley and Company – Tiny Accessories 2 – 1076
- Karen Burniston in cahoots with Riley and Company – Tiny Accessories 1 – 1025
- Karen Burniston in cahoots with Riley and Company – Twist Panel Pop-Up – 1009
Papers
- Hot off the Press – Black Glitter Cardstock
- American Crafts – Peebles – Spooky – 12 x12 Double-sided – Candy Toss – 736981
- EKSuccess – Martha Stewart Crafts – 12×12 Double-sided Paper Pad – Gothic Manor – 48-20301
- Graphic 45 – 8×8 Double-sided Paper Pad -Midnight Tales Collection – Hocus Pocus and Full Moon
- Orange, brown, black and white cardstock scraps
- Upcycled packaging – matte gold
- Lawn Fawn – Pearlescent Vellum 8.5×11 – LF2088
- Brazzill – 12×12 cardstock -Coconut Swirl
Pens, Crayons, Inks & Coatings
- Sharpie – Permanent Marker – Ultra Fine Point – Black
- Recollections – Watercolor Crayons – White and Orange
- Ranger – Tim Holtz – Distress Ink – Walnut Stain
Miscellaneous
- Neutral PH Adhesive by LINECO
- Fine-Tip Glue Bottle
- Baker’s Twine – Yellow and Orange
- Satin Ribbon – Neon Orange
- Concord & 9th – Velco Fastener
- Recollections – Rhinestone Sticker

Amazing and wonderful…as always. I just want to walk into your cards. Thanks for sharing such great instructions!
LikeLiked by 1 person
This is adorable
LikeLiked by 1 person
What an amazing Halloween card!
LikeLiked by 1 person
Thank you for sharing your spooktacular creations
LikeLiked by 1 person
I LOVE the banner die and the papers! The inside “party” scene is just amazing!
LikeLiked by 1 person
This is such a fun diorama card. My grandsons would love it.
LikeLiked by 1 person
This must have been a labor of love for you because it really shows in the making of this card.
LikeLiked by 1 person
Details make the difference, Awesome card.
LikeLiked by 1 person
so creative, I can not wait to try and make this card!!
LikeLiked by 1 person
I get freaked out in haunted houses, but this one is so cool I want to move in!
LikeLiked by 1 person
What a tremendous amount of work that you went through creating this wonderful card! Inspiring!
LikeLiked by 1 person
OMG! You sure went all out. A Whole lot of work, I just love the end results.
LikeLiked by 1 person
How clever. This car is amazing.
LikeLiked by 1 person
I love the fireplace scene with the cute skeletons! Fun card!
LikeLiked by 1 person
What a fantastic scenario! You put so much thought and detail into part of the card! This is such a fun card!
LikeLiked by 1 person
This is one of the most amazing Halloween cards I have ever seen!!!! I love it!
LikeLiked by 1 person
Really Love all the detail you put in the card with the surprise result. It is great!
LikeLiked by 1 person