Go Dogs Go

GoDOGSgo-Front-cu

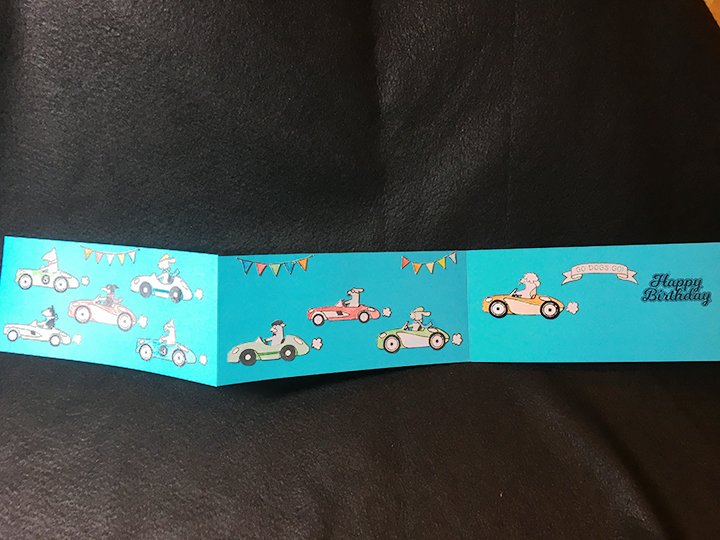
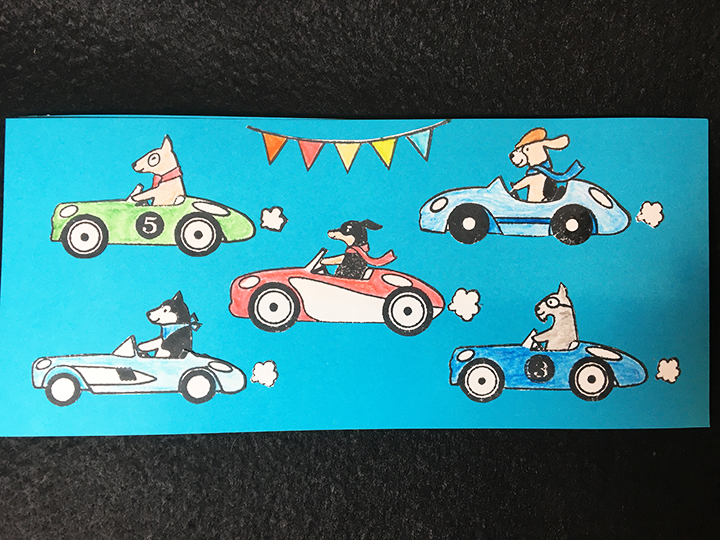
Go Dogs Go, the classic P.D. Eastman book that so many American children in the 1960s and 70s learned to read with, was the inspiration for this card using Lia Griffith’s 2017 Party Time stamp set for Fiskars.

I had stamped, water colored and fussy cut the cars and dogs and set them aside until I figured out how to use them.  I had thought about making an interactive card with them, but in playing with layouts for a slider type card, I decided I liked the flat glued down look on the brilliant blue cardstock better.

GoDOGSgo-all

Cut two pieces of blue cardstock 9 inches x 4 inches (230 mm x100 mm) and a third piece 9 ½ inches x 4 inches (240 mmx 100 mm). Using a scoring board, I scored the longest piece down both short sides at ¼ inch (5 mm) from edge to form the flaps to glue to the other two pieces.

GoDOGSgo-middle

Once the card was glued together, I laid out the position of the cars and pendants. I used the banner and sentiment from the stamp set for the “Go dogs Go” banner and then using a stamping platform, stamped my favorite Happy Birthday stamp on the last panel.

GoDOGSgo-last

Supplies

Stamps

Inks/Watercolors

Paper

Miscellaneous


A Veggie Thank You

Veggies-front

A very veggie tale of how this card developed. I had received some new stamps and had tested them out. The background stamp was begging to be used and I had a test strip of the garden stamps floating around on my desktop, and thought they were a good mix.

I fussy cut the garden stamps and glued all the pieces except the banner on to the background using glue dots. Next, I adhered the banner using foam squares. The card front still needed something, so I added Nuvo drops in black. I thought the top right corner needed a tad more black, but I ended-up smearing it a bit.

A day or so later I needed a thank you card and thought this card front would work well on a craft card base with matching envelope. So adhered front to card with double-sided tape. Then I stamped the ‘Thank You” sentiment inside and the peas on the envelope flap.

Veggies-inside-envelope

E-Z-peas-z. The card was finished.

I want to give a special shout-out to my Stampin’ Up demonstrator and friend, Donna Butler, for all her help in learning to how to stamp well.

Materials Used:

Stamps

Inks

Papers

  • A2 Brown craft paper card base and envelope purchased from Target
  • White cardstock

Miscellaneous

Balloons and Flowers Pop-Up

Hot Air Balloon-side view

My challenge to make a sweet and up-lifting birthday card for someone who was not happy about celebrating her birthday alone. I had the “Flying High” Craftwork Cards paper collection which has muted neon colors along with pinks and turquoise blue. It is cheery with it has hot air balloons and loads of cute die-cuts and foiled sentiments.

I decided on a box pop-up and used the low and wide shape of the Lawn Fawn Scalloped Box die set which fits into an A2 envelope. Th box was cut from the second darkest pink shade of lightweight cardstock in the Recollection’s Pink Buttons paper pack.

Hot Air Balloon-flat

I punched out the flower die-cuts and shaped them with my fingers and adhered pearls and dots embellishments to their centers. Next, I adhered the flowers to long strips of clear acetate from leftover packaging.

Hot Air Balloon-CU

I assembled the box following the video instructions by Kelly Marie, using strips of clear acetate for the crossbars adhering them in place with clear tape which bends well. All the decorative papers are from one sheet of paper from the “Flying High” collection as well as all the decorations.

The finished card folds flat. A small hot air balloon from the Tim Holtz Collection Little Things stamp set was stamped on the back flap of the envelope.

Hot Air Balloon-open

Materials Used:

Dies

Stamps

Inks

Papers

Miscellaneous

Stick-on pearls and dots from Dollar Tree and

A Trout Fishing Kind of Day

After 63 years of marriage and numerous fishing and mountain trips, I knew this couple deserved a special anniversary card that evoked all the things they love.

Hot Air Balloons-front

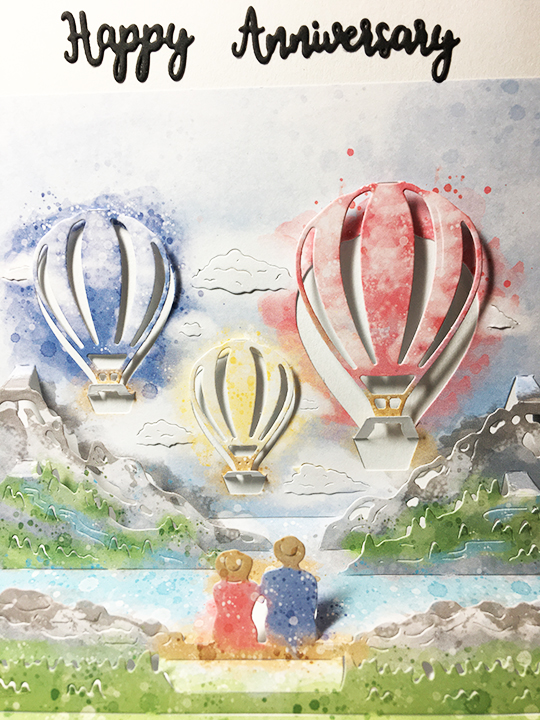
Hunkydory’s Moments in TimeLove is In the Air” die set and matching paper pad had the perfect pop-up card with a pond, mountains, hot air balloons and a couple taking it all in siting at the edge of the pond. The die took a couple of passes through a die cutting machine and then the tricky part of working all the folds. This die is one of the less intricate dies in the Moments in Time series but using a paper piercing tool helped with shaping all the trees on the mountains and puffing out the clouds. There is an instruction sheet on the Hunkydory’s website that is useful when doing the folding.

Hot Air Balloons-inside Wide

The front of the card’s paper and label topper came from the “Flying High” Craftwork Cards paper collection. “On Your Special Day” die cut sentiment is from Creative Dies by Sue Wilson and the jumping trout is from Stampin’Up’s “Best Catch” stamp set stamped in brown ink and fussy cut and adhered with foam pads.

Hot Air Balloons-inside

The inside “Happy Anniversary” sentiment was cut from two die sets in the Gemini Expressions series by Crafter’s Companion. The additional bird on flower and best wishes banner came from the aforementioned “Flying High” paper collection. The back side of the card is finished with more of the paper from the front.

Hot Air Balloons-back

The front and back flap of the envelop are stamped with images that give a hint of what the card is inside.


Materials Used:

Dies

Stamps

Inks

Papers

Miscellaneous

Hot Air Balloons-inside CU

Soda Shaker

Soda Shaker - Front Close up

Who hasn’t watched the bubbles in a carbonated drink rise to the top of a bottle? I was inspired to create this soda shaker by some pink seed beads that I found in my stash.

I picked a chevron striped pink card base and some printed cherry paper. First, I cut the card base in half separating the front from the back. I next cut the cherry print to match the inside dimensions of the front of the card. Then, using removable tape, I secured the front of the card to the cherry print making sure the edges all met up. Using the Bottles and Bubbles Framelits dies from Stampin’ Up, I cut the bottles out of both the card front and cherry print.

Soda Shaker - inside

After separating the card front and cherry print, I cut two pieces of clear acetate smaller than the dimensions of the card front, but large enough to cover the bottle cut-outs. Using double-sided tape I adhered the acetate to the back side of the card front and cherry print.

I cut two of each straws from red and white chevron striped paper and snipped each straw below the bend. I glued the straight straw pieces to the back side of the acetate and the bend straw parts to the front of the card front and cherry print to make the straws look like they were inside the bottles.

soda shaker-front CU

Normally I would have used craft foam to cut out the negative of the shaker, but I didn’t have any on hand. So, I cut out eight of each of the bottles from white cardstock, rough cut a ¼ inch frame around each piece and glued them together. Next, I aligned the frames to the acetate covered back of the card front and glued in place. Using foam tape, I filled in the space between the edge of the card front and the bottle frames. Let the glue dry for a few hours so the glitter and beads won’t stick to the edges of the bottle.
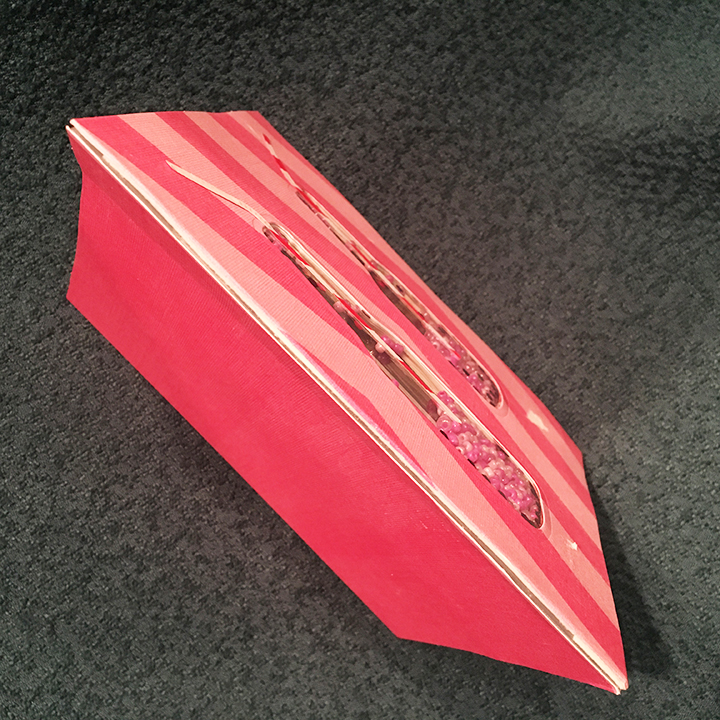
Soda Shaker -spine

Before fill the bottles, I used an anti-static pad to wipe down the acetate inside the bottles  Using my fingers and tweezers to fill the bottles with pinches of glitter and the three colors of seed beads, I was careful not to fill them too full. Next, I peeled back the foam tape backing papers, applied tiny bits of glue to the bottle frames and matched the cherry print card up to the bottle frames. A shaker card was born.

Soda Shaker - outside spine

I had cut the card base apart because the thickness of the shaker front would not have allowed the card to close properly. I used clear tape on the inside to tape the shaker front to the card back. Next, I cut a polka-dotted print paper to cover the inside card back and add sturdiness to it.  It was adhered with double-sided tape. Polka-dotted washi tape was used both on the outside spine of the card and on the inside of the card to frame the inside back and to cover unsightly edges. The finished card has the feel of a school composition book.

soda shaker-front CU

Using scrapes of red paper from an old Christmas envelop, I first stamped the bottle label sentiments with Versa Mark ink and the white heat embossed them. Next using the label dies in the Bottles and Bubbles die set, the labels were cut out. Glue was used to adhere the labels.

Soda Shaker - inside CU

With plenty of space inside the card to write a personal message this card is ready to be Happy Mail.

Supplies used:

Dies

Stamps

Papers

Inks and Embossing Powders

Miscellaneous
May Flowers

Blue teacup-inside-sideCelebrating Mother with May flowers is a tradition. I was happy to see that Anna Griffin’s new teacup die set includes the ability to emboss flowers onto the edges and side of the cup and saucer.

This was my first try at using the new die set as well as some of Anna’s sentiment stamps. The teacup goes together easily following the enclosed instructions. I embossed the cup and saucer first using an embossing mat/plate and then die cut all the pieces.

Blue teacup-front

By using a preprinted card base from a card kit by Punch Studio that has been in my stash for a while, along with some of the butterfly toppers and pink flatback gems, the front of the card came together quickly. The inside paper is from Graphic 45. I cut two pieces so as not to cover the fold and used a green marker to color the inside edges of the card as a border to the floral paper.

Blue teacup-inside

I ended up heat embossing the decorative border on the gold metallic sentiment base with clear embossing powder. I learned that the metallic card I used is heat sensitive and had a minor curling effect happen.

To fill the cup I used flower embellishments from Anna Griffin as well. This vintage teacup card is perfect for celebrating Mother’s Day.

Wishing all mothers, a Happy Mother’s Day.


Materials:

Dies

Stamps

Papers

Miscellaneous

Father’s Day Waterfall Pop-up

Ed Fathers Day-front

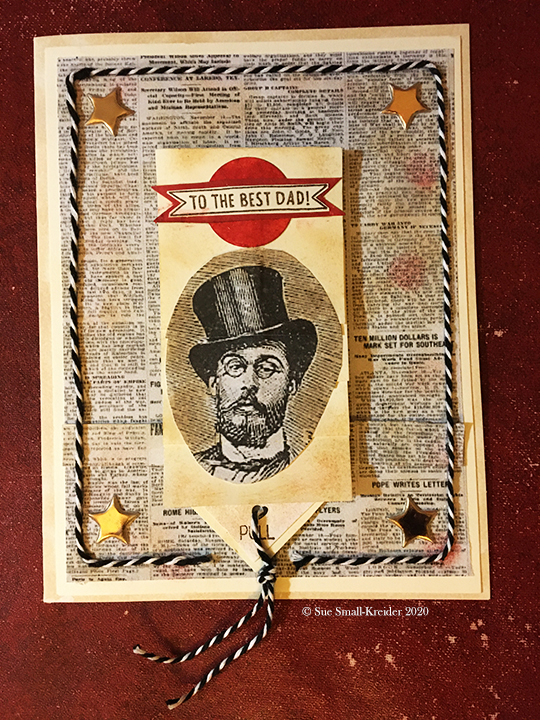
This card was designed for a contest on Craftworld.com, but I had my own father in-mind as I created it. The mechanical action of the waterfall combined with the pop-up words make it feel like an early silent movie. Click here to see a short video of it.

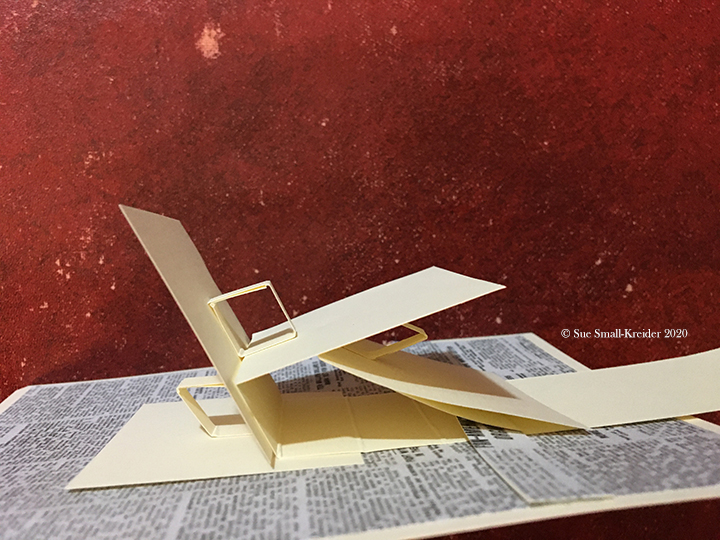
To make the card you will need a 6 ½ x 5 inch card base, four 2 inch squares, one waterfall strip 1 ½ x 10 inches, one ½ x 4 ½ inches holding strip, and strong double sided tape 1/8 to 1/4 inches wide.

  1. Score waterfall strip at 2 5/16 inches, 2 15/16 inches, 3 9/16 inches and 4 3/16 inches. Place double sided tape below each score mark.2Ed Fathers Day- Main Strip
  2. Place tape on back ends of holding strip in such a manner as to have the center be 2 ½ inches free of tape. Adhere on card front 2 inches from bottom of card.1Ed Fathers Day-Holding strip
  3. Make a point at end of waterfall strip with out tape. Thread pointed end under holder strip making sure the taped side of waterfall strip face up when bent over as in photos and adhere all for squares to strip using tape under the score lines.

  • On a 1 by 2 ½ inch rectangle, score at 2 inches, 1 ½ inches, 1 inch, and ½ inch. Place a line of tape on one edge. Then cut into four even strips of ¼ inch wide by 2 ½ inches long. Fold into square rings adhering taped flap to form squares. You will need three of these pop-up rings or stands for the project, but if you are like me, these tiny rings fall on the floor and get lost so having an extra may come in handy.
  • Add double-sided tape to two sides of each ring. Peel tape and adhere to center of each flap as shown in photo. Slide the waterfall strip up and down to get folds and pop-up stands to work smoothly.

  • Decorate flaps using four copies of the same image on overlapping flaps, trim each image to fit each flap matching up where the image continues onto next flap. Use distress inks to “age” insides of flaps. Glue a word per pop-up ring to form “Happy Father’s Day.”8Ed Fathers Day-Pop-up Strips added
  • Compose on computer your own message for the waterfall pull strip (approximately 3 inches long) Punch a hole near point and added baker’s twine or ribbon as a pulling aid.
  • Ed Fathers Day-open

    Inside of card you can add your personal message.

    © Sue Small-Kreider 2020

    Other Father’s Day cards on my blog

    A Tool Box Father’s Day

    A Fishing Father’s Day

    A Father’s Day Waterfall Pop-Up

    A Work Bench Father’s Day Card

    In-Vested Father’s Day Card

    Supplies:

    Dies

    Stamps/Images

    Papers

    Inks

    Miscellaneous