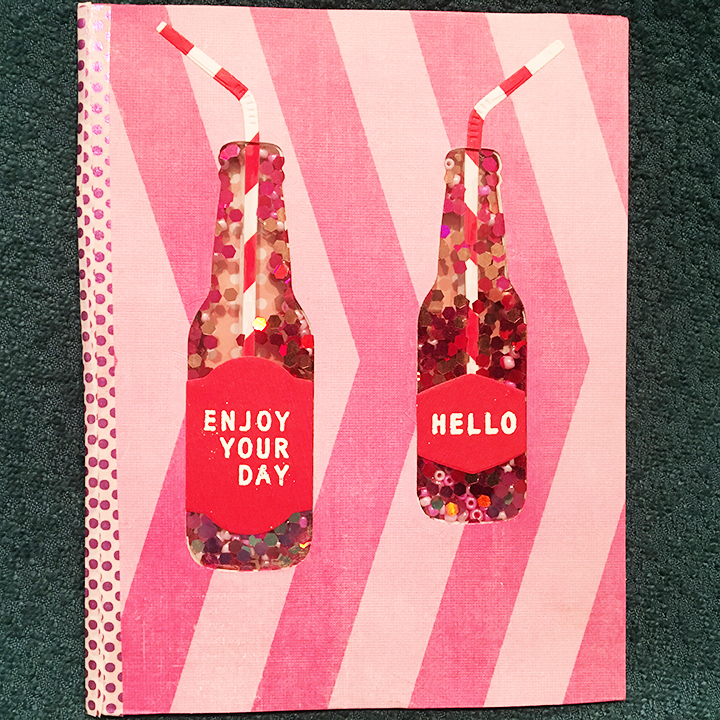
Who hasn’t watched the bubbles in a carbonated drink rise to the top of a bottle? I was inspired to create this soda shaker by some pink seed beads that I found in my stash.
I picked a chevron striped pink card base and some printed cherry paper. First, I cut the card base in half separating the front from the back. I next cut the cherry print to match the inside dimensions of the front of the card. Then, using removable tape, I secured the front of the card to the cherry print making sure the edges all met up. Using the Bottles and Bubbles Framelits dies from Stampin’ Up, I cut the bottles out of both the card front and cherry print.

After separating the card front and cherry print, I cut two pieces of clear acetate smaller than the dimensions of the card front, but large enough to cover the bottle cut-outs. Using double-sided tape I adhered the acetate to the back side of the card front and cherry print.
I cut two of each straws from red and white chevron striped paper and snipped each straw below the bend. I glued the straight straw pieces to the back side of the acetate and the bend straw parts to the front of the card front and cherry print to make the straws look like they were inside the bottles.
Normally I would have used craft foam to cut out the negative of the shaker, but I didn’t have any on hand. So, I cut out eight of each of the bottles from white cardstock, rough cut a ¼ inch frame around each piece and glued them together. Next, I aligned the frames to the acetate covered back of the card front and glued in place. Using foam tape, I filled in the space between the edge of the card front and the bottle frames. Let the glue dry for a few hours so the glitter and beads won’t stick to the edges of the bottle.

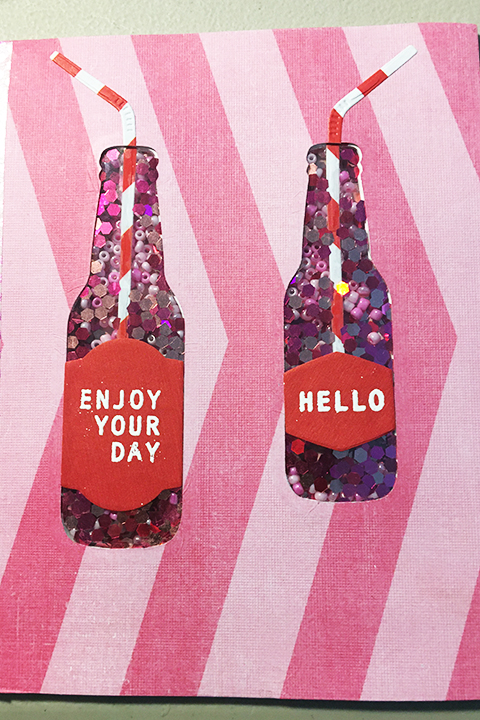
Before fill the bottles, I used an anti-static pad to wipe down the acetate inside the bottles Using my fingers and tweezers to fill the bottles with pinches of glitter and the three colors of seed beads, I was careful not to fill them too full. Next, I peeled back the foam tape backing papers, applied tiny bits of glue to the bottle frames and matched the cherry print card up to the bottle frames. A shaker card was born.

I had cut the card base apart because the thickness of the shaker front would not have allowed the card to close properly. I used clear tape on the inside to tape the shaker front to the card back. Next, I cut a polka-dotted print paper to cover the inside card back and add sturdiness to it. It was adhered with double-sided tape. Polka-dotted washi tape was used both on the outside spine of the card and on the inside of the card to frame the inside back and to cover unsightly edges. The finished card has the feel of a school composition book.
Using scrapes of red paper from an old Christmas envelop, I first stamped the bottle label sentiments with Versa Mark ink and the white heat embossed them. Next using the label dies in the Bottles and Bubbles die set, the labels were cut out. Glue was used to adhere the labels.

With plenty of space inside the card to write a personal message this card is ready to be Happy Mail.
Supplies used:
Dies
Stamps
Papers
- Dura-Lar .0005 Clear Film acetate
- Echo Park – Homegrown by Alisha Gordon & Kasie Fry -6 x 6 paper pad
- ColorBok – Carnival Designer papers – 6 x 6 paper pad
- DCWV – Strips Box of Cards – 40 A2 Printed Textured Cards & Envelops
Inks and Embossing Powders
Miscellaneous
- Jumbo Pink Holo Mix non-toxic Sparkling Glitter by Advantus Corp.
- Seed Beads – Dollar Tree’s Crafter’s Square
- Scotch Foam Tape
- PVA Glue – Cosmic Shimmer Acrylic Glue/
- Clear Tape
- Double-Sided Tear Tape – com Clear Double Sided Adhesive Roll ¼ inch
- Washi Tape- Dollar Tree’s Crafter’s Square

Gracious, your cards keep getting better and better. I love how you were resourceful when you didn’t have exactly what you needed (foam strips.) Did you even score the straws to make them look like the bendy part???!!!! You are definitely the most detail oriented person I know. Another amazing card. Thanks for sharing!
LikeLiked by 1 person
Thank you Donna. The dies actually emboss the bendy parts of straw.
LikeLiked by 1 person
Amazing design. I love it!
LikeLiked by 1 person