This card was made for Craft Roulette #169 whose parameters included: see-thru card, rustic garden colors, fashion element and a hexagon.
I made this card using all Concord & 9th dies and stamps. (See other shop cards.)

Cardbase: For this A2 (4.25×5.5-inches) card start with a piece of white cardstock 8.5×5.5-inches and scored and folded in half at 4.25-inches. Cover the back of the card base with white brick paper.


Shop Front: Watch an assembly video to get the basics on the assembly. Cut the shop front from white brick paper. (My paper was double-sided with red and white bricks on the back side.) Fold on score lines as directed in video. Decorate and add window acetate before attaching to cardbase. I used white and blue cardstock to cut the side posts and just blue for the panel below the windows. I cut the planters from white cardstock and brushed gray ink over them to add shape to them. The greenery is peppered with tiny red flowers made with a red gel pen. The planters are adhered and popped up on the shop front with thin foam squares.
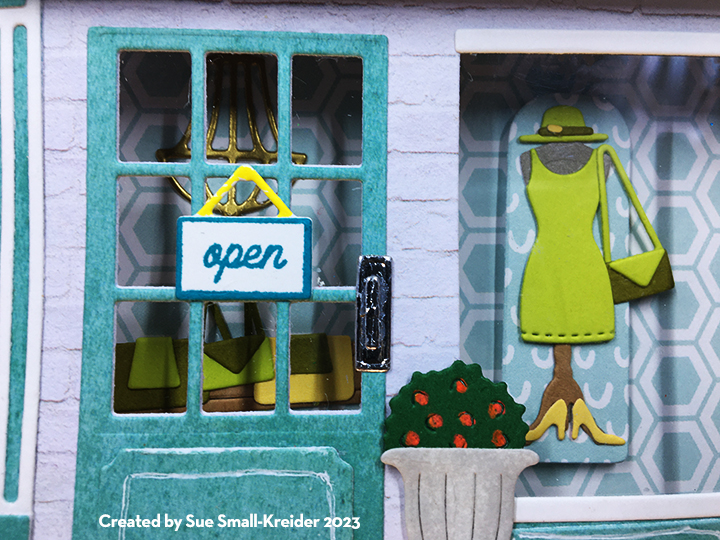
Shop Front Door: I decided to make the door window see-thru too, so I played with positioning the door and its windowpane die on the shop front. I only cut the panes into the front. Cut the door with pane die taped together with the door die and the decorative panel from blue cardstock. Ink edges of the decorative panel before gluing to bottom of door. (I used a white gel pen to freehand the lines on the panel.) I stamped the open sign (Fashion Shoppe Stamp set) and die-cut the sign base from white cardstock coloring string with a yellow marker. Die cut the door handle and plate from silver foil card and adhere to door side.
Shop Front Window: Cut a piece of acetate 4×5.25-inches. Use double-sided tape around all the window and door openings on the back side of the shop front.
Shop Assembly: Using double side tape, adhere bottom tab on shop front to bottom edge of front panel on cardbase. Cut a piece of decorative paper (I used a hexagon paper) 4.125×5.5-inches and adhere over the shop front tab and line-up with card fold. (I cut an additional hexagon strip to cover the top tab.) Decorate the inside of the shop before adhere top tab of the shop front . (I didn’t remember to decorate first and had to use tweezers to place all my shop pieces inside the shop.)

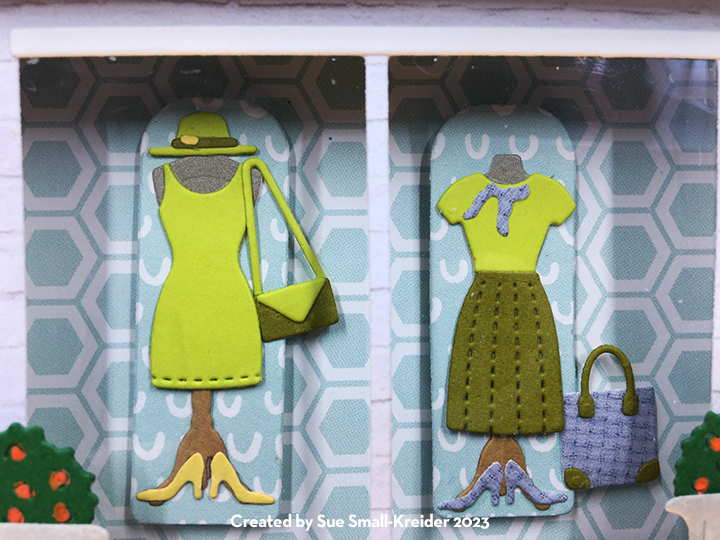
Watch fashion shop dies assembly video before constructing your outfits and merchandise table. (I used the mirror die to cut backdrops for my dress frames.)
Using double-sided tape on the front side of the shop front upper tab, adhere to card base as shown in the assembly video.
Awning: Die cut the shop awning from striped paper and fold along score lines. Glue the die-cut “Boutique” to middle of awning. I adhered the backside of the awning top tab with thin foam tape to the top of the card base.

Sentiments: The sentiment inside of “You’re classy from head to toe,” is from the Fashion Shoppe Stamp Set and stamped in a turquoise blue ink on a 4×5.25-inch piece of white cardstock. The sentiment piece was matted with a 4.25×5.5-inch piece of blue printed cardstock (backside of hexagon print.)

Envelope: The card fits into an A2 envelope. To give a hint as to what’s inside, a pair of shoes and a hat were glued to the back envelope flap.
Thank you for reading this blog post. I hope this inspires you and makes you smile. Please like and leave comments 😊
Materials Used:
Dies
Stamps
Papers
- Craft Consortium – 6×6 Double-Sided Paper Pad – Brick Textures
- My Favorite things – 6×6 Double-Sided Paper Pad – Finishes and textiles EP-96
- Honey Bee Stamps – 6×6 Double-Sided Paper Pad – Bee Bliss
- Recollections – 5×7 Embossed Solids – Neutrals
- Colored Cardstock Scraps
- Matte gold Cardstock
- Silver Foiled Cardstock
- Heavy White Cardstock for cardbase
- A2 Blue Envelope
Ink
- Red Gel Pen
- Sharpie – Permanent Marker – Fine Point – Yellow
- Ranger – Distress Crayon – White
- Pigma – Mircon 01 Fine Tip Pen – Black
- Sakura – Gelly Roll Pen – Medium – White
- Ranger – Distress Ink – Lost Shadow
- Catherine Pooler – Premium Dye Ink – Party Collection – All That Jazz
Adhesives
- Neutral PH Adhesive by LINECO
- Fine-Tip Glue Bottle
- Foam Squares – Thick and Thin
- Foam Tape – Thin – 1/4-inch wide
- Scrappy Tape – Double-Sided Tape – 1/4-inch wide
Tools
- Die Cutting Machine
- We R Memories – QuickStik
- Scissors
- Stamping Blocks/ Weights
- Bone Folder
- Blending Brush
- Craft Mat
- Stamping Platform
- LDRS – Stampendable Stamping Tool
- Stamping Cloth
Miscellaneous
- Dura-Lar – .005 Clear Film – Acetate

Love, love, love this one. Unbelievable details.
LikeLiked by 1 person