Sapphire 65th Anniversary

Sixty-five years together is a wonderful celebration. Traditionally, this wedding anniversary is blue sapphire. This card was for a long-distance celebration, so it has a pocket inside to tuck a gift.

When I start a card such as this one with a specific theme of sapphire blue, shiny and wedding-like, I pull all the materials I think might work such as blue mirror cardstock, white gold shimmer cardstock, 6 and 5 shaker elements with cutting dies, blue gems and gel dots, as well as heart dies, embossing folders and anniversary sentiments. I had a purchased card base made from pale gold pearlescence cardstock and came folded like an envelope with an inside pocket.

Using several embossing folders, I created some floral and heart textured pieces that became backgrounds and decorative elements for the card using white gold shimmer cardstock. I found I had coordinating heart dies by Sue Wilson that cut the lattice heart from shimmer cardstock and the vellum heart that the inside sentiment was stamped onto.

The “65” and “Happy Anniversary” needed to be cut from the blue mirror cardstock. Because of the intricacy of the sentiment die, I found I had to pass it through my die-cutting machine several times to ensure all was cut crisply.

To assemble, a panel of floral embossed shimmer cardstock was cut 1/4 inch smaller than the folded card base’s dimensions and adhered to the front of the card using double-sided tape. The blue sentiment die-cut was spot glued to the embossed panel. The lattice heart and numbers where glued together before being glued to the card flap.  The embossed heart was glued to the inside pocket.

For the inside sentiment, I stamped a white adhesive backed piece of vellum with the anniversary message using StazOn black ink. I waited overnight for the ink to dry before I die-cut the heart from the stamped vellum. Once I knew the positioning of the vellum heart inside the card, I peeled the top edge of the backing paper from the heart and adhered the top edge before peeling all of the backing off and pressing onto the card base.

Blue jelly dots and Nuvo drops were used to embellish the card. (I tried the new aroma scented Nuvo drops that has a mild floral scent. They caution that the scent will fade, so it won’t overpower the card receiver.)

The envelope back was stamped in blue with the “Wishing you Happiness on your special day” sentiment stamp from PoppyStamps.

Thank you for reading this blog post. Please like and leave comments 😊

Materials Used:

Dies

Embossing Folders

Stamps

Inks & Pigments

  • StazOn Solvent Ink – Jet Black
  • Stampin’ Up – Classic Stampin’ Pad – Blueberry Bushel

Papers

  • Recollections – Shimmer Cardstock 65 lb. 8.5in x 11 in– White Gold
  • Joy Craft Mirror Cardstock
  • Xcut – Xtras Adhesive Vellum Sheets – White
  • Mrs. Sparkle & Co. – A7 Shimmer All-in-One – Card and Envelope

Miscellaneous

Bee-utiful Flowery Painting

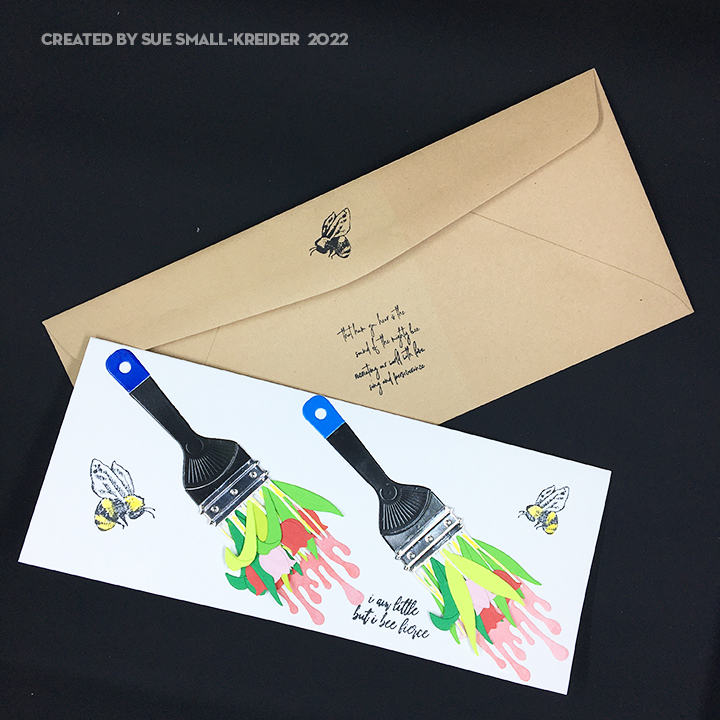
Bees, fresh paint and tulips seem like harbingers of Spring as we humans come out of winter hibernation.  I had some of the paint brush die sets from the Spellbinder’s Paint Your World Collection by Vicky Papaioannou as well as the Picket Fence Studio’s I Bee Fierce stamp set by Nicole Peterson on my crafting desk and thought they went well together. 

Having die-cut four sets of paint brushes from three of the die sets, I set about assembling the brushes noting that the handle pieces are not interchangeable, but all three sets have the same bristles die. I glued one layer of bristles to the back of each handle and another layer of bristles to the back of the silver band. Next, I studied the packaging for decorative ideas on the placement of the tulips within the bristles. I glued in place the leaves and flowers once I had figured out their placement in the two layers of bristles. I decided to ink blend some pink Distress Ink onto white cardstock scraps before die-cutting the paint drips.  I applied glue the silver band layer just on the back of the band and then placed it on top of the handle layer matching up the two lines on the band with the lines on the handle. Once the paint drips were dry, they were glued to the back of the assembled paint brushes.

Following the design rule of odd numbers of elements, I knew I had to stamp three elements to make the card front flow. Another design trick is to suggest movement by placing things on the diagonal.

I stamped the front, back and inside of the card before I adhered the paint brushes to the card. Stamping is easy when you use a stamping platform with stamping tool to help apply even pressure to the stamps. The back of the card is stamped using a Technique Tuesday stamp set.

The front sentiment is “I am little but I bee fierce,” while the inside says, “Be like the bee… fly despite the risks.” The back of the card states “This is a random act of cardiness.”

The envelope back was stamped with another sentiment from the Picket Fence set as well as the smaller bee. It says “that hum you hear is the sound of the mighty bee recreating our world with love, song and perseverance.”

Thank you for reading this blog post. Please like and leave comments 😊

Materials Used:

Dies

Stamps

Inks & Pigments

  • Ranger – Jim Holtz’s Distress Oxide Ink – Abandon Coral
  • Memento Fade-Resistant Dye Ink – Tuxedo Black
  • Nuvo Highly Pigmented Watercolour Pencil – Golden Canary

Papers

  • Heavyweight white cardstock
  • Colored cardstock scraps
  • Coated cardstock from junk mail
  • Silver mirrored cardstock from packaging
  • Brown #10 business envelope

Miscellaneous

You’re The Best!

Recently I received a Divinity Designs Mystery Bag for $29.95 and received three die sets, one stencil, one rubber stamp set and one embossing folder retailing for over $70 total. I decided to challenge myself to see what I could make with them. I add the Divinity Designs Thank You clear stamp set with matching Thank You die to my one brand challenge.

I cut several elements for this card in vellum. The balloons were cut from a strip of adhesive backed colored vellum that I folded and stuck to itself and then die cut the balloons. With blending alcohol markers I used the stencils within the dies to stencil the embossed designs onto the balloons. (I learn something when the ink on the heart balloon ran under the die, so I sprayed rubbing alcohol onto the vellum and it cleared the ink leaving an interesting faded ink look.) Baker’s twine was tied to the ends of the balloons and a dot of glue was used on the back side to secure the twine to the vellum.

For the beverage cup and domed lid, I cut them from clear vellum and inked the edges with a silver marker. From a white shimmer cardstock scrap, I cut the cup again and the whipped cream topping. The cup section I colored with a soft orange marker. The straw was cut from a piece of white cardstock I had drawn diagonal red stripes on with a red marker. The orange slice was cut from a bright orange scrap and outlined with a bright orange marker. To adhere the vellum cup I used a fine tipped glue bottle to line the edge of the cup before gluing to the orange cup that I had already glued the straw and orange slice to knowing that glue on vellum will be seen. The whipped cream topping was glued on top of the straw. For the vellum lid, the glue was applied to the lip that covers the cup.  The assembled cold orange drink was adhered to the pistachio inked rectangle with one layer of thin foam squares.

The white embossed fish background used the embossing folder from the mystery bag. My hope was to convey a night at a beach side carnival to say thanks. To add to the theme, I die-cut three Thank Yous from black shiny cardstock, and yellow and neon green cardstock scraps and staggered them to create the look of a neon sign.

To complete the card front I stamped, and heat embossed in black the sentiment “YOU’RE THE BEST” onto a white scrap of cardstock. I then ink blended the embossed piece with a large brush the pistachio Distress Ink. I trimmed the scrap down to a rectangle and cut a triangle from each end to make the banner.

The assembly of the card involved gluing the white and pistachio pieces to the A7 sized card base and then adhering the cup and balloons with foam squares. The cup had one layer of foam while the balloons had two layers. The three strands of the balloons’ baker’s twine was gathered and tied into a knot and glued in place on the card base. The sentiments were glued on last. Three glow-in-the-dark stars where added as bling.

To hint at the envelope’s contents, I stamped “JUST WANTED TO SAY” (from the Divinity Designs’ Thank You stamp set) in Memento’s London Fog gray ink to the back flap. I also stamped the Divinity Designs logo in the same ink on the back of the card and added my initials and year of creation.

Thank you for reading this blog post. Please like and leave comments 😊

Materials Used:

Dies & Embossing Folders

Stamps

Inks & Embossing Powders

Papers

  • White, yellow, orange and neon green card stock scraps
  • Clear vellum scraps
  • Xcut – Xtras Adhesive Vellum Sheets – purple, pink yellow
  • AC Cardstock – Kraft Cardstock – 5×7 in A7 card and envelope

Miscellaneous

A Card For A Cat Mom

I received an unusual commission from two cats who desired a card for their “Mom.” They requested that it show how much they loved her and appreciated how she cared for them.

The Simon Says Stamp “Happy Meother’s Day” stamps and coordinating dies were perfect for this card. Knowing that the cats spend a good part of their day watching the outside world at the living room window, I thought an actual photograph of their neighborhood would work well as the world beyond the window that the cats would be looking at.

All of the stamping and embossing for the card was done first, using clear Versamark ink and a stamping platform.  The sentiment banner and two sets of sitting cats were stamped on scrap cardstock and then heat embossed with a detail black embossing powder. (I stamped two sets of cats in case I didn’t like the way I’d colored or cut them so there would be a back-up set to use.)

Layout the placement of the stamps to be used inside the card on a stamping platform. Stamp the red solid hearts first and heat dry the ink before stamping and embossing each side of the card.

It is easier to work at stamping and embossing just one side of the card at a time. Make sure you use an anti-static tool or powder bag to remove the chance of stray embossing powder remaining on your card.

Cut the front and back decorative papers to fit the 5-inch by 7-inch folded card base.

(I used the scraps from cutting the front panel’s 5×7 bottom mat and 4 1/2 x 6 1/2 top layer to decorate the back panel.) Use a rectangle die to cut out the center of the back mat layer so as to get more mileage out of the paper. (Stamp, emboss and color before gluing on papers.)

Cut two of the window frames using the emboss and cut folder. Fussy cut out the windows. (You can trim the back frame a bit smaller than the front frame.) Cut a piece of acetate to fit the windowpane area and glue using small dots of glue at the cross points of the bottom window frame. Use foam squares to adhere the top window frame to the bottom one.

The cats had been kind enough to supply photos of themselves, so I colored the stamped images to reflect their personalities using watercolor pencils and a water brush. To get the stripes to standout more, I went over the wet blended images with a darker color pencil. (I didn’t have to use my back-up set of images as everything worked out as planned!)

The trick to getting perfect die-cuts of stamped images is to make a template the lets you center the cut-out where you want over the image and then taping with low-tack tape to hold the die in place while you run it through a die-cutting machine. 

Once the decorative papers have been glued to the card base, (stamp, emboss and color before gluing on papers,) add the photo back to the bottom window frame. Place one foam square on the back bottom section of the die-cut cats and two squares at the back of the heads where they will adhere through the window opening to the acetate. Use double foam squares on the back of the sentiment banner.

Stamp the front and back of the envelope using two shades of gray and red ink for the hearts and extra sentiment. (I used a red marker to color the collar and extra sides of the heart.)

Thank you for reading this blog post. Please like and leave comments 😊

MATERIALS USED:

Dies & Embossing Folders

Stamping

Inks and Embossing Powder

  • Recollections – Detail Embossing powder – Ebony
  • VersaMark – Watermark Stamp Pad
  • Nuvo – Highly Pigmented Watercolor Pencils – Skin & Hair Tones
  • Crayola Signature Blending Markers- red
  • Simon Says Stamp – Premium Dye Ink – Slate
  • Memento – Fade-resistant Dye Ink – London Fog
  • Hero Arts – Dye Ink – Pale Tomato

Papers

  • A7 white card base and envelope
  • White and blue scraps of cardstock
  • Decorative papers designed by Adam Pescott from Cardmaking & Papercraft, issue 204, January 2020
  • Dura-Lar – .005 clear film – Acetate

Miscellaneous

Sunny and Flowery Thanks

Bright yellow and orange flowers stitched around a golden “THANKS” makes for a sunny thank you.

I stitched the flowery THANKS die from Spellbinders again when I needed a special thank you card. This time picking warm colors. 

The larger flower petals and leaves were outline or chain stitched before filling in the centers of them using three strands of floss. The black flower centers are French knots. While I knotted the floss ends when starting, I finished the flowers on the back side by adding dots of glue to seal the thread ends and add dimension to the stitched frame.

After gluing the gold letters cut on the front of the stitched piece, I added foam squares with glue to back side of the stitched piece behind the letters and attached to the front of the card base. The card base is an 8 x 8 inches sheet of heavy orange card stock folded in half.

This card was for someone leaving one position to start a new job, so the flap of the envelop is stamped in a gold ink stating “start of something new.”

Thank you for reading this blog post. Please like and leave comments 😊

Like this stitched card? Here are other stitched cards:

·  Flowery Thanks

·  Stitched Flowers for a Spring Birthday

·  Stitched Flowers for a Summer Birthday

·  Stitched Valentine

·  Shine Bright

Materials Used:

Dies

Papers

  • Heavy yellow cardstock
  • Scrap matte gold cardstock
  • 8 x8 inch heavy weight orange cardstock

Stamps and Inks

  • Scrapbook.com -Wordfetti Oh So Happy Clear Stamps
  • Stampin’ Up – Classic Stampin’ Pad – Crumb Cake

Miscellaneous

  • Yellows, oranges and black embroidery floss
  • Large eyed needle
  • Foam squares

Olga’s Garden

Olga Direktorenko is the creative designer behind the Paper Discovery brand sold by Craftstash out of the UK and carried by Paper Wishes in the USA. I love her dimensional dies sets that often feel like creating a doll’s house or miniature scenes.

On Craftworld, she talks of her garden with vegetables and Ukrainian sunflowers in one of her video demos. This card is my first time out using her Garden Delight dies which are copyrighted in 2021. I purchased them from Paper Wishes.

The side dies cut and score accordion folds that easily create tunnel-like cards. Her garden accessories allow for fun details, but like doll house accessories, not all are on the same scale. I placed the wheelbarrow in the middle layer because I felt it was of a larger scale than the picket fence.

I colored the garden frame using colored papers. The flowered vines reminded me of purple morning glories common in the USA. I cut the frame die, several times in several colors to fussy cut and glue the vines, flowers, birds, rope, bird houses and ladder on to the white base frame.

For the sunflowers have two flower head dies and are intended to be glued on top of each other with the petals alternating to create a full flower. Using a black gel pen, I colored the seed heads that are embossed with the die.

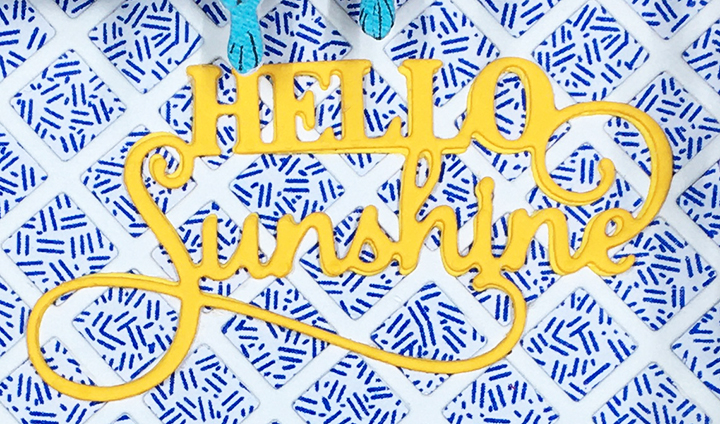
The white lattice background is glued to some blue patterned paper recycled from an envelope.

The sentiment “Hello Sunshine” is a die-cut from Sue Wilson of Creative Expressions. (While there are stamps that go with the Garden Delights collection there are no sentiments.)

This card will collapse to fit into a 5 inch by 7 inch envelope.

Thank you for reading. If you enjoyed this blog post, please like it and follow the blog. 😊

Dies

Inks

  • Black gel pen

Papers

  • White cardstock
  • Colored cardstock and paper scraps (recycled envelopes and junk mail)
  • Blue patterned scrap paper (inside of envelope)
  • Hunkydory mirri card from the oxidized metals collection

Additional Supplies:

  • We R Memory Keepers – Quickstik Tool
  • Low tack tape