Laundry vs. Crafting Card

This card was made for Craft Roulette #182 whose parameters included a card with circles, vegetable garden colors, screen element and fuzz.

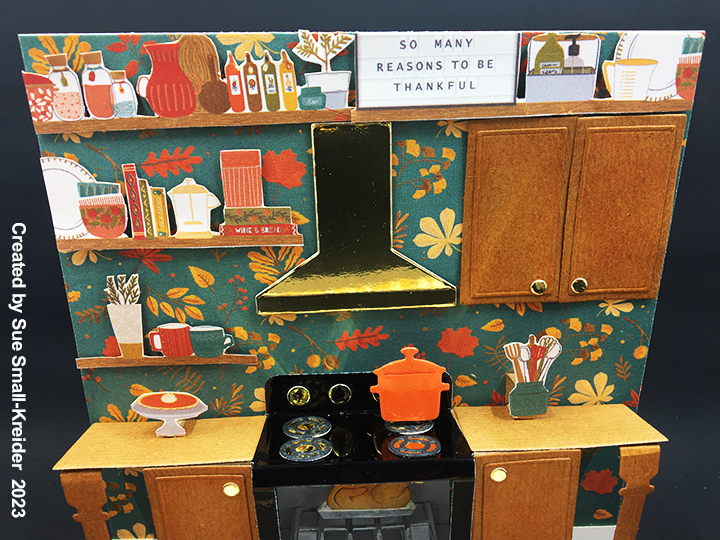
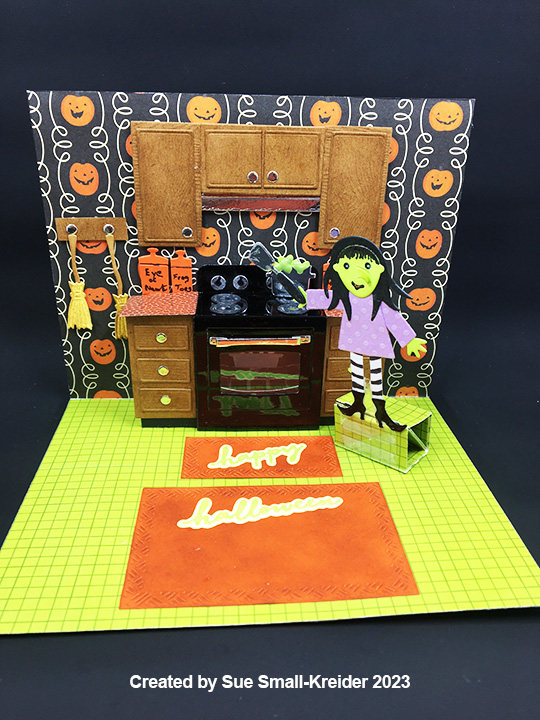
For this pop-up card for a crafting friend, I converted Karen Burniston’s new Oven Pop-Up and Small Script – Christmas, along with along with a number of her previously released dies into a laundry/crafting room.

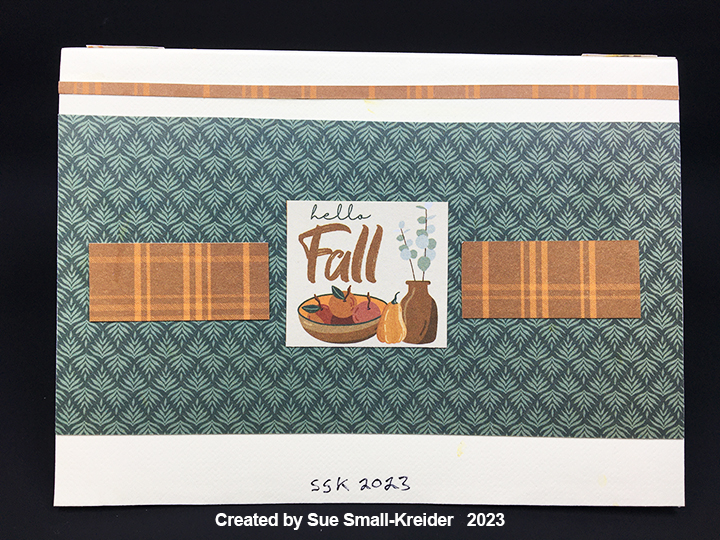
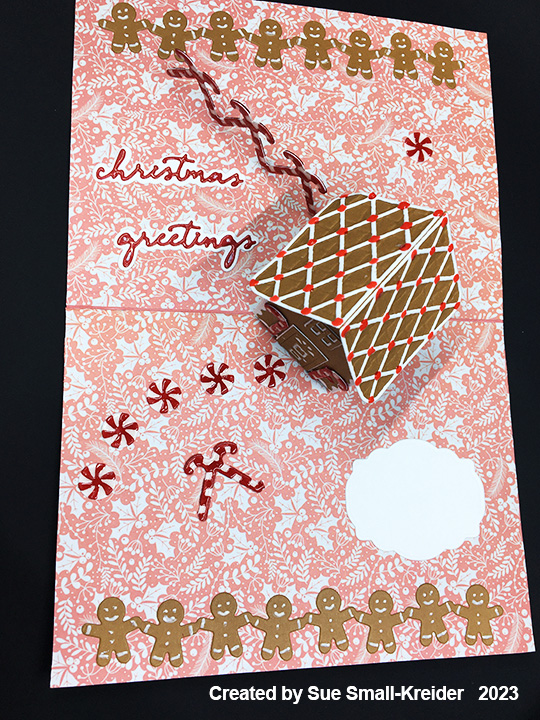
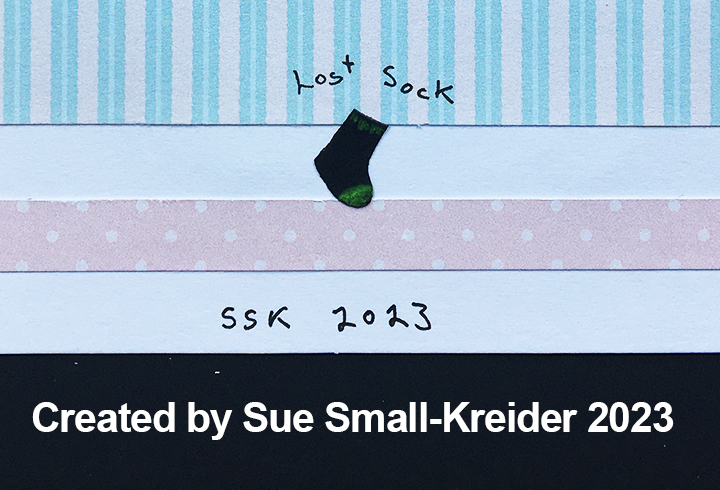
Cardbase: I used a purchased A7 cardbase. Each of the inside panels are covered with papers from the Cosy Kitchen paper collection. The front of the card has a computer-generated panel while the card back uses scraps from the inside of the card including the lost sock.

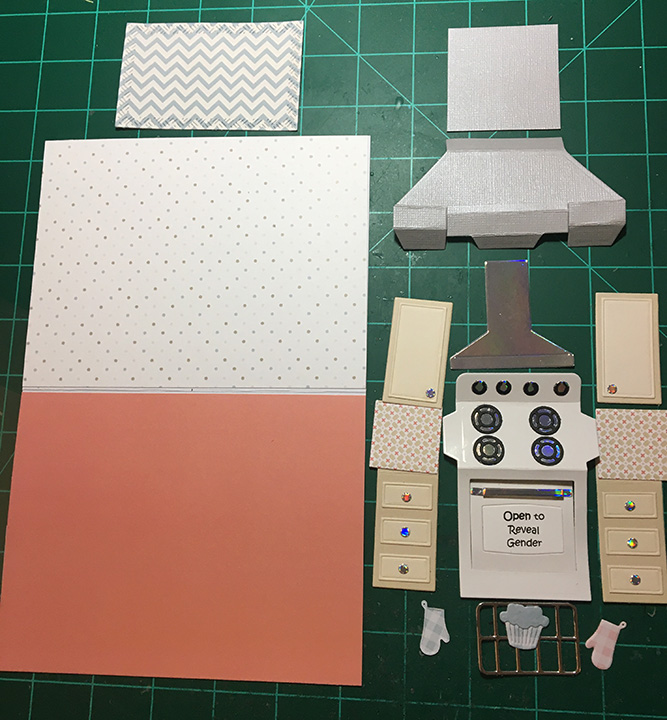
Washer/Dryer: Watch the assembly video at the bottom of the linked page before starting the card. Both the washer and dryer are made the same way with different shaker contents and knobs using the Oven Pop-Up.

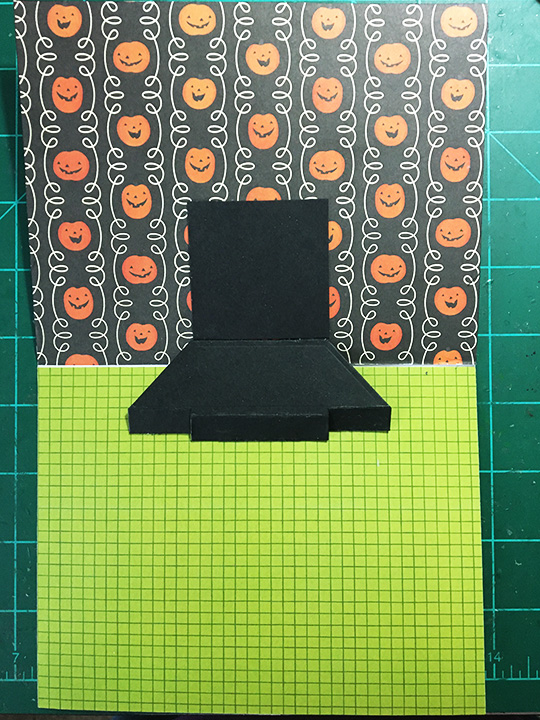
I created a double platform by cutting two oven platforms from white cardstock and trimming the sides that come together to a 1/4 inch or less. These cut sections are glued together making sure the tabs are all aligned straight. (Fold on all the score lines with a bone folder before gluing.)

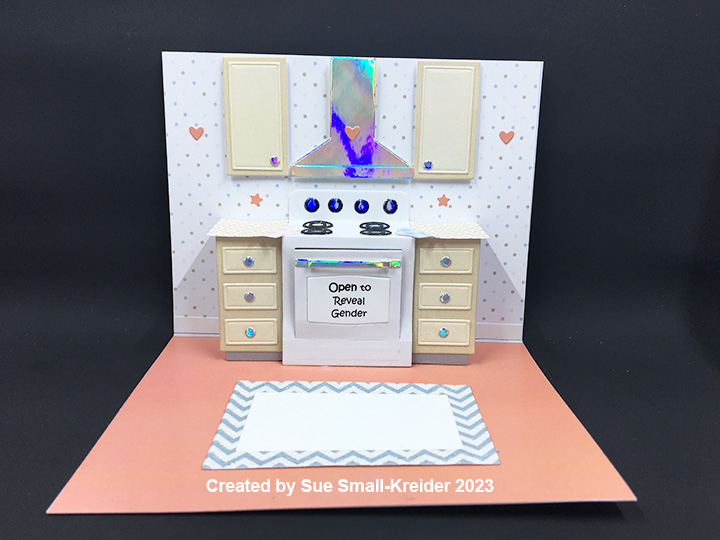
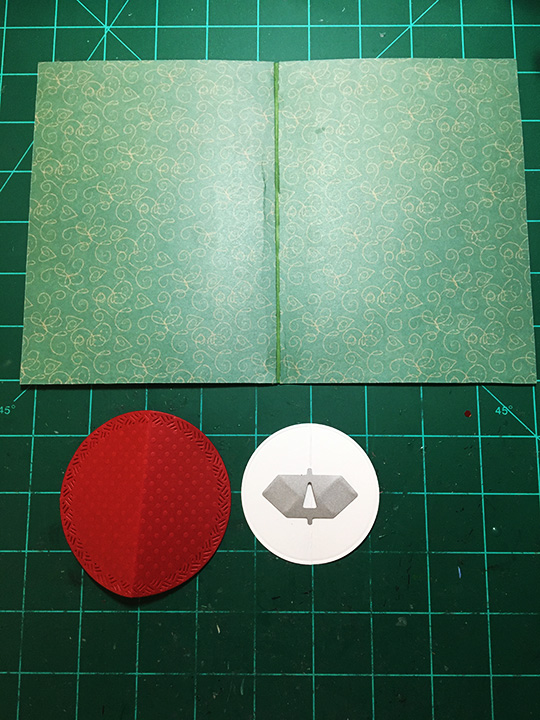
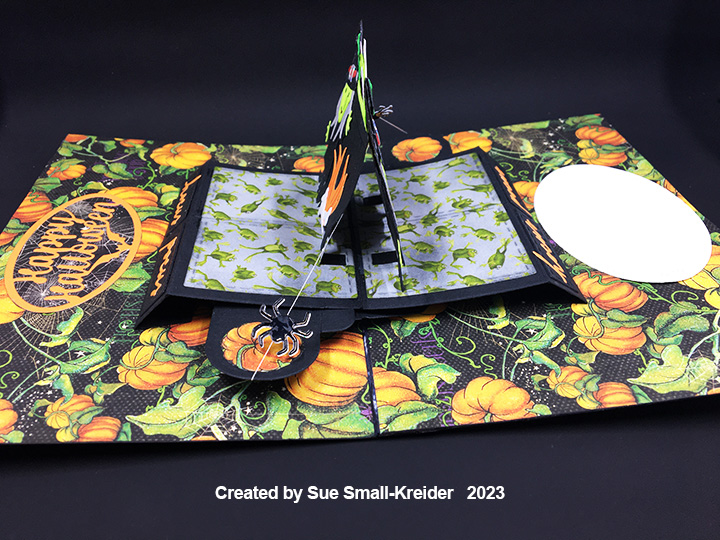
Mark with a pencil the center point of the card fold. Center the double platform and attach the back tabs with glue. Fold the platform and front tabs as shown in the photo and add glue to tabs, close card to attach the platform to floor of card.

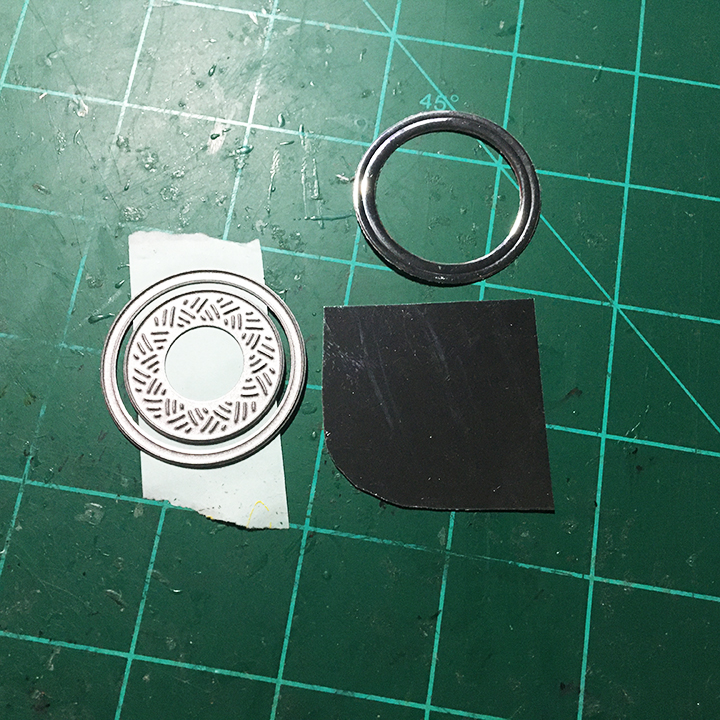
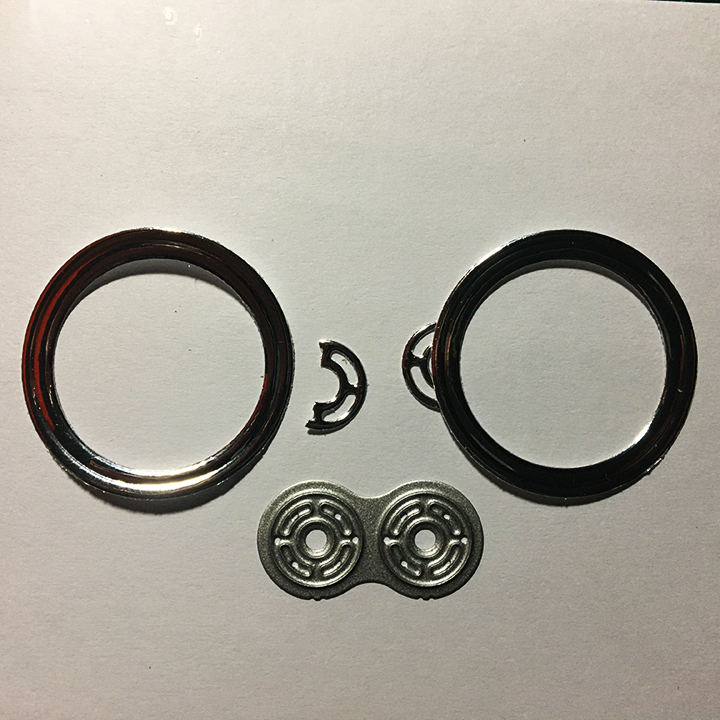
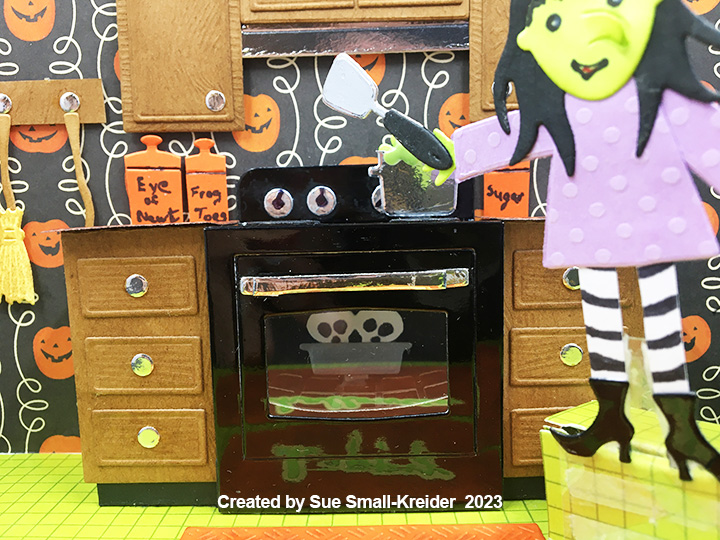
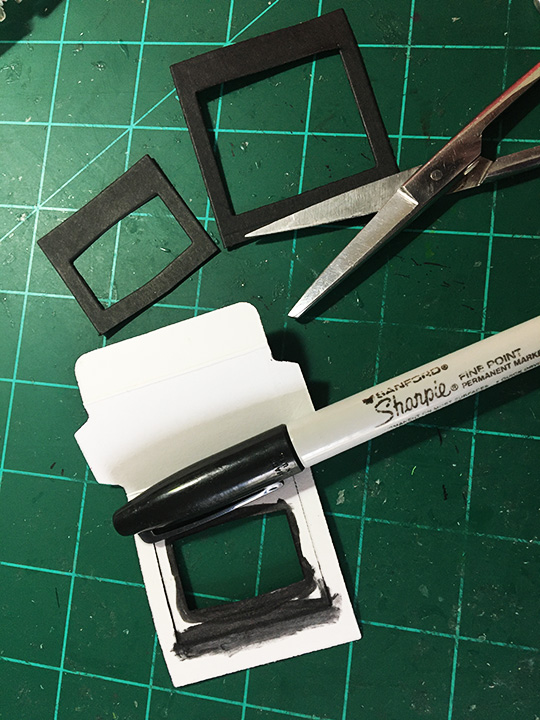
Cut two circle frames by using the smallest circle dies in the Circles – Crosshatch set from silver foil cardstock. Cut one of the stove burners from the Oven Pop-Up set and cut it in half for the clasp on the washer/dryer doors.

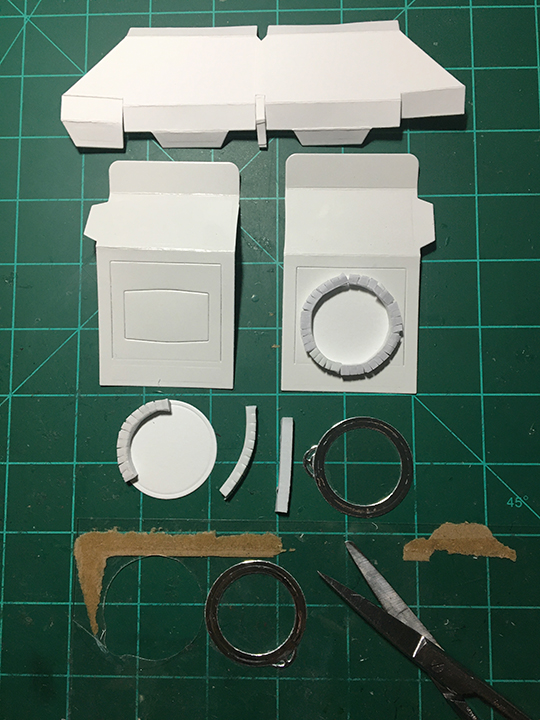
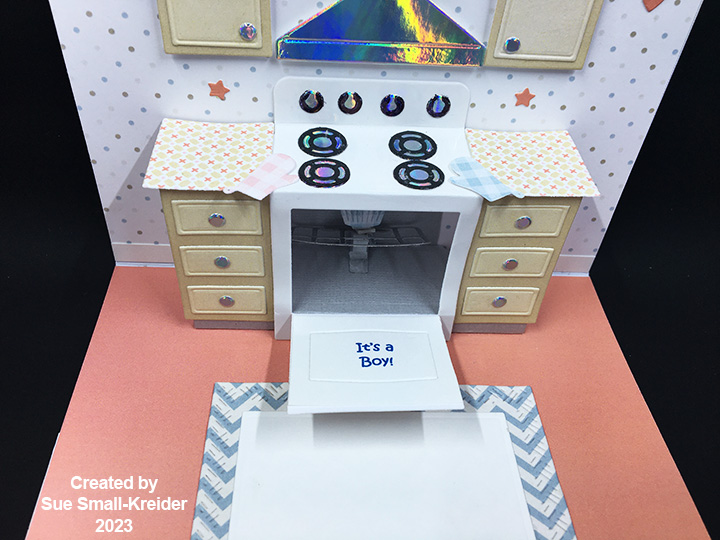
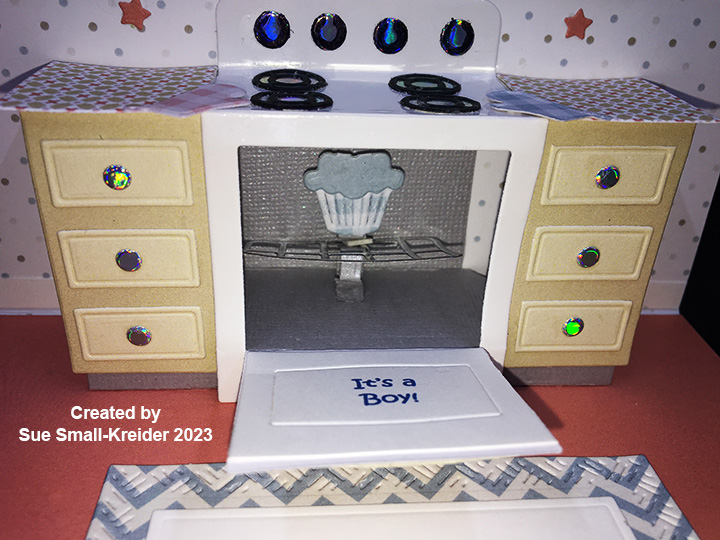
Cut two stove pieces from glossy white cardstock. Trim off one of the side tabs from each piece as shown in photo. Tape the oven door and window piece in place using packing tape on the backside. Glue the silver doors with clasps onto clear plastic and cut them out. (I used a piece plastic that had been a window in packaging.) Take foam strips and snip along one edge to make them bend easily. Place the snipped foam strips around the edge of two white circles (cut using the larger of the silver frame dies.) Cut socks from the gnome boots in the Gnome and Santa set. Use gel pens to add details to the socks. Glue four socks to the back of each white circle. Add circle confetti to washer shaker and a single black sock to dryer shaker. Glue the silver framed doors to the shaker circles.

Side Tables: Once the stove is attached, you can add the side tables which are made with the cabinet and drawer dies from the Oven Pop-Up. Cut a narrow rectangle in the middle of the long section of the cabinet piece to create the legs. attach to the stove and platform as normal. Pink ink was lightly sponged onto the tabletops and drawers.

TV: The TV set from the Memory Charms die set has had its antenna and feet trimmed off and Nuvo Drops added for knobs. I screen shot a photo from the Craft Roulette episode #182 and resized it to a 1-inch rectangle, print on white paper and die-cut it with the TV screen die.

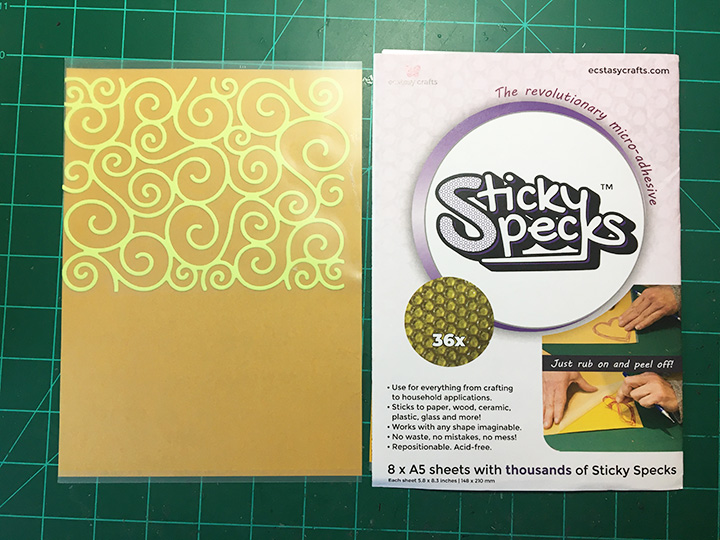
Decorations: Actual dryer lint fuzz is glued to the top of the blue trash can cut from the Coffee Charms tall coffee cup. The laundry basket is the picnic basket cut from white cardstock covered with clear packing tape and stenciled with a teal permanent marker. A piece of thin white felt is the folded laundry in the basket. Two wall decorations are threaded needle and scissors from the Sewing Charms set. A tiny sweet pea green birthday card is the right table.

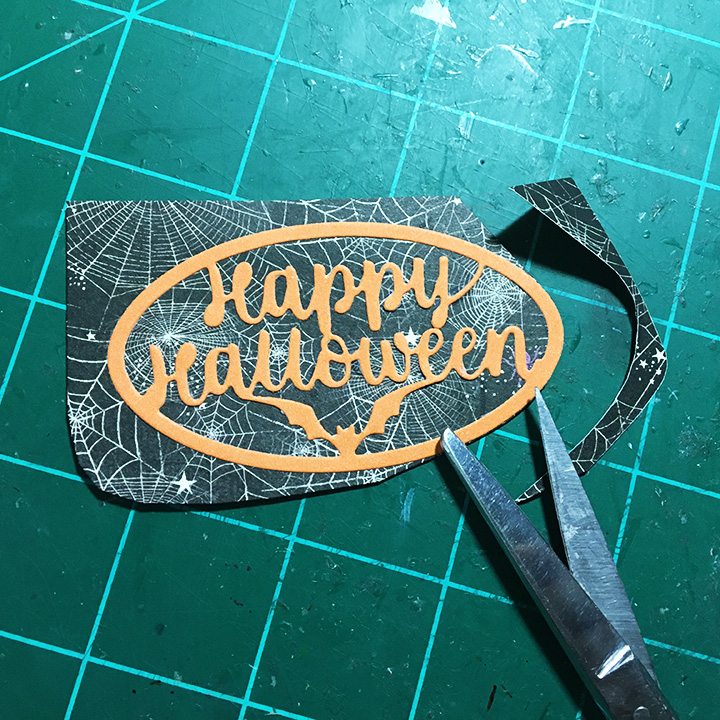
Sentiments: The front of the card sentiment “My Head Says Laundry” is computer generated. Inside the “my heart says Craft!” is a combination of die cut letters and tomato red heart with a computer generated “Craft!” (For “my” and “says,” I did word surgery using the words “merry christmas.”) The oval rug with its white label for a personal message come from the Crosshatch Ovals set. Blue ink was used on the die-cut letters and rug to make them standout from their backgrounds.

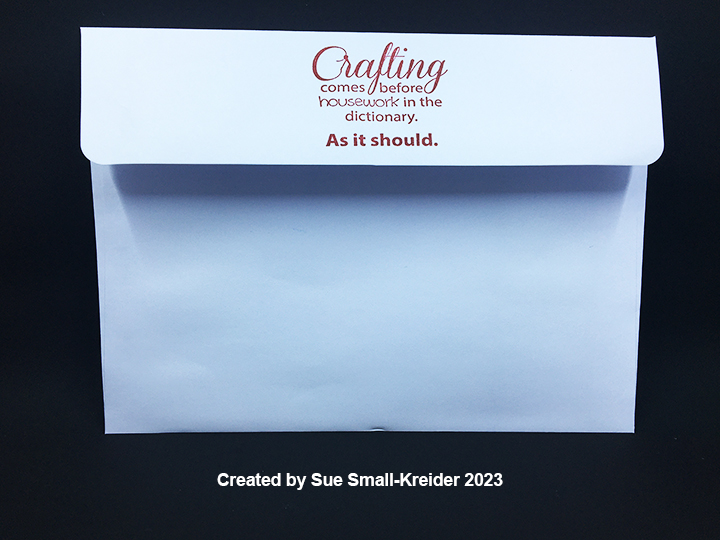
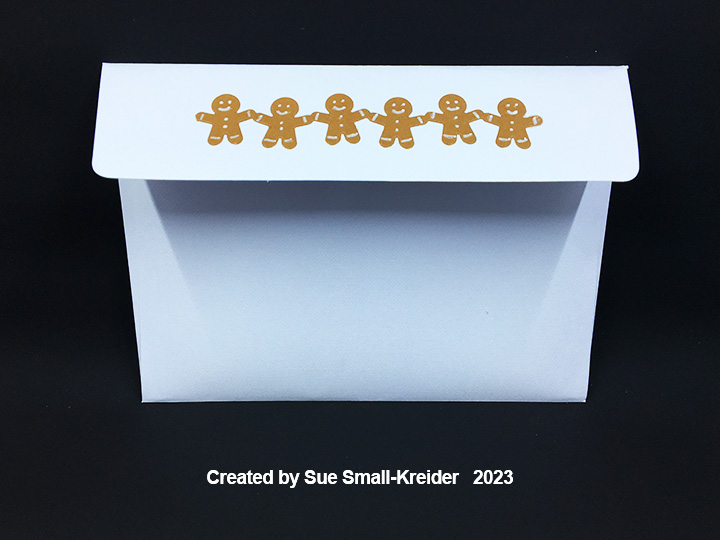
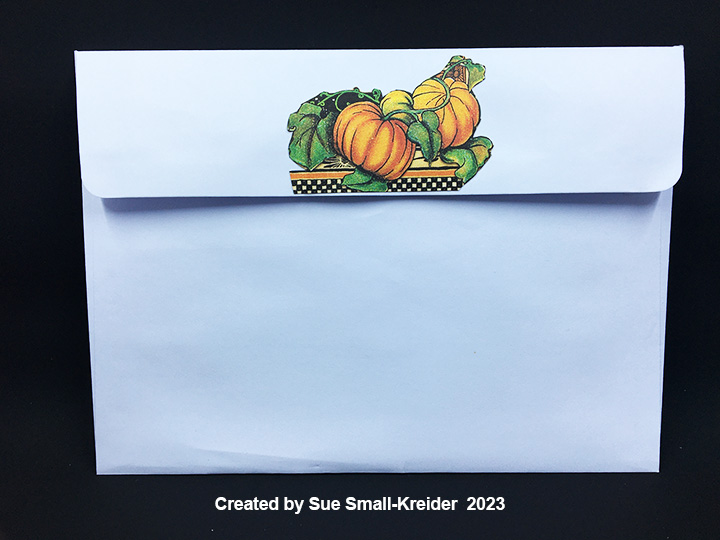
Envelope: To hint at what’s inside, the sentiment stamp of “Crafting comes before housework in the dictionary. As it should” is stamped in red on the back flap.

Thank you for reading this blog post. I hope this inspires you and makes you smile. Please like and leave comments 😊

Materials Used:

Dies

Stamps

  • Riley & Company – Funny Bones – Crafting Comes Before Housework -RWD-1037

Papers

  • Paper Discovery by Olga Direktorenko – A5 Paper Pad – Cosy Kitchen
  • White Glossy Cardstock
  • Silver Foil Cardstock
  • White, Black, Pink, Red, Green, Blue and Cream Cardstock
  • Clear Plastic Packaging
  • Park Lane Paperie – A7 Cardbase and Envelope – White

Ink

  • Stampin’ Up – Classic Stampin’ Pad – Cherry Cobbler
  • Ranger – Tim Holtz – Distress Ink- Salty Ocean and Saltwater Taffy
  • Sharpie – Permanent Marker – Ultra Fine Tip – Black and Teal
  • Pigma – Mircon 01 Fine Tip Pen – Black
  • Gel Pen – White and Yellow

Adhesives

Tools

  • Die Cutting Machine
  • We R Memories – QuickStick
  • Bone Folder
  • Ruler
  • Stamping Platform
  • LDRS – Stampendable Stamping Tool
  • Stamping Cloth
  • Sponge Dauber
  • Craft Mat
  • Scissors
  • Paper Cutter
  • Computer and Printer
  • Pencil

Miscellaneous

  • Nuvo Crystal Drops – Simply White
  • Nuvo – Pure Sheen Confetti – Crystal Cloud Circles
  • Dryer Lint Fuzz
  • White Felt

A Thanksgiving Kitchen Card

A home cooked meal is often the ideal image and scent of Thanksgiving, but what really matters is a grateful heart for all the blessings we have.

The card uses dies from Karen Burniston’s September 2023 release including Oven Extras and Oven Pop-Up, and a few other previously released die sets.

Before starting, I recommend watching the assembly videos of the pop-ups which are usually near the bottom of the linked pages for the various dies used.

Cardbase: I started with a rectangle of patterned cardstock 12×6 inches that was folded in half to form a 6-inch square, top fold card. The outside was left to the beautiful autumn trees (Photoplay Autumn Vibes-Crunchy Leaves) while the inside top panel with a teal blue leaf wallpaper and the bottom panel a brown textured cardstock.

Oven/Stove: I was genuinely surprised at how easy the pop-up oven is assembled. It has just two pieces -the outer shell which I cut from black mirror cardstock and the inner platform which I cut from a gray cardstock. The platform attaches much like the Little Labels Pop-Up with the front tabs gluing to the floor of the card and the back tab gluing to the wall of the card. Before I attached the outer shell, I added a 1 3/8-inch square of clear plastic packaging to the back of the oven door with double-sided tape. Then I cut another oven door from gray cardstock trimming the bottom 1/8-inch shy of the fold line to cover the plastic inside when the door was opened. I also cut a 2-inch square of gray cardstock and glued it to the back wall just above the pop-up platform. This will be the inside wall of the oven. It is easier to add the items inside the oven before the outer shell is attached. I glued a silver rack to the platform and then added two pop-up cubes for the top oven rack which I trimmed one of the long edges from. Once the top rack was glued in place on the two cubes, I added another cube on top for the turkey pan which is in the Oven Extras set.

I find it easier to glue all the knobs, burners and door handle to the stove while it is still flat. (For this stove I cut all the knobs, burner base circles and door handle from gold foil cardstock). To attach the oven shell, glue the bottom to the center of the platform and then fold the oven flat and add adhesive to the back of the stove knob panel. Close the card and the top panel will be positioned on the card wall so that it forms the stove. On the tabs that come off the sides of the stove top add glue. Now position the squares of the cabinet pieces’ onto the tabs. Glue cabinet bottoms to the top edge of the platform, so that there is a toe kick below the cabinets.

Cabinets: Once the stove is attached, you can add the side cabinets. I cut the cabinets from some embossed wood grain cardstock and then inked them with Rusty Hinge ink to bring out the grain. The upper cabinets and lower cabinet door fronts are cut using the larger rectangle die in the Oven Extras set and then covered with the small rectangle die pieces.

To make the counter tops longer to fill the card, I followed Sandy Diller’s idea to use the larger rectangle door die for the countertops and two trimmed lampposts from the Street Lantern Pop-Up set for the turned legs that support the extended countertops.

Decorations: Between the two oven sets are lots of fun pieces that add dimension and realism to the pop-up scene. The Oven Pop-Up set includes the stove burners and knobs, oven rack and door handle. The Oven Extras set includes the turkey and roasting pan in the oven and pot on the stove as well as three pop-up cube strips that I used to pop-up the oven rack, pan inside the oven and pot on the stove. The turkey is cut in two pieces – leg bone base in pan and the bird body. The body I cut from kraft cardstock and inked with Fossilized Amber and Vintage Photo inks. The bone/pan base was cut from white cardstock and the pan colored with a silver marker, the body piece glued on so it sits in the pan and the bone was inked with rusty hinge ink.

For the orange pot, I used clear packing taper over orange cardstock to die-cut the pot. The plaid rug is cut from the second largest crosshatch die from the Rectangle Crosshatch set. I found a patterned paper (Photoplay Thankful Collection) with shelves of kitchen items and a message board that I fussy cut and adhered to the wall with foam squares. The cooking hood was cut from gold foil cardstock using the hood die from the Oven Extras set. The large pumpkin on the floor is from the Autumn Elements set.

Sentiments: The small strip sentiments of “give thanks with a grateful heart” (card front) and “thankful hearts” on envelope flap are from the same paper collection as the autumn trees paper used on the card front. “Happy Thanksgiving” was cut into the plaid rug with the waste pieces saved and glued on to the card floor once the rung was glued in place. These words are from Word Set 7.

Envelope: The sticker leaves and sentiment strip on the back of the envelope set the tone for the card inside and are from the Photoplay Autumn Vibes paper collection.

Thank you for reading this blog post. I hope this inspires you and makes you smile. Please like and leave comments 😊

Materials Used:

Dies

Papers

  • Photoplay – 12×12 Autumn Vibes Collection Pack by Becky Moore
  • Photoplay – 6×6 Thankful Paper Pad by Michelle Coleman
  • Bazzill – 8.5×11 Textured Cardstock – Tiara -18-1002
  • American Crafts – 12×12 Embossed Wood Grain Cardstock – Dark Kraft
  • Gold, Silver and Black Mirror Cardstock
  • Kraft and Orange Cardstock
  • Clear Plastic Packaging
  • 6×9 Catalog Envelope – White

Ink

  • Ranger – Tim Holtz – Distress Ink- Fossilized Amber, Rusty Hinge and Vintage Photo
  • Sharpie – Permanent Marker – Ultra Fine Tip – Black
  • Sharpie – Permanent Marker –Fine Tip – Olive
  • Crafter’s Square – Metallic Maker .05 in/1.2 mm point – Silver

Adhesives

Tools

Baking for Thanksgiving

This card was made for Craft Roulette #182 whose parameters included a card with circles, vegetable garden colors, screen element and fuzz.

For this pop-up Thanksgiving card, I used Karen Burniston’s new Oven Pop-Up, along with her Memory Charms and Crosshatch Ovals

Cardbase: I used a purchased A6 cardbase that I trimmed down to 4.5×6 inches.Each of the four panels are covered with papers from the Cozy Fall paper collection. The front of the card has a stenciled wreath of leaves using oxide inks.

Oven/Stove: Watch the assembly video at the bottom of the linked page before starting the card. I cut my stove from a piece of orange cardstock covered with clear packing tape. I found that the silver foil oven door handle did not like to stay glued to the packing tape, so I reverted to glue dots to hold the handle on. The inside of the oven and pop-up platform were cut from a metallic coated black textured cardstock. I find it easier to add the stove knobs and burners to the stove in a flat position before attaching it to the card. Also it is easier to add any baking trays to the platform before attaching the oven to the platform.

Cabinets: Once the stove is attached; you can add the side cabinets. I cut the cabinets from some embossed wood grain cardstock and then inked them with brown ink to bring out the grain. The drawer and door (cookie tray) panels are part of the Oven Pop-Up set.  Decorative paper was used for the countertops. The upper cabinets are cut using the cookie tray die.

TV: The TV set from the Memory Charms die set has had its antenna and feet trimmed off and Nuvo Drops added for knobs. I screen shot a photo from the Craft Roulette episode #182 and resized it to a 1-inch rectangle, print on white paper and die-cut it with the TV screen die.

Decorations: Cotton fuzz was pulled from a cotton ball to be the steam off the tray of cookies fresh from the oven. The cookie tray, cookies, turner utensil, oven rack, oven mitt, and cabinet knobs are all part of the Oven Pop-Up set. The oval rug with its white label for a personal message come from the Crosshatch Ovals set.

Sentiments: The sentiments on the front (“Happy Thanksgiving Day”) and back (“Hello Fall”) come from the Cozy Fall paper collection.

Thank you for reading this blog post. I hope it has provided some inspiration.

Materials Used:

Dies

Stencils

  • Penguin Palace – Stencils 360o – Scents of Fall -STR004

Papers

  • Reminisce – 6×6 Double-sided Papers – Cozy Fall
  • American Crafts – 12×12 Embossed Wood Grain Cardstock – Dark Kraft
  • My Colors Cardstock – 12×12 Textured Cardstock – Black Bear
  • Silver Foil Cardstock
  • Black, Brown Kraft, Orange and White Cardstock
  • Patterned Cardstock Scraps
  • Park Lane Paperie – A6 Textured Card & Envelope – Ivory

Ink

  • Ranger – Tim Holtz – Distress Ink- Walnut Stain
  • Ranger – Tim Holtz – Distress Oxide – Ripe Persimmon & Mustard Seed
  • Sharpie – Permanent Marker – Ultra Fine Tip – Black

Adhesives

Tools

  • Die Cutting Machine
  • We R Memories – QuickStick
  • Bone Folder
  • Small Clips
  • Sponge Dauber
  • Craft Mat
  • Scissors
  • Paper Cutter
  • Penguin Palace – Stencils 360o System Templates
  • Computer and Printer

Miscellaneous

  • Nuvo Crystal Drops – Simply White
  • Cotton Ball Fuzz

Bun In The Oven – Gender Reveal Card

Want a fun way to do a gender reveal for expectant parents? Here is a “Bun in the Oven” (which I must credit Kelly Marie Alvarez for the original 2D version of this interactive card idea.)

The card uses dies from Karen Burniston’s September 2023 release including Oven Extras, Oven Pop-Up and the Rectangles – Crosshatch, Baby Charms and Birthday Charms which were previously released.

(I recommend watching the assembly video for the Oven Pop-Up before starting your card.)

Cardbase: I started with a purchased A6 (4.75×6.5 inches) cardbase and envelope. The front and back panels were covered using two 6×6 sheets of pink and blue gingham checked papers, cut in 1-inch strips, and adhered alternating the colors. The inside panels are covered with wallpaper-like patterned paper and terra cotta colored floor paper.

Oven/Stove: I was genuinely surprised at how easy the pop-up oven is to assemble. It has just two pieces -the outer shell which I cut from white glossy cardstock and the inner platform which I cut from gray metallic cardstock.

The platform attaches much like the Little Labels Pop-Up with the front tabs gluing to the floor of the card and the back tab gluing to the wall of the card. Before I attached the outer shell, I added two sentiments to the window of the oven door. (You can download these sentiments below.) and cut another oven door from white cardstock trimming the bottom 1/8-inch shy of the fold line. I also cut a 2-inch square of gray metallic cardstock and glued it to the back wall just above the pop-up platform. This will be the inside wall of the oven.

It is easier to add the items inside the oven before the outer shell is attached, but you can still add the two pop-up cubes – one for the oven rack and then the other for the bun. The bun cube is adhered to the rack cube sandwiching the rack in place. (I ended up using a foam square between the two cubes to get a strong bond.)

To attach the oven shell, glue the bottom to the center of the platform and then fold the oven flat and add adhesive to the back of the stove knob panel. Close the card and the top panel will be positioned on the card wall so that it forms the stove. On the tabs that come off the sides of the stove top add glue. Now position the cabinet pieces’ small squares onto the tabs. Glue cabinet bottoms to the top edge of the platform, so that there is a toe kick below the cabinets. The counter tops are glued on once cabinets are attached.

Cabinets and Vent Hood: Once the stove is attached; you can add the side cabinets of drawers. I cut the cabinets a pale brown cardstock. The drawer panels and knobs are part of the Oven Pop-Up set.  Decorative paper was used for the countertops. The upper cabinets are cut using the larger rectangles dies in the Oven Extras set. The vent hood is in the same set. All the over the pop-up oven cabinets and vent hoof were adhered to the card with foam tape.

Decorations: The rug is made using two mid-size dies from the Rectangle Crosshatch set. On the back of the card is a yellow duck cut from the Baby Charms set and markers were used with the stencil die feature to make the bill and eye. The tiny hearts and stars on the wallpaper inside the card are from the Oven Pop-Up set. The bun in the oven was made by cutting off the charm loop on the cupcake die from the Birthday Charms set. The oven rack is from the Oven Pop-Up set as are the oven mitts.

Sentiments: All the sentiments were digitally created. You can download them here.

Envelope: An extra oven mitt was glued to the back flap of the envelope to set the tone for the card inside.

Thank you for reading this blog post. I hope this inspires you and makes you smile. Please like and leave comments 😊

Materials Used:

Dies

Papers

  • Bazzill – 8.5×11 Textured Cardstock – Tiara -18-1002
  • Divinity Designs – 6×6 Paper Pad – Baby Boy
  • Divinity Designs – 6×6 Paper Pad – Baby Girl
  • Paper Lane Paperie – Silver Holographic Cardstock
  • White, Black and Yellow Cardstock
  • Paper Lane Paperie – A6 Cardbase and Envelope – White

Ink

  • Computer Printer
  • Sharpie – Permanent Marker –Fine Tip – Black and Orange

Adhesives

Tools

Seas The Day

I am always needing masculine birthday cards, so having an underwater sea turtle card that has some pop-up motion is a good thing.

This card uses a new pop-up mechanism in Karen Burniston’s September 2023 release – Stocking Pop-Up. I also used Karen’s Sea Animals, and a variety of her word and alphabet sets.

Cardbase: I started with an A5 (148 x 210mm or 5.875 x 8.25 inches) piece of heavy sea blue cardstock and folded in in half to form card that is (148 x 105mm or 5.875 x 4.125 inches) with a side fold. I had two sheets of the same A5 size printed underwater background. One I cut in half for the two panels inside. From the matching sheet I cut the decorative panels needed for the pop-up mechanism and used the remaining paper to cover the top half of the card front and the final two scraps to cover the card back. Any exposed areas on the outside of the card were covered with printed wave vellum.

Turtle Pop-Up: While the Stocking Pop-Up comes with a large stocking and Christmas decorations, you don’t need them to make the pop-up mechanism. I cut the large rectangular cover piece, the tombstone piece with baby tombstone and the triangular shaped piece with tabs from sea blue cardstock. I followed the directions on the packaging to assemble on to the card. (I practiced with some scrap cardstock first to get the placement right.) I assembled up to the point where I needed to glue the second tab of the large cover piece to the card. This so I could easily adhere the turtle to the mechanism.

Once I had the turtle from the Sea Animals die set assembled, I glued it to the large tombstone matching the upper edge of the turtle shell to the curve of the tombstone, so the arms and head of the turtle are above the tombstone. Next, I trimmed the tombstone down to fit the turtle’s shell.

Decorations: Plastic droplets were used on the card front along with trails of glitter gloss to simulate bubbles. A strip of vellum printed with waves adds to the sense of underwater motion.

The back of the card uses scraps of the underwater paper with a turtle swimming upward. A tiny shaker element is under the vellum piece with tiny yellow and orange fish and clear sequins.

Sentiments: Three different die sets were used to create “Seas the Day.” The Mini Alphabet was uses for “Seas.” The “the” comes from Word Set 11 and “Day” is from Word Set 17. Both the Happy Birthday die and its shadow die were used. The shadow was cut from shimmer cardstock and the “Happy Birthday” was coated with glitter gloss.

Envelope: The A6 white envelope has a school of fish stamped on its back flap in blue ink.

Thank you for reading this blog post. I hope this inspires you and makes you smile. Please like and leave comments 😊

Materials Used:

Dies

Stamps

  • Papercraft Society – Sam Calcott’s Underwater & Nautical Box – Clear Stamps

Papers

  • Papercraft Society – Sam Calcott’s Underwater & Nautical Box – A5 Size Papers -Underwater Background, Wave Vellum and Blue(s) Cardstock
  • Craft Consortium – A4 Size Double-Sided 200gsm Papers – Gardeners Delight – Greens & Browns
  • Recollections – 8.5×11 White Gold Shimmer Cardstock
  • Dark Green Foil Cardstock
  • White, and Black Cardstock
  • A6 Envelope – White

Ink

  • Papercraft Society – Sam Calcott’s Underwater & Nautical Box – Mini Ink Pad – Aquamarine
  • Pigma – Mircon 01 Fine Tip Pen – Black
  • Nuvo – Aqua Shimmer – Glitter Gloss

Adhesives

Tools

  • Die Cutting Machine
  • Bone Folder
  • Stamping Platform
  • LDRS – Stampendable Stamping Tool
  • Stamping Cloth
  • Scissors

Miscellaneous

  • Kat Scrappiness – Sparkling Clear Droplets- Sampler Pack
  • Picket Fence Studios – Sequin Mix – Fishy Wishes

Merry & Bright Shiny Baubles

The large tree ornaments in Karen Burniston’s new Christmas Borders 1 are very mid-century modern and are the inspiration for this retro pop-up Christmas card.

The card uses decorations from three of the new die sets in the September 2023 release – Christmas Borders 1, Stocking Pop-Up, and Small Script – Christmas along with Karen’s Christmas Tree Pop-Up and Circles – Crosshatch.

Cardbase: I used a white purchased A6 (4.75×6.5-inch) cardbase and covered the outside of it with a single piece of printed rice paper using lots of glue and a brayer to smooth the paper down and adhere it to the cardstock. Inside, I cut two 4.75×6.5-inch panels of green printed paper and glued them close to the center fold but leaving a tiny gap at the fold. The white gap was colored in with an olive-green marker to match the paper.

Ornament Borders: For the ornament borders, I cut four of the main border die from the Christmas Border1 die set from a white shimmer cardstock. I also cut four of the ornament cap die from matte gold cardstock. I cut the borders to fit the width of the card. (Seven ornaments fit.) Using permanent markers to individually color the ornament balls, they allowed some of the metallic shimmer to come through the ink. Glue the gold caps to the ornaments.

Stocking: The red and white stocking comes from the Stocking Pop-Up die set as does the holly and berries. I used the stencil feature on the holly to draw leaf veins and Nuvo Drops to add dimension to the berries.

Pop-Up Tree: Watch the assembly video located towards the bottom of the linked page before starting on the tree. I used two circles from the Circles – Crosshatch set to make the tree skirt. I folded both circles in half and on the smaller white circle, I used the small die in the Christmas Tree Pop-Up set to cut the two tabs that work the pop-up mechanism for the tree. The die is centered over the fold. Cut both circles in half on the fold lines. Glue the circles onto the inside of the card leaving the tabs unglued and in the open position.  Cut the tree base from red, fold and attach to the white mechanism tabs inside the card.

Cut the four tree greenery pieces and decorate with the string of lights border from the Christmas Borders 1 die set. (I cut seven stands of green lights to use as the base and then two strands each of blue, red and yellow. For the different colored light bulbs, cut the bulbs off the colored strands and glue to the green base.) Make sure that you trim away any light strand pieces from the tree’s assembly slots.

Assemble tree as shown in the video and attach to red base.

Sentiments: On the stocking is the word “jolly” from the new word set –Small Script – Christmas. The “j” is dotted with a Nuvo Drop in red. Inside the card “Christmas greetings” uses both the shadow and script dies in contrasting green and red cardstock. A large white gift box with red bow serves a place for a personal message. The stitched rectangle and bow are from the Stocking Pop-Up die set.

Envelope: On the back of the envelope stamped in red and green are three small light bulbs and the words “Merry & Bright.” I used paper tape to mask half the sentiment to stamp in red and then masked the other half to stamp in green.

Thank you for reading this blog post. I hope this inspires you and makes you smile. Please like and leave comments 😊

Materials Used:

Dies

Stamps

  • Woodware – Clear Stamps designed by Francoise Read – Snowman Light Bulb

Papers

  • Stamperia – Rice Paper – Classic Collection – Holly & Berries
  • Hallmark Cards PLC – Forever Friends Retro Collection – 8×8 Stack – A Christmas Tale
  • Recollections – 8.5×11 White Gold Shimmer Cardstock
  • Matte Gold Cardstock
  • Green, White, Black and Red Cardstock
  • Park Lane Paperie – A6 Cardbase and Envelope – White

Ink

  • Stampin’ Up – Classic Stampin’ Pad – Emerald Green and Real Red
  • Sharpie – Permanent Marker – Fine Tip – Olive
  • Sharpie – Permanent Marker – Ultra Fine Tip – Light Blue, Lime Green, Racer Red, Yellow
  • Pigma – Mircon 01 Fine Tip Pen – Black

Adhesives

Tools

  • Die Cutting Machine
  • We R Memories – QuickStick
  • We R Memories – Scoring Board and Trimmer
  • Stamping Platform
  • LDRS – Stampendable Stamping Tool
  • Stamping Cloth
  • Scrap Paper To Color On
  • Scissors
  • Brayer

Miscellaneous

  • Nuvo Vintage Drops – Postbox Red

A Modern Halloween

Casting a spell of delight is this Halloween card depicting a modern-day witch cooking up a green bubbling brew on her shiny new stove.

The card uses dies from Karen Burniston’s September 2023 release including Oven Extras, Oven Pop-Up, Witch and Cauldron, Halloween Borders and Small Script – Halloween, a word set. A few other die sets from Karen Burniston were also used.

Cardbase: I started with a rectangle of white cardstock 10×6.5 inches that was folded in half to form a 5-inch tall by 6.5-inch wide, top fold card. The outside two panels were covered with black and white night sky paper. The inside top panel with a pumpkin wallpaper and a green grid cardstock.

Card Front: I used the Swirl Pattern Plate to create green, wispy steam swirls that encircle a witch’s face and elements of a spell casting brew – all of which come from the Witch and Cauldron die set. (I cut the swirl pattern and then used pressed the piece onto Sticky Specks, an adhesive sheet that can be applied after die-cutting.) I used the stencil features of the witch’s face die to color in the eyes and mouth. The nose can be folded out to ink the edges with green ink. The bubbles, eyeball and frog legs also have stencil features. With the exceptions of the face, bone, eyeball and broom, all other elements have been brushed with a glitter gloss to give them some subtle sparkle.

Standing Witch: Using the Witch and Cauldron die set; I used all the witch dies except the hat dies to create this long-legged witch with bangs.  Because she is seen both the front and the back, I cut two sets of her dress and sleeves. Her legs are two strips of 3/8-inch by 1-inch that I drew stripes on with a black marker. After I glued her head to her hair, I used an ultra-fine tipped black marker to draw in her bangs. She is adhered to a piece of clear plastic packaging with doubled sided tape so that she appears to be standing on the large bam box. When positioning the bam box, make sure that in the closed position the witch is within the closed card. (An assembly video of the bam box is located at near the bottom of the linked bam box page.)

Oven/Stove: I was genuinely surprised at how easy the pop-up oven is assembled. It has just two pieces -the outer shell which I cut from black mirror cardstock and the inner platform which I cut from 100 lb. black cardstock.

The platform attaches much like the Little Labels Pop-Up with the front tabs gluing to the floor of the card and the back tab gluing to the wall of the card. Before I attached the outer shell, I added a 1 3/8-inch square of clear plastic packaging to the back of the oven door with double-sided tape.

Then I cut another oven door from black cardstock trimming the bottom 1/8-inch shy of the fold line. Using a black marker, I colored the space around the oven door fold on the back (to hide the white) and the edges of the mirrored cardstock. I also cut a 2-inch square of black cardstock and glued it to the back wall just above the pop-up platform. This will be the inside wall of the oven. It is easier to add the items inside the oven before the outer shell is attached, but you can still add the two pop-up cubes – one for the oven rack and then the other for the pan. The pan cube is adhered to the rack cube sandwiching the rack in place. (I ended up using a foam square between the two cubes to get a strong bond.)

To attach the oven shell, glue the bottom to the center of the platform and then fold the oven flat and add adhesive to the back of the stove knob panel. Close the card and the top panel will be positioned on the card wall so that it forms the stove. On the tabs that come off the sides of the stove top add glue. Now position the cabinet pieces’ small squares onto the tabs. Glue cabinet bottoms to the top edge of the platform, so that there is a toe kick below the cabinets.

Cabinets: Once the stove is attached; you can add the side cabinets of drawers. I cut the cabinets from some embossed wood grain cardstock and then inked them with brown ink to bring out the grain. The drawer panels and knobs are part of the Oven Pop-Up set. Decorative paper was used for the countertops. The upper cabinets are cut using the larger rectangles dies in the Oven Extras set. For the cabinet doors over the vent hood (also in the Oven Extras set) I turned the rectangle on its side and cut the smaller decorative panel in half. Setting these small doors slightly apart, creates the illusion of two doors with silver knobs. The three upper cabinets were joined together with a strip of cardstock glued to their backs. They then were adhered to the card with foam tape.

Decorations: Between the two oven sets are lots of fun pieces that add dimension and realism to the pop-up scene. The Oven Pop-Up set includes the stove burners and knobs, oven rack and handle. The Oven Extras set includes the pan in the oven and pot on the stove as well as three pop-up cube strips that I used to pop-up the oven rack, pan inside the oven and pot on the stove. For the green bubbles in the pot, I used the hearts in the Oven Pop-Up set glued to the back of the pot which has its lid cut off. The bubbles are covered with green Nuvo Drops for dimension and slime factor. The orange canisters are the pot cut narrower and the lid glued on. They are adhered with foam squares to the wall. The orange rugs are from the Rectangle Crosshatch set. The brooms are from the Witch and Cauldron set and attached to the wall with foam squares as is the woodgrain scrap with silver knobs. The cooking utensil in the witch’s hand is from the Oven Pop-Up set. From the Halloween Borders set, I used the skulls and bones on the back of the card as well as two skulls inside the oven in a pan.

Sentiments: The new Small Script Halloween word set has the “hocus pocus” used on the card front as well as the “happy halloween” used inside on the kitchen rugs. The larger rug has space to add a personal message.

Envelope: “Cast A Spell” and a bubbling cauldron are stamped in black on the back of the envelope to set the tone for the card inside.

Thank you for reading this blog post. I hope this inspires you and makes you smile. Please like and leave comments 😊

Materials Used:

Dies

Stamps

  • Fun Stampers Journey – Rubber Stamps – Witches Brew – SS-0388

Papers

  • Bazzill – 12×12 Raised Dot Cardstock – Berry Pretty
  • Bazzill – 8.5×11 Textured Cardstock – Tiara -18-1002
  • American Crafts – 12×12 Patterned Paper – Pumpkin Wallpaper – 320459
  • American Crafts – 12×12 Patterned Paper – Night Sky – 320409
  • American Crafts – 12×12 Embossed Wood Grain Cardstock – Dark Kraft
  • The Paper Studio – 12×12 Textured Paper – Football – 5241435
  • Keep It Simple – 12×12 Double-Sided Cardstock
  • Silver and Black Mirror Cardstock
  • Woodgrain Embossed 12
  • White, Black, Kraft, Orange, Green and Yellow Cardstock
  • Clear Plastic Packaging
  • A7 envelope – White

Ink

  • Memento – Fade-Resistant Dye ink – Tuxedo Black
  • Ranger – Tim Holtz – Distress Ink- Gathered Twigs and Mowed Lawn
  • Sharpie – Permanent Marker – Ultra Fine Tip – Black and Red
  • Sharpie – Permanent Marker –Fine Tip – Black
  • Farber-Castell – Pitt Artist Pen – 1.5 Bullet Nib – White-101 Marker – Snow
  • Sakura – Gelly Roll Pen – Medium – White
  • Nuvo – Aqua Shimmer – Glitter Gloss

Adhesives

Tools

  • Die Cutting Machine
  • We R Memories – QuickStick
  • Bone Folder
  • Sponge Dauber
  • Craft Mat
  • Scissors
  • Kat Scrappiness – Anti-Static Tool
  • Tweezers
  • Stamping Platform
  • LDRS – Stampendable Stamping Tool
  • Stamping Cloth

Miscellaneous

Baking Gingerbread

The fragrance of spices and fresh baked gingerbread herald the Christmas season. Decorating a gingerbread house is often a group activity for families. This card is intended to evoke these kinds of memories.

Karen Burniston’s September 2023 release of new dies include the following dies used on this card: Oven Pop-Up, Oven Extras, Christmas Borders 1, Christmas Borders 2 and Small-Script – Christmas. Also included in the card are Karen’s Tiny House Pop-Up and Gingerbread Tiny House Add-Ons.

Cardbase: I used a white purchased A6 (4.75×6.5-inch) cardbase and covered the outside of it with two 4.75×6.5-inch panels of golden striped paper. Inside, I cut 4.75×6.5-inch panels of pink patterned paper and glued them close to the center fold but leaving a tiny gap at the fold. The white gap was colored in with a pink marker to match the paper on the inside of the card.

Stove: While the Oven Pop-Up is designed to be 3D, it can be trimmed and used as a flat piece by cutting off the stove top section and using the utensil handle as the burners. The oven window is backed with a silver baking sheet glued and taped to the back of the oven door. (Before I die-cut the oven, I covered the red cardstock with clear packing tape to get a shiny effect.) The handle and knobs were cut, folded and colored as you would for a pop-up version of the oven.

Decorations – Card Front: For the baking elements on the front of the card, all of them except the mixer are in the Oven Pop-up set. The mixer is in the Oven Extras set. The plates that the cookies are on are the burner circles for the stove top. I covered a piece of red cardstock with clear packing tape before cutting out all the red elements. For the white mixing bowl and plates, I used a glitter gloss to make them sparkle.

Gingerbread House: Watch the assembly video for the Gingerbread Tiny House Add-Ons located at the bottom of the linked page before cutting out pieces. I covered all the edges of the tiny house base before adhering the gingerbread panels with glitter gloss to make shiny frosting. You can die-cut tiny candy dots and gum drops to decorate the house. I opted to use translucent red Nuvo Drops to decorate the roof. For all the candy canes on the card come from the Christmas Borders 2 set.

Decorations – Inside: For all of the red and white candy decorations, I first assembled the candies and then added Glossy Accents to give them shine and dimension. (The candy canes on the back of the card I used clear packing tape on red cardstock which kept the white a crisp white rather than the pinkish white of the of the inside candy.) While the fence of candy canes is from the Christmas Borders 2 set, the peppermint candies are from the Gingerbread Tiny House Add-Ons set. The borders of gingerbread men are from the Christmas Borders 1 set which has a stencil feature to add the white icing decorations.

Sentiments: The “ho ho ho” and “Christmas greetings” are all from the Christmas Small Script word set. The shadows were cut from white and the words from red cardstock covered with clear packing tape to have a shiny appearance. A white label cut using the Crosshatch Rectangles and Labels is a place to write a personal message.

Envelope: Another strip of gingerbread men was cut using the Christmas Borders 1 set and glued to the back flap of the envelope.

Thank you for reading this blog post. I hope this inspires you and makes you smile. Please like and leave comments 😊

Materials Used:

Dies

Papers

  • Carnation Crafts – A4 Double-Sided Paper – Merry & Bright
  • Park Lane Paperie – Holographic Cardstock – Silver
  • White, Kraft, Black and Cream Cardstock
  • A6 Cardbase and Envelope – White

Ink

  • Pigma – Mircon 01 Fine Tip Pen – Black
  • Farber-Castell – Pitt Artist Pen- Bullet Nib – White-101 Marker – Snow
  • Nuvo – Aqua Shimmer – Glitter Gloss

Adhesives

Tools

Miscellaneous

  • Ranger – Glossy Accents
  • Nuvo Jewel Drops – Holly Berries

Macbeth’s Witches – A Halloween Card

Welcome to our Karen Burniston Products – KB Riley LLC September 2023 Release Blog Hop. (See details at the end of this post for blog list.) The Design Team have come together with Karen today for a fun blog hop to celebrate the release of 9 new dies. Sneak peeks of the new release started last week, and the dies are available to order NOW!

“Double, double, toil and trouble. Fire burn and cauldron bubble…. Eye of newt, and toe of frog,” The infamous words of Shakespeare’s trio of witches casting a spell over Macbeth are the inspiration for this Halloween card.

This card uses a new pop-up mechanism in Karen Burniston’s September 2023 release – Stocking Pop-Up as well as her new Witch and Cauldron and Small Script- Halloween die sets.

(Before starting to make a card, I recommend watching the assembly views for all of Karen Burniston’s interactive die sets. The videos are located near the bottom of any linked page in this blog post.)

Cardbase: I started with a purchased A7 (5 x 7 inches) cardbase and matching envelope. The outer panels were covered with a spider’s web paper and the inner panels with a coordinating pumpkin patch paper. The front panel also uses a border panel from the paper collection that says, “There’s magic in the air.” The back panel has a pumpkin fussy cut from the papers.

Cauldron Pop-Up: The Stocking Pop-Up is a versatile mechanism that can be used for more than Christmas cards. I doubled the mechanism which means placing the lower pop-up mechanisms moving in opposite directions and cutting two upper covering pieces joined to form a platform.

Adding pop-stands from either the Christmas Tree Pop-up or Barn Pop-Stand sets, to the decorative stitched rectangles, allows for a cauldron to set atop the platform with witches attached. Add fussy cut pumpkins to the pop-out tombstone pieces. (I ink blended the white frog paper with a gray ink to make it sooty from the fire.)

In the Witches and Cauldron die set are a strip of bubbles that a white pen can add highlights to as well as an eyeball, frog legs and a bone. The fire is the witch’s hair turned upside and stenciled flames with an orange maker.

Spiders: For the spiders crawling out of the cauldron, I cut four spiders from the Witch and Cauldron set from black mirror cardstock. A 12-inch piece of white polyester thread was threaded with two circles (eyeball center circles from Witch and Cauldron) and knotted to the cauldron. The circles were glued to the underside of the pop-out mechanisms from under the platform. Adjust the thread tension to be loosely taunt and test for catchpoints when opening and closing card before gluing spiders to the threads. (I found the best spots for the spiders were near the ends of the threads.)

Witches: I used the stencil features of the witch’s face die to color in the eyes and mouth. The nose can be folded out to ink the edges with green ink. I cut extra dress and hat pieces so that the backs of the witches would look complete. The blond witch has silver pieces from the hat buckle on her shoes. The cauldron witches’ hats have red hat bands cut from red cardstock covered with clear packing tape.

Sentiments: The card front sentiments are stamped sentiments fussy cut into tombstones and a bat shaped banner. Inside the “hocus pocus” on the platform ends are from the new Small Script- Halloween die set and the “Happy Halloween” is from the Halloween Charms set. A white oval for a personal message is cut using the Crosshatch Ovals.

Envelope: The A7 white envelope has fussy cut pumpkins from the paper collection glued to its back flap.

Thank you for reading this blog post. I hope this inspires you and makes you smile. Please like and leave comments 😊

Materials Used:

Dies

Stamps

  • Fun Stampers Journey – Witches Brew – SS-0388

Papers

  • Graphic 45 – 8×8 Double-Sided Papers – Midnight Tales Collection – Abracadabra &Pumpkin Patch
  • Stampin’ Up – 12×12 Double-Sided Designer Series Papers – Toil & Trouble
  • Paper Lane Paperie – Holographic Cardstock – Silver
  • Black Mirror Cardstock
  • White, Orange, Green, Red, Yellow and Black Cardstock
  • Paper Lane Paperie – A7 Cardbase and Envelope – White

Ink

  • Ranger – Tim Holtz – Distress Ink- Mowed Lawn
  • Ranger – Tim Holtz – Distress Oxide – Lost Shadow
  • Memento – Fade-Resistant Dye ink – Tuxedo Black
  • Sharpie – Permanent Marker –Fine Tip – Black, Red and Orange
  • Farber-Castell – Pitt Artist Pen – 1.5 Bullet Nib – White-101 Marker – Snow
  • Nuvo – Aqua Shimmer – Glitter Gloss

Adhesives

Tools

  • Die Cutting Machine
  • We R Memories – QuickStick
  • Bone Folder
  • Stamping Platform
  • LDRS – Stampendable Stamping Tool
  • Stamping Cloth
  • Songe Dauber
  • Blending Brush
  • Bone Folder
  • T-Ruler
  • Scissors
  • Needle
  • Thimble
  • Stamping Blocks for Paper Weights
  • Tweezers
  • Craft Clip

Miscellaneous

  • White Polyester Thread

This release includes:

  • 2 new Script Sentiment Die Sets
  • 3 new Border Die Sets
  • 2 new Pop-up Die Sets
  • 1 new Add-on Die Sets
  • 1 stand alone Die Set

Dies are available to order now on the website.

GIVEAWAY:

To celebrate the release Karen Burniston and each of the Karen Burniston – KB Riley LLC Design Team members will be giving away a $25 Gift Certificate to some lucky person who comments on our blog posts, so make sure you join the hop and comment on everyone’s blog post. Winners will be randomly chosen from ALL of the blog hop comments received on our blog posts by Monday, 25th September 2023. Lots of chances to win some goodies, so just leave a comment on this post or any other blog hop posts to enter!

Don’t forget to leave some way for us to contact you, in case you are a lucky winner!

Karen Burniston

Lois Bak

Sue Small-Kreider – YOU ARE HERE

Frances Byrne

Jennifer Webster

Suzanne Smit

Sandy Diller

Nicky Foden