It’s time for the Karen Burniston Design Team Challenge for August 2023 with the theme of ACCORDION dies.
I choose to use the Fancy Label Accordion die with the sleigh from the Sleigh Pop-Up and reindeer from the Christmas Animals set as add-ons similar to the new Cupcake or Fence Add-ons for the Landscape Rectangle Accordion set. I also used the snowflake frames from the Fancy Winter Frames set.

There are several ways of assembling this accordion card – prepare frames and attach them all together and then add the sleigh and reindeer – OR – prepare frames (adding snowflake frames to fronts of accordion frames only), make all the animals, sleigh and gifts and assemble each panel as you go adding the back snowflake frame pieces after you attach the accordion frames. The latter is the method I choose to follow. Watch the assembly videos for the Fancy Label Accordion and the Fence Add-ons (located towards the bottom of the linked pages.)

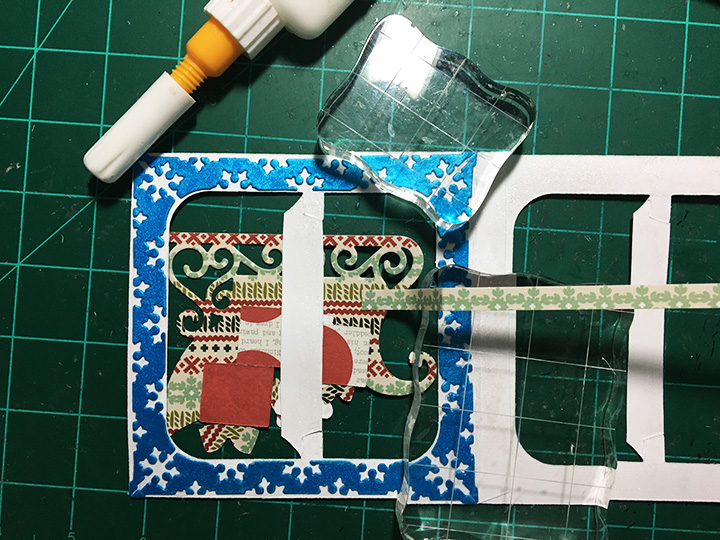
Frames: Cut four accordion frames from the Fancy Label Accordion set from heavy white cardstock. With scissors cut off the sides of the fancy label to form a pivot post on each accordion frame. Cut a total of 16 snowflake frames pieces from the Fancy Winter Frames set from blue cardstock. (I sprayed my frames with mica spray to get the metallic shiny frames.) Brush the accordion frame sides and the pivot post with glitter gloss. (I recommend doing both sides of the frame at this stage.) Glue blue snowflake frames onto the fronts only of the accordion frames. (Watch assembly video for the Fancy Winter Frames.)

Sleigh: Using red cardstock cut two sleighs. (If using decorative cardstock with a different pattern on each side, cut one red in reverse.) Cut two more of the lower portions, of the sleigh from silver foil cardstock making sure one is the reverse of the other. Fussy cut off just the sleigh runners. Glue runners to red sleigh bases.
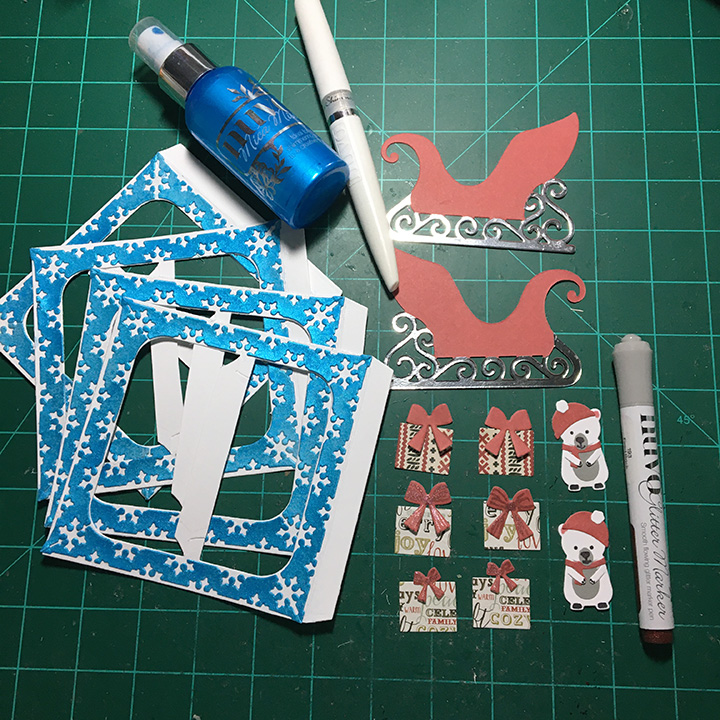
Gifts: From the Sleigh Pop-Up set, cut a total of six gift boxes and four bows, making sure you have pairs of matching papers for each box and bow. (I used a glitter marker to add some accents to the bows.) Play with the layout of where the packages and bear will go in the sleigh and still fit inside the accordion frame.
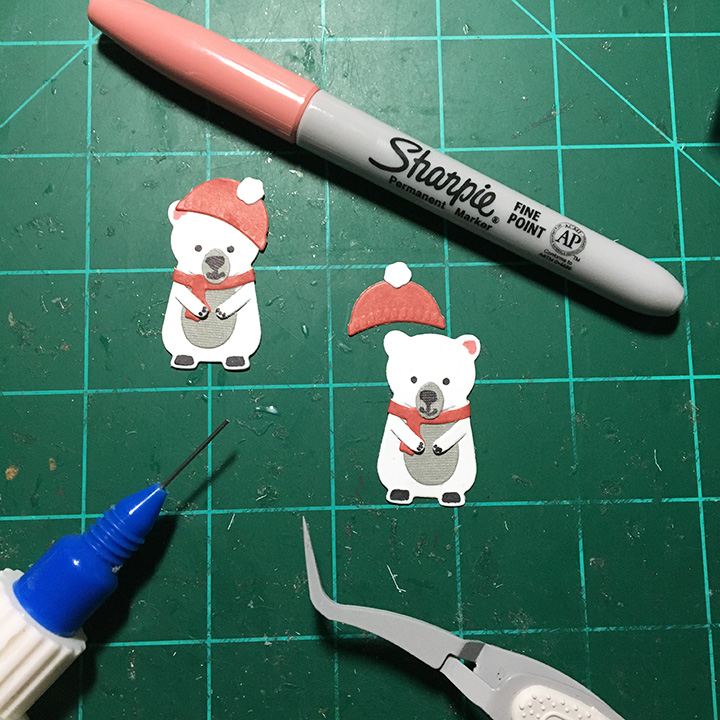

Bear: Cut two bears from white cardstock and two of the tummy and nose pieces from gray using the Winter Animals set. Cut from red two hats and scarves and two pompoms from white. Assemble as shown on the package. Use the main die to stencil the pink ears and black eyes, and the nose die to draw the mouth and nose in black. Assemble with the hat covering the opposite ear from the other bear.

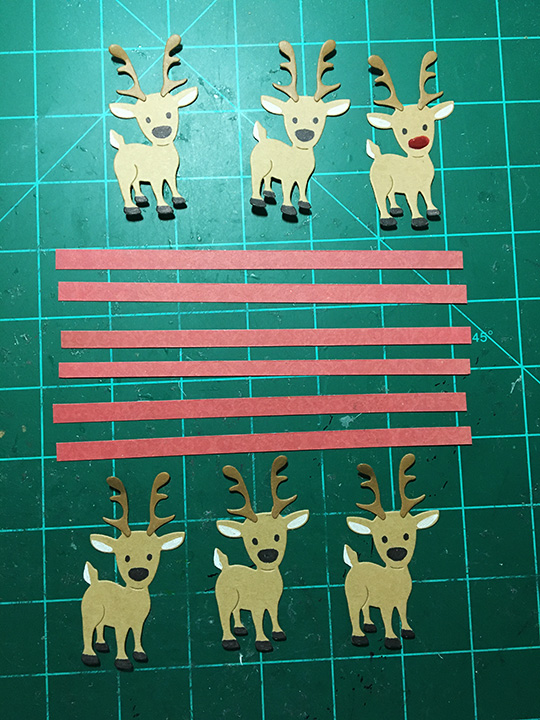
Reindeer: Cut 12 reindeer from brown cardstock and 12 pairs of antlers from darker brown cardstock using the Christmas Animals die set. With a fine tipped black marker use the reindeer die as a stencil to color hooves and faces of the six of the deer and a white gel pen to color the ears. Repeat with the remaining six reindeer, but on the reverse side. Color all the tail as shown on package with white gel pen. Glue on antlers to one set of six reindeer. You will glue the remaining six pairs of antlers on when you assemble the card matching up the fronts and backs of them. (I made one reindeer have a red nose by using red Nuvo drops.) Cut six strips of red cardstock 6-inchs long and 1/4-inches wide for the sleigh shafts that the reindeer will be harnessed to.

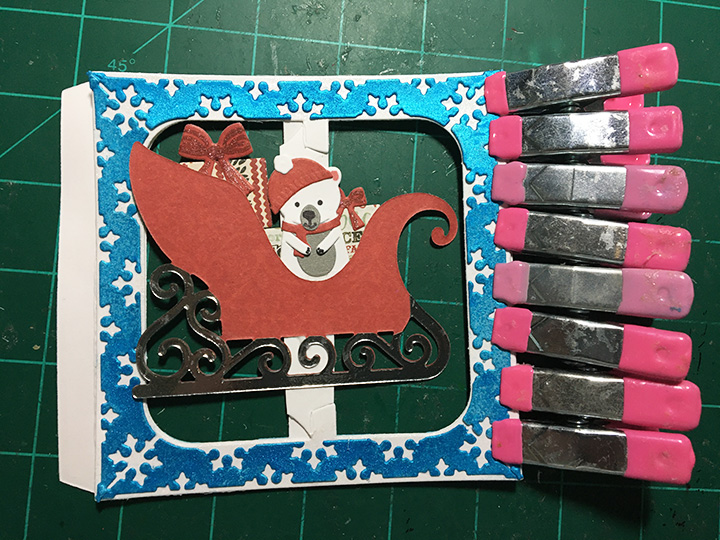
Assembly: Play with the layout of where the packages and bear will go in the sleigh and still fit inside the accordion frame. Glue the packages and bear to the back of sleigh. Start with the first frame and position the sleigh so that the front curling tip of sleigh is just inside the frame and a small portion of the back of the sleigh is over the other side of the accordion frame. (I placed my sleigh so that the shaft that will connect the sleigh to the reindeer will be approximately in the middle of the frame.) Glue the frame tab to the second frame. ( I used crafting clips to hold the frames together until the glue set-up.
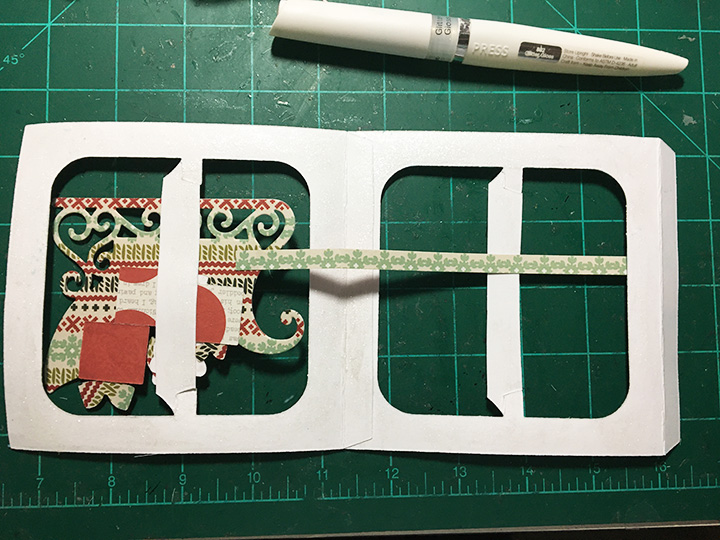

Flipping the two frames over, I glued a shaft onto the back of the sleigh making sure it was long enough to reach the edge of the next frame. Next, before I glued the blue frames on , I brushed all the accordion frame sides with a glitter gloss then I attached the blue snowflake frames to the back sides of the accordion frames covering over where the tab is. Use weights to keep the frames from curling as the glue dries.

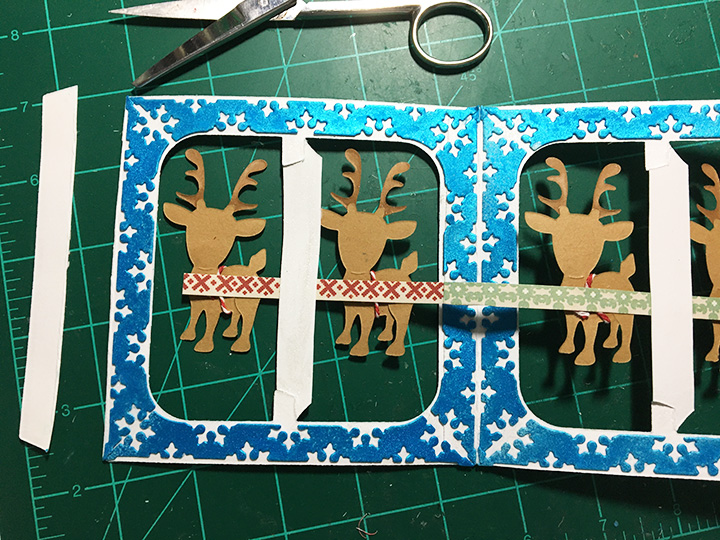
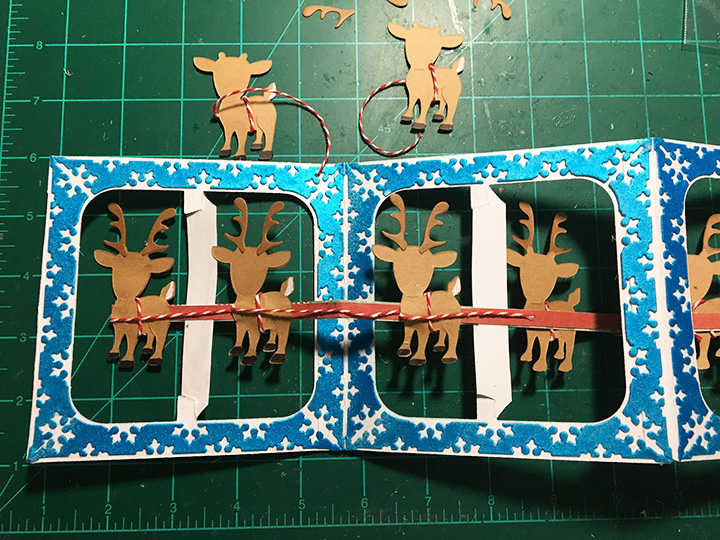
Cut two pieces of baker’s twine 6-inches long and ten pieces 5-inches long. (Use the 6-inch piece of twine for the rein deer that attach to the sleigh.) To make the harness on the reindeer start with the end of the twine on the back side going over the neck and back under the belly. Glue the end and bend to back of reindeer. Pull twine around the front of the animal and with a dot of glue, adhere the twine to the rear end of the reindeer. Glue the lead reindeer to to the second frame and glue the end of the harness twine to where it will be covered with the reindeer with with a 6-inch harness. Adhere second reindeer and wrap end of twine around the bear’s paw.

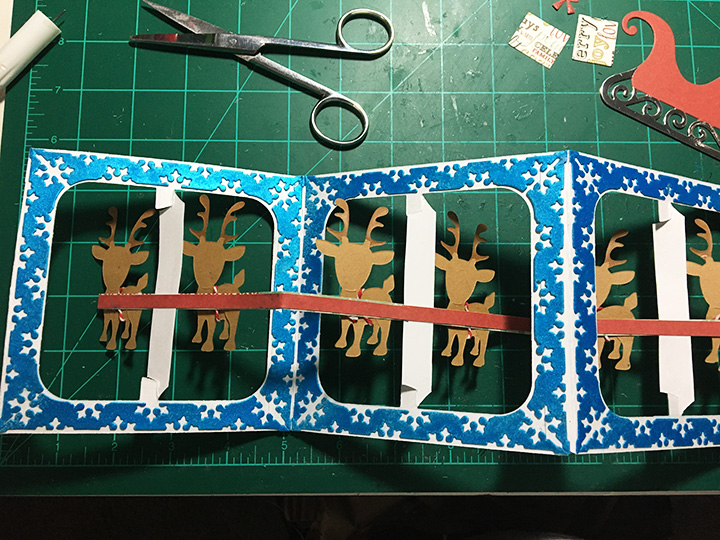
Add the next two frames following the same instructions for the second frame and reindeer. (In hindsight, I think it may be easier to assemble all the accordion frames together, adding one sleigh and attaching all the shaft pieces together. Then you can start adding the reindeer starting with Rudolph in the front, gluing down his twine harness, and adding the next reindeer and so on with each frame.)

When all the frames have been added with blue frames on both sides and front side of reindeer added, flip over and cut off the unused tab on fourth frame. Glue red shafts to the back side of shafts. (This covers the different patterned paper for my card, but also adds some strength to the folding mechanism.)

Glue the packages to the backs of the first packages matching them up. Then adhere the bear. Finally glue the sleigh in place matching up the edges and runner swirls. Use clips to keep the pieces in place until the glue dries.

Glue the remaining reindeer in place. Train all the folds. (I decided that the back side of the reindeer would look better with faces so I stenciled them on after the card was assemble.)

This card will easily fit into an A7 envelope, but it is thick, so a padded envelope or hand delivery is recommended.
Thank you for reading this blog post. I hope this inspires you and makes you smile. Please like and leave comments 😊
Click here to see other Accordion cards
Materials Used:
Dies
- Karen Burniston in cahoots with Riley and Company – Fancy Winter Frames – 1145
- Karen Burniston in cahoots with Riley and Company – Christmas Animals – 1061
- Karen Burniston in cahoots with Riley and Company – Fancy Label Accordion – 1043
- Karen Burniston in cahoots with Riley and Company – Sleigh Pop-Up – 1021
- Karen Burniston in cahoots with Riley and Company – Winter Animals – 1016
Papers
- My Mind’s Eye – 6×6 Double-Sided Paper Pad – Cozy Christmas
- White, Brown, Gray, and Light Blue Cardstock
- A7 ivory Envelope
Ink
- Sharpie – Permanent Marker – Fine Tip – Pink
- Sharpie – Permanent Marker – Ultra Fine Tip – Black
- Sakura – Gelly Roll Pen – Medium – White
- Nuvo – Glitter Marker – Fired Brick – 193
- Nuvo – Aqua Shimmer – Glitter Gloss
- Nuvo – Mica Mist – Nebula Blue
Adhesives
Tools
- Die Cutting Machine
- We R Memories – QuickStick
- Scissors
Miscellaneous
- Baker’s Twine – Red/White
- Nuvo – Vintage Drops – Postbox Red

I love how you created this card, Sue.
LikeLiked by 1 person
Absolutely adorable! Thank you for sharing!
LikeLiked by 1 person
Fabulous creation Sue. Thanks for the details regarding how it was put together and the video of the final card – amazing! Cx
LikeLiked by 1 person
Wow! This is unbelievably complicated and you made it look so easy!! Gorgeous! Love those little deer all carrying that beautiful gift laden sleigh!! The bear is so cute too!! Great job and love it!!
LikeLiked by 1 person
Ms. Sue, I think your card is my absolute favorite of all the cards on Karen’s blog hop. I absolutely Love how you used the sleigh and reindeer on the card for Christmas. It is just too adorable. Also gives me some ideas for my Christmas cards this year. 😉 Thank you so much for the idea and instructions.
My favorite ice cream is Vanilla, because you can add anything you want to it, depending on your mood at the time. lol!
LikeLiked by 1 person
Fabulous and stunning!
LikeLiked by 1 person
I loved this card and every single card on your blog. Thank You for sharing your remarkable talent with us crafters. I will follow you
LikeLiked by 1 person
HO Ho Ho! I think this card is outstanding. Fabulous. Thanks for all of the detailed instructions. I want to try and make one of these. My favorite ice cream is any thing with caramel in it.
LikeLiked by 1 person
love this card. Love the instructions, and will watch the video later to try and make.
LikeLiked by 1 person