Simple with a Twist

Farm House BDay-inside CU2

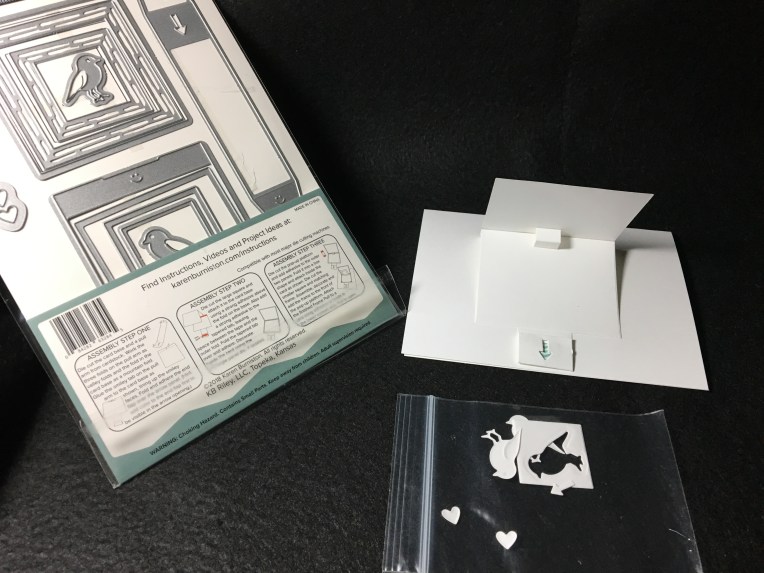
Inspiration can be as simple as seeing something that reminds you of another thing. It was a simple as that when I looked at the 6 x6 paper pad in Prima’s Spring Farm House collection.  I saw the 12 rectangular images on one page and my mind wondered if they were the same size as the photo frames in Karen Burniston’s Photo Collage Pop-Up die. They were close enough in size to make the mechanism work.

The mechanism is where the twist comes in to play. It has four arms that you can attach flat images to that explode out as you open the card. From the folded close position, the mechanism twists out to display the images. (I watched KB’s assembly video several times to understand how the mechanism works and its assembly before I made my test mechanism to play with and keep stored with the die set.)

Farm House BDay-inside closing

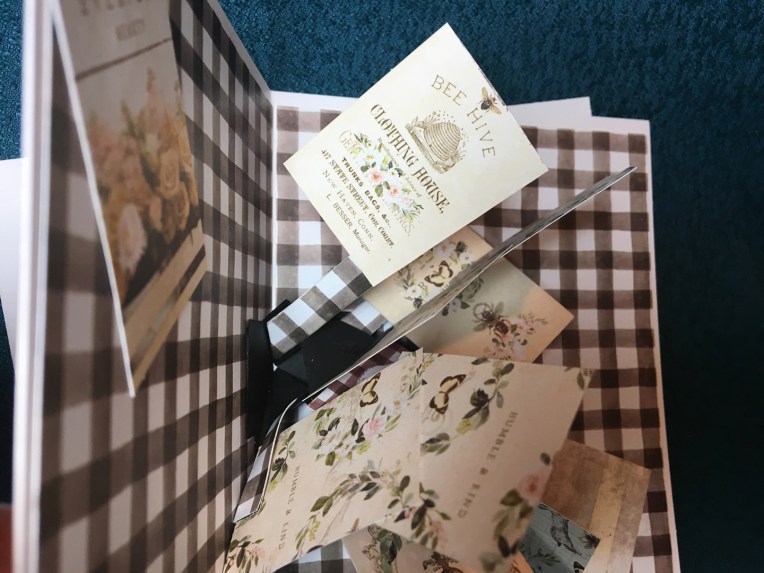
It was trial and error when placing the images on the four arms. I used a tape runner as recommended in the assembly video to place the images, test the placement when folded up, move the image several times, rub off adhesive and start over with the placement.

Farm House BDay-inside W

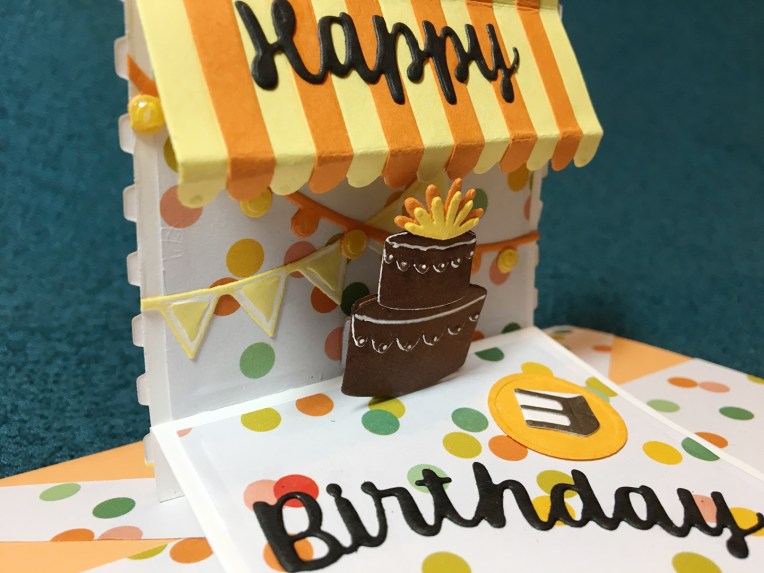
For the front of the card I used on of the journaling postcards that I trimmed down and glued a die-cut “Happy Birthday.”

Farm House BDay-Front


SUPPLIES USED:

Dies

Stamps

Paper

Miscellaneous

Bendi-Shadow Boxes

Swing Tree-front

Bendi-Shadow Boxes are quick to make when using a scene building die set. I built this tree swing example in under 2 hours from design, locating materials from scrap paper stash to die-cutting all the pieces to assembly, using the Xcut “Make Me” die set included in the Homemaker Die Cuts & Digi Stamps All-in-one Die & Digi Stamp Kit.

I cut two pieces of card stock 5 1/2 inches x 4 1/4 inches for the outside pieces and one piece 5 inches x 4 1/4 inches for the inside layer. Next I scored the two outer pieces at 1/4 inch, 3/8 inch, 5 3/8 inches and 5 1/4 inches on each piece. The score marks closest to the inside are mountain folds and the score marks closes to the outside are valley folds.

Swing Tree-Assembly 3

Next I laid-out my two rectangular nesting dies and decided on the size cuts I wanted for my shadow box openings on one of the 5 1/2 inch outer pieces and the 5 inch middle piece.  I used the largest die on the front outside layer. After cutting the front layer, I used it as a template to place the next size smaller die on the 5 inch middle layer.

I decorated my layers before I assembled the layers together. (I did use some foam tape for the grass in front of the fence for an extra layer of dimension.)

Swing Tree-Assembly 1

Using 1/8 inch red double-sided sticky tape, I ran strips down the inside edges of the outer two pieces.

Swing Tree-Assembly 2

Peeling only the left back layer red tape, I lined up the inside layer left edge to the back piece left edge and pressed together. I did the same for the back, right edge and the front edges – doing one edge at-a-time for the most control over alignment of edges.

Because the outer layers are longer than the inside layer, they bow out some which allows the card to stand-up.

Swing Tree-3 layers

Here is another example of a bendi-shadow card.


Swing Tree-front

SUPPLIES USED:

Dies


Paper:


Miscellaneous:


Be Spontaneous!

BDay Party Ulta closeup-pop-up

Spontaneous birthday parties are wonderful, especially pop-up ones. This card’s inspiration came from experimenting with cutting multiple square wave frames and playing with shadow boxes. Once I realized the square wave frames fit the Karen Burniston Frame Pull Pop-Up top square, I knew I had to create a mini pop-up version of Courtney Chilson’s Birthday Shadow Box card.

BDay Party closeup-Front

Having made the Frame Pull Pop-up card before, I studied my practice card to make sure I remembered the assembly. (You can access the assembly video at here.) I remembered her advice to keep the top square flexible and not over decorated with stiff layers and used papers rather than cardstock to lay the background of colorful wave frames. I made sure the top edge did not have any overhanging edges of the frames that would catch when the card popped open.

IMG_5856

I had cut and assembled several sets of decorations from the Birthday Shadow Box card die set the last time I had made the card, so I only had to cut the cake and frosting and a circle for a plate from scrap cardstock in my stash. I found two shades of browns for the cake and used a white gel pen to added accents to the frosting. After gluing the cake together, I gently rounded the cake with my fingers to add depth to it as well as a Mini Dimensional foam dot to adhere it to the pop-up cube on the card. Double-sided red tape was used to attach the awning to the top of the pop-up.

BDay Party closeup-pop-up right

Decorations for the inside of the card all came from the Birthday Shadow Box set. The sentiment banner is a strip of thin cardstock stamped and embossed using Stampin’ Up Blow Out the Candles stamp set, VersaMark Watermark Stamp Pad and Ranger Black Sparkle Embossing Powder. The balloons stamped on the envelope flap are also from the Blow Out the Candles set. The die cut words on the pop-up come from Karen Burniston Word-Set-2-Birthday.

BDay Party -inside

SUPPLIES USED:

Dies

Stamps:

Paper:

Miscellaneous:

TZXT2727[1]

Bee Sweet

BEE SWEET Front extended

Summer holidays are wonderful for their lazy days to be creative.

I had picked up several BoBunny paper pads at my Tuesday Morning store which included the BEE_UTIFUL YOU 6 x 8 paper pad. The collection features bees. I also picked up at the same time Stampers Anonymous Tim Holtz Collection Little Things Cling Stamps set which has a bee about to land.  Needless to say, I felt the need to get BEE-zy and created something from all this inspiration.

BEE SWEET inside detail

This simple Oval Landscape Accordion fold card was created using the Elizabeth Craft Designs Karen Burniston Pop It Ups die set 1108. I cut six frames with the inner oval taped to cut a narrow frame around the pivot oval.

BEE SWEETBack extended

Once all six frames were cut, I mixed the inner ovals patterned paper and taped them into the oval frames on the back side using white paper backed double-sided tape.  I left the backing paper on the tape until I was ready to adhere two frames together.  Once I had decided on the fronts and back of the frames and the order of the patterned paper on the frames, I placed double-sided tape on the backside frames (only the three patterned paper for the backside of the card.) Starting with my last frame on the right, I peeled off the backing paper on the two oval sections and carefully matched them up. I did not press the ovals together as I wanted wiggle room to remove the backing paper from a side of the outer frame, one-at-a-time, matching the sides together as best I could.  I did not put tape on the two tabs that would attach to the next frame.  I snipped off the two tabs of the back frame. Next I folded back the backing paper off just on the tape on the back frame of the middle section where the two tabs would adhere. I lined up the tabs and pressed them onto the tape of the middle section and started the process again to adhere the ovals first and then the outer frames of the middle frame section. Finally, I cut off the tabs on the first section before adhering the middle section tabs to the first frame as described before.

BEE SWEET inside wide

The ovals tabs were inserted between the sticky sections, aligned and firmly pressed together to adhere.  (See Karen Burniston accordion assembly video which shows a different shape, but the principles for accordion assembly are similar.)

BEE SWEET Front extended above

I decorated the ovals after I had assembled the frames so that I would not over embellish them.  To mail this card, I needed it to lie flat, but I wanted some dimension to the panels. Using small flower shapes cut from colored food boxes, I assembled six small flowers and two large flowers (see Supplies Used list for specific dies). On the Thinking of You frame, the flower and bee come from a Burts Bee’s box I had saved in my stash.

The last oval has a lacy oval of cream colored card stock to write a personal note on.

SUPPLIES USED:

Dies

Stamps:

Paper:

Miscellaneous: