2027 New Year Card

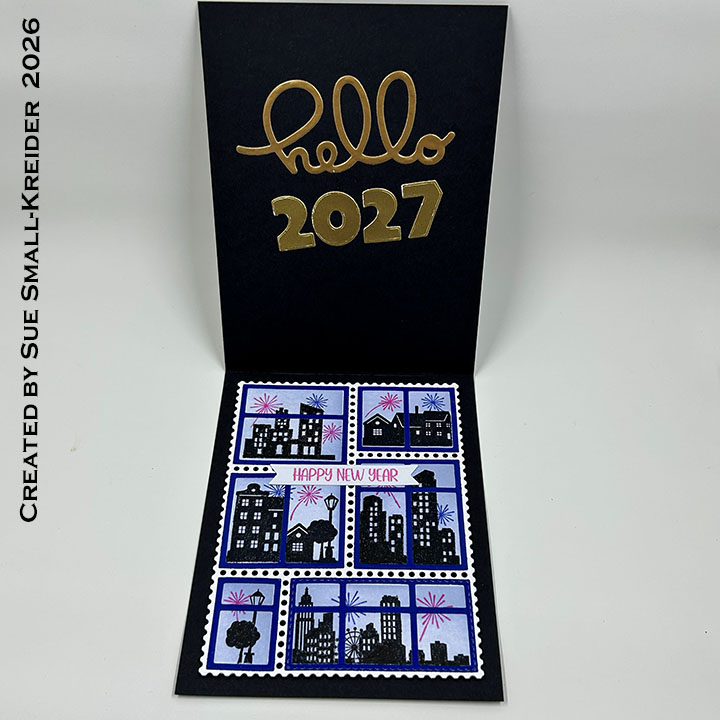
Using Waffle Flower Postage Collage collection of City Sunset stamp set, Postage Collage dies Windows Die and Coloring Stencil, I made the inside of this New Year 2027 card.
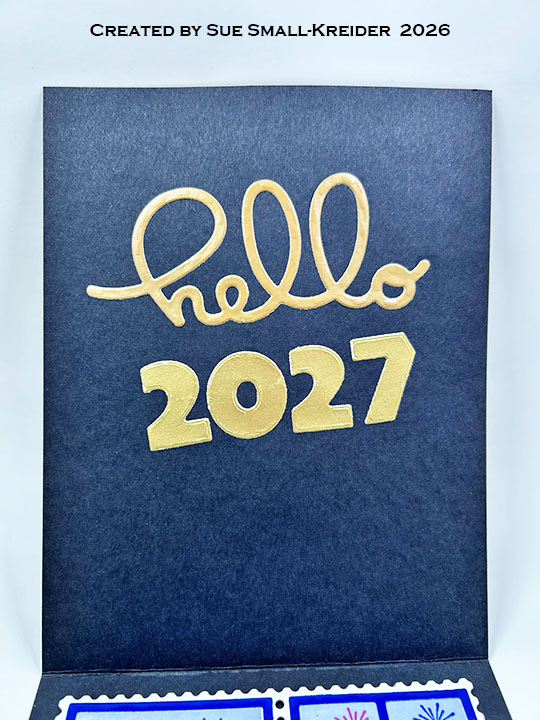
Cardbase: I created an American size A2 (4 1/4×5 1/2-inches) top-fold, vertical cardbase from thick black cardstock.
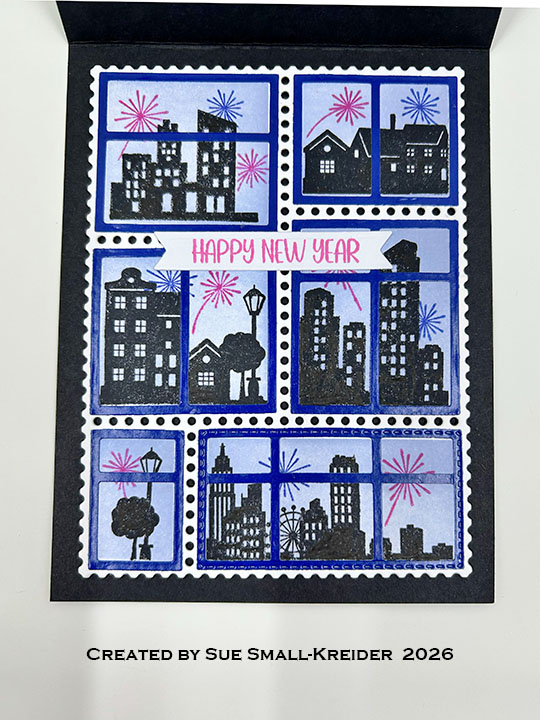
Postage Stamps: I used a blending brush with the Catherine Pooler ink of Tranquil for the sky with the Postage Collage Coloring Stencil. The buildings and fireworks are from the Postage Collage City Sunset and stamped with Memento inks of Paris Dusk, Rose Bud and Tuxedo Black. The blue window frames are die cut using the Postage Collage Windows Die.
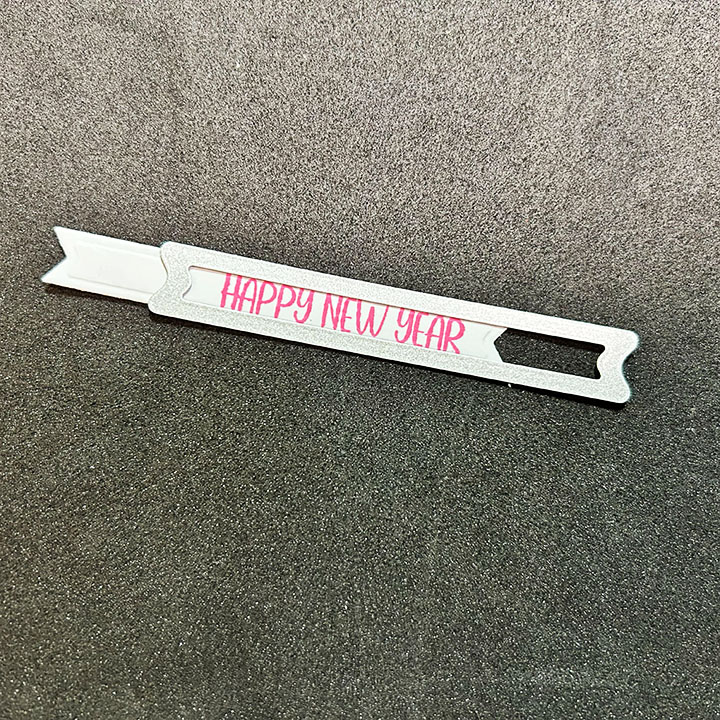
Sentiments: All the sentiments are by Karen Burniston. “Happy New Year” is from her Season of Cheer set stamped in red ink and then using her smallest banner die from the Greeting Labels die set to cut it out as shown above. (I cut the banner twice – one to get the long banner – twice to trim it to size.)

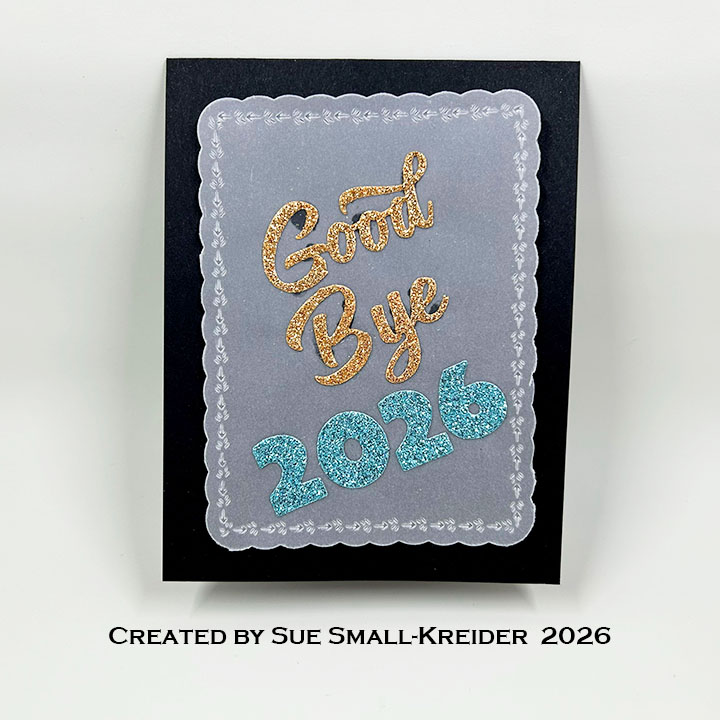
“Good Bye 2026” is die cut using the β€œGood” is from Good Luck The β€œB” is from Happy Birthday while the β€œye” is from Happy Easter. The years are cut using the Numbers die set. The scalloped edges rectangle of vellum is a die cut from Emily Moore’s Decorative Sentiment Dies.

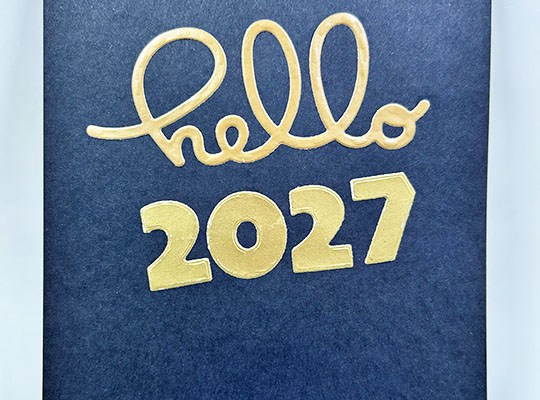
“Hello 2027” uses Hello the Numbers die sets.
Envelope: The panel card fits into an A2 (4 1/4×5 1/2-inches) size envelope.

___________________________________

Thank you for experiencing this blog post.

I hope this inspires you and makes you smile.

Please subscribe, like and leave comments 😊

Follow my YouTube channel, Instagram and Pinterest as well.

___________________________________

Disclaimer: Karen Burniston products are provided free of charge by the manufacturer for review and use. All other items were personally purchased. Compensated affiliate links used where or when possible, meaning I will receive a small percentage commission from these manufacturers at no cost to you. This will allow me to add more content to my YouTube channel and help out a lot. Thank you.

Materials Used:

Dies

Stamps

Stencils

Papers

  • Black and White Cardstock
  • Matte Gold Cardstock and Gold Junk Mail
  • The Paper Studio – 8.5Γ—11 – Clear Vellum
  • DCWV – 6Γ—6 Glitter Cardstock – Glitter Pastels

Ink

  • Catherine Pooler- Mini Ink Pads – Tranquil
  • Memento – Fade-Resistant Dye Ink – Paris Dusk, Rose Bud &Tuxedo Black
  • Pigma – Mircon 01 Fine Tip Pen – Black

Adhesives

Tools

Golf Postage Stamp Thinking of You Card

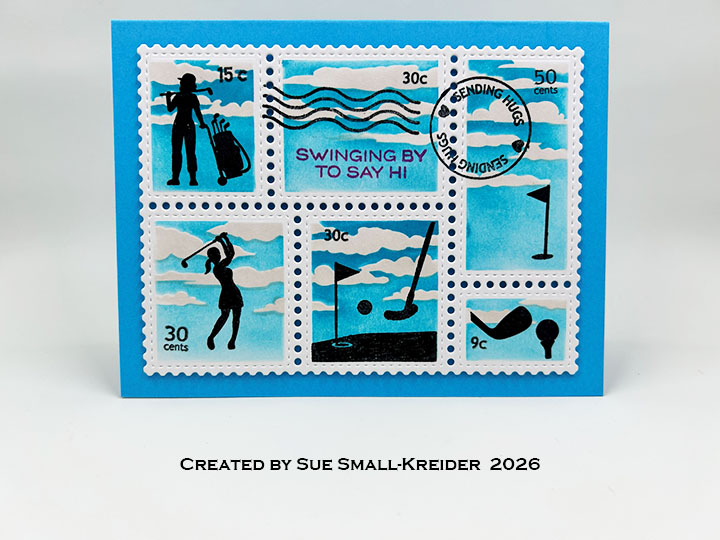
Just got the new Waffle Flower golf themed collection of Gone Golfing Dies, Postage Collage Airmail Stencils, Golf Puns and Postage Collage Golf Silhouettes stamp sets.

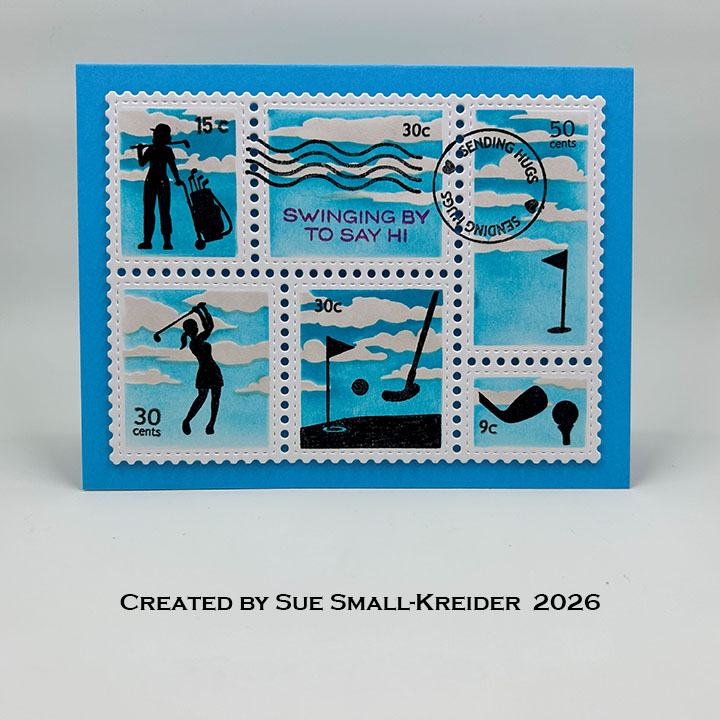
Cardbase: I created an American size A2 (4 1/4×5 1/2-inches) top-fold, horizontal cardbase from Spellbinders Island Blue cardstock.

Postage Stamps: I used Catherine Pooler inks of Oyster for the clouds and Fiesta Blue for the sky with the Postage Collage Airmail Stencils. The female golfers are from the Postage Collage Golf Silhouettes.

Sentiments: “Swinging by to say hi” is from the Golf Puns set stamped in red ink. The circle cancellation saying “Sending Hugs” comes from Postage Collage stamps set.

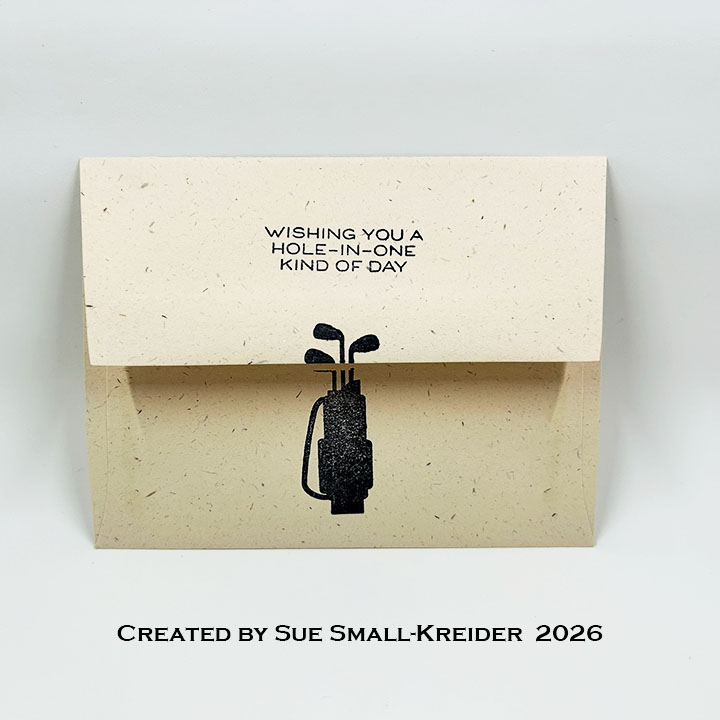
Envelope: The panel card fits into an A2 (4 1/4×5 1/2-inches) size envelope with the back flap stamped with “Wishing you a hole-in-one kind of day” is from the Golf Puns stamp set and a golf bag with clubs from the Postage Collage Golf Silhouettes in black.

___________________________________

Thank you for experiencing this blog post.

I hope this inspires you and makes you smile.

Please subscribe, like and leave comments 😊

Follow my YouTube channel, Instagram and Pinterest as well.

___________________________________

Disclaimer: Karen Burniston products are provided free of charge by the manufacturer for review and use. All other items were personally purchased. Compensated affiliate links used where or when possible, meaning I will receive a small percentage commission from these manufacturers at no cost to you. This will allow me to add more content to my YouTube channel and help out a lot. Thank you.

Materials Used:

Dies

  • Waffle Flower – Steel Craft Dies – Postage Collage

Stamps

  • Waffle Flower – Clear Stamps – Golf Puns
  • Waffle Flower – Clear Stamps – Postage Collage
  • Waffle Flower – Clear Stamps – Postage Collage Golf Silhouettes

Stencils

  • Waffle Flower – Plastic Stencils – Postage Collage Airmail Stencils

Papers

  • Heavy White Cardstock
  • Spellbinders – Color Essentials 100lb Cardstock – Island Blue
  • Fraser Papers for William House – A2 Envelope – Genesis Text Milkweed Smooth

Ink

Adhesives

Tools

A Beachy Thank You Card

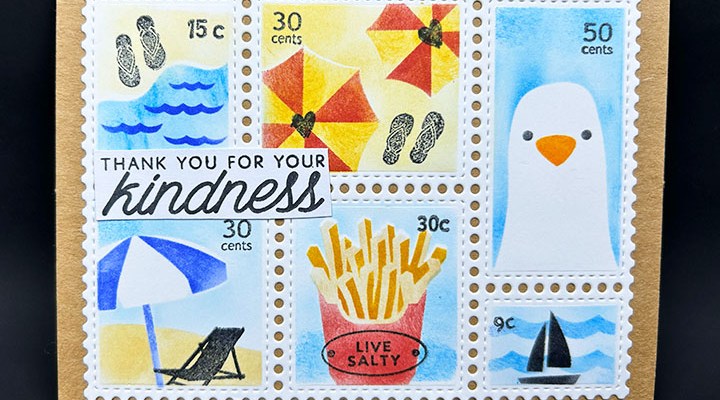
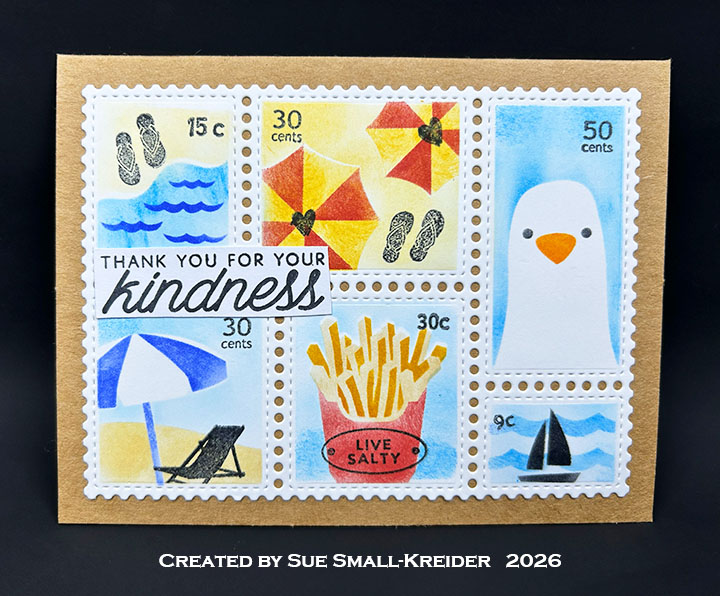
This card was made for Craft Roulette #301 whose parameters were: an appreciation card, apple farm colors, silhouette element and old [craft] product. I used Waffle Flower Beach Days dies, stencils and stamps along with a Hero Arts sentiment stamp to create this card.

Watch the process video below to learn how this card was made.

Cardbase: I used a purchased American size A2 (4 1/4×5 1/2-inches) kraft cardbase and matching envelope.

Postage Stamps: Using the stamps and stencils from the Waffle Flower Beach Days collection along with their Postage Collage die and stamp set, I created the beached themed postage collage seen in the video above. (See below Materials Used for all the ink colors used.)

Sentiments: “Thank you for your kindness” is from the Hero Arts Kindness stamp set.

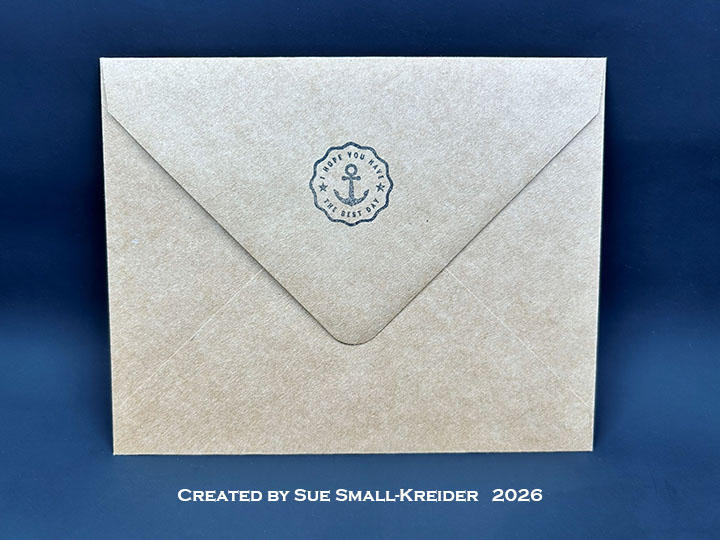
Envelope: The panel card fits into an A2 (4 1/4×5 1/2-inches) size envelope with the back flap stamped with an anchor seal “I hope you have the best day” in black.

___________________________________

Thank you for experiencing this blog post.

I hope this inspires you and makes you smile.

Please subscribe, like and leave comments 😊

Follow my YouTube channel, Instagram and Pinterest as well.

___________________________________

Disclaimer: Karen Burniston products are provided free of charge by the manufacturer for review and use. All other items were personally purchased. Compensated affiliate links used where or when possible, meaning I will receive a small percentage commission from these manufacturers at no cost to you. This will allow me to add more content to my YouTube channel and help out a lot. Thank you.

Materials Used:

Dies

  • Waffle Flower – Steel Craft Dies – Postage Collage

Stamps

  • Hero Arts- Clear Stamps – Kindness
  • Waffle Flower – Clear Stamps – Postage Collage Beach Days
  • Waffle Flower – Clear Stamps – Postage Collage

Stencils

  • Waffle Flower – Plastic Stencils – Postage Collage Beach Days

Papers

  • White Cardstock
  • Park Lane Paperie – A2 Cardbase & Envelope – Kraft

Ink

  • Memento – Fade-Resistant Dye Ink – Tuxedo Black
  • Pigma – Mircon 01 Fine Tip Pen – Black
  • Ranger – Tim Holtz – Distress Ink- Antique Linen, Blueprint Sketch, Fossilized Amber, Lumberjack Plaid, Salty Ocean, Spiced Marmalade

Adhesives

Tools

  • Die Cutting Machine
  • Scrapbook.com – Magic Mat
  • Stamping Block
  • Stamping Platform
  • Paperweight
  • Scissors
  • Sponge Daubers
  • Scrapbook.com – Mint Tape
  • Trinity Stamps – Pickup Stick Tool

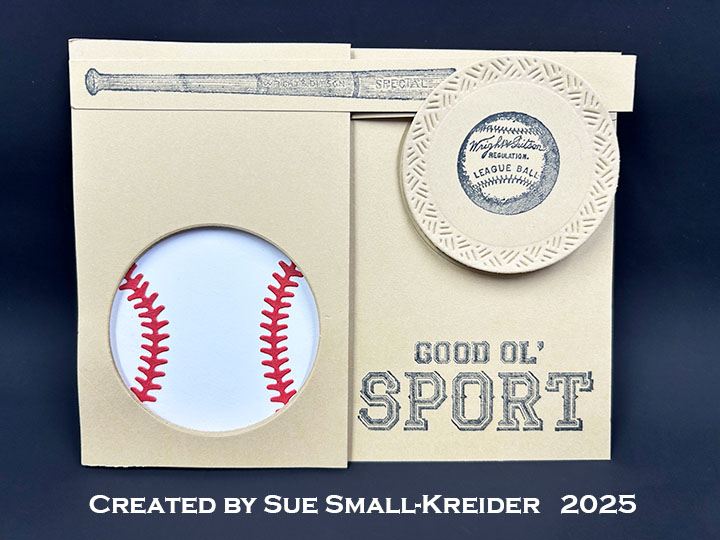
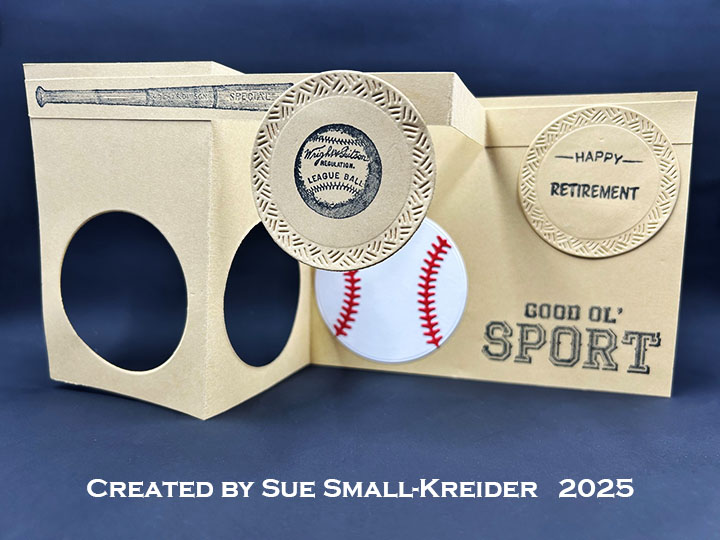
Double Z Baseball Retirement Card

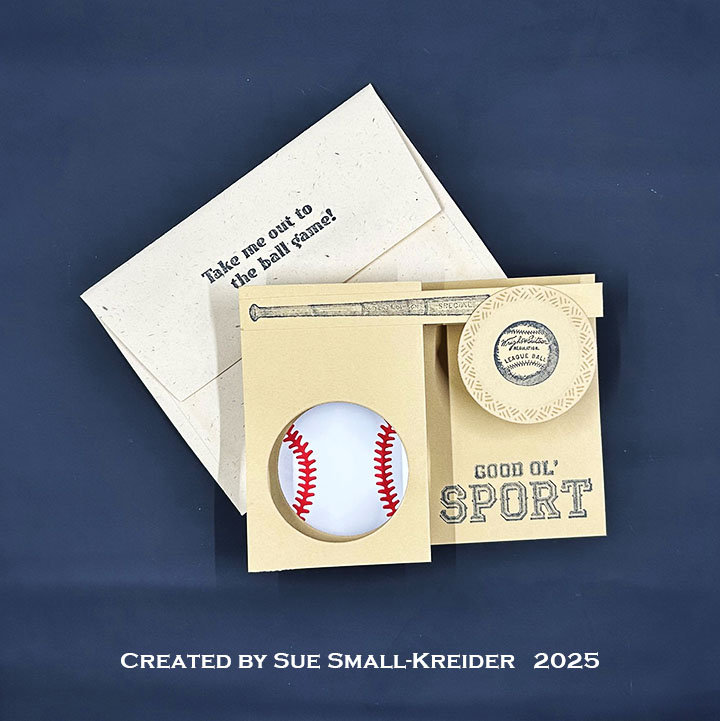
This card was made for Craft Roulette #299 whose parameters were: a double Z-fold card, Rudolph colors, optimistic element and plain circles. I used Karen Burniston dies and stamps as well as Waffle Flower dies and Graphic 45 stamps to create this card.

Watch the process video below to learn how this card was made.

Cardbase: Using a 4.25×11-inch sheet of tan cardstock, fold in half for a 4.25×5.5-inch cardbase. Fold the front flap in half again to form the z-fold. Using the second smallest crosshatch circle die in Karen Burniston’s Circles – Crosshatch die set, center the die over the front panel folded in half to cut through the two layers as shown in the video above. Save the two circles. Cut a half-inch by 11-inch long strip of the tan cardstock and fold in half. Fold one half of the strip again in half to make the second z-fold piece for the card. Stamp all the pieces as described below before assembling the card.

Baseball Equipment: Using the Graphic 45 Good Ol Sport set, stamp the baseball bat onto the long section of the 11-inch strip. Stamp one of the saved circles with the baseball stamp. From white cut out the largest circle in the Waffle Flower Stamps Baseball Dad die set. Cut the stitching from red. Glue the stitching onto the white circle to make it look like a baseball.

Sentiments: stamp “Happy Retirement” on the second save circle using Karen Burniston’s Fishing stamp set. From the Graphic 45 stamp set add “Good Ol’ Sport” to the bottom right corner of the card using black ink.

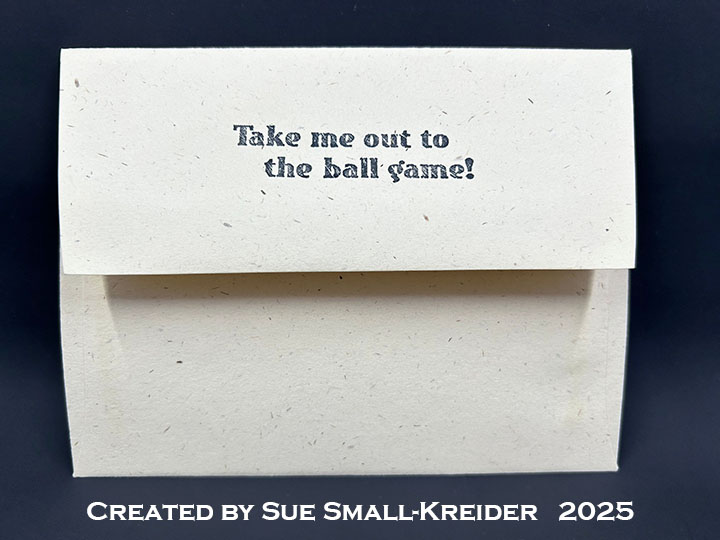
Envelope: The panel card fits into an A2 (4.25×5.5-inches) size envelope with the back flap stamped with “Take me out to the ball game!” from the Graphic 45 stamp set.

___________________________________

Thank you for experiencing this blog post.

I hope this inspires you and makes you smile.

Please subscribe, like and leave comments 😊

Follow my YouTube channel, Instagram and Pinterest as well.

___________________________________

Disclaimer: Karen Burniston products are provided free of charge by the manufacturer for review and use. All other items were personally purchased. Compensated affiliate links used where or when possible, meaning I will receive a small percentage commission from these manufacturers at no cost to you. This will allow me to add more content to my YouTube channel and help out a lot. Thank you.

Materials Used:

Dies

  • Karen Burniston in cahoots with Riley & Company – Circles – Crosshatch – 1057
  • Waffle Flower Stamps – Dies – Baseball Dad

Dies

Papers

  • Red, Tan and White Cardstock
  • Fraser Papers for William House – A2 Envelope – Genesis Text Milkweed Smooth

Ink

  • Memento – Fade-Resistant Dye Ink – Tuxedo Black
  • Pigma – Mircon 01 Fine Tip Pen – Black

Adhesives

Tools

  • Die Cutting Machine
  • Scrapbook.com – Magic Mat
  • Paper Trimmer
  • Scrapbook.com – Mint Tape

Cake Time Birthday Cards

Having just received the new Waffle Flower Cake Time Texture die and stencil set, I decide to make a batch of birthday cards.

I used purchased A2 (4.25×5.5-inch) plaid cardbases with white envelopes to start.

CARD

Front

  • Taking an 8.5×11-inch sheet of cream cardstock and cut into four 4.25×5.5-inch panels (I used 100 lb cardstock.)
  • Die-cut two of the panels in the center of panel with the texture die
Die-Cut Texture
  • Emboss the remaining panels using die-cutting machine’s embossing sandwich to emboss the die into the cardstock (I like the texture this gives to the panel, but it was harder to line-up the stencils.)
Embossed Texture
  • Using the five layered stencils, color the image with ink (I used a blue/orange/yellow color palette.)
  • Trim off the panel edges to the embossed die edge
  • Adhere to the center of card fronts (I used double-sided tape.)
  • Add black sentiment strips to front

Inside

  • Die-cut four mechanism arms using Karen Burniston’s Katherine Label Pop-Up L-shaped die from cream colored cardstock (I used 65 lb weight cardstock.)
  • Watch the assembly video located at the bottom of the linked page for the Katherine Label Pop-Up
  • Die-cut from white cardstock four of Karen Burniston’s Happy Birthday Shadows
  • Die-cut from blue cardstock four of Karen Burniston’s Happy Birthday
  • Glue the words to shadow
  • Stamp the verse from the Craft Roulette’s Funn Sentiments #01 inside the cardbase just below the center of the panel
  • Glue in the pop-up mechanism
  • Attach the “Happy Birthday” to the box pop-up making sure there are no catchpoints and that the sentiment stays inside the card when closed
  • Add glitter gloss to “Happy Birthday” and the word Glitter in the stamped verse

ENVELOPE

  • Stencil the envelope flap with the pennant using similar colors to the card
  • Stamp “HBD” over the stenciling using the Craft Roulette’s Funn Sentiments #01

___________________________________

Thank you for experiencing this blog post.

I hope this inspires you and makes you smile.

Please subscribe, like and leave comments 😊

___________________________________

Disclaimer: Karen Burniston products are provided free of charge by the manufacturer for review and use. All other items were personally purchased. Compensated affiliate links used where or when possible, meaning I will receive a small percentage commission from these manufacturers at no cost to you. This will allow me to add more content to my YouTube channel and help out a lot. Thank you.

Materials Used:

Dies

Stamps

  • Craft Roulette – Clear Stamps – Funn Sentiments #01

Stencils

  • Waffle Flower – Layering Stencils – Cake Time

Papers

  • Plaid Cardbase and Envelope
  • Blue, Cream and White Cardstock
  • Waffle Flower – Sentiment Strips – Cake Time

Ink

  • Catherine Pooler – Premium Dye Ink – All That Jazz, Blue Raspberry, Mandarin Spice, Sauna, Tiara
  • Nuvo – Aqua Shimmer Brush Marker – Glitter Gloss

Adhesives

Tools

  • Die Cutting Machine
  • Paper Trimmer
  • Stamping Platform
  • LDRS – Stampendable Stamping Tool
  • Scissors
  • Paper Masking Tape

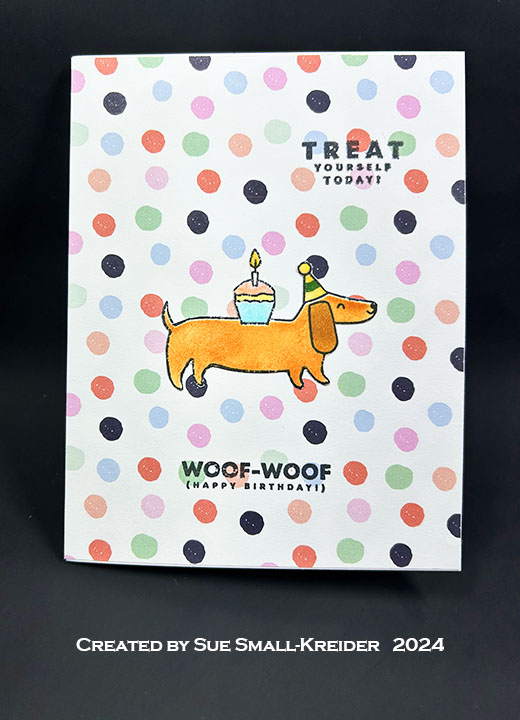
Dog Gone Cute Birthday Cards

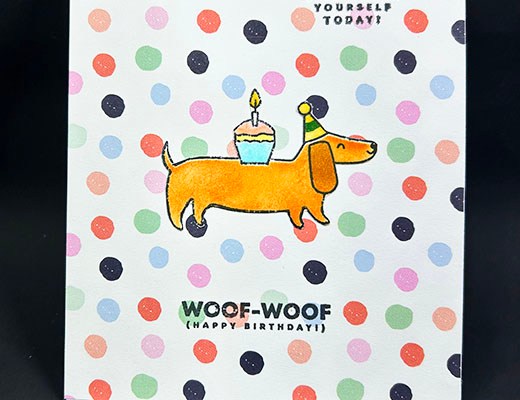
I needed some birthday cards for dog lovers quickly, so I used Waffle Flower’s Birthday Puppies stamps and stencil sets along with Craft Roulette’s Funn Sentiments #01 stamp set and some patterned paper.

Watch the process video to see how I made these cards.

Cardbase: I cut an 8.5×11 sheet of white 65lb. cardstock in half to create two 5.5×8.5-inch rectangles that I fold in half to make side-fold A2 cardbases.

Sentiments: The front sentiments β€œTreat yourself today!” and β€œWoof-Woof (Happy Birthday)” are part of Waffle Flower’s Birthday Puppies stamps. The inside sentiments come from Craft Roulette’s Funn Sentiments #01 stamp set.

Envelope:  The card fits into an A2 (4.25x 5.5-inches) size envelope.

___________________________________

Thank you for experiencing this blog post.

I hope this inspires you and makes you smile.

Please like and leave comments 😊

___________________________________

Disclaimer: Karen Burniston products are provided free of charge by the manufacturer for review and use. All other items were personally purchased. Compensated affiliate links used where or when possible, meaning I will receive a small percentage commission from these manufacturers at no cost to you. This will allow me to add more content to my YouTube channel and help out a lot. Thank you.

Materials Used:

Stamps

  • Craft Roulette – Clear Stamps – Funn Sentiments #01
  • Fairy Hugs – Clear Stamps – Paw Prints
  • Waffle Flower – Clear Stamps –  Birthday Puppies

Stencil

  • Waffle Flower – Plastic –  Birthday Puppies

Papers

  • Recollections – 8.5×11 65 lb. Cardstock – White
  • Simple Stories – 6×8 Double-Sided Cardstock – Winter Wonder
  • Fraser Papers for William House – A2 Envelope – Genesis Text Milkweed Smooth

Ink

  • Memento – Fade Resistant Dye ink – Tuxedo Black
  • Ranger – Tim Holtz – Distress Ink- Black Soot, Dried Marigold, Fossilized Amber, Rusty Hinge, Saltwater Taffy, Salvaged Patina, Walnut Stain
  • Nuvo – Aqua Shimmer Brush – Glitter Gloss
  • Pigma – Mircon 005 Fine Tip Pen – Black
  • Sharpie – Permanent Marker – Ultra Fine Tip – Green and Red
  • Stampin’ Up – Stampin’ Blends Marker – Light Daffodil Delight

Adhesives

Tools

  • Paper Trimmer
  • Stamping Platform
  • LDRS – Stampendable Stamping Tool
  • Stamping Blocks
  • Scissors
  • Sponge Daubers
  • Gel Plate
  • Paper Masking Tape

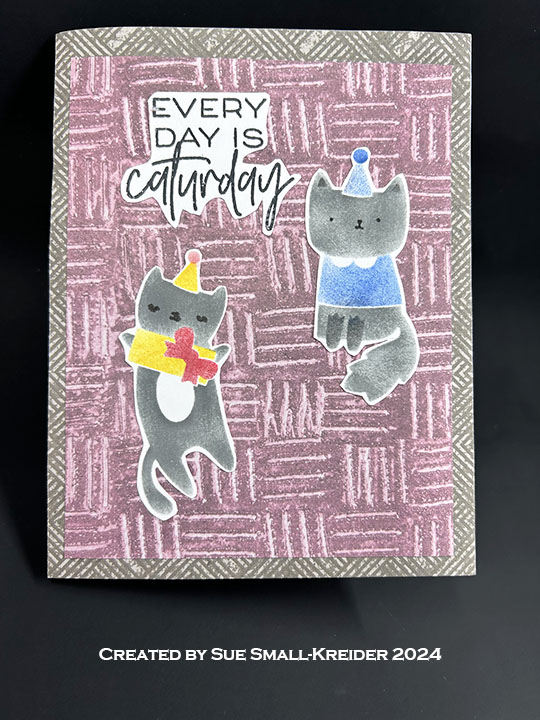
A Purrfect Birthday Pop-Up Card

This is the fourth in a series of cards that have shelves as the main element of the card.

This card was made with Waffle Flower dies, stamps and stencils.

Watch the process video to see how I made this card.

Cardbase: The outer cardbase is an A2 (4.25×5.5-inches) made from an 8.5×5.5-inch rectangle of lightweight white cardstock.  The outside is covered with panels of decorative paper.

Pop-Out Shelves: For the popout shelves cut an 8.5×5.5-inch rectangle of either patterned cardstock or lightweight cardstock with decorative paper covering it. Mark the center of the rectangle at 4.24-inches at the top and bottom of the cardstock and place the Inside Pop-Up Shelves die’s dotted center line on the center marks. Run through a die cut machine and work the fold-lines to make the shelves pop-out. Die-cut just the shelves from a woodgrain paper. Cut the shelf sections out and glue to the large pop-up panel. Decorate with plants from the Shelf Add-Ons die set.

Cats: Add to the shelves, cats die-cut from black cardstock using the Cattitude die set. Stencil cats using the Birthday Kitties Stencil set onto white cardstock and fussy cut out for use on card front.

Sentiments: Using the Purrfect Sentiments stamp set, stamp β€œEveryday is caturday” on white cardstock and β€œHave a purrect birthday” inside the card. Add β€œYou’re the cat’s meow” diecut Subsentiments Cat to the inside shelves.

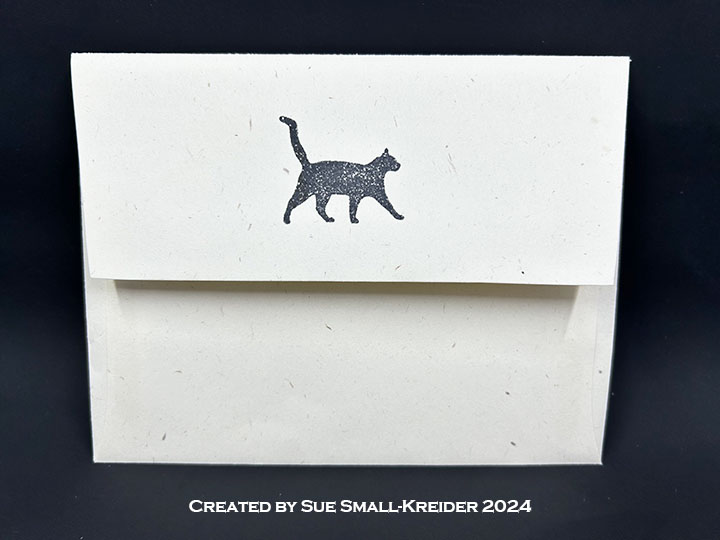
Envelope: The card fits into an A2 (4.25x 5.5-inches) size envelope which has a cat stamped on its back flap from the Cattitude stamp set.

___________________________________

Thank you for experiencing this blog post.

I hope this inspires you and makes you smile.

Please like and leave comments 😊

___________________________________

Disclaimer: Karen Burniston products are provided free of charge by the manufacturer for review and use. All other items were personally purchased. Compensated affiliate links used where or when possible, meaning I will receive a small percentage commission from these manufacturers at no cost to you. This will allow me to add more content to my YouTube channel and help out a lot. Thank you.

Materials Used:

Dies

  • Waffle Flower – Steel Craft Die – Cattitude
  • Waffle Flower – Steel Craft Die – Inside Pop-Up Shelves
  • Waffle Flower – Steel Craft Die – Shelf Add-Ons

Stamps

  • Waffle Flower – Clear Stamps – Cattitude
  • Waffle Flower – Clear Stamps – Purrfect Sentiments

Stencil

  • Waffle Flower – Plastic – Birthday Kitties

Papers

  • Recollections – 8.5×11 65 lb. Cardstock – White
  • Stampin’ Up – 12×12 Designer Series Paper – Earthen Elegance
  • Black, Greens and Yellow Cardstock
  • Fraser Papers for William House – A2 Envelope – Genesis Text Milkweed Smooth

Ink

  • Memento – Fade Resistant Dye ink – Tuxedo Black
  • Ranger – Tim Holtz – Distress Ink- Black Soot, Fossilized Amber, Hickory Smoke, Lumberjack Plaid, Prize Ribbon
  • Pigma – Mircon 05 Fine Tip Pen – Black
  • Sakura – Gelly Roll Pen – Medium – White
  • Sharpie – Permanent Marker – Fine Tip – Red
  • Sharpie – Permanent Marker – Ultra Fine Tip –Blue, Green, Red

Adhesives

Tools

  • Die Cutting Machine
  • Paper Trimmer
  • Bone Folder
  • Stamping Blocks
  • Scissors
  • Pencil
  • Ruler
  • Sponge Daubers
  • Paper Masking Tape

Miscellaneous

  • Waffle Flower – Subsentiments Cat – Diecuts

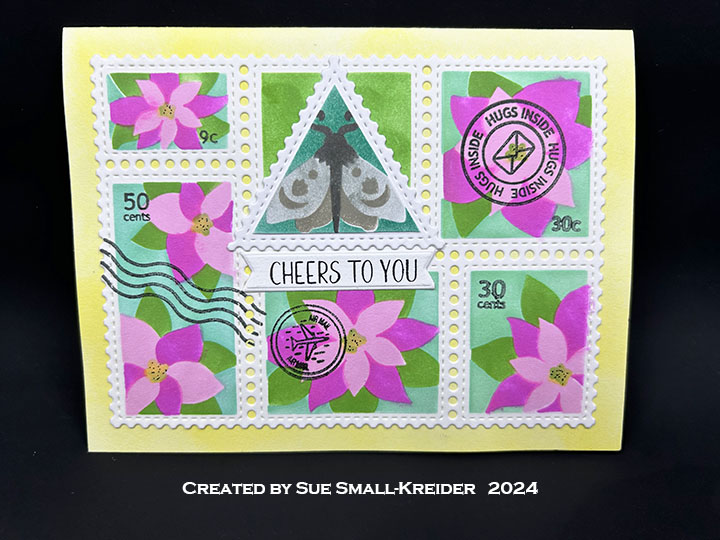
A Jungle Postage Stamp Thank You Card

This card was made for Craft Roulette #240 whose parameters included a card for a helper, cereal box colors, jungle element, and a paper sack.

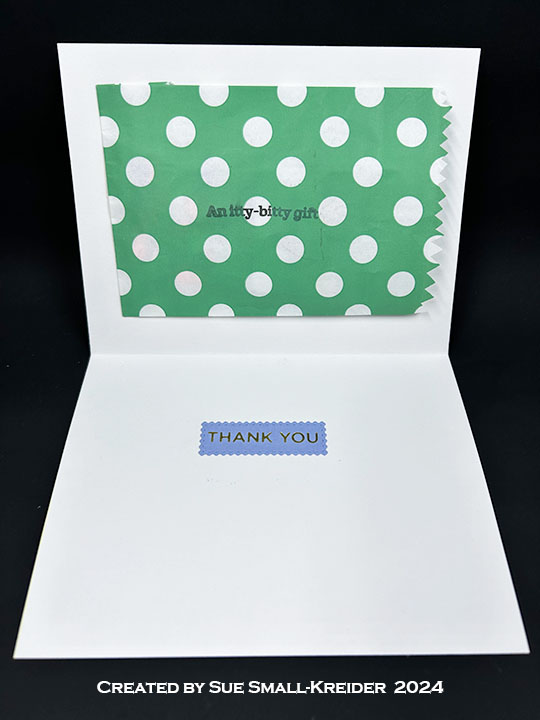
I choose to make a thank you card with a paper sack for an itty-bitty gift, stenciling tropical flowers and a large moth that you might see in a jungle. (Please note that after I completed the process video, I decided to add some cancellation stamps to the front of the card. So they are not mentioned in the video, but they are Waffle Flower stamps.)

Watch the process video to see how I made this card.

Cardbase:  Cut a 5.5 x 8.5-inch piece of white cardstock and fold in half to form a 4.25×5.5 top-fold A2 size card.

Sentiments:  The front sentiment β€œCheers to you” is from a BetterPress plate and die set while the inside foiled β€œThank You” is a Spellbinders Glimmer plate die cut with a Waffle Flower Postage Collage rectangle die. The β€œItty-bitty gift stamped on the paper sack is from the Craft Roulette Stamp set.

Envelope:  The card fits into an A2 (4.25x 5.5-inches) size envelope with an extra moth stamp on the back flap.

___________________________________

Thank you for experiencing this blog post.

I hope this inspires you and makes you smile.

Please like and leave comments 😊

___________________________________

Disclaimer: Karen Burniston products are provided free of charge by the manufacturer for review and use. All other items were personally purchased. Compensated affiliate links used where or when possible, meaning I will receive a small percentage commission from these manufacturers at no cost to you. This will allow me to add more content to my YouTube channel and help out a lot. Thank you.

Materials Used:

Dies

  • Spellbinders – Glimmer Plate – Everyday Sentiments – GOM-FEB19
  • Spellbinders – BetterPress Plate – Cheers To You – BP-162
  • Waffle Flower – Steel Craft Die – Postage Collage Die
  • Waffle Flower – Steel Craft Die – Postage Collage Moth Die

Stamps

  • Craft Roulette – Clear Stamps – Funn Sentiments #01
  • Waffle Flower – Clear Stamps – Postage Collage

Stencil

  • Waffle Flower – Plastic Stencil – Postage Collage Coloring Stencil
  • Waffle Flower – Plastic Stencil – Postage Collage Moth Stencil
  • Waffle Flower – Plastic Stencil – Postage Collage Poinsettia Stencil

Papers

  • White Cardstock
  • Fraser Papers for William House – A2 Envelope – Genesis Text Milkweed Smooth

Ink

  • Simon Says Stamp – Premium Dye Ink – Mint
  • Simon Says Stamp – Pawsitivity Saturated Ink – Aegean, Bubblegum, Fairway, Lemonade, Sweets
  • Stampin’ Up – Classic Ink Pad – Basic Grey, Gray Granite, Smoky Slate
  • Pigma – Mircon 01 Fine Tip Pen – Black

Adhesives

Tools

  • Gel Plate
  • Die Cutting Machine
  • Spellbinders – BetterPress Letter Press System
  • Spellbinders – Glimmer Hot Foil System
  • Paper Trimmer
  • Bone Folder
  • Stamping Blocks
  • Scissors
  • Craft Mat
  • Paper Masking Tape
  • Blending Brush
  • Detail Blending Brushes (Altenew & Kat Scrappiness)

Reindeer Farm Winter Holidays Card

This card was made for Craft Roulette #239 whose parameters included an interactive card, picnic colors, farm element, and paper strips.

Watch the process video to see how I made this card.

Cardbase:  I used a purchased A6 (4.5 x 6.25-inch) cardbase and envelope.

Stable & Reindeer:  Using the Reindeer Stable die set by Scrapping Cottage, cut the stable base from red cardstock and inked the edges with brown ink. All the other pieces were cut from white cardstock and colored. The weathervane was cut twice and glued together to reinforce the tiny piece. I made my own wire wobbler springs using thin florist wire and gluing them in place.

Flying Reindeer Mechanism:  Using dies by Whimsy Stamps kinetic collection, I eventually figured out how to make the reindeer fly over the stable using the die cut paper strips and foam dots. (Watch the tutorial to see how I made it.)

Snow:  Avry Elle white ink spray was used to cover the card with splatters of snow. (I had to color over the facial details and shading on the reindeer after spraying.) The trees have white gel pen to place snow accumulation at the end of the branches.

Sentiments:  All the winter sentiments stamped in black ink are from Waffle Flower. The β€œPull” and arrow are tiny stamps from My Favorite Things.

Envelope:  The card fits into an A6 (4.5x 6.25-inches) size envelope With β€œLet It Snow” on the back flap.

___________________________________

Thank you for experiencing this blog post.

I hope this inspires you and makes you smile.

Please like and leave comments 😊

___________________________________

Materials Used:

Dies

  • Scrapping Cottage – Cottage Cutz – Reindeer Stable
  • Whimsy Stamps – Metal Craft Dies – Kinetic Curved Hills
  • Whimsy Stamps – Metal Craft Dies – Kinetic Curved Basics
  • Whimsy Stamps – Metal Craft Dies – No See Kinetic Basics

Stamps

  • My Favorite Things – Clear Stamps –  Interactive Labels
  • Waffle Flower – Clear Stamps – Star Snowflake Sentiments

Papers

  • Craft Consortium – A4 Double-Sided Solid Colored Cardstock – Little Robin Redbreast
  • Fun Stampers Journey – 8.5×11 Cardstock – Cranberry Bliss
  • Black and White Cardstock
  • Park Lane Paperie – A6 Cardbase and Envelope – White

Ink

  • Avery Elle – White Spray Ink
  • Memento – Dye Ink – Tuxedo Black
  • Ranger – Tim Holtz – Distress Ink- Gathered Twigs
  • Creative Craft Products – Alcohol Markers – Dual Tipped –WG 3 Warm Grey
  • Pigma – Mircon 005 Fine Tip Pen – Black
  • Sakura – Gelly Roll Pen – Medium – White
  • Sharpie – Permanent Marker – Fine Tip – Black, Green
  • Sharpie – Permanent Marker – Ultra Fine Tip – Black, Red
  • Stampin’ Up – Stampin’ Blends – Dark & Light Daffodil Delight
  • Stampin’ Up – Stampin’ Write – Chocolate Chip

Adhesives

Tools

  • Die Cutting Machine
  • Paper Trimmer
  • Stamping Platform
  • LDRS – Stampendable Stamping Tool
  • Stamping Blocks used as paperweights
  • Scissors
  • Pencil
  • Craft Clip
  • Scrap Paper to color on
  • Sponge Daubers
  • Circle Hole Punch – 1-inch wide
  • Paper Masking Tape
  • We R Memories – QuickStick

Miscellaneous

  • Florist Wire – Brown