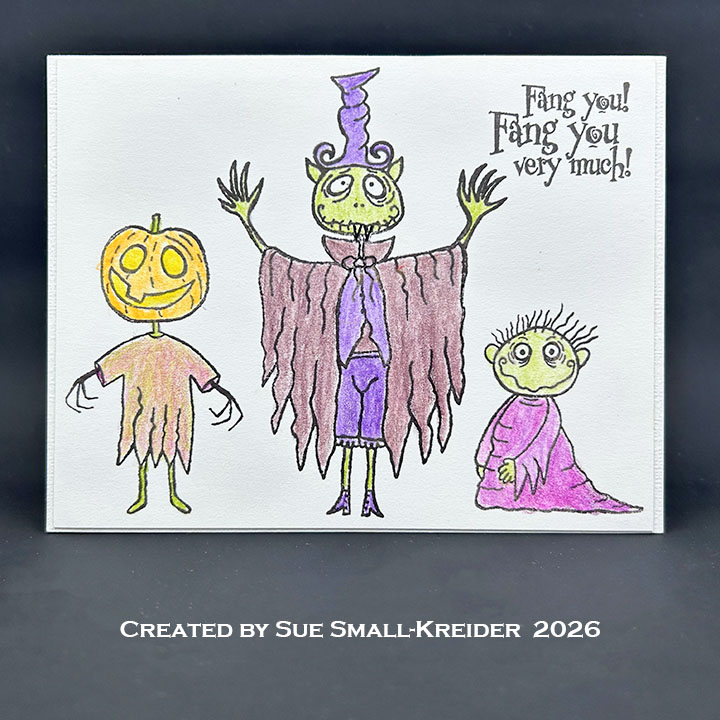
Pumpkin Thank You Card

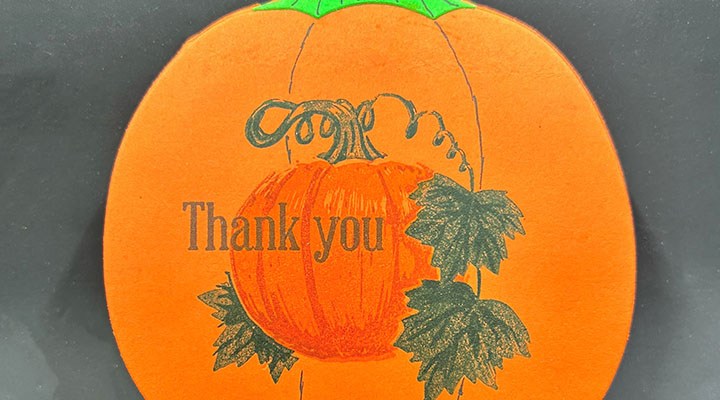
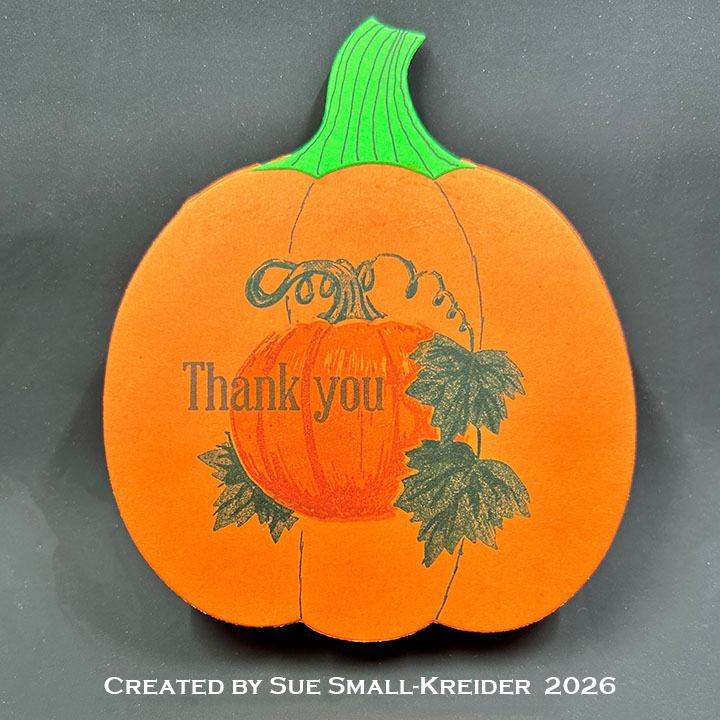
I needed a Halloween themed thank you card, and this is the 4.5×3.75-inch card I made using Scrapbook.com shape dies and retired stamps from Hero Arts and Pajama Crafter Stamps.

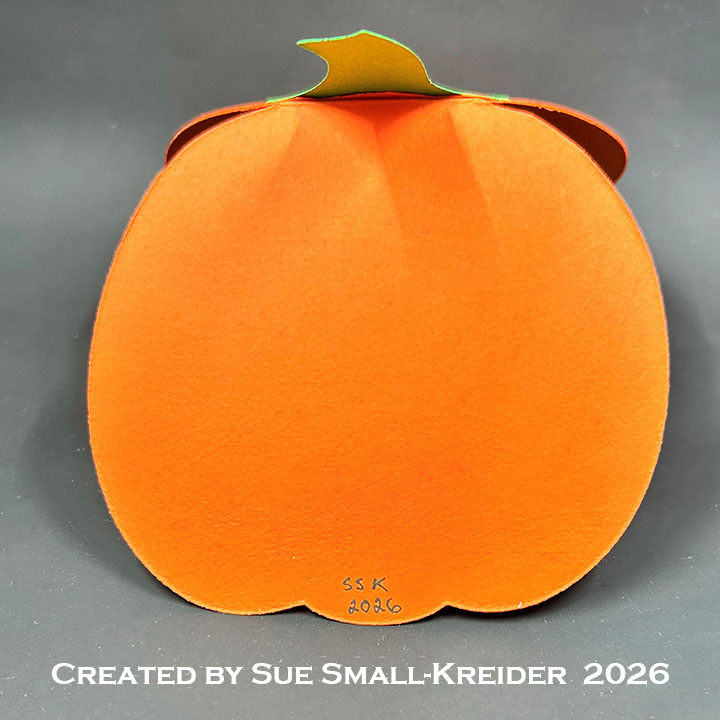
Cardbase: I folded an 4.25×11 sheet of orange cardstock at 4.5-inches and cut out pumpkin shaped card using the second largest die in the Scapbook.com Nested Pumpkins shape dies. The card is hinged at the top by placing the top edge of the die above the fold.

Card Front: From the remain orange cardstock, cut a full pumpkin for the card front. Using the Hero Arts Color Laying Pumpkin set, stamp the pumpkin on the card front. Use a lighter orange for the pumpkin base and a darker orange for the details. Do the same for the vining leaves with two shades of green. Die cut a green stem using the Scapbook.com Nested Pumpkins shape dies and glue in place. Glue card front onto the card base matching up the edges.Using a fine-tipped black pen, draw on the ridges in the pumpkin stem and on the pumpkin base.

Sentiments: “Thank You” is stamped using a dark brown ink and the Hero Arts Color Laying Pumpkin set.

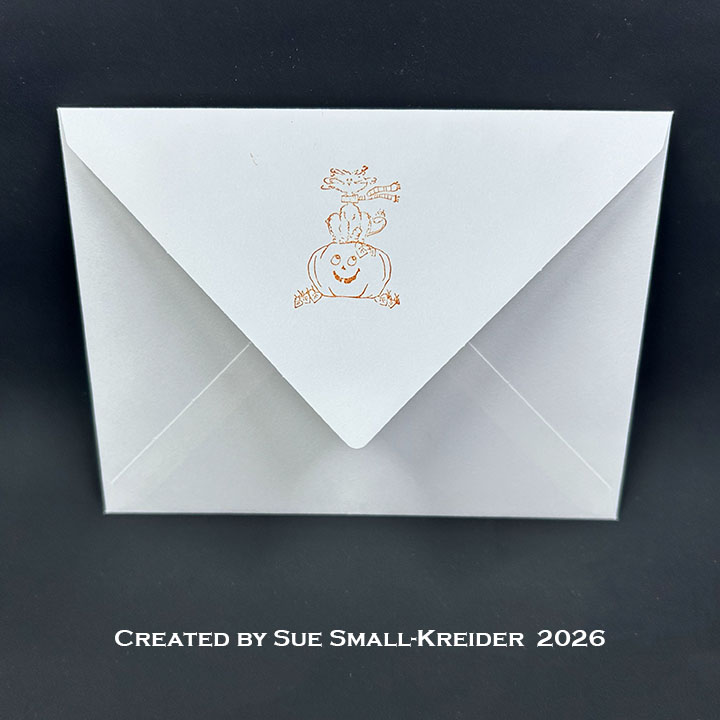
Envelope:  The card fits into an A2 (4.25x 5.5-inches) size envelope with an orange cat on a pumpkin from Pajama Crafter Stamps.

___________________________________

Thank you for experiencing this blog post.

I hope this inspires you and makes you smile.

Please subscribe, like and leave comments 😊

Follow my YouTube channel, Instagram and Pinterest as well.

___________________________________

Disclaimer: Karen Burniston products are provided free of charge by the manufacturer for review and use. All other items were personally purchased. Compensated affiliate links used where or when possible, meaning I will receive a small percentage commission from these manufacturers at no cost to you. This will allow me to add more content to my YouTube channel and help out a lot. Thank you.

Materials Used:

Dies

Stamps

Papers

  • Green and Orange Cardstock
  • Spellbinders Merry Moments Holiday Kit – A2 Cardbase and Envelope – White

Ink

  • Memento – Fade Resistant Dye ink – Espresso Truffle
  • Stampin’ Up – Classic Ink Pad – Emerald Green, Pumpkin Pie, Shaped Spruce, Terracotta Tile
  • Pigma – Mircon 01 Fine Tip Pen – Black

Adhesives

Tools

Pumpkin Shaker Halloween Card

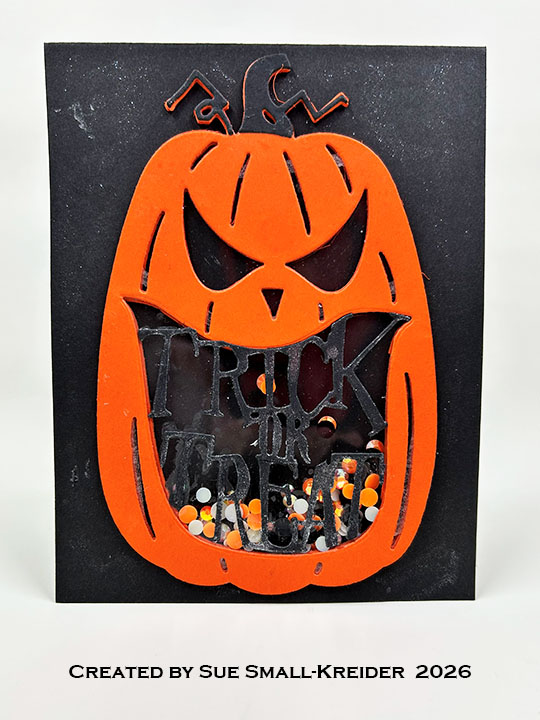
I recently purchased a Scrappy Tails Halloween die set to make a Jackolantern Shaped Card. This was my first go at making a shaker card with this die set.

Cardbase: I used an 11×4.25 rectangles of heavy black cardstock that was scored and folded to form a 4.25×5.5-inch top-fold card. Decorate the card front with glitter gloss as needed.

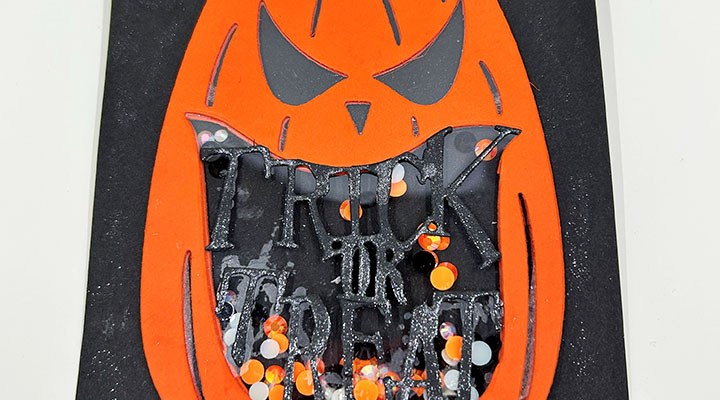
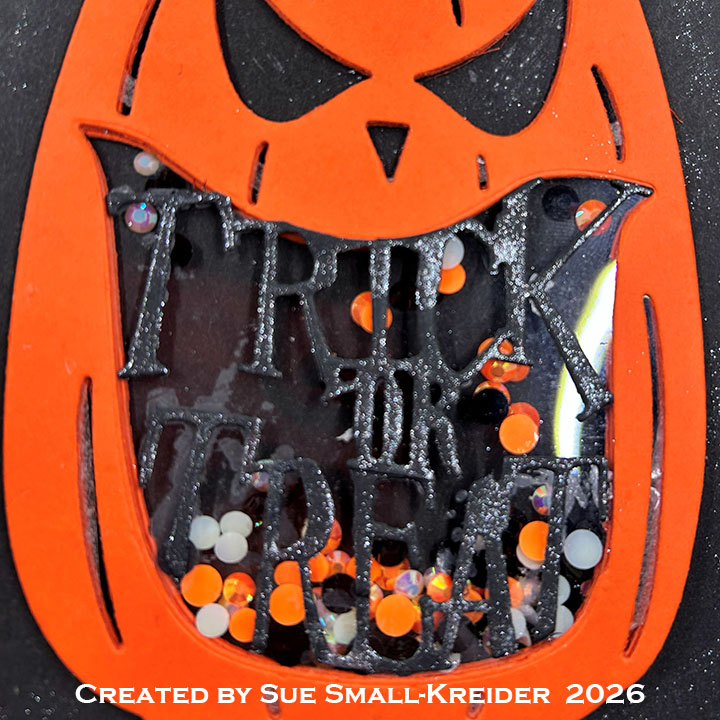
Jack O’lantern Shaker: The pumpkin was cut four times from heavy orange cardstock using the large pumpkin and mouth dies in the Scrappy Tails Jackolantern Shaped Card set. After weeding out the face and vertical ridge lines, a piece of acetate was sandwiched between the back of one pumpkin and the front of another with double-sided tape. The excess acetate was trimmed away. Next, the remaining two pumpkins were glued to the back of the other pumpkins. From black cardstock cut the stem, vines and the sentiment “Trick or Treat” using the same die set. Brush glitter gloss over the words and let dry before gluing onto the mouth opening. Position the pumpkin on card front and note where the mouth opening is. remove pumpkin and place a small quantity of shaker elements in the mouth area on the card front. Add glue to the back of the pumpkin and adhere to the card front trapping the shaker elements in the mouth section. Add a weight over the pumpkin until glue drys.

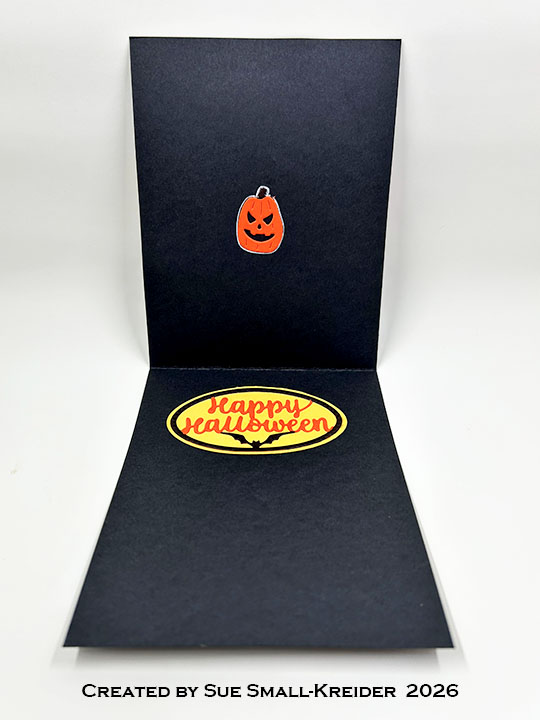
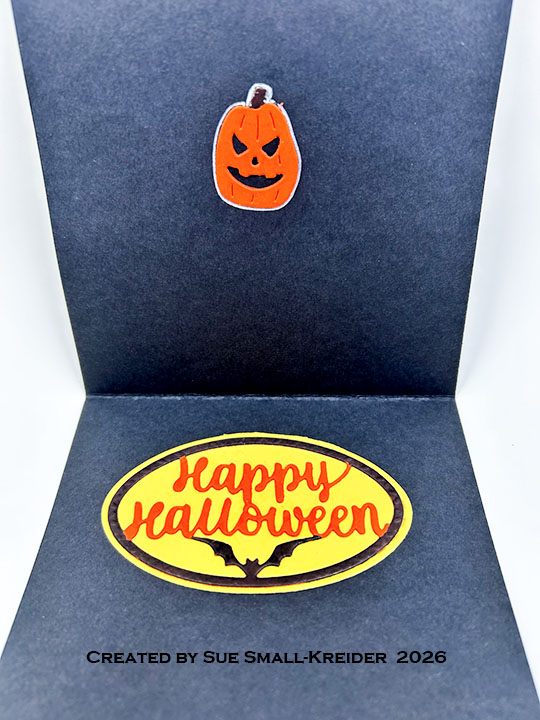
Sentiment: The inside sentiment uses my favorite Karen Burniston “Happy Halloween” from her Halloween Charms die set. (I cut a backing oval from yellow using an unknown die from my stash cut in yellow. Then I cut the charm die from orange and color the frame and bat black before gluing the pieces together.) The inside pumpkin (outlined in white gel pen) and the front “Trick or Treat” sentiment are from the Jackolantern Shaped Card die set.

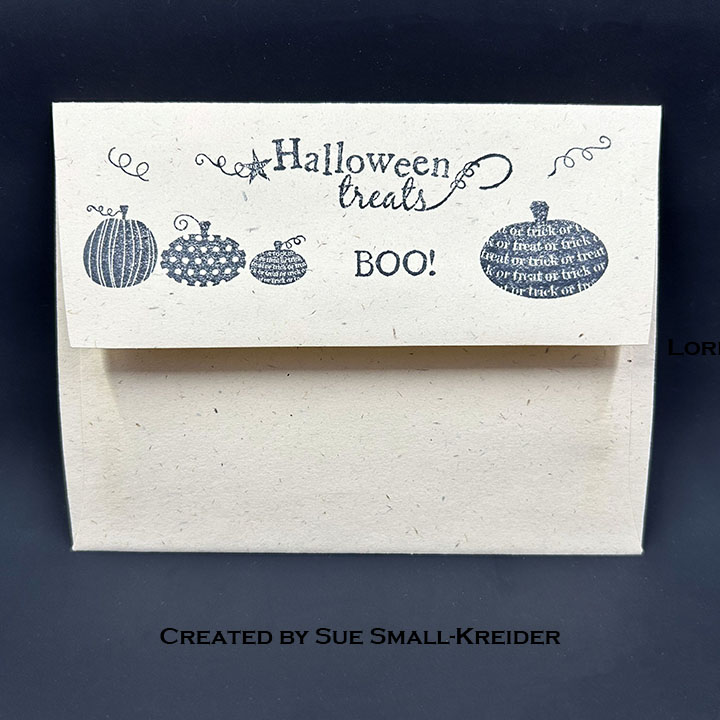
Envelope: The card fits into an A2 size envelope with the a Halloween themed sentiment stamped on the back flap using My Favorite Things Primitive Pumpkins stamp set.

___________________________________

Thank you for experiencing this blog post.

I hope this inspires you and makes you smile.

Please subscribe to the email notices, like and leave comments 😊

Follow my YouTube channel, Instagram and Pinterest as well.

___________________________________

Disclaimer: Karen Burniston products are provided free of charge by the manufacturer for review and use. All other items were personally purchased. Compensated affiliate links used where or when possible, meaning I will receive a small percentage commission from these manufacturers at no cost to you. This will allow me to add more content to my YouTube channel and help out a lot. Thank you.

Materials Used:

Dies

Stamps

  • My Favorite Things – Clear Stamps – Primitive Pumpkins


Papers

  • Grafix – 8.5×11 Dura-Lar Acetate .005 – Clear Film
  • Black, Orange and Yellow Cardstock


Ink


Adhesives


Tools

Miscellaneous

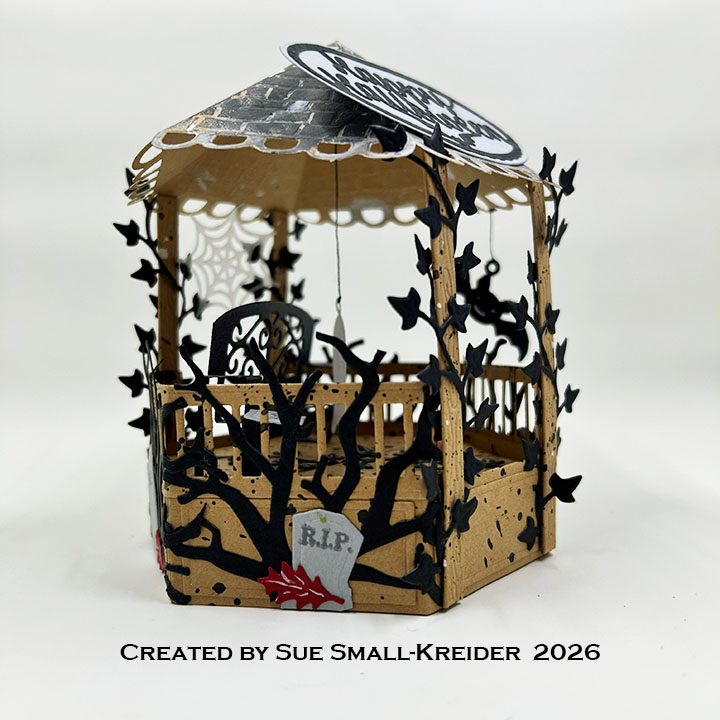
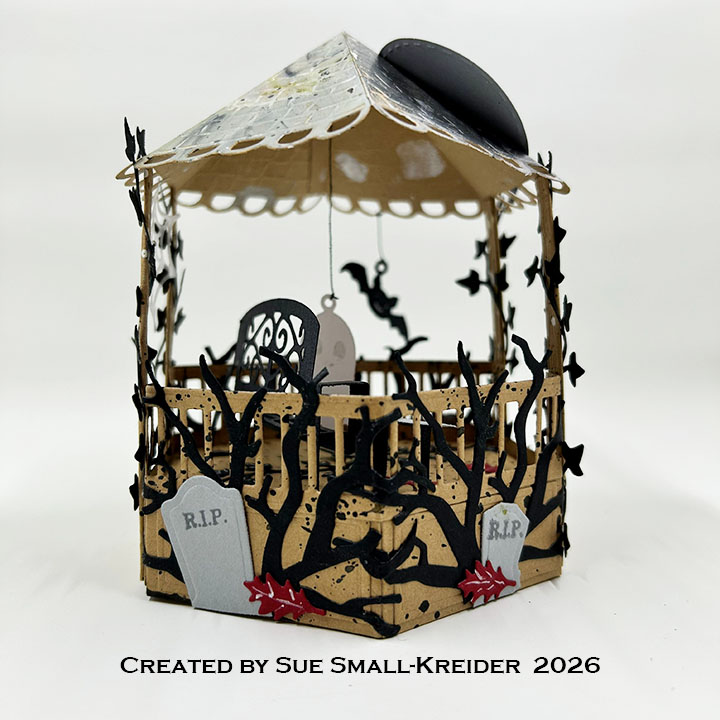
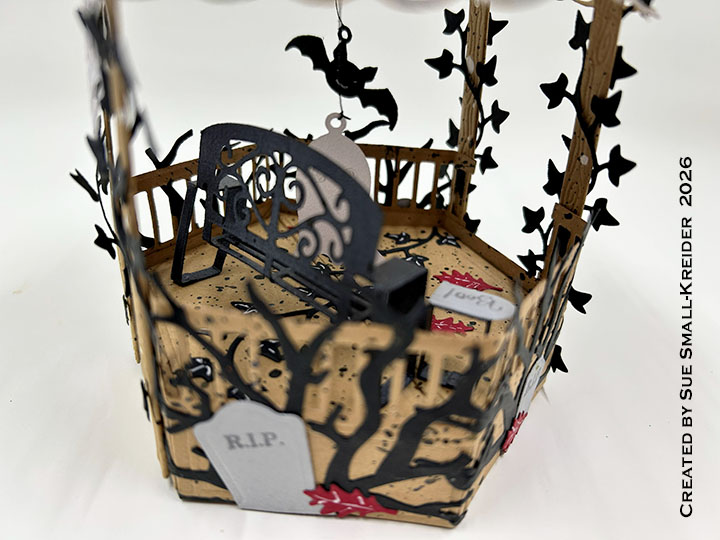
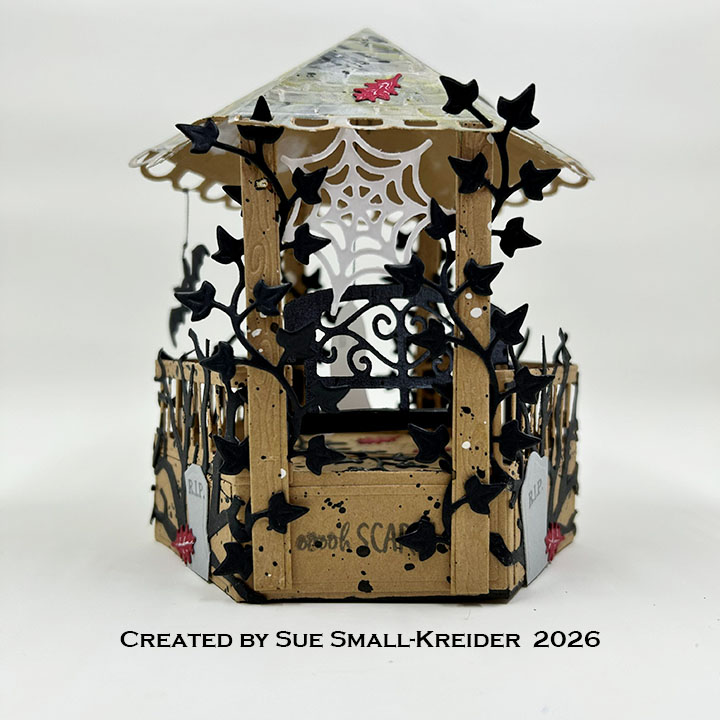
Haunted Gazebo Pop-Up Card

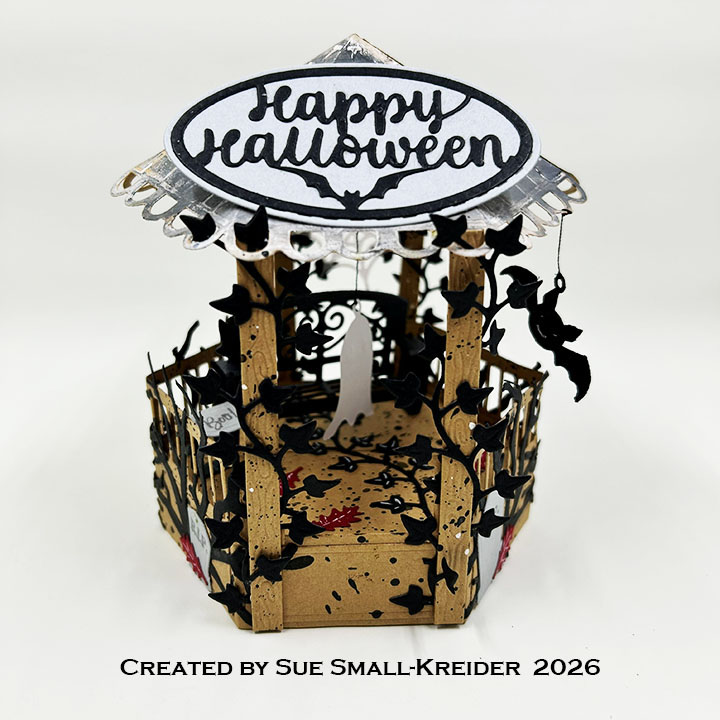
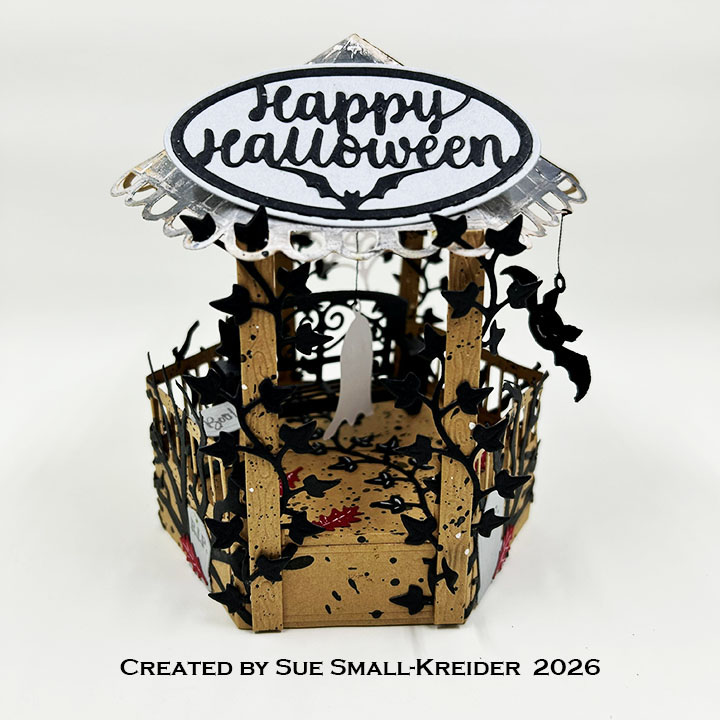
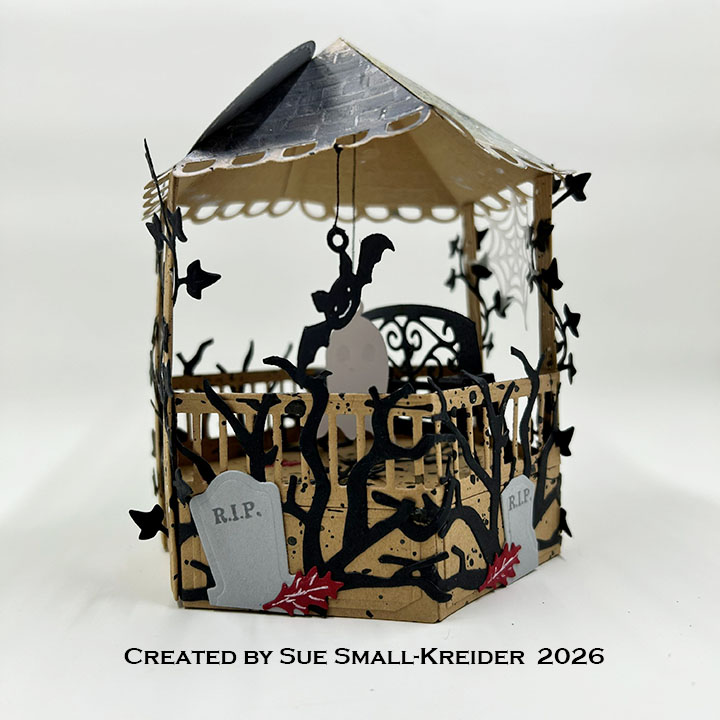
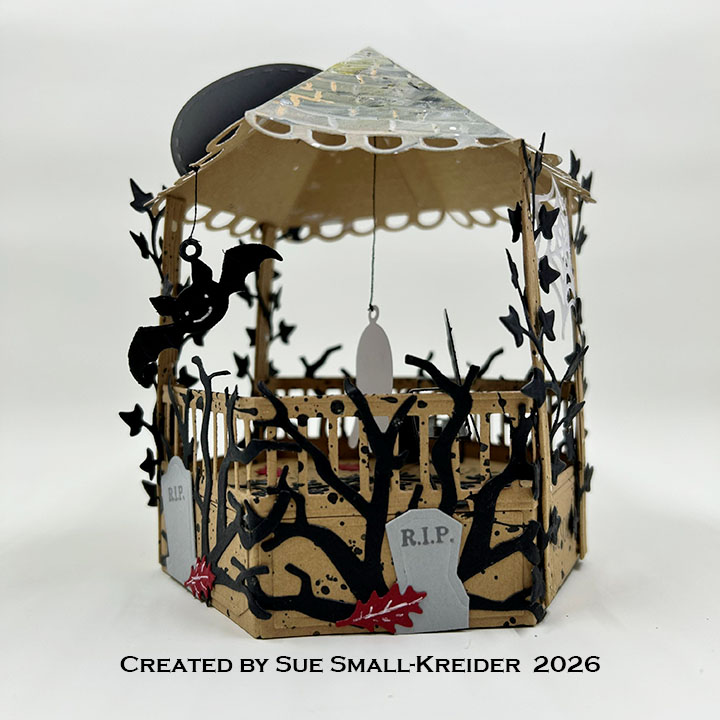
It’s time for Sneak Peek Week for Karen Burnistons July 2026 release of ten new die sets and five new stamp sets. This pop-up Halloween card features the new Gazebo Stage Add-Ons and Little Bench Pop-Up as well as the previously released Tree Pop-Up, Halloween Scene, Halloween Charms, and Stage Pop-Up. New dies and stamps will be available on July 23, 2026 on Karen Burniston’s website.

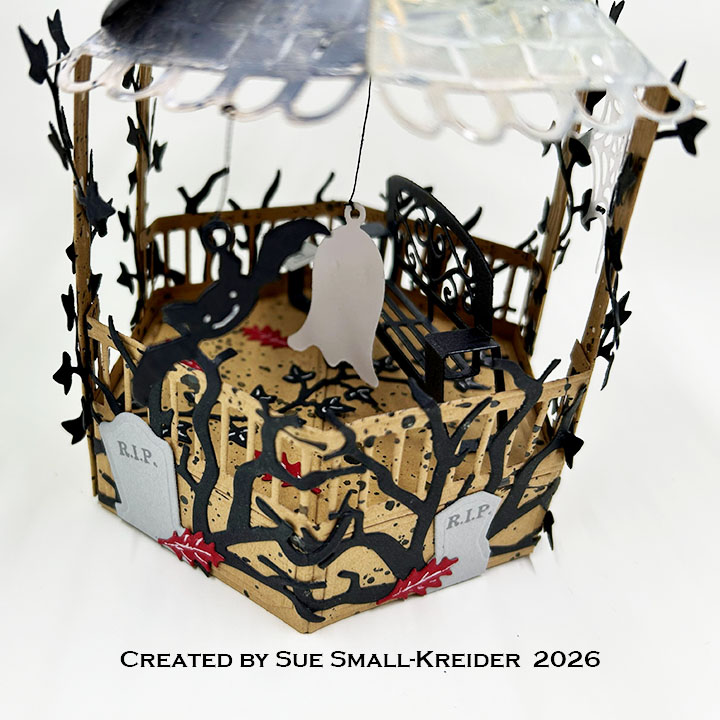
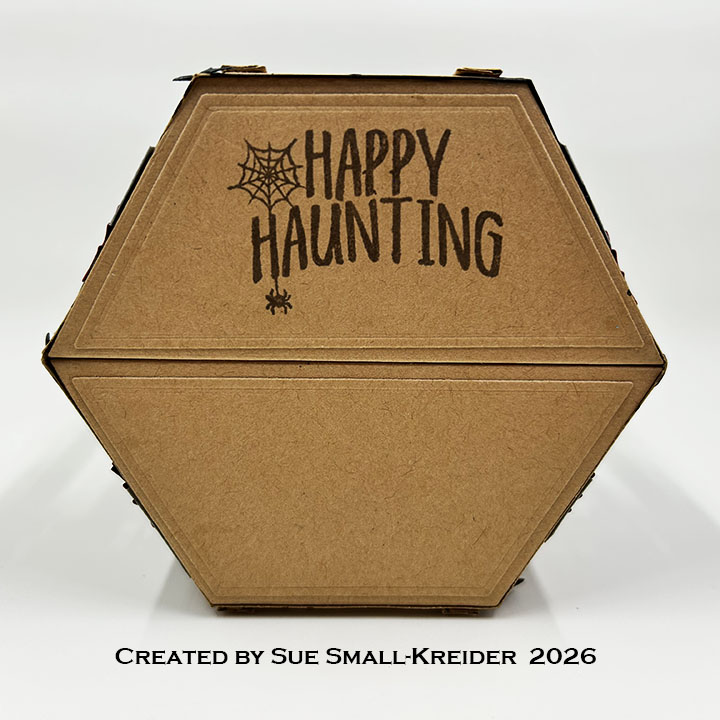
Stage Pop-Up Base: (Watch the assembly video at the bottom of the linked page for Stage Pop-Up.) Using the Stage Pop-Up die set and a medium weight kraft cardstock, cut two of the large stage pieces, two of the side strips, and four of the polygon decorator shapes. Assemble stage. Splatter drops of black, brown and white paint onto stage. Stamp sentiments before adding to the base.

Bench and Table: Using the Little Bench Pop-Up set, cut the bench from a black sparkle cardstock and fold as shown on the packaging and glue in place with the bench on one side of the Stage Pop-Up center fold and the table on the other. (Watch the assembly video for the Family Room Pop-Up to see how bench and table /sofa and chair are added to base.) I used a tiny tombstone with “Boo!” stamped on it for the table top.

Gazebo Stage Add-Ons: Using the Gazebo Stage Add-Ons set, cut four of the woodgrain posts and two railings from kraft cardstock. Cut two of the scalloped roof pieces from kraft cardstock. Paint the roof with white, black and brown paints. Assemble the gazebo as shown on the packaging – adding the two posts to each roof section and then attaching the roof sections together. Cut four of the vine die from the Little Bench Pop-Up set in black. Weave the vine decorations around the four posts before gluing posts to the stage base.

Ghost, Spiderweb and Bat: From the Halloween Charms, I cut the ghost and bat charms. The ghost and spiderweb are cut from pearlescent vellum which shimmers. The spiderweb is from the Halloween Scene set. Thread was used to suspend the ghost and bat from the roof.

Tombstones and Bushes: Cut four trees from black using the Tree Pop-Up die. Trim off trunks of trees and add to the railing sides of gazebo. From the Halloween Scene set, cut two sets of tombstones from gray cardstock and stamp “R.I.P.” from the Halloween Phrases stamp set. Trim the tombstones apart and glue onto sides. Add red oak leaves cut from the Tree Pop-Up to tombstone bases.

Sentiments: “Happy Haunting” ” Boo!” “ooooh SCARY!” is from the Halloween Phrases stamp set. The oval “Happy Halloween” is cut using the Halloween Charms die set.

Envelope:  The card fits into a catalog (6×9-inches) size envelope.

___________________________________

Thank you for experiencing this blog post.

I hope this inspires you and makes you smile.

Please subscribe, like and leave comments 😊

Follow my YouTube channel, Instagram and Pinterest as well.

___________________________________

Disclaimer: Karen Burniston products are provided free of charge by the manufacturer for review and use. All other items were personally purchased. Compensated affiliate links used where or when possible, meaning I will receive a small percentage commission from these manufacturers at no cost to you. This will allow me to add more content to my YouTube channel and help out a lot. Thank you.

Materials Used:

Dies

Stamps

Papers

  • Concord & 9th – 8.5×11 Cardstock – Dove
  • Lawn Fawn – 8.5×11 Vellum – Pearlescent
  • Recollections – 8.5×11 65 lb. Cardstock – Kraft
  • Seguras – 5.5×4.25 105lb Cardstock – Anthracite
  • Black and Red Cardstock
  • Catalog (6×9) Envelope – White

Ink

  • Memento – Fade Resistant Dye ink – Gray Flannel, Rich Cocoa
  • Pigma – Mircon 005 Fine Tip Pen – Black
  • Sakura – Gelly Roll Pen – Medium – White

Adhesives

Tools

  • Die Cutting Machine
  • Paper Trimmer
  • Bone Folder
  • Stamping Blocks used as paperweights
  • Scissors
  • We R Memories – QuickStick
  • Ruler
  • Scrapbook.com – Mint Tape
  • Tweezers
  • We R – Precision Press Mini – Stamping Platform

Miscellaneous

  • Black Thread

Haunted Woods Pop-Up Halloween Card

It’s the Karen Burniston design team challenge for October 2025 using the theme of PEEK-A-BOO!” – What is hiding in your card? I chose to make a Halloween card with a haunted woods using the Arch Pop-Up, Tree Pop-Up, Halloween Elements, Slim Pattern Plate – Spiders and Ovals- Crosshatch die sets and the new Halloween Phrases stamp set.

Watch the process video to see how I made this card.

Cardbase: Start with a white, purchased A2 (4.25×5.5-inch) cardbase. Covered the four panels with decorative papers.

Arch Pop-Up: Watch the assembly video (located at the bottom of the linked die set page) for the Arch Pop-Up. For details on how I decorated the arch with nine trees cut from the Tree Pop-Up die set, watch the video above. (Four of the trees are glued onto the arch side pop-ups and the remaining five are cut up for their branches which are glued onto the arch and the back pop-out strip. Orange leaves were cut also from the Tree Pop-Up set.)

Decorations: Three ghosts were cut from pearlescent vellum using the Halloween Elements dies. The dangling spider is made up of two spiders cut using the Slim Pattern Plate – Spiders. (You can use the spider from the Halloween Scene set as well.) Sandwich a piece of white thread between the two spider die cuts and tie onto back pop-out strip behind the arch.

Sentiments: Pearlescent vellum was using again to cut the “Boo!” (Halloween Elements) and the larger oval for a personal message (Ovals-Crosshatch). Graphic 45 Midnight Tales papers and ephemera are used for their sentiments on the card front and back. The “Happy Haunting” sentiment is from the newly released Halloween Phrases stamp set.

Envelope: The card fits into an A2 (4.25x 5.5-inches) size envelope with its back flap decorated with more of the Graphic 45 papers.

___________________________________

Thank you for experiencing this blog post.

I hope this inspires you and makes you smile.

Please subscribe to the email notices, like and leave comments 😊

Follow my YouTube channel, Instagram and Pinterest as well.

___________________________________

Disclaimer: Karen Burniston products are provided free of charge by the manufacturer for review and use. All other items were personally purchased. Compensated affiliate links used where or when possible, meaning I will receive a small percentage commission from these manufacturers at no cost to you. This will allow me to add more content to my YouTube channel and help out a lot. Thank you.

Materials Used:

Dies
Karen Burniston in cahoots with Riley and Company – Arch Pop-Up – 1308

Karen Burniston in cahoots with Riley and Company – Slim Pattern Plate – Spiders– 1207

Karen Burniston in cahoots with Riley and Company – Ovals – Crosshatch – 1055

Karen Burniston in cahoots with Riley and Company – Halloween Scene – 1014

Karen Burniston in cahoots with Riley and Company – Halloween Elements – 1013

Karen Burniston in cahoots with Riley and Company – Tree Pop-Up – 1005

Stamps

Karen Burniston in cahoots with Riley and Company – Clear Stamps – Halloween Phrases

Papers
• Graphic 45 – 8×8-inch Double-Sided Paper – Midnight Tales

• Lawn Fawn – 8.5×11 Vellum – Pearlescent

• Black Cardstock

• A2 Cardbase – White

• Fraser Papers for William House – A2 Envelope – Genesis Text Husk Smooth


Ink
Sakura – Gelly Roll Pen – Medium – White

Adhesives
Neutral PH Adhesive by LINECO
Fine-Tip Glue Bottle

Tools
• Die Cutting Machine

• Paper Trimmer

• Stamping Blocks

• Scissors

• Paper Masking Tape

• Tweezers

Miscellaneous

• White Thread

2025 ATC Calendar – October

I started a new challenge for 2025 – the ATC calendar challenge. With a group of crafty friends, we are making a new image on a 4.25×5.5-inch calendar card for each month.

October’s card is made with Spellbinders Boo Crew by Simon Hurley dies and some light gray ink on the ghost.

To see other months’ calendars go to click here.

___________________________________

Thank you for experiencing this blog post.

I hope this inspires you and makes you smile.

Please like and leave comments 😊

___________________________________

Disclaimer: Karen Burniston products are provided free of charge by the manufacturer for review and use. All other items were personally purchased. Compensated affiliate links used where or when possible, meaning I will receive a small percentage commission from these manufacturers at no cost to you. This will allow me to add more content to my YouTube channel and help out a lot. Thank you.

___________________________________

Materials Used:


Dies
• Spellbinders – Cutting Dies – Simon Hurley’s Boo Crew


Press Plates
• Spellbinders – BetterPress Plates – 2025 DIY Calendar


Papers
•Black, Orange, Teal and White Cardstock
• Spellbinders – BetterPress – 5.5 x 4.25” (A2) Cotton Card Panels – Porcelain & Pebble


Ink
• Ranger – Tim Holtz – Distress Ink – Lost Shadow
• Spellbinders – BetterPress Ink – BetterPress Black


Adhesives
Neutral PH Adhesive by LINECO
Fine-Tip Glue Bottle

Tools
• Die Cutting Machine
• Scissors

We R Memories – QuickStick
• Paper Masking Tape


A Halloween Pop-Up Fence Card

This Halloween card is based off a pop-up picket fence card that Karen Burniston made for her design team challenge for April 2025. (You can see her video here.)

Watch the process video to see how I made this card.


Cardbase: Start with an 8.5 x 11-inch piece of patterned cardstock and fold in half to form a side-fold A9 (5.5×8.5-inch) card. Mark on the inside fold 4.75-inches up from the bottom edge.


Iron Fence: Cut two of the fence piece, using the Iron Fence Pop-Up die set, from heavy black cardstock. Watch the video below to see how to cut the two fence pieces into the gate, and the left and right fence pieces.


Pop-Up Mechanisms: Watch the assembly video above on how to cut-out, fold and attach the three mechanisms. Cut two of the Katherine Label Pop-Up L-shaped mechanism and one of the smallest angle pop-up from the Mini Pops Pop-Up die set.


Decorations: The Halloween Borders die set was use for all the outside decorative borders as well as the bats inside the card. The raven is from the Iron Fence Pop-Up die set. The hands are from the Halloween Elements die set.


Sentiments: “Boo!” on the card front is cut using the Halloween Elements die set while the “Happy Halloween” inside is from the Halloween Charms set.

Envelope: The card fits into a catalog (6×9-inch) size envelope stamped with sentiments from the Queen & Co. stamp set. The cobwebs are from the Tim Holtz stamp set and the dancing skeleton is from Riley & Company.


_________________________________________
Thank you for experiencing this blog post.

I hope this inspires you and makes you smile.

Please like and leave comments 😊
_________________________________________


Disclaimer: Karen Burniston products are provided free of charge by the manufacturer for review and use. All other items were personally purchased. Compensated affiliate links used where or when possible, meaning I will receive a small percentage commission from these manufacturers at no cost to you. This will allow me to add more content to my YouTube channel and help out a lot. Thank you.
_________________________________________

Materials Used:
Dies
Karen Burniston in cahoots with Riley and Company – Halloween Borders – 1247
Karen Burniston in cahoots with Riley and Company – Fence Add-Ons – 1240
Karen Burniston in cahoots with Riley and Company – Iron Fence Pop-Up – 1172
Karen Burniston in cahoots with Riley and Company – Mini Pops Pop-Up – 1146
Karen Burniston in cahoots with Riley and Company – Halloween Charms – 1058
Karen Burniston in cahoots with Riley and Company – Halloween Elements – 1013
Karen Burniston in cahoots with Riley and Company – Katherine Label Pop-Up – 1011

Stamps
• Queen & Co. – Clear Stamps – Fright Fest Kit
• Riley & Company – Funny Bones Red Rubber Stamp – RWD-492 Dancing Skeleton
• Stampers Anonymous – Tim Holtz Collection – Clear Stamps/Stencils – Halloween

Papers
• Martha Stewart Crafts – 12×12 inch Double-Sided Paper – Gothic Manor
• Black, Oranges and White Cardstock
• Catalog Envelope (6×9-inch) – White

Ink
• Memento – Fade Resistant Dye ink – Tuxedo Black
• Pigma – Mircon 05 Fine Tip Pen – Black
Sakura – Gelly Roll Pen – Medium – White

Adhesives
Neutral PH Adhesive by LINECO
Fine-Tip Glue Bottle
• Double-Sided Tape – 1/4-inch wide

Tools
• Die Cutting Machine
• Paper Trimmer
• Bone Folder
• Score Board
• Stamping Platform
• Scissors
• Pencil
• Paper Masking Tape

Halloween Tri-Fold Pop-Up Card

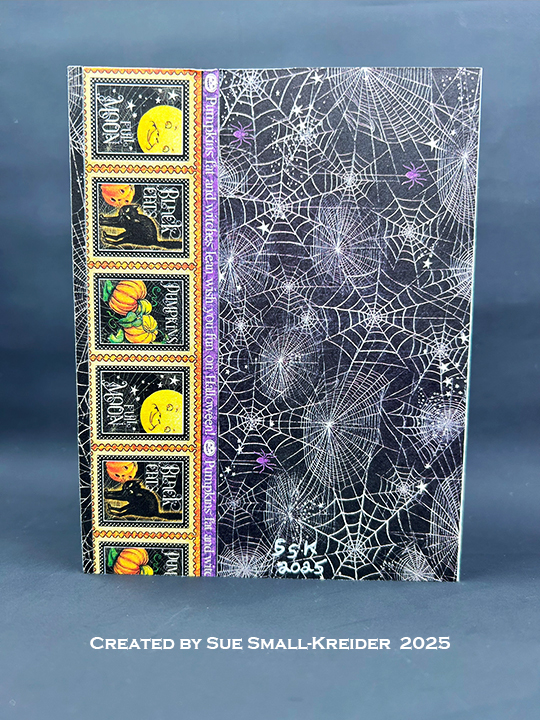
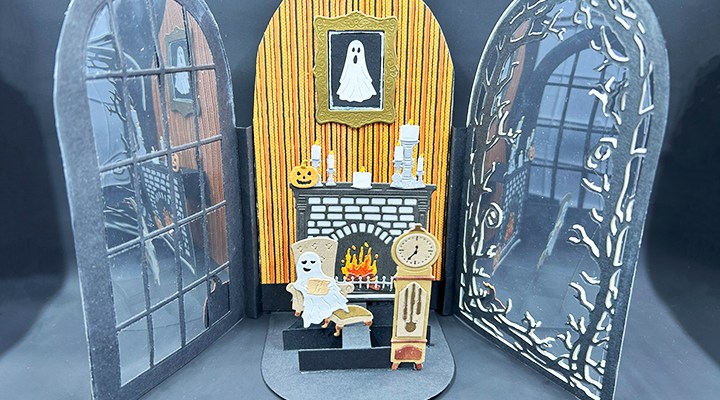
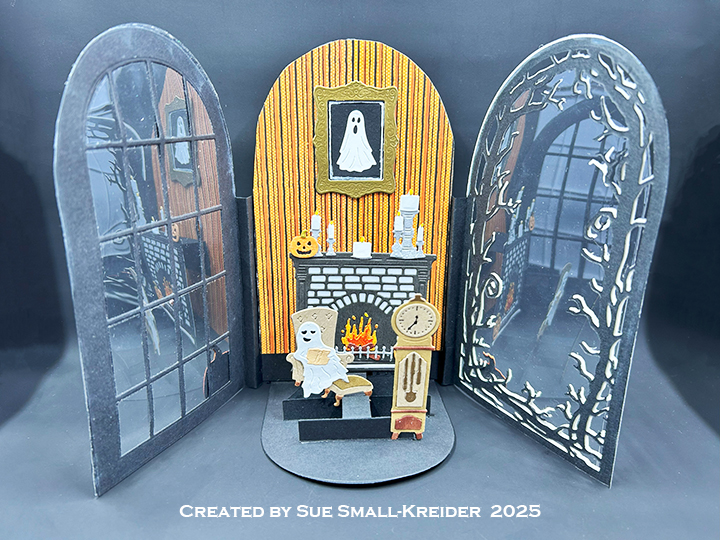
I recently purchased some new Scrappy Tails Halloween dies to make some pop-up tri-fold cards. Here is my first go at making one of Sabrina Leavell’s tri-fold cards. I watched a few of her YouTube lives before I began.

Watch the video below to see how I made this card.

___________________________________

Thank you for experiencing this blog post.

I hope this inspires you and makes you smile.

Please subscribe to the email notices, like and leave comments 😊

___________________________________

Disclaimer: Karen Burniston products are provided free of charge by the manufacturer for review and use. All other items were personally purchased. Compensated affiliate links used where or when possible, meaning I will receive a small percentage commission from these manufacturers at no cost to you. This will allow me to add more content to my YouTube channel and help out a lot. Thank you.

Materials Used:

Dies
• Scrappy Tails – Metal Craft Dies – Ghost Gallery
• Scrappy Tails – Metal Craft Dies – Ghost Study
• Scrappy Tails – Metal Craft Dies – Halloween Tri-Fold Window Add-On

• Scrappy Tails – Metal Craft Dies – Spooky Fireplace
• Scrappy Tails – Metal Craft Dies – A7 Tri-fold Pop Up Card Base


Stamps
• Colorado Craft Company – Clear Stamps – Scary Pumpkin – BB704


Papers
• Bazzill – 8.5×11 Cardstock – Tiara -18-1002

• Graphic 45 – 8×8 Double-Sided Papers – Midnight TalesFull Moon

• Grafix – 8.5×11 Dura-Lar Acetate .005 – Clear Film

• Concord & 9th – 8.5×11 Cardstock – Mushroom

• Fun Stampers Journey – 8.5×11 Cardstock – Tin Pail

• Black, Browns, Oranges, Tans, White and Yellow Cardstock

• #10 Business Envelope – White


Ink
• Memento – Fade Resistant Dye ink – Tuxedo Black
• Pigma – Mircon 01Fine Tip Pen – Black
Sakura – Gelly Roll Pen – Medium – White
• Stampin’ Up – Stampin’ Blends Marker – Dual Tip – Dark Copper Clay & Dark Wild Wheat


Adhesives
Neutral PH Adhesive by LINECO
Fine-Tip Glue Bottle

• Scrapbook.com – Double-sided Tape – 4-inch wide


Tools
• Die Cutting Machine

• Paper Trimmer

• Stamping Platform

• Scissors

• Pencil

• Paper Masking Tape

• Riley and Company – Pick & Poke Tool

• This Calls For Confetti – It’s No Secret Anti-Static Powder Brush

• Microfiber Cloth

A Gothic Classic Pop-Up Book

This card was made for Craft Roulette #237 whose parameters included a pop-up card, Trick or Treat colors, boutique, and jewelry.

I chose to make Mary Shelley’s gothic novel Frankenstein as a pop-up book card using dies by Scrappy Tails.

Watch the process video to see how I made this card.

Cardbase: The card base is made using the Scrappy Tails A7 Pop up Book die set. (I apologize for not having included video of the frame assembly.) The accordion fold pages frame that goes inside the book card can be seen in an assembly video by the designer by clicking here.

Sentiments: The “Halloween Greetings” is a stamp from PoppyStamps. The “Boo-tique Books specializing in Gothic Novels” was computer generated and die using a label die from the Scrappy Tails Life is a Story die set.

Envelope: The card fits into a catalog (6×9-inches) size envelope. “This book belongs to…” is stamped in black on the envelope flap.

___________________________________

Thank you for experiencing this blog post.

I hope this inspires you and makes you smile.

Please like and leave comments 😊

___________________________________

Materials Used:

Dies

  • Scrappy Tails – Metal Dies – A7 Pop up Book – Parts 1 & 2
  • Scrappy Tails – Metal Dies – Frankenstein Tomb Stone
  • Scrappy Tails – Metal Dies – A7 Frankenstein CP
  • Scrappy Tails – Metal Dies – Life is a Story CD 

Stamps

  • Papercraft Essentials Magazine Issue 183, January 2020The Next Chapter
  • PoppyStamps – Clear Stamps – Bugs and Hisses -CL512

Papers

  • Bazzill – 8.5×11 Cardstock – Tiara -18-1002
  • Concord & 9th – 8.5×11 Cardstock – Dove
  • Craft Perfect – 8.5×11 Pearlescent Cardstock – Glazed Chestnut
  • Fun Stampers Journey – 8.5×11 Cardstock – Tin Pail
  • Recollections – 12×12 inch Glitter Cardstock – White Marble
  • Recollections – 12×12 inch Embossed Cardstock – Kraft
  • The Paper Studio – 12x12Faux Leather – Football
  • Clear Plastic Packaging
  • Black, Blue, Brown, Greens, Purple, Red, White and Yellow Cardstock
  • Catalog (6×9) Envelope – White

Ink

  • Hero Arts – Alcohol-Marker Friendly Ink Pad – Intense Black
  • Simon Says Stamp – Pawsitivity Saturated Ink – Aegean
  • Ranger – Tim Holtz – Distress Ink – Dried Marigold, Forest Moss, Hickory Smoke, Mowed Lawn, Rusty Hinge, Seedless Preserves
  • Pigma – Mircon 005 Fine Tip Pen – Black
  • Sakura – Gelly Roll Pen – Medium – White
  • Sharpie – Permanent Marker – Fine Tip – Black, Yellow
  • Sharpie – Permanent Marker – Ultra Fine Tip –Blue, Greens, Orange, Red,

Adhesives

Tools

  • Die Cutting Machine
  • Paper Trimmer
  • Bone Folder
  • Score Board
  • Stamping Platform
  • Stamping Blocks used as paperweights
  • Scissors

A Haunted Chair In The Pumpkin Patch

It’s time for the October 2024 Karen Burniston Design Team Challenge with the theme of a haunted location. I chosen an Adirondack chair in a pumpkin patch to be haunted.

Watch the process video to see how the card was assembled.

Cardbase: Cut two 5 1/2 x 11-inch rectangles from black cardstock. Fold each rectangle in half to form two 5 1/2-inch square top fold cards. Two pieces of patterned paper from Graphic 45 were used to cover the inside floor and front card cover.

Adirondack Chair: Watch the assembly video for the Adirondack Chair located at the bottom of the linked page.

Ghost Mechanism: Watch the assembly video for the Spinner Square Pop-Up located at the bottom of the linked page. The ghosts are from the Halloween Charms set and were cut once from white cardstock and had their eyes and mouth stenciled on using the die. They also were cut from glow-in-the-dark paper for their backs and to hide the black mechanism arm.

Decorations: The large pumpkins are from the Autumn Elements set and the smaller jack-o-lantern and green hands are from the Halloween Elements set. The background pumpkins were cut from the Graphic 45 papers. The black cat on the chair is from the Skeleton and Bat set. The Slim Pattern Plate – Spiders was cut from pearlescent vellum and the spiders colored black. Then it was placed on the diagonal on the card front.

Sentiments: The card front uses the “Happy Halloween” from the Halloween Charms set while the inside uses a Spellbinders BetterPress “Happy Haunting” sentiment. Other inside sentiments – “Boo!” “Sit for a spell” and “Hey Pumpkin” – are cut from the Graphic 45 papers.

Envelope: The card will fit into a 6×6-inch square envelope or a 6×9-inch catalog envelope.

___________________________________

Thank you for experiencing this blog post.

I hope this inspires you and makes you smile.

Please like and leave comments 😊

___________________________________

Disclaimer: Karen Burniston products are provided free of charge by the manufacturer for review and use. All other items were personally purchased. Compensated affiliate links used where or when possible, meaning I will receive a small percentage commission from these manufacturers at no cost to you. This will allow me to add more content to my YouTube channel and help out a lot. Thank you.

Materials Used:

Dies

Press Plates

  • Spellbinders – BetterPress Letterpress System – Press Plate & Die Set – Halloween Icons

Papers

  • Graphic 45 – 8×8 Double-Sided Paper – Charmed
  • Lawn Fawn – 8.5×11 Lawn Fawndamentals – Pearlescent Vellum
  • Stampin’ Up – 6×6 Specialty Paper – Glow-In-The-Dark
  • Thin Clear Cello Packaging
  • Black, Orange, Purple, White Cardstock
  • 6×6 Brown Envelope

Ink

  • Spectrum Noir – Shimmer Gold Series Pearlescent Pigment – Peach Terracotta
  • Ranger – Tim Holtz – Distress Ink- Gathered Twigs
  • Pigma – Mircon 005 Fine Tip Pen – Black
  • Sharpie – Permanent Marker – Chisel Tip – Black
  • Sharpie – Permanent Marker – Fine Tip – Green
  • Sharpie – Permanent Marker – Ultra Fine Tip – Black
  • Sakura – Gelly Roll Pen – Medium – White

Adhesives

Tools

  • Die Cutting Machine
  • Bone Folder
  • Stamping Blocks used as paperweights
  • Scissors
  • Pencil
  • We R Memories – QuickStick
  • Tweezers
  • Metal Ruler
  • T-Ruler
  • Glue Eraser
  • Craft Mat
  • Sponge Daubers
  • Blending Brush
  • Paper Masking Tape