Day 7 – Week of Good Cheer Christmas Cards

This is Day 7 in the Week of Good Cheer Christmas Card series featuring cups and mugs of winter cheer as beverages. Today’s card features Trinity Stamps’ Trini-Tea Cup Card die set made up as a Santa mug of cocoa. (GIVEAWAY opportunity near end of post.)

Watch the video below to see how the card was made.

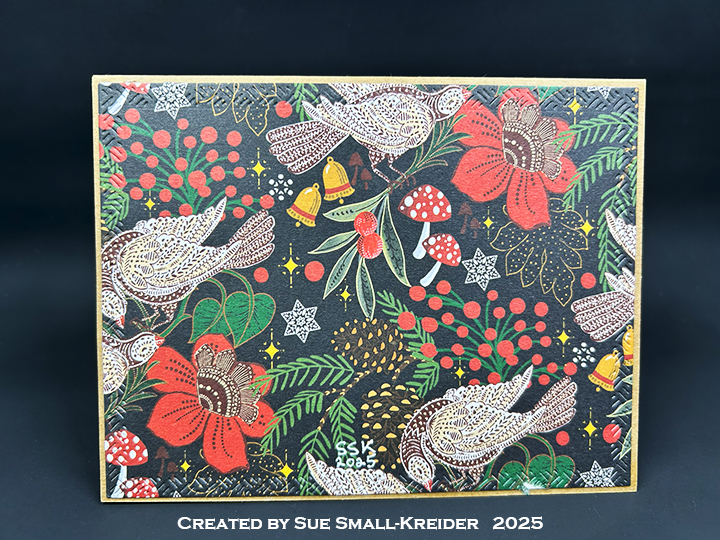
Cardbase:  I started with an 8.5×11-inch sheet of red cardstock of at least 80lb. weight and cut out the shaped card base using the Trinity Stamps’ Trini-Tea Cup Card die set.

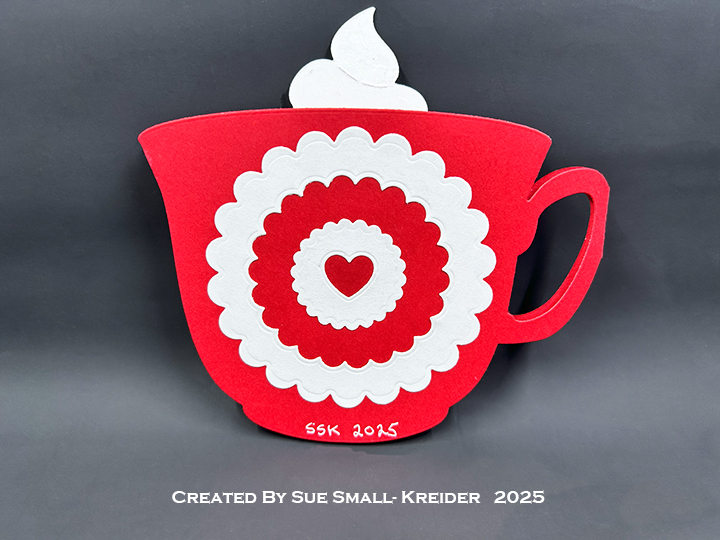
Santa:  Santa is created using a Spellbinders’ set of scalloped circles and an i-Crafter’s set of nested circle dies. Watch the video above to see how it was made. The mustache, eyes, mouth and eyebrow come from the Spellbinder’s Cocoa Wonderland die set.
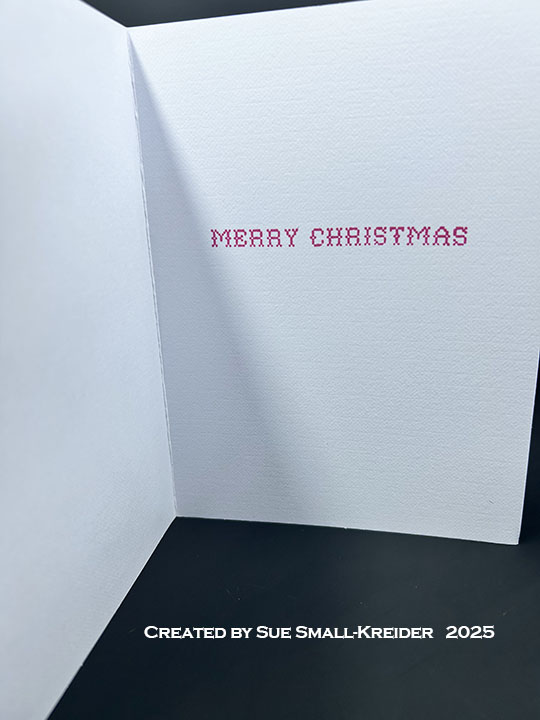
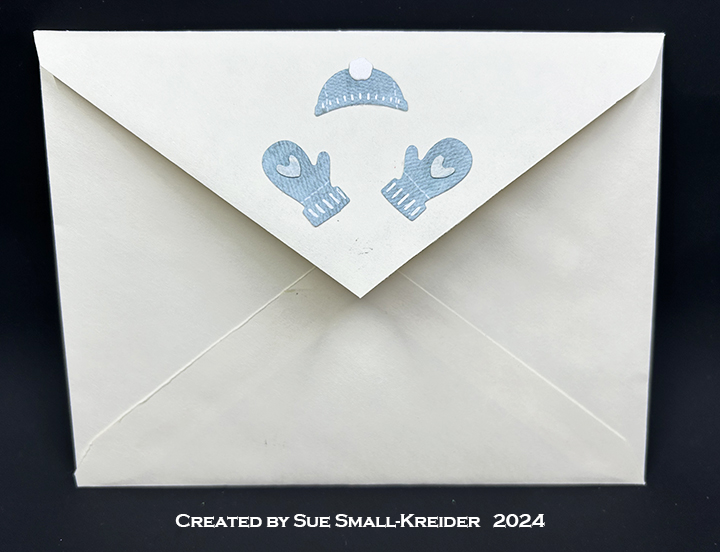
Sentiments:  The die-cut sentiments of β€œChristmas Greetings” and β€œho, ho, ho” are from Karen Burniston’s Small Script- Christmas die set. Another Karen Burniston product, her Winter Hugs stamp set, was used to stamp β€œStay warm and drink Hot Cocoa” in brown ink on the catalog (6×9-inches) envelope’s back flap.

___________________________________

Thank you for experiencing this blog post.

I hope this inspires you and makes you smile.

Please subscribe to the email notices, like and leave comments 😊

___________________________________

GIVEAWAY

I’m cleaning out my dies and stamps and will be giving away crafting bundles to 8 lucky crafters who follow, subscribe and comment on my Week of Good Cheer Christmas Cards posts on Facebook, Instagram, YouTube and my website. (If you comment on all 4 platforms, each day, you have over 28 opportunities to be picked for a crafting bundle.)

Tell me why you like each cup or which is your favorite cup. Winners will be picked by September 2, 2025.

___________________________________

Disclaimer: Karen Burniston products are provided free of charge by the manufacturer for review and use. All other items were personally purchased. Compensated affiliate links used where or when possible, meaning I will receive a small percentage commission from these manufacturers at no cost to you. This will allow me to add more content to my YouTube channel and help out a lot. Thank you.

Materials Used:

Dies

Stamps

Papers

  • Astrobrights – 8.5×11-inches 65lb Cardstock – Grocer Kraft
  • Fun Stampers Journey8.5×11-inches Cardstock – Cranberry Bliss
  • White Cardstock

Ink

  • Nuvo – Aqua Shimmer – Glitter Gloss
  • Sharpie – Permanent Marker –Fine Tip – Pink
  • Stampin’ Up – Stampin’ Blends – Dark Copper Clay
  • Sunbird Spark – Velvety Dye Ink – Canyon

Adhesives

Tools

  • Die Cutting Machine
  • Paper Trimmer
  • Stamping Blocks
  • Scissors
  • Scrapbook.com – Mint Paper Tape
  • Riley and Company – Pick & Poke Tool
  • Microfiber Cloth

Day 5 – Week of Good Cheer Christmas Cards

This is Day 5 in the Week Of Good Cheer Christmas Card series featuring cups and mugs of winter beverages like hot cocoa, tea and coffee. Today’s card uses Karen Burniston’s die sets. (GIVEAWAY opportunity near end of post.)

Watch the video below to see how this card was made.

Cardbase:  The cardbase is a purchase A2 (4.25×5.5-inch) brown kraft paper one with matching envelope. The four panels are covered with decorative paper using rectangles cut by the largest die in the Rectangles – Crosshatch set.

Pop-Up Ball Cup:  Watch the assembly video for the Mini Ball Pop-Up located at the bottom of the linked page. Cut two of the ball pieces from red coated cardstock. Cut from the Mini Ball Add-ons 2 – Monkey and Lion die set, two of the curled tail piece – one on the coated side and one on the reverse side of coated cardstock – and glue together with paper tape addition as shown in the video above. Stamp the brown cocoa design onto a scrap of white cardstock and cut out using the Bitty Ball decorator hexagon die from either the Bitty Ball Double-Ups or the Bitty Ball Pop-Up. Cut out two white and one red hexagon frames using the Bitty Ball and Mini Ball decorator hexagon dies. (Mini Ball Double-Ups or the Mini Ball Pop-Up sets both have this die.) Assemble as shown in the video above. The white saucer is cut using the Hexagons – Crosshatch set.

Sentiments:  All the sentiments stamped in brown ink using the Karen Burniston stamp set – Winter Hugs. The labels on which they are stamped were cut using label dies in the Rectangles and Labels – Crosshatch set.

Envelope:  The card fits into an A2 envelope whose back flap is has stamped “Winter Hugs” in brown ink from the Winter Hugs stamp set.

___________________________________

Thank you for experiencing this blog post.

I hope this inspires you and makes you smile.

Please subscribe to the email notices, like and leave comments 😊

___________________________________

GIVEAWAY

I’m cleaning out my dies and stamps and will be giving away crafting bundles to 8 lucky crafters who follow, subscribe and comment on my Week of Good Cheer Christmas Cards posts on Facebook, Instagram, YouTube and my website. (If you comment on all 4 platforms, each day, you have over 28 opportunities to be picked for a crafting bundle.)

Tell me why you like each cup or which is your favorite cup. Winners will be picked by September 2, 2025.

___________________________________

Disclaimer: Karen Burniston products are provided free of charge by the manufacturer for review and use. All other items were personally purchased. Compensated affiliate links used where or when possible, meaning I will receive a small percentage commission from these manufacturers at no cost to you. This will allow me to add more content to my YouTube channel and help out a lot. Thank you.

Materials Used:

Dies

Stamps

Papers

  • Craft Consortium – 12×12 Double-Sided 200gsm Papers – Tis The Season by Linsey Kelly
  • Scrapbook.com – 6×8 Glossy Cardstock – Rainbow
  • White Cardstock
  • A2 (4.25×5.5-inch) Cardbase and Envelope – Brown Kraft

Ink

Adhesives

Tools

  • Die Cutting Machine
  • Stamping Platform
  • Paper Trimmer
  • Scissors
  • Tweezers
  • Scrapbook.com – Mint Paper Tape

Day 3 – Week of Good Cheer Christmas Cards

This is Day 3 in the Week Of Good Cheer Christmas Card series featuring cups and mugs of winter beverages like hot cocoa, tea and coffee. Today’s card uses Karen Burniston’s Tea and Coffee Pop-Up and Topper Tags die sets. (GIVEAWAY opportunity near end of post.)

Watch the video below to see how this card was made.

Cardbase:  The card base is four tags cut using the Topper Tags die set. Each tag has a clear packing tape hinge at the bottom edge. Watch the video above for tape placement. Use decorator pieces from the tag die set. Add baker’s twine once the card is fully decorated to each tag hole.

Mug Pop-Up:  Watch the assembly video for the Tea and Coffee Pop-Up located at the bottom of the linked page. Cut one mug from a decorative cardstock. From cardstock that matches the base tag, cut one mechanism piece. Cut a spoon from silver mirror cardstock. Cut the steam from clear vellum. Assemble as shown in the video above.

Sentiments:  All the sentiments are fussy cut from the Stamperia Classic Christmas paper collection.

Envelope:  The tags card fits into a #10 business envelope whose back flap is covered with leftover strips from the paper collection.

___________________________________

Thank you for experiencing this blog post.

I hope this inspires you and makes you smile.

Please subscribe to the email notices, like and leave comments 😊

___________________________________

GIVEAWAY

I’m cleaning out my dies and stamps and will be giving away crafting bundles to 8 lucky crafters who follow, subscribe and comment on my Week of Good Cheer Christmas Cards posts on Facebook, Instagram, YouTube and my website. (If you comment on all 4 platforms, each day, you have over 28 opportunities to be picked for a crafting bundle.)

Tell me why you like each cup or which is your favorite cup. Winners will be picked by September 2, 2025.

___________________________________

Disclaimer: Karen Burniston products are provided free of charge by the manufacturer for review and use. All other items were personally purchased. Compensated affiliate links used where or when possible, meaning I will receive a small percentage commission from these manufacturers at no cost to you. This will allow me to add more content to my YouTube channel and help out a lot. Thank you.

Materials Used:

Dies

Papers

  • Red #10 Business Envelope
  • Silver Foil Cardstock
  • Stamperia – 8×8 Paper Collection – Classic Christmas
  • The Paper Studio – 8.5×11 Vellum – Clear

Ink

  • Pigma – Mircon 05 Fine Tip Pen – Black

Adhesives

Tools

  • Die Cutting Machine
  • Paper Trimmer
  • Scissors
  • Paper Masking Tape

Miscellaneous

  • Red and Yellow Baker’s Twine

Day 2 – Week of Good Cheer Christmas Cards

This is Day 2 in the Week Of Good Cheer Christmas Card series featuring cups and mugs of winter beverages like hot cocoa and mulled cider. Today’s card uses Spellbinders’ Mugs & Mittens die set and Stay Snuggly stamp set. (GIVEAWAY opportunity near end of post.)

Watch the video below to see how this card was made.

Cardbase:  I started with an A6 sized (4.625×6.25-inches) purchased cardbase and matching envelope.

Card Front:  Cut a white panel 4.375×6-inches and ink blend around the edges in a snowy blue ink. Splatter with white paint for snowflakes. Cut and assemble mitten, sweater and mug pieces as shown in video.

Sentiments:  The front sentiment is debossed using the banner and sentiment dies in the Mugs & Mittens die set and the letters colored with a white gel pen.  The inside sentiment and card back snowflake star are stamped in red ink using the Stay Snuggly stamp set.

Envelope:  The back flap is stamped in red ink using the snowflake and β€œWinter Cheers” from the  Stay Snuggly stamp set.

These are two additional Christmas mugs of good cheer that I made with the July 2025 Spellbinder’s Small Die of the Month – Cocoa Greetings, Ginger Sip die, Starry Snowfall 3D embossing folder and Nordic Noel embossing folder.

___________________________________

Thank you for experiencing this blog post.

I hope this inspires you and makes you smile.

Please subscribe to the email notices, like and leave comments 😊

___________________________________

GIVEAWAY

I’m cleaning out my dies and stamps and will be giving away crafting bundles to 8 lucky crafters who follow, subscribe and comment on my Week of Good Cheer Christmas Cards posts on Facebook, Instagram, YouTube and my website. (If you comment on all 4 platforms, each day, you have over 28 opportunities to be picked for a crafting bundle.)

Tell me why you like each cup or which is your favorite cup. Winners will be picked by September 2, 2025.

___________________________________

Disclaimer: Karen Burniston products are provided free of charge by the manufacturer for review and use. All other items were personally purchased. Compensated affiliate links used where or when possible, meaning I will receive a small percentage commission from these manufacturers at no cost to you. This will allow me to add more content to my YouTube channel and help out a lot. Thank you.

Materials Used:

Dies

  • Spellbinders – Large Die of the Month – Mugs & Mittens – DOML-JUL25

Stamps

  • Spellbinders  β€“ Clear Stamp of the Month – Stay Snuggly – CSOM-JUL25

Papers

  • Red – Scrap Envelope
  • Coated White Cardboard Packaging
  • Cream, Red and White Cardstock
  • Park Lane Paperie – A6 (4.625×6.25-inches) Cardbases and Envelopes – Textured White
  • Recollections – 8.5×11-inch Shimmer Cardstock -White Gold
  • The Paper Studio – 8.5×11-inch – Clear Vellum

Ink

  • Blue Gel Pen
  • Hero Arts Acrylic Spray – Opaque White
  • Memento – Fade Resistant Dye ink – Rose Bud
  • Nuvo – Highly Pigmented Watercolour Pencils – Pink Flamingo
  • Pigma – Mircon 005 Fine Tip Pen – Black
  • Ranger – Tim Holtz – Distress Ink – Fired Brick, Walnut Stain
  • Sakura – Gelly Roll Pen – Medium – White
  • Stampin’ Up – Classic Stampin’ Pad – Balmy Blue

Adhesives

Tools

  • Die Cutting Machine
  • Paper Trimmer
  • Stamping Platform
  • LDRS – Stampendable Stamping Tool
  • Stamping Blocks used as paperweights
  • We R Memories – QuickStick
  • Scissors
  • Heat Gun
  • Blending Brush
  • Sponge Dauber
  • Paper Masking Tape

Day 1 – Week of Good Cheer Christmas Cards

This is Day 1 in the Week Of Good Cheer Christmas Card series featuring cups and mugs of winter beverages like hot cocoa and mulled cider. Today’s card uses Karen Burniston’s Flower Pot Pop-Up die set and Winter Hugs stamp set. (GIVEAWAY opportunity near end of post.)

Watch the video below to see how this card was made.

Cardbase:  I started with a purchased A6 sized (4.625×6.25-inches) cardbase and matching envelope. Use the large journaling cards in the paper collection to cover the front and back panels of the cardbase. Die cut two scalloped rectangles from the Rectangles and Labels – Crosshatch die set for the inside of the card.

Cocoa Mug Pop-Up:  Watch the assembly video for the Flower Pot Pop-Up located at the bottom of the linked page. Cut and emboss the napkin from the Coffee Cup Pop-Up. Tape napkin pieces together to form a square, leaving a thin gap between the pieces. Die cut the tabs in the Flower Pot Pop-Up into the napkin. Cut two sets of the candy cane (reversing the paper on one set) from white and red cardstock using the dies from the Stocking Pop-Up. Cut several large marshmellows using the Camping Charms die set. Cut a spoon from silver mirror cardstock using the die in the Tea and Coffee Pop-Up set. Using the same set, cut the mug handle twice positioning the die so that it cuts just a thin strip of the mug.

Sentiments:  The front sentiment is a journaling card from the paper collection. Inside are Fancy labels die using the Rectangles and Labels – Crosshatch die set. The smaller label is stamped in pink and brown ink using the Winter Hugs stamp set.

Envelope:  The back flap is covered with stickers from the Simple Stories Paper Collection.

These are two additional Christmas mugs of good cheer that I made using the same technique for the Flower Pot Pop-Up.

___________________________________

Thank you for experiencing this blog post.

I hope this inspires you and makes you smile.

Please subscribe to the email notices, like and leave comments 😊

___________________________________

GIVEAWAY

I’m cleaning out my dies and stamps and will be giving away crafting bundles to 8 lucky crafters who follow, subscribe and comment on my Week of Good Cheer Christmas Cards posts on Facebook, Instagram, YouTube and my website. (If you comment on all 4 platforms, each day, you have over 28 opportunities to be picked for a crafting bundle.)

Tell me why you like each cup or which is your favorite cup. Winners will be picked by September 2, 2025.

___________________________________

Disclaimer: Karen Burniston products are provided free of charge by the manufacturer for review and use. All other items were personally purchased. Compensated affiliate links used where or when possible, meaning I will receive a small percentage commission from these manufacturers at no cost to you. This will allow me to add more content to my YouTube channel and help out a lot. Thank you.

Materials Used:

Dies

Stamps

Papers

  • Brown Cardstock
  • Echo Park – 12×12 A Perfect Christmas Collection – Snowflake Swirl
  • Park Lane Paperie – A6 (4.625×6.25-inches) Cardbases and Envelopes – Textured White
  • Silver Foil Cardstock
  • Simple Stories – 12×12 Collection Kit – Snow Pine Lodge
  • White Cardstock

Ink

  • Memento – Fade Resistant Dye ink – Rich Cocoa & Rose Bud
  • Pigma – Mircon 005 Fine Tip Pen – Black

Adhesives

Tools

  • Die Cutting Machine
  • Paper Trimmer
  • Stamping Platform
  • LDRS – Stampendable Stamping Tool
  • Stamping Blocks used as paperweights
  • We R Memories – QuickStick
  • Scissors
  • Plastic Knife
  • Paper Masking Tape

Miscellaneous

  • Cotton Ball

Reindeer Farm Winter Holidays Card

This card was made for Craft Roulette #239 whose parameters included an interactive card, picnic colors, farm element, and paper strips.

Watch the process video to see how I made this card.

Cardbase:  I used a purchased A6 (4.5 x 6.25-inch) cardbase and envelope.

Stable & Reindeer:  Using the Reindeer Stable die set by Scrapping Cottage, cut the stable base from red cardstock and inked the edges with brown ink. All the other pieces were cut from white cardstock and colored. The weathervane was cut twice and glued together to reinforce the tiny piece. I made my own wire wobbler springs using thin florist wire and gluing them in place.

Flying Reindeer Mechanism:  Using dies by Whimsy Stamps kinetic collection, I eventually figured out how to make the reindeer fly over the stable using the die cut paper strips and foam dots. (Watch the tutorial to see how I made it.)

Snow:  Avry Elle white ink spray was used to cover the card with splatters of snow. (I had to color over the facial details and shading on the reindeer after spraying.) The trees have white gel pen to place snow accumulation at the end of the branches.

Sentiments:  All the winter sentiments stamped in black ink are from Waffle Flower. The β€œPull” and arrow are tiny stamps from My Favorite Things.

Envelope:  The card fits into an A6 (4.5x 6.25-inches) size envelope With β€œLet It Snow” on the back flap.

___________________________________

Thank you for experiencing this blog post.

I hope this inspires you and makes you smile.

Please like and leave comments 😊

___________________________________

Materials Used:

Dies

  • Scrapping Cottage – Cottage Cutz – Reindeer Stable
  • Whimsy Stamps – Metal Craft Dies – Kinetic Curved Hills
  • Whimsy Stamps – Metal Craft Dies – Kinetic Curved Basics
  • Whimsy Stamps – Metal Craft Dies – No See Kinetic Basics

Stamps

  • My Favorite Things – Clear Stamps –  Interactive Labels
  • Waffle Flower – Clear Stamps – Star Snowflake Sentiments

Papers

  • Craft Consortium – A4 Double-Sided Solid Colored Cardstock – Little Robin Redbreast
  • Fun Stampers Journey – 8.5×11 Cardstock – Cranberry Bliss
  • Black and White Cardstock
  • Park Lane Paperie – A6 Cardbase and Envelope – White

Ink

  • Avery Elle – White Spray Ink
  • Memento – Dye Ink – Tuxedo Black
  • Ranger – Tim Holtz – Distress Ink- Gathered Twigs
  • Creative Craft Products – Alcohol Markers – Dual Tipped –WG 3 Warm Grey
  • Pigma – Mircon 005 Fine Tip Pen – Black
  • Sakura – Gelly Roll Pen – Medium – White
  • Sharpie – Permanent Marker – Fine Tip – Black, Green
  • Sharpie – Permanent Marker – Ultra Fine Tip – Black, Red
  • Stampin’ Up – Stampin’ Blends – Dark & Light Daffodil Delight
  • Stampin’ Up – Stampin’ Write – Chocolate Chip

Adhesives

Tools

  • Die Cutting Machine
  • Paper Trimmer
  • Stamping Platform
  • LDRS – Stampendable Stamping Tool
  • Stamping Blocks used as paperweights
  • Scissors
  • Pencil
  • Craft Clip
  • Scrap Paper to color on
  • Sponge Daubers
  • Circle Hole Punch – 1-inch wide
  • Paper Masking Tape
  • We R Memories – QuickStick

Miscellaneous

  • Florist Wire – Brown

Snowflake Easel Birthday Card

Karen Burniston’s October 2024 release of new dies and sentiment stamps are now available.

Today’s card is an A7 size top-fold easel card that uses the new Postage Pop-Up, Charm Rings, Snow Charms die sets and Winter Hugs stamp set.

Watch the process video to see how this card was made.

Cardbase: Β Cut a white 7 1/2 x 5-inch rectangle; score and fold at 7-inches to form a tab. Cut a white 7 x 5-inch rectangle and glue to tab. On panel that does not have the tab glued to it, score at the center (3 1/2-inches) and fold to make an easel. Three decorative panels 3 4/3 x4 3/4-inches will be used to cover the outside of the card.

Postage Stamp Diamond Frames: Β Using the large postage stamp frame and smaller squares and rectangle dies, cut eight frames. Separate the frames so that you have eight small square frames and two large square frames. (Save the other frames and cut-out shapes for other projects.) Glue to frames together to form four small squares and one large square. Watch video to see how window apertures are cut into the easel and how charms are hung.

Decorations: The smaller snowflake charms are from the Winter Charms set while the larger snowflake charm and individual snowflake are from the Snow Charms set. (Save the small circles that pop-out of the snowflakes to decorate the postage frames at the corners.) Watch the tutorial to see how the individual snowflake was made into a charm using the larger snowflake. Use two of the medium size Charm Rings to hang each snowflake.

Sentiments: Β All the sentiments come from the Winter Hugs stamp set and were fussy cut out of the same cardstock as the cardbase. The back of the card uses “I made this cool card” stamp with the maker’s mark below and a pair of mittens from the Snow Charms set.

Envelope: Β The card fits into an A7 (5 x 7-inches) size envelope. The back flap was decorated with a large snowflake from the Snow Charms set.

___________________________________

Thank you for experiencing this blog post.

I hope this inspires you and makes you smile.

Please like and leave comments 😊

___________________________________

Disclaimer: Karen Burniston products are provided free of charge by the manufacturer for review and use. All other items were personally purchased. Compensated affiliate links used where or when possible, meaning I will receive a small percentage commission from these manufacturers at no cost to you. This will allow me to add more content to my YouTube channel and help out a lot. Thank you.

Materials Used:

Dies

Stamps

Papers

  • My Favorite Things – 8.5×11 inch 100lb. Cardstock – Smooth White
  • American Crafts – 8.5×11 inch Specialty Cardstock – Foil On Paper
  • Recollections – 12Γ—12 inch Glitter Cardstock – White Marble
  • Unknown – 8.5×11 Fabric Backed Paper – Hammered Metal – Silver
  • A7 Envelope – Cream

Ink

Adhesives

Tools

  • Die Cutting Machine
  • Paper Trimmer
  • Score Board
  • Bone Folder
  • Stamping Platform
  • Stamping Blocks used as paperweights
  • Scissors
  • Craft Knife
  • Pencil
  • T-Ruler
  • Paper Masking Tape
  • We R Memories – QuickStick
  • 1/8-inch Hole Punch
  • Ice Pick or Awl

Snowflake Kisses and Warm Wishes

It’s Sneak Peak Week for Karen Burniston’s October 2024 release of new dies and sentiment stamps. These dies will be available for purchase on October 28, 2024 on the KB Riley LLC website.

Today’s card is an A2 size top-fold card that uses the new Snow Charms die set and Winter Hugs stamp set.

Watch the process video to see how this card was made.

Cardbase:  Fold in half an 11×4.25 inch piece of white cardstock to form a top-fold A2 (4.25×5.5 inch) size cardbase. Cover all four panels with rectangles of patterned paper using the largest die from the Rectangles – Crosshatch set. Cut a frame of white glitter cardstock using the same die and the next largest die and glue to the front panel.

Mug of Cocoa:  Using the Tea and Coffee Pop-Ups die set cut one mug from red cardstock covered with clear packing tape. Cut one of the largest snowflake in the Snow Charm set, snip off charm loop and cover with glitter gloss before gluing to mug center. Allow to dry before rounding/shaping mug with a bone folder. Cut from white shimmer cardstock the cupcake frosting piece from the Cupcake Add-Ons set and adhere to back of the mug with two small foam dots. Cut one steam piece from the Tea and Coffee Pop-Ups set from clear vellum.

Cut the mechanism piece and arm strip from the same patterned paper as inside of card. Cut a white crosshatch label from the Rectangles and Labels – Crosshatch set and trim off about 1/2-inch from long side. Glue the large piece of label onto the inside card floor centering it up against the fold. Glue the mechanism into card as instructed on the assembly video located at the bottom of this linked page. Attach arm to mechanism. Using a large foam dot adhere the mug to the front of mechanism. Glue vellum steam piece to arm making sure it is positioned so it does not peak-out of the card when it is closed.

Decorations: The card front decorations are from the Snow Charms set, along with some snowflake sequin mix elements. The inside spoon is from the Tea and Coffee Pop-Ups set.

Sentiments: Β All the sentiments come from the Winter Hugs stamp set. All the fancy labels come from the Rectangles and Labels – Crosshatch die set. β€œSnowflake kisses & winter wishes” was stamped on clear vellum with StazOn ink and the whole label was covered with glitter gloss. The vellum was adhered to the card front using glue dots.

Envelope: Β The card fits into an A2 (4.25x 5.5-inches) size envelope. The back flap was decorated with a hat from the Winter Animals set and mittens from the Snow Charms set.

___________________________________

Thank you for experiencing this blog post.

I hope this inspires you and makes you smile.

Please like and leave comments 😊

___________________________________

Disclaimer: Karen Burniston products are provided free of charge by the manufacturer for review and use. All other items were personally purchased. Compensated affiliate links used where or when possible, meaning I will receive a small percentage commission from these manufacturers at no cost to you. This will allow me to add more content to my YouTube channel and help out a lot. Thank you.

Materials Used:

Dies

Stamps

Papers

  • Hot Off The Press – 8.5×11 inch Double-Sided Papers – Magnolia Blooms
  • PinkFresh Studio – Essentials 8.5×11 inch Glitter Cardstock – Glacier
  • Recollections – 8.5Γ—11 White Gold Shimmer Cardstock
  • The Paper Studio – 8.5×11 Clear Vellum
  • Sliver Foil Cardstock
  • Black, Red and White Cardstock
  • A2 Envelope – Cream

Ink

Adhesives

Tools

  • Die Cutting Machine
  • Paper Trimmer
  • Bone Folder
  • Stamping Platform
  • LDRS – Stampendable Stamping Tool
  • Stamping Blocks used as paperweights
  • Scissors
  • Craft Knife
  • Pencil
  • T-Ruler
  • Paper Masking Tape
  • We R Memories – QuickStick

Miscellaneous

  • Buttons Galore & More – 28 Lilac Lane – Sequin Mix – Snowflakes

Reindeer Games

It’s Sneak Peak Week for Karen Burniston’s October 2024 release of new dies and sentiment stamps. These dies will be available for purchase on October 28, 2024 on the KB Riley LLC website.

This card was inspired by the age-old question pertaining to the Rudolph-The-Red-Nose-Reindeer song – What are reindeer games? My interpretation is Winter games Olympic style with Rudolph winning the sledding race!

Watch the process video to see how this card was made.

Cardbase: The cardbase is an A7 size (5 x 7-inch) purchased card base with decorative papers glued to the four panels. I used the largest rectangle in the Rectangles and Labels – Crosshatch die set to cover the inside of the card and leftover pieces for the outside of the card.

Finish Line Flag Pop-Ups: Two Photo Fans Pop-Ups were created using white cardstock brushed with glitter gloss the arms and decorator pieces. the arm decorator pieces were cut in black and the two sided flags come from the Pirate Ship Add-Ons set. (You can also find a single flag in the Castle Pop-Up set.)

Sitting Reindeer: The sitting reindeer uses the body of the Snowman Pop-Up with the face, antlers, legs and tail from the Penguin and Reindeer Snowman Add-Ons set. The sled is from the Snow Charms set. (If I were to make this card again I would make two sleds and glue them into the card first, placing them so they overlap under the reindeer trimming off the excess front and back sled pieces before gluing the reindeer base over them and into the card.)

Standing Reindeer: Two reindeer were cut using the Christmas Animals die set. One reindeer is assembled on the reverse side so that the reindeer can face each other.

Sentiments: “Reindeer Games” was created using the Mini Alphabet die set while the inside “You’re so Cool” was stamped on a fancy label from the Rectangles and Labels – Crosshatch set with a stamp from the Winter Hugs stamp set. The “Made with Love” circle image on the back of the card is from the Special Delivery stamp set. The blank personal message label is also from the Rectangles and Labels – Crosshatch set. (I didn’t have a piece of matching cardstock wide enough for this label die, so I elected to center the die and cut with flat top and bottom of the label.)

Envelope:  The card fits into an A7 size envelope with the back flap decorated with leftover blue flags.

___________________________________

Thank you for experiencing this blog post.

I hope this inspires you and makes you smile.

Please like and leave comments 😊

___________________________________

Disclaimer: Karen Burniston products are provided free of charge by the manufacturer for review and use. All other items were personally purchased. Compensated affiliate links used where or when possible, meaning I will receive a small percentage commission from these manufacturers at no cost to you. This will allow me to add more content to my YouTube channel and help out a lot. Thank you.

Materials Used:

Dies

Stamps

Papers

  • Carnation Crafts – Merry and Bright from PaperCrafter issue 40
  • Echo Park – 12×12 Double-Sided Cardstock – Bundle of Joy -Peek-A-Boo
  • Silver Foil Cardstock
  • Black, Browns, Cream, Teal Blue, White and Yellows Cardstock
  • Park Lane Paperie – A7 Cardbase and Envelope – White

Ink

  • Hero Arts – Alcohol-Marker Friendly Ink Pad – Intense Black
  • Ranger – Tim Holtz – Distress Ink- Scorched Timber
  • Pigma – Mircon 005 Fine Tip Pen – Black
  • Sharpie – Permanent Marker – Ultra Fine Tip – Black and Red
  • Sakura – Gelly Roll Pen – Medium – White

Adhesives

Tools

  • Die Cutting Machine
  • Paper Trimmer
  • Bone Folder
  • Paperweight
  • Stamping Blocks used as paperweights
  • Scissors
  • We R Memories – QuickStick
  • Sponge Dauber
  • Paper Masking Tape
  • Glue Eraser
  • Pencil