
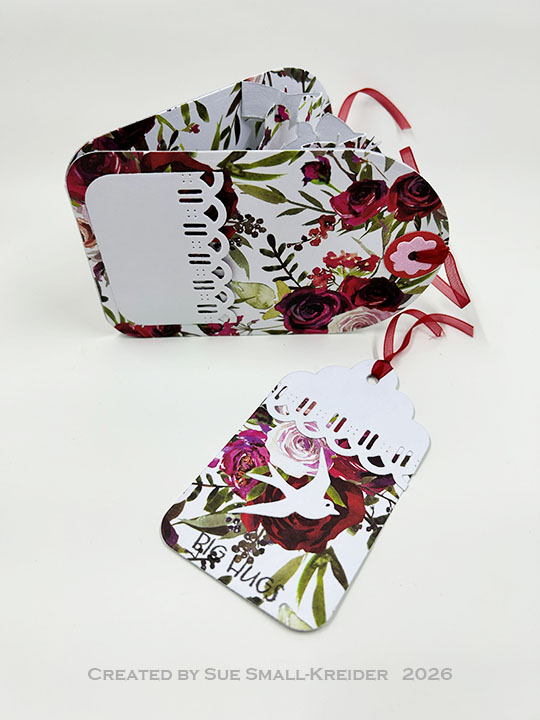
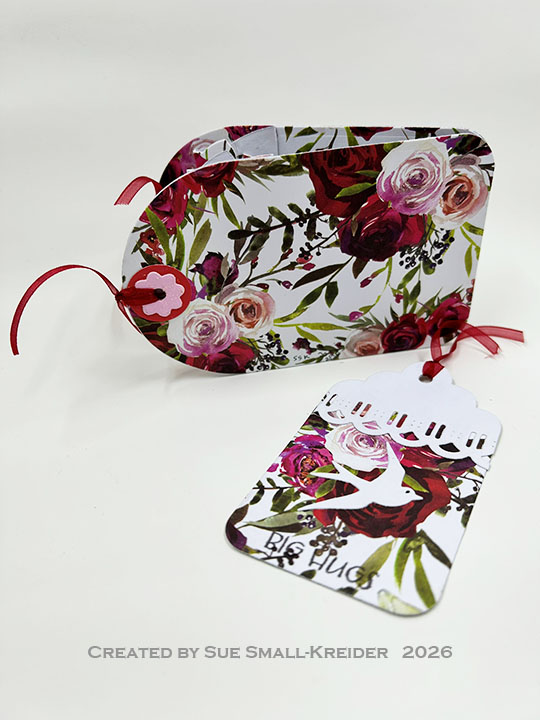
It’s time for the Karen Burniston Design Team March 2026 Challenge whose theme is For The Birds.I’ve chosen to make a Circle Tag Book Pop-Up card using rose patterned paper with bird embellishments from the Outdoor Scene die set and long stem roses from the Love Is In The Air Charms. There is also a tag bookmark feature to the card using the Topper Tags die set.
Watch the process video to see how I made this card.
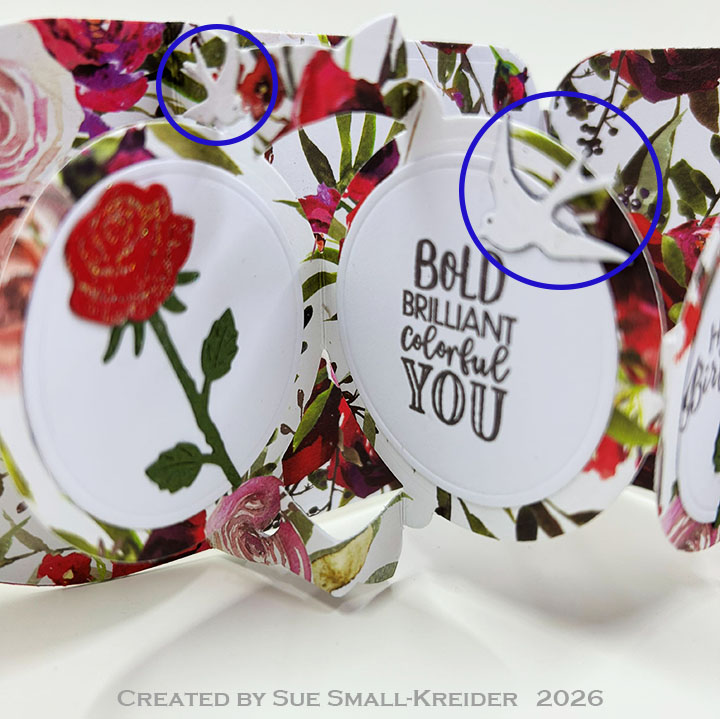
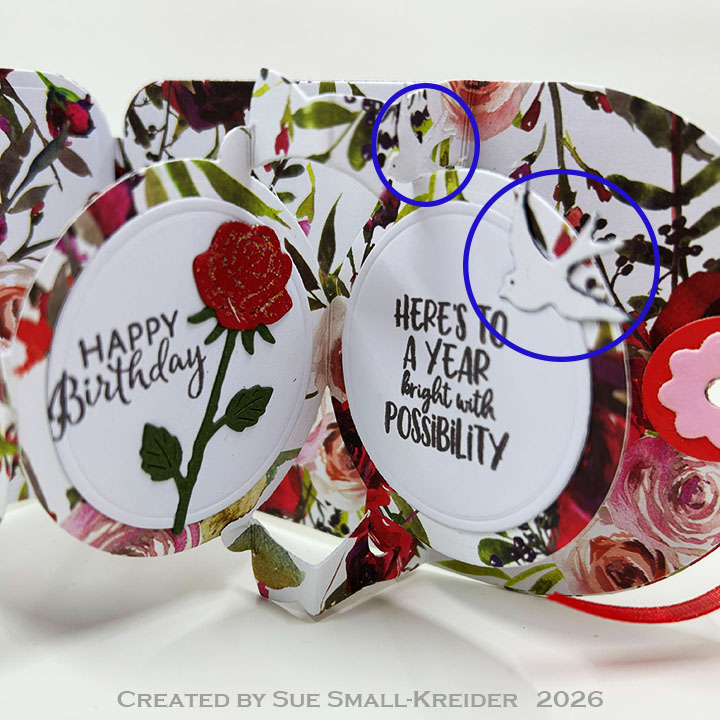
Cardbase: Watch the assembly video at the bottom of the linked page for the Circle Tag Book Pop-Up. Cut four of the tag die from patterned paper. Cut one hinge piece and two of the pop-up mechanism piece from the same patterned paper. Cut four of the circles from white cardstock. Also from white cardstock, cut two each of the medium and small birds in the Outdoor Scene set. Cut from red and pink cardstock four each of the circle and flower hole protectors from the Circle Tag Book Pop-Up set. Follow the video above for the assembly of card and placement of small birds.
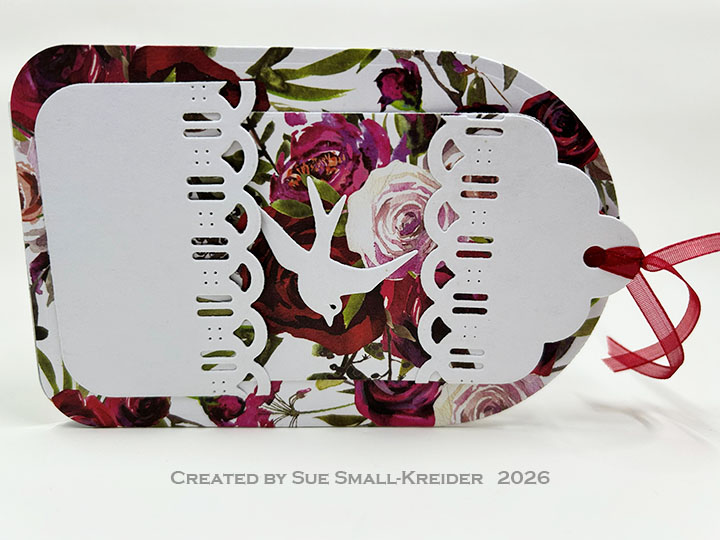
Bookmark: The bookmark and lacy pocket were made by cutting the smallest tag die in the Topper Tags set from patterned paper. The white trim was cut from the backside of a scrap of the patterned paper with the decorative edge die in the same set and trimmed with the smallest tag die. The pocket was made in a similar way, but using the next largest tag die to cut to size. The flying bird was cut from white cardstock using the largest bird die in the Outdoor Scene set.
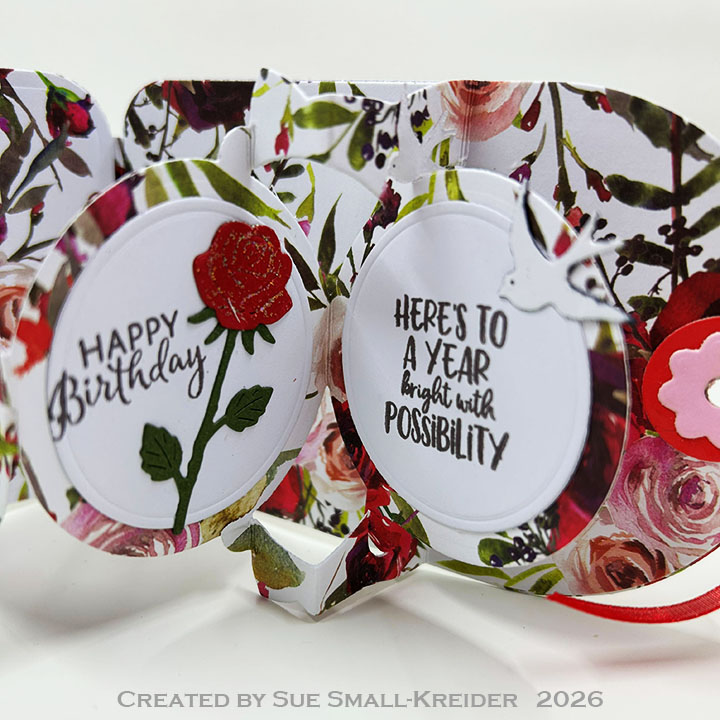
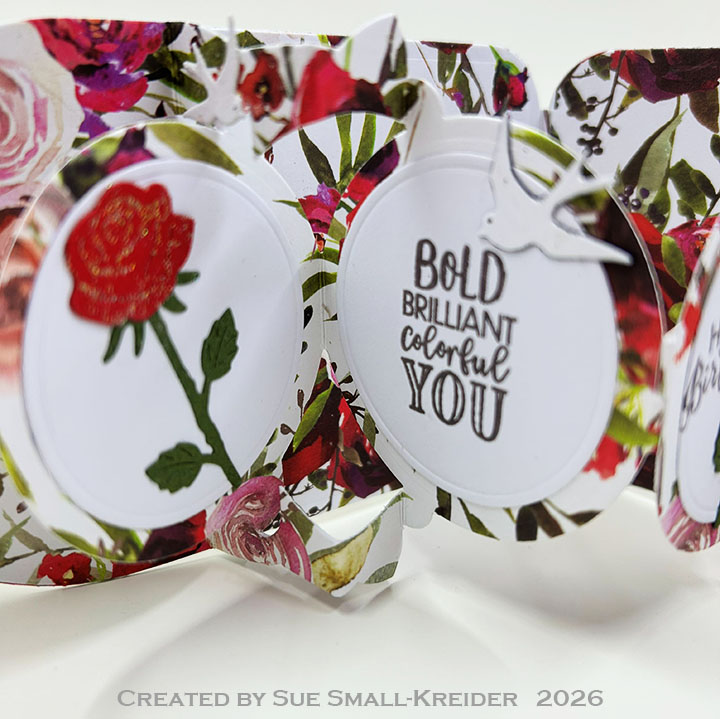
Sentiments: Using a stamping platform with the white circles cut using the Circle Tag Book Pop-Up circle dies, sentiments were picked from the following Karen Burniston stamp sets: Bouquet Sayings, Stage Scenes and Strut Your Stuff. “Big Hugs” on the bookmark comes from the Cat Sayings set. The long stem roses come from the Love Is In The Air Charms set.
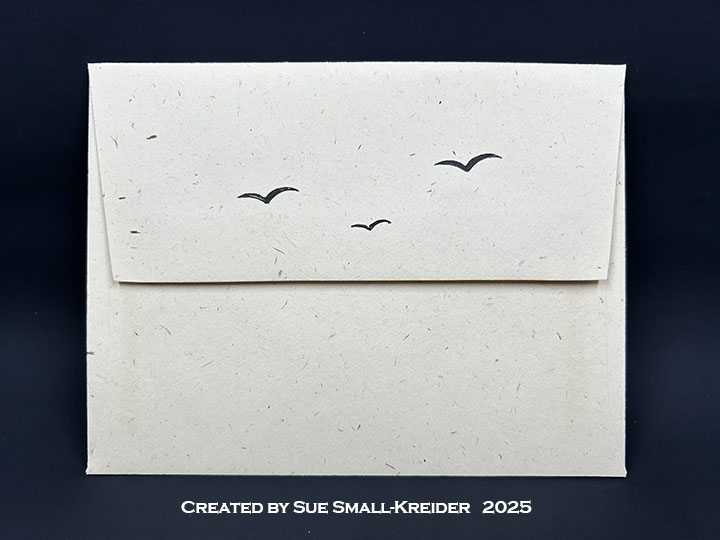
Envelope: The card fits into an A2 (4.25×5.5-inch) size envelope.
___________________________________
Thank you for experiencing this blog post. I hope this inspires you and makes you smile.
Please subscribe, like and leave comments 😊
Follow my YouTube channel, Instagram and Pinterest as well.
___________________________________
Disclaimer: Karen Burniston products are provided free of charge by the manufacturer for review and use. All other items were personally purchased. Compensated affiliate links used where or when possible, meaning I will receive a small percentage commission from these manufacturers at no cost to you. This will allow me to add more content to my YouTube channel and help out a lot. Thank you.
Materials Used:
Dies
- Karen Burniston in cahoots with Riley and Company – Love Is In The Air Charms – 1326
- Karen Burniston in cahoots with Riley and Company – Topper Tags – 1253
- Karen Burniston in cahoots with Riley and Company – Circle Tag Book Pop-Up – 1081
- Karen Burniston in cahoots with Riley and Company – Outdoor Scene – 1045
Stamps
- Karen Burniston in cahoots with Riley and Company – Clear Stamps – Bouquet Sayings
- Karen Burniston in cahoots with Riley and Company – Clear Stamps – Cat Sayings
- Karen Burniston in cahoots with Riley and Company – Clear Stamps – Stage Scenes
- Karen Burniston in cahoots with Riley and Company – Clear Stamps – Strut Your Stuff
Papers
- Park Lane Paperie – 8.5×11 110lb. Cardstock – Roses
- Red & Pink Cardboard Packaging
- Red & Green Cardstock
Ink
- Memento – Fade Resistant Dye ink – Espresso Truffle
- Pigma – Mircon 005 Fine Tip Pen – Black
- Sharpie – Permanent Marker – Fine Tip – Black
Adhesives
Tools
- Die Cutting Machine
- We R – Precision Press Mini – Stamping Platform
- Scissors
- Paper Masking Tape
- Plastic Palette Knife
Miscellaneous
- Ranger – Simon Hurley’s Astro Paste – Phoenix Feathers
- Red Organza Ribbon 1/4-inch wide


