Watch the process video to see how I made this card.
Cardbase: Start with a 4.25 x 11-inch piece of cardstock and fold in half to form a side-fold A2 (4.25×5.5-inch) card. Cover the four panels with decorative papers.
Pop-Up: Watch the assembly videos for the Boat Pop-Up and Cruise Ship Add-ons. Cut out one of the back trim piece from the Cruise Ship Add-ons and two of the ship’s wheels from the Cruise Charms in red. Trim the ship’s wheels as directed in the video above.
Sentiments: All the sentiments used on the card come from the Sail Away stamp set except for the “Happy Birthday” which is from the Belated Birthday set.
Envelope: The card fits into an A2 (4.25x 5.5-inches) size envelope stamped with a sentiment used on the card on the back flap in dark brown ink.
___________________________________
Thank you for experiencing this blog post.
I hope this inspires you and makes you smile.
Please like and leave comments 😊
___________________________________
Disclaimer: Karen Burniston products are provided free of charge by the manufacturer for review and use. All other items were personally purchased. Compensated affiliate links used where or when possible, meaning I will receive a small percentage commission from these manufacturers at no cost to you. This will allow me to add more content to my YouTube channel and help out a lot. Thank you.
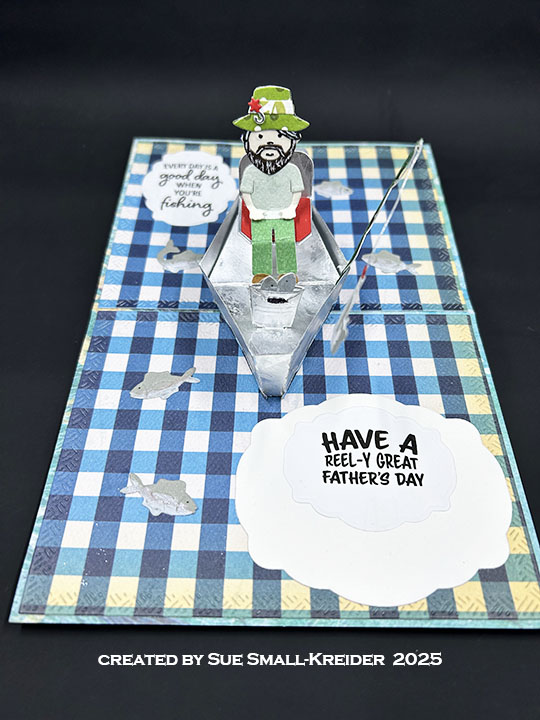
It’s Sneak Peek Week for Karen Burniston’s January 2025 release of eight new dies and four new clear stamps. For this Father’s Day card I used several of the new sets including: Paper People and Fishing Boat Add-Ons along with the previously released Boat Pop-Up dies and the new FishingPhrases stamps. The new release will be available on January 27, 2025.
Watch the video below to see how this card was made.
Cardbase: I started with an underwater pattern cardstock rectangle that was 5.5 x 8.5-inches and folded it in half to form a top-fold horizontal 4.25 x 5.55-inch slimline card. Next, I cut two of the largest die in the Rectangles – Crosshatch set from blue and white checkered paper and covered the inside panels. The outside panels used journaling cards from the coordinating paper collection.
Fisherman: Using the Paper Peopledie set cut one figure from flesh colored paper. (It is best to use your thinnest cardstock and decorative papers as the figure will need to be covered on both front and back from the waist up.) Cut hair and clothes to suit your card recipient. The hat with a fishing lure attached comes from the Fishing Boat Add-Ons set.
Fish and Fishing Rod: The Fishing Boat Add-Ons set includes dies to cut three different fish as well as a pail with a handle and a fishing rod, fishing line and three hooks. (It also includes an outboard motor, motor mount, and a hat.) I cut all the fish twice for this card from a greenish gray cardstock and colored the fish with glitter brush makers. The rod I cut twice from a dark green cardstock and the line once from silver cardstock. the line is sandwiched between the two layers of the rod. Take two of the jumping fish and glue them back to back except at the mouth. Feed the fish onto the hook and glue shut. The pail I cut twice from silver cardstock and the handle just once. (The handle knob is colored with a black marker.) There is a slot at the top of the pail that you can slide the small fish through.
Boat Pop-Up: Using the Boat Pop-Up die set, cut one of the boat’s hull or sides and one of the boat deck from matte silver cardstock (or use my trick of dulling the shine with dried layer of glue.) Cut two of the tabbed mechanism strips from a lightweight cardstock. (Assembly video for Boat Pop-Up set is at the bottom of the linked page.) Follow the directions to assemble boat except replace the rowboat seat with the fishing seat and use the pail of fish to cover front tab. Attach outboard motor using the slotted mount strip. No need for oar locks or oars.
Sentiments: There are two sentiments on the card – “Every day is a good day when you’re fishing” and “Have A Reel-y Great Father’s Day.” Both were stamped using the Fishing Phrasesclear stamp set with black ink onto white copier paper and die cutting with the smallest fancy label in the Rectangles and Labels- Crosshatch set.
Envelope: The card fits into an A2 size envelope which was has the last of the die-cut jumping fish glued to the back flap.
Karen Burniston’s Boat Pop-Up can become many different types of boats and ships using her different add-on sets. In her January 2025 there are two new add-on sets – Fishing Boat Add-Ons and Cruise Ship Add-Ons. There is also a new Paper People so you can add people to your cards.
Click on the pictures to see their posts. The last image will have will be posted in March.
This card was made for Craft Roulette #227 whose parameters included a 4×8 project mountain colors, float(s) or floating element and water.
___________________________________
Thank you for experiencing this blog post.
I hope this inspires you and makes you smile.
Please like and leave comments 😊
___________________________________
Disclaimer: Karen Burniston products are provided free of charge by the manufacturer for review and use. All other items were personally purchased. Compensated affiliate links used where or when possible, meaning I will receive a small percentage commission from these manufacturers at no cost to you. This will allow me to add more content to my YouTube channel and help out a lot. Thank you.
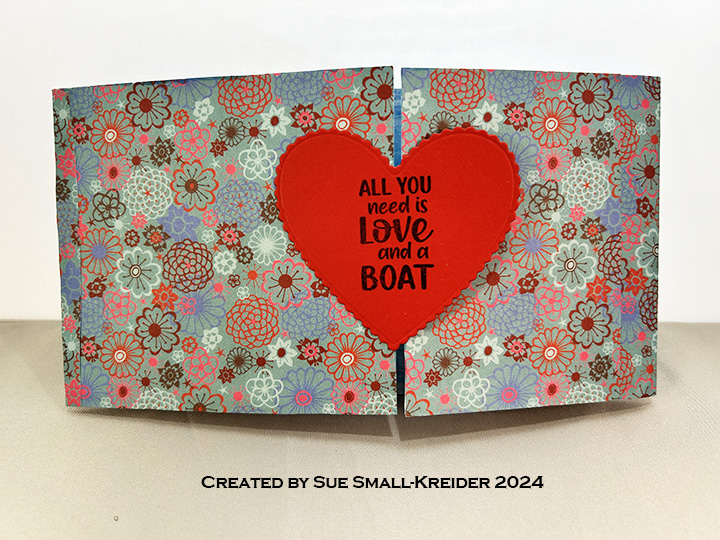
Cardbase: This slimline card is made up of three rectangles 7 1/2 x 4-inches, 4 1/2 x4-inches and 3 3/4 x 4-inches. Score and fold 1/4-inch tabs on the two smaller pieces. Glue tabs to largest piece. Cover with decorative papers.
Sentiments: The stamped sentiments are from Karen Burniston’s new clear stamps sets – “All you need is love and a boat” from Sail Away set and “Happy Anniversary” from Seasons set. “Love you” is a die in Word Set 9. The front sentiment is stamped on the scalloped heart from the Hearts – Crosshatch set. A tiny bit of a Velcro hook and loop sticker was attached to the back of the right side of the heart and the cardbase as a closure.
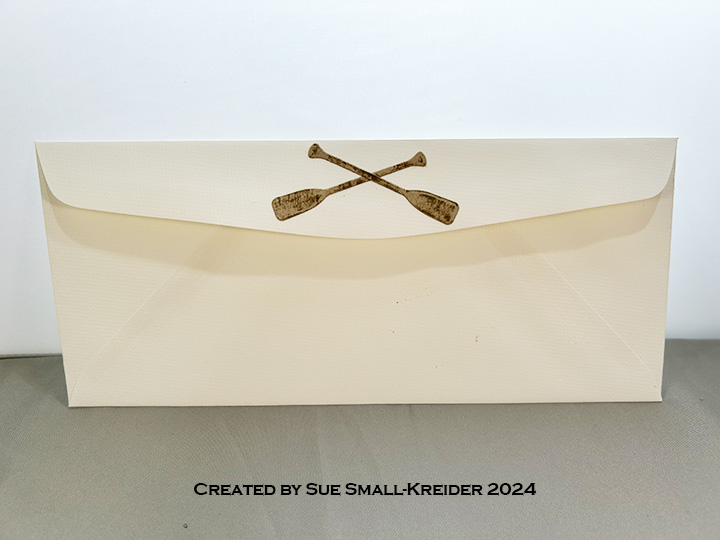
Envelope: The #10 business envelope back flap has a pair of die cut oars from the Boat Pop-Up set glued to it. They are inked by rubbing them over the brown ink cube.
To celebrate the release Karen Burniston and each of the Karen Burniston – KB Riley LLC Design Team members will be giving away a $25 Gift Certificate to some lucky person who comments on our blog posts, so make sure you join the hop and comment on everyone’s blog post. Winners will be randomly chosen from ALL of the blog hop comments received on our blog posts by Monday, 8th July 2024. Lots of chances to win some goodies, so just leave a comment on this post or any other blog hop posts to enter!
Watch the YouTube video below to learn how the card was made.
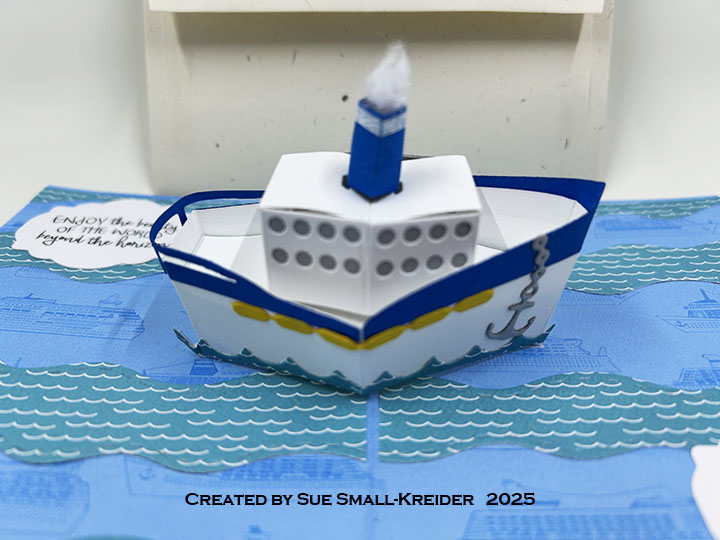
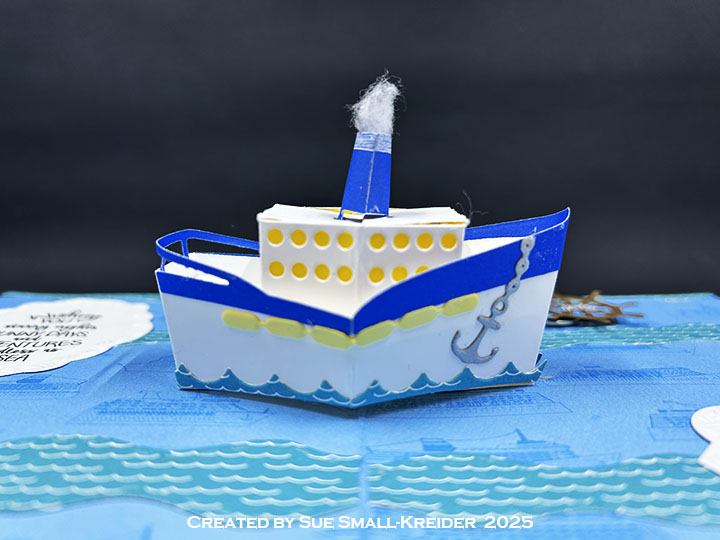
Sailboat Pop-Up: This pop-up is made with two die sets – the base is the Boat Pop-Up and the sails, pendant, railing, life preservers and anchor are all in the Sailboat Add-Ons set.
Cardbase: The card base is made up of two rectangles On 4 x8 1/2-inches and the other 4 x 8 3/4-inches. The longer piece is scored at 8 1/2-inches for the tab to glue to back of the other piece. The card front scene is made from waving water paper brushed with glitter gloss and Distress Oxide ink and a large blending brush. The birds are hand-drawn. The porpoise is from the Set Sail Bordersdie set. On the card back is a border of shells from the Set Sail Bordersdie set and colored with alcohol markers.
Sentiments: The card front “waving hello” is die-cut letters from the Mini Alphabet and the “hello” is from the Just A Note Lorna Add-Ons. The stamped sentiments inside the card are from the Sail Awaystamp set. A white label inside is for a personal message and was cut from the Labels – Crosshatch die set.
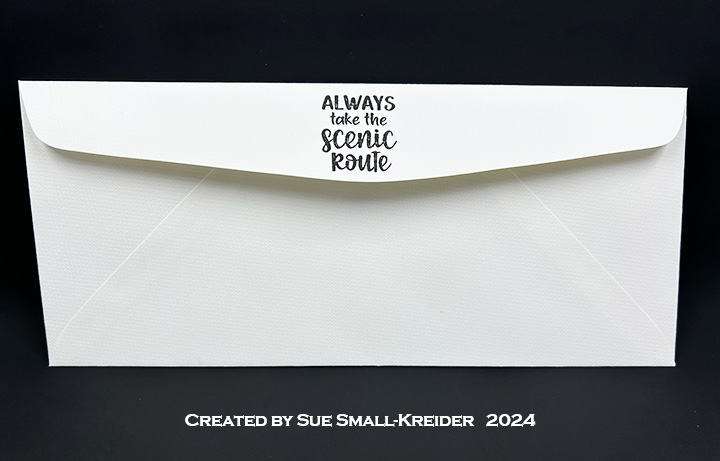
Envelope: The card fits into a #10 business envelope stamped with “Always take the scenic route” from the Sail Awaystamp set.
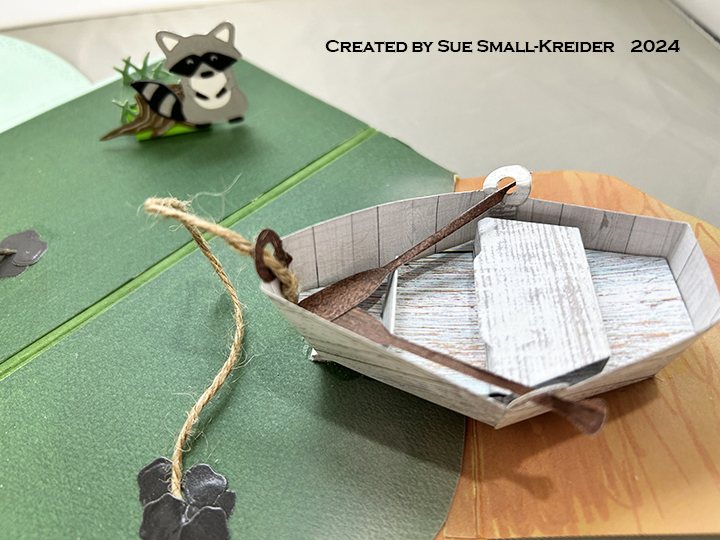
For my card I chose a Valentine theme using excerpts Edward Lear’s 1870 poem “The Owl and The Pussy-cat.” The action in this card comes as a wave lifting the pea-green boat up in the sea near the edge of the sand.
Cardbase: I used a purchased 5×7-inch (A7) white cardbase and covered the front and back panels with decorative blue sea patterned cardstock cut using the largest crosshatch rectangle in the Rectangles and Labels – Crosshatch set. Inside, I cut a 5×7 rectangle out of my one sheet of wave paper making the angle of the waves to match the angle of the raising platform base. From the scraps of wave paper, I pieced out the other inside panel leaving the bottom right corner without waves. I cut a sandy beach from patterned paper to cover the right corner. The edges of the beach were inked with blue ink and sea foam was added using a textured white paint. Trim off excess decorative paper from the card edges.
Raising Platform:(Watch the assembly video before starting.) From blue sea patterned paper cut, using the Raising Platform Pop-Up set, the “L” shaped mechanism piece, the largest label and a strip 1/4-inch by 2 1/2-inches. (Save the strip for use under the Boat section.)
(If your mechanism is cut from a one-sided patterned paper, cut a coordinating blue-green pattern paper cut two of each of the decorative diamond-shaped panels to cover the inside of the mechanism that is visible when assembled.)
Attach to inside of the card base as shown in assembly video/package instructions. Add waves cut from blue-green patterned cardstock using a die from the Tropical Scene set to the mechanism base making sure they don’t have catchpoints.
Owl: (Watch the assembly video before starting.) Cut two owls from brown, a triangle beak and a set of feet from yellow, one set of eyes from black and one oval from white using the Feathered Animals set. Glue white oval to back of one owl piece and attach black eyes. Add white dots to eyes as shown on packaging. Glue back owl piece to front and glue in the brown eye circles to back of head. Using the owl die, stencil on the feathers and wings to front and back of owl.
Cat: (Watch the assembly video before starting.) Cut two cats and two collars using the Cat and Dog set. Using die, stencil face on to one cat piece. Trim tag off one collar and glue to back cat piece and tagged collar to front cat piece. (I used markers and glitter brushes to color the collar.) Glue the green tab cut from scrap green cardstock used for the boat to the back side of one cat piece and then glue the other piece sandwiching the tabbed piece in between.
Boat: The boat is made by trimming off the two arm sections of the Raising Platform Pop-Up “L” shaped mechanism. (See photo for white sections to keep.) Train all the folds in the two pieces. Glue the tab to the inside of each piece to form the pointed front and back of the boat. Place one piece inside the other piece so that the untabbed tip of one piece points into the base point of the other and fold the sides to form a triangle. (See photo of inside of boat for folds.) Repeat with other piece. Glue the two pieces together making sure the boat is long enough to hold the cat and owl pieces.
Take the strip 1/4-inch by 2 1/2-inches cut in the Raising Platform section and fold in half. Fold again a 1/2-inch from the center fold and then 3/4-inch from the center fold. Repeat on the other side of the fold. (If using a one-sided patterned cardstock, cut 1/2-inch strips to cover the two ends that will show when assembled.) glue strip to bottom of boat as shown in photo.
Cut two more of the boat pieces for the inside of the boat. Trim off tabs and cut down the center fold to form diamond shapes. Glue in the cat and the owl inside the boat using their green tabs. Glue green boat diamonds inside the boat covering the animals’ tabs. Trim off excess patterned paper as needed along boat top edges.
Fold strip on bottom of boat form a cradle that the boat sets on when placed on raising platform . Adjust strip’s folds as needed. Glue cradle to platform.
Train boat and platform to close properly.
Sentiments: I used computer generated sentiments sized to be cut using dies in the Rectangles and Labels – Crosshatch set. I aged the pieces that were printed on cream cardstock by roughing-up the edges with a distress tool (knife sharpener) and crumpling the pieces and inking with yellow, brown and blue inks. On the inside sentiment I stamped in yellow a crescent moon in the clouds and on the front sentiment shooting stars in the corners. Tiny iridescent star confetti were glued randomly on the sentiments. On the card back credit is given to Edward Lear for the poem excerpts.
Thank you for reading this blog post. I hope this inspires you and makes you smile. Please like and leave comments 😊