When I saw this Funny Bones sentiment (scroll down to see the joke), I immediately thought of Karen Burniston’s Family Room Pop-Up dies that would make some fun patio furniture using Karen’s new Stage Pop-Up as a base.
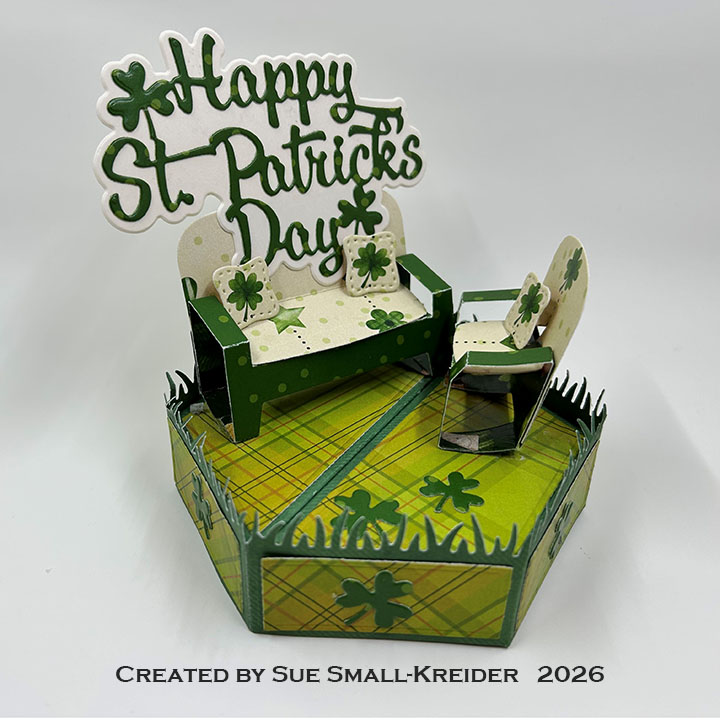
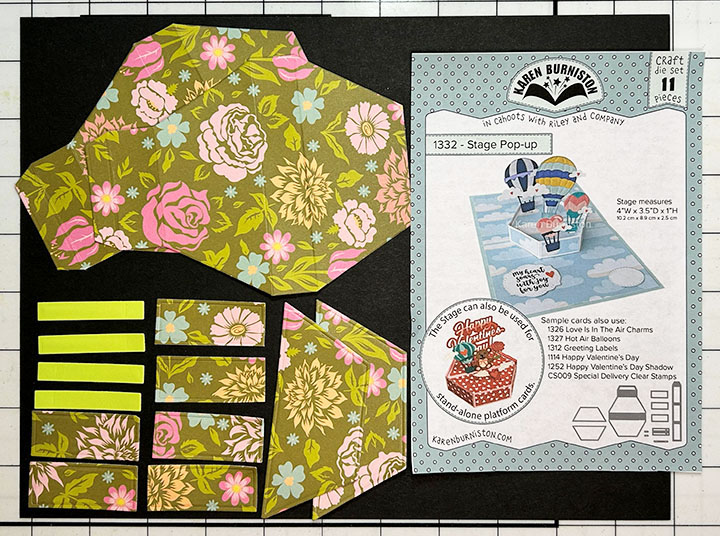
Pop-Up Stage Base: (Watch the assembly video at the bottom of the linked page for Stage Pop-Up.) Cut two base pieces from the Stage Pop-Up die set and two grassy side pieces from the Grass Stage Add-Ons set. Cut six decorative rectangles from the Stage Pop-Up set. Cut two of the base polygon decorative pieces from patterned cardstock and two more from white cardstock. Glue the patterned cardstock to the top of the bases and the save the white to be stamped with a sentiment before gluing to the bottom of the stage base.
Furniture Pop-Up: (Watch the assembly video at the bottom of the linked page for Family Room Pop-Up .) Using shamrock patterned cardstock cut the sofa and chair seats and pillows. Cut the base piece from dark green cardstock. Assemble as shown in video. (Because I used a slippery coated patterned cardstock for my card. I had to use double-sided tape and glue dots to adhere my furniture.)
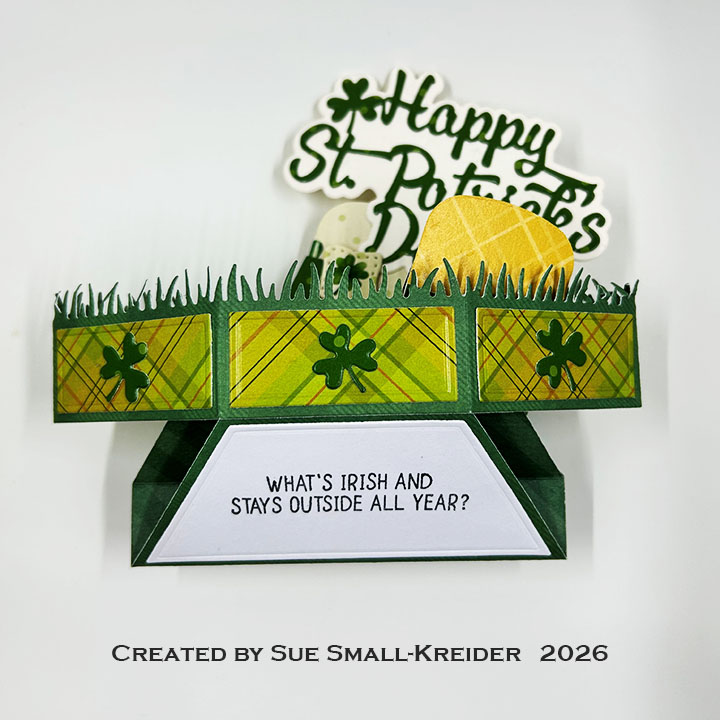
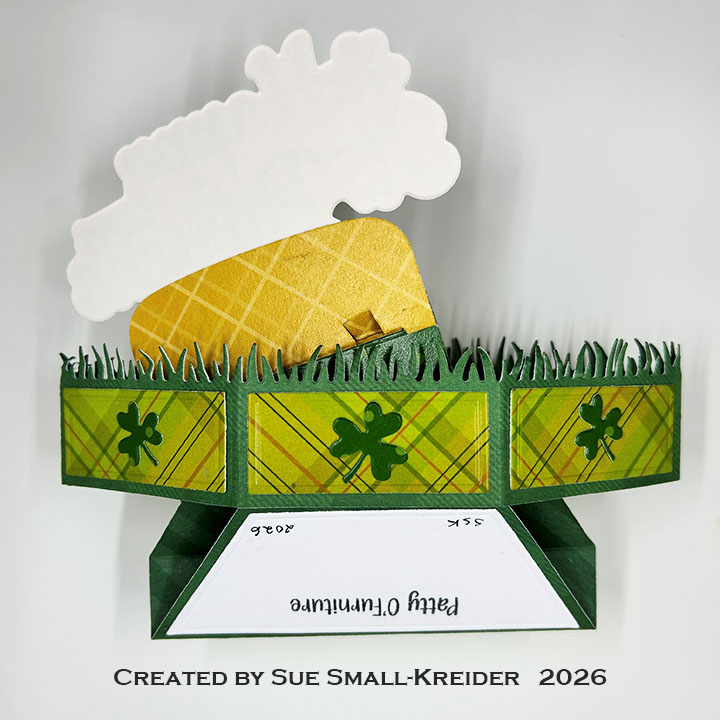
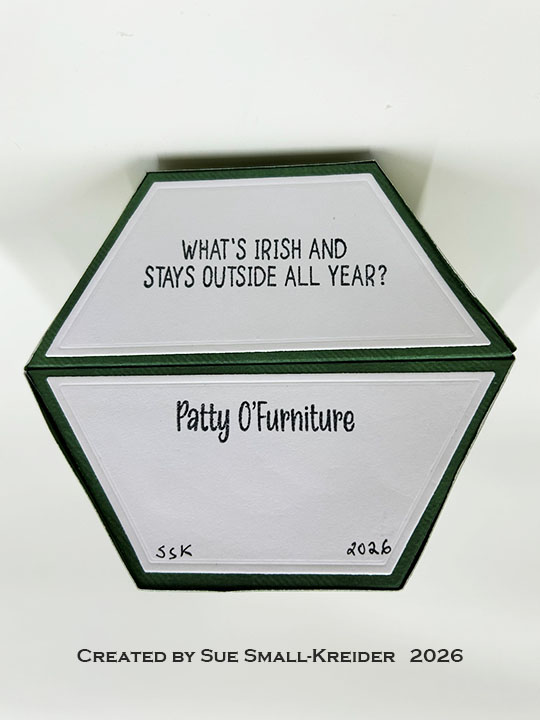
Sentiments: The top sentiment “Happy St. Patrick’s Day” is from the die set of the same name. On the bottom side of the Stage Pop-Up, I stamped on the two white decorator panels with the Funny Bones “ What’s Irish and stays outside all year?” on the upper piece and the answer “Paddy O’Furniture” on the lower piece so that when the card is folded you only see the question before you see the answer.
Envelope: The card fits into 6×9-inches catalog size envelope.
___________________________________
I hope this inspires you and makes you smile.
Please subscribe, like and leave comments 😊
Follow my YouTube channel, Instagram and Pinterest as well.
___________________________________
Disclaimer: Karen Burniston products are provided free of charge by the manufacturer for review and use. All other items were personally purchased. Compensated affiliate links used where or when possible, meaning I will receive a small percentage commission from these manufacturers at no cost to you. This will allow me to add more content to my YouTube channel and help out a lot. Thank you.
Materials Used:
- Karen Burniston in cahoots with Riley and Company – Grass Stage Add-Ons – 1333
- Karen Burniston in cahoots with Riley and Company – Stage Pop-Up – 1332
- Karen Burniston in cahoots with Riley and Company – Happy St. Patrick’s Day – 1189
- Karen Burniston in cahoots with Riley and Company – Family Room Pop-Up – 1099
Stamps
- Funny Bones by Riley & Company – Clear Stamps – What’s Irish and Stays Out – RWD-1437
Papers
- Keep It Simple – 12×12 inch Double-Sided Coated Cardstock – Lucky Day
- Keep It Simple – 12×12 inch Double-Sided Textured Cardstock – Jade -Lucky Clover: Buffalo Plaid
- Cream Cardstock
- Catalog (6×9) Envelope – White
Ink
- Memento – Fade Resistant Dye ink – Tuxedo Black
- Pigma – Mircon 005 Fine Tip Pen – Black
Adhesives
- Double-Sided Tape – 1/8-inch wide
- Glue Dots
Tools
- Die Cutting Machine
- Paper Trimmer
- Bone Folder
- Stamping Platform
- LDRS – Stampendable Stamping Tool
- Stamping Blocks used as paperweights
- Scissors
- Tweezers
- Paper Masking Tape