S’more Funn Birthday Card

This card was made for CRAFT ROULETTE #273 whose parameters included a lady’s card, candy wrapper colors, camp(s)/(ing) element, and belt. I chose to make a trifold, slimline card that is interactive using Karen Burniston dies and some custom cut pieces of my own design.

Watch the process video to see how I made this card.

Cardbase:  The cardbase is a trifold, so there are three panels (I made mine out of 80lb black and 110lb white cardstock, but you could make it all out of 100 lb black.) I cut two black panels at 3.75×8.5-inches for the card back. One white 4.125 x6-inches (Score at 3.75-inches and at 3.875-inches.) Cut another white panel at 4.125×7-inches (Score at 3.75-inches.) Cut two thumb holes in each panel as shown in video using die from Whirly Wheel die set. Follow video above for assembly order of panels. (You can follow the video with cutting the waves into the white cardbase panels or you and just round the tops of the panels as I eventually did.)

Flame Panels:  Cut one 3.75×6-inch panel and one 3.75×7-inch panel. Using the waves die in the Curved Edges die set, cut the two panels with waves at the top. Cut two sets of five different fire colors using the waves die from 4×3-inch pieces of paper. Adhere the fire color pieces to the panels going from darkest to lightest colors. (I ended with a dark color next to custom cut and colored logs.)

Whirly Wheel Flames:  (Watch the assembly video located at the bottom of the linked Whirly Wheel die set.) Cut two sets of wheels, thermometer arms, and washers from heavy white cardstock. (I recommend adding the arrows before adding the clear packing tape by either using a marker and the die as a stencil or stamping using the Whirly Wheel Words stamp set.) Cover all die-cut pieces with clear packing tape. Assemble as shown in the video. Test flame shapes to add to Whirly Wheel arm making sure they stay within the card base when closed. Attach to arm as shown in video.

Marshmallow Sticks:  I drew my marshmallows on sticks on a piece of 8.5x 3.5-inch white cardstock. They were fussy cut and then the sticks were colored dark brown. The marshmallows were covered with Nellie’s Choice Snow Effects, allowed to dry and then colored with light brown and hints of black to make the bubbling, toasted look of the marshmallows. The sticks were fitted and folded to the card before gluing on to the card back.

Sentiment Pop-Up:  Die cut a white l-shaped mechanism from the Katherine Label Pop-Up die set. (Watch the assembly video located at the bottom of the linked die set.) Die cut in orange and red, the Happy Birthday and its shadow piece. Install the mechanism into card making sure it is high enough in the card not to interfere with the thumbholes. Color the top sides of the mechanism black to blend into the background. (I cut a 1.5×1.75-inch piece of black and colored afterwards. You could just color the three sides of the box part of the mechanism at this point.) Glue Happy Birthday onto its shadow and adhere to mechanism.

Sentiment Belt:  Cut an 11×2.5-inch strip of dark brown textured cardstock. Fold it around the card loosely so it can slide off. Glue together back edges. On a computer design a 2×2.75-inch brown panel that says “Dear Sweet Lady, Wishing you S’more Funn!” followed by instructions on how to operate the card. An additional instruction panel is added to the back of the belt.

Envelope:  The card fits into #10 business envelope (4.125x 9.5-inches).

___________________________________

Thank you for experiencing this blog post.

I hope this inspires you and makes you smile.

Please like and leave comments 😊

___________________________________

Disclaimer: Karen Burniston products are provided free of charge by the manufacturer for review and use. All other items were personally purchased. Compensated affiliate links used where or when possible, meaning I will receive a small percentage commission from these manufacturers at no cost to you. This will allow me to add more content to my YouTube channel and help out a lot. Thank you.

Materials Used:

Dies

Stamps

Papers

  • Bazzill – 8.5×11-inch Textured Cardstock – Bitter Chocolate
  • Orange, Reds and Yellow Cardstock
  • Scrapbook.com -8.5×11-inch 110lb Cardstock – White
  • The Paper Studio – 8.5×11-inch 80lb Cardstock – Black
  • #10 Business Envelope – Kraft

Ink

  • Sakura – Gelly Roll Pen – Medium – White
  • Sharpie – Permanent Marker – Fine Tip – Black, Red
  • Sharpie – Permanent Marker – Ultra Fine Tip – Black
  • Stampin’ Up – Stampin’ Blends – Dark and Light Cooper Clay

Adhesives

Tools

  • Die Cutting Machine
  • Paper Trimmer
  • Bone Folder
  • Score Board
  • Craft Knife
  • Scissors
  • Pencil
  • Paper Masking Tape

Miscellaneous

  • Nellies Choice – Snow Effects

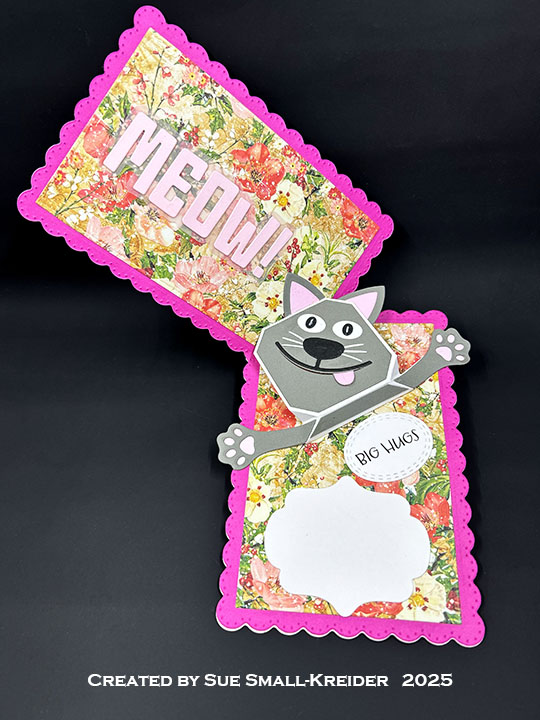
Rainbow Bridge Card

It’s the Karen Burniston design team challenge for July 2025 using the theme of Rainbow. I choose to make a sympathy card for a pet using the new Rainbow Add-Ons and the previously released Flip Frame Pop-Up, Cat and Dog, and Rectangles and Labels – Crosshatch die sets along with the Rainbow Greetings stamp set.

Watch the process video to see how I made this card.

Cardbase: I started with a purchased side-fold 4×6-inch A6 cardbase. Cover the four panels with decorative papers cut using the scalloped edge die in the Rectangles and Labels – Crosshatch set. Use the large frame die in the Flip Frame Pop-Up set to cut the card front frame. The dog comes from the Cat and Dog die set. I inked the white dog slightly with gray ink and used a fine tipped black marker to stencil in his face and paw areas.

Rainbow Flip Pop-Up: Watch the assembly videos for the Flip Frame Pop-Up and Rainbow Add-Ons located at the bottom of each linked die set.

Sentiments:  All the sentiments used on the card come from the Rainbow Greetings stamp set and are stamped in brown ink. They are cut out using the two smallest label dies in the Rectangles and Labels – Crosshatch set.

Envelope:  The card fits into an A6 (4×6-inches) size envelope.

___________________________________

Thank you for experiencing this blog post.

I hope this inspires you and makes you smile.

Please like and leave comments 😊

___________________________________

Disclaimer: Karen Burniston products are provided free of charge by the manufacturer for review and use. All other items were personally purchased. Compensated affiliate links used where or when possible, meaning I will receive a small percentage commission from these manufacturers at no cost to you. This will allow me to add more content to my YouTube channel and help out a lot. Thank you.

Materials Used:

Dies

Stamps

Papers

  • Darice – 8.5×11-inch Single-Sided Paper – Green Prints
  • Concord & 9th – 8.5×11-inch Solid 80 lb Cardstock – Poppy, Marmalade, Buttercup, Clover, Peacock, Eggplant, Spout, Oceanside
  • Green and White Cardstock
  • Park Lane Paperie – A6 Cardbase & Envelope – Cream

Ink

  • Memento – Fade Resistant Dye ink – Espresso Truffle
  • Pigma – Mircon 01 Fine Tip Pen – Black
  • Ranger – Tim Holtz Distress Ink – Lost Shadow

Adhesives

Tools

  • Die Cutting Machine
  • Paper Trimmer
  • Bone Folder
  • Score Board
  • Stamping Platform
  • LDRS – Stampendable Stamping Tool
  • Stamping Blocks
  • Scissors
  • Paper Masking Tape

Miscellaneous

  • Green Gem
  • Green Satin Bow

Whirly Wheel Projects

Here is a quick summary of cards using the new Karen Burniston Whirly Wheel die set.

(HINT: Click on the photo to go to the tutorial on how to make it.)

________________________

Thank you for experiencing this blog post.

I hope this inspires you and makes you smile.

Please like and leave comments 😊

________________________

Disclaimer: Karen Burniston products are provided free of charge by the manufacturer for review and use. All other items were personally purchased. Compensated affiliate links used where or when possible, meaning I will receive a small percentage commission from these manufacturers at no cost to you. This will allow me to add more content to my YouTube channel and help out a lot. Thank you.

________________________

Matchbook Purse Birthday Card

This card was made for Craft Roulette #271 whose parameters included a matchbook card, park colors, key(s) element, and curved and straight.

Watch the process video to see how I made this card.

Cardbase:  Start with a 6×11-inch piece of patterned cardstock and score and fold at 3 1/4, 3 3/4 and 8 1/4-inches. Thread cardstock through the Karen Burniston Long Flap and Closure smaller flap die and center before cutting curved edge of the purse flap. Use white maker to outline curved edge.

Ribbon Handle:  Cut an 18-20-inch piece of 3/8 to 1/2-inch wide ribbon.  Punch two holes through the folded flap and thread ribbon through the holes. Leaving enough ribbon for a purse strap, tie ribbon at holes  before tying bow.

Keys and Clasp: Die cut a total of four keys using the key die in the Karen Burniston Katherine Label Pop-Up die set. Cut two from silver foil cardstock and two more keys from the white backside of the silver foil cardstock. Glue keys together to form two keys that are silver on both sides. Add a jump ring to each key and then add each key to the third jump ring before attaching it to the ribbon. Glue large sequin to center of flap as a decorative clasp.

Sentiments:  All the sentiments used on the card come from the Craft Roulette Funn Sentiments #01 stamp set and stamped in blue ink. stamped in black ink.

Envelope:  The card fits into an A7 (5x 7-inches) size envelope that has a strip of the decorative cardstock glued to the back envelope flap.

___________________________________

Thank you for experiencing this blog post. I hope this inspires you and makes you smile. Please like and leave comments 😊

___________________________________

Disclaimer: Karen Burniston products are provided free of charge by the manufacturer for review and use. All other items were personally purchased. Compensated affiliate links used where or when possible, meaning I will receive a small percentage commission from these manufacturers at no cost to you. This will allow me to add more content to my YouTube channel and help out a lot. Thank you.

Materials Used:

Dies

Stamps

  • Craft Roulette – Clear Stamps – Funn Sentiments #01

Papers

  • Darice – 8.5×11 Single-Sided Cardstock – Blue Prints
  • Your Paper Insider – Silver Holographic Oil Slick Envelope Scrap
  • A7 Envelope – Cream

Ink

  • Memento – Fade Resistant Dye ink – Paris Dusk
  • Pigma – Mircon 01 Fine Tip Pen – Black
  • Scrapbook.com – Glitter Brush Marker – Coral, Frosty Blue, Mint Green & Purple
  • Sharpie – Paint Marker – Extra Fine Tip – Oil Based White

Adhesives

Tools

  • Die Cutting Machine
  • Paper Trimmer
  • Stamping Platform
  • Bone Folder
  • Score Board
  • Needle-Nose Pliers
  • Hole Punch
  • Stamping Blocks
  • Scissors
  • Pencil
  • Paper Masking Tape
  • We R Memories – QuickStick

Miscellaneous

  • 18-20-inches of Ribbon
  • 3 Metal Jump Rings
  • Large sequin

RAINBOW connection pop-up birthday card

It’s Sneak Peek Week for Karen Burniston’s June 2025 release of ten new dies and five new clear stamps. For this rainbow connection slimline birthday card, I used several of the new sets including Arch Pop-Up, Leaping Animals and Rainbow Add-Ons die sets and Rainbow Greetings stamp set.

Watch the process video to see how I made this card.

Cardbase:  An 8×8.75-inch rectangle of white cardstock was scored and folded into a side-fold 4×8.75 size slimline card.  Thin decorative papers were used to cover the cardbase. The inside panels were cut using the largest die from the Long Rectangles – Crosshatch die set. (See video above for details on how they were cut and attached.)

Arch Pop-Up:  Cut out the two large arch dies in the Arch Pop-Up from solid 65-80lb. cardstock. Assemble as shown in the video above, adding the rainbow strips which were cut using double-sided adhesive tape. Attach the pop-up rainbow arch as shown in the video.

Frogs:  Cut four green, leaping frogs from the Leaping Animals die sets. Cut three green, sitting frogs from the Bayou Animals die set. With a white gel pen and frog dies as stencils, add spots and mouths to frogs. Using the eyes die from either animal set, cut four sets of eyes from white and stencil the black pupil of the eye and add a white gel pen dot onto them.

Sentiments:  All the sentiments were stamped using the Rainbow Greetings stamp set with in black ink. “Sprinkling a little Rainbow magic your way” and “Happy Birthday” were cut out using the smallest fancy label die in the Rectangles and Labels – Crosshatch die set. Use the largest cloud die in the Rainbow Add-Ons set to cut out “Hello there.”

Envelope:  The card fits into #10 business (4.25x 9-inches) size envelope stamped with “Wishing you sunshine and rainbows” the back flap.

Here is a great reel on singing the Rainbow Connection song with Kermit – https://www.facebook.com/reel/531484342305953

__________________________

Thank you for experiencing this blog post.

I hope this inspires you and makes you smile.

Please like and leave comments 😊

__________________________

Disclaimer: Karen Burniston products are provided free of charge by the manufacturer for review and use. All other items were personally purchased. Compensated affiliate links used where or when possible, meaning I will receive a small percentage commission from these manufacturers at no cost to you. This will allow me to add more content to my YouTube channel and help out a lot. Thank you.

__________________________

Materials Used:

Dies

Stamps

Papers

  • Concord & 9th – 8.5×11-inch Solid 80 lb Cardstock – Poppy, Marmalade, Buttercup, Clover, Peacock, Eggplant, Spout, Oceanside
  • Spellbinders – 8.5×11-inch 80 lb Cardstock – White
  • The Paper Studio – 8.5×11-inch Single-Sided Patterned Paper – Random Dot – Mint & Robin’s Egg Blue
  • #10 Business Envelope

Ink

Adhesives

Tools

  • Die Cutting Machine
  • Paper Trimmer
  • Bone Folder
  • Score Board
  • Stamping Platform
  • LDRS – Stampendable Stamping Tool
  • Stamping Blocks used as paperweights
  • Scissors
  • Pencil
  • Paper Masking Tape

It’s Who You Meet Along The Way

It’s the Karen Burniston design team challenge for June 2025 using the theme of Animals and Characters. I chose to make a Wizard of Oz themed card using a variety of die sets. (See Materials Used for the list of dies used located at the bottom of this post.)

Watch the process video to see how I made this card.

Cardbase: Start with a 8.5×5.5-inch piece of single-sided patterned cardstock and fold in half to form a side-fold A2 (4.25×5.5-inch) card. Cover the two inside panels with decorative papers cut with the largest die in the Rectangles – Crosshatch die set.

House Pop-Up: (Watch the assembly video for Tiny House Pop-Up located at the bottom of the linked page.) Follow the directions in the process video above for the modifications made to the Tiny House Pop-Up using the Beach Bar Tiny House Add-Ons to add a porch to the house.

Characters: (Watch the assembly videos for Paper People, Knight and Dragon, and Monkey and Lion located at the bottom of the linked pages.) Follow the directions in the process video above for the modifications made to these die sets for the specific characters. For the Witch’s legs cut two strips of white cardstock 1/8-inch thick and draw red strips on them. Die cut shoes from the Witch and Cauldron die set in red glitter cardstock.

Sentiments:  All the sentiments used on the card are stamped using brown ink and Riley and Company Wizard of Oz Dress-Up stamps.

Envelope:  The card fits into an A2 (4.25x 5.5-inches) size envelope stamped with a sentiment from Riley and Company on the back flap in brown ink.

___________________________________

Thank you for experiencing this blog post.

I hope this inspires you and makes you smile.

Please like and leave comments 😊

___________________________________

Disclaimer: Karen Burniston products are provided free of charge by the manufacturer for review and use. All other items were personally purchased. Compensated affiliate links used where or when possible, meaning I will receive a small percentage commission from these manufacturers at no cost to you. This will allow me to add more content to my YouTube channel and help out a lot. Thank you.

Materials Used:

Dies

Stamps

  • Riley and Company – Clear Stamps & Dies – Dress-Up Riley – Oz 1 & Oz 2

Papers

  • Bazzill – 8.5×11 Cardstock – Tiara -18-1002
  • Concord & 9th – 8.5×11-inch Solid 80 lb Cardstock – Poppy, Buttercup, Peacock
  • DCWV – 6×6 Mat Stack of Glitter Cardstock – Pink, Purple, Ruby
  • Hunkydory – A2 Mirri Card – Oxidised Metals
  • Keep It Simple – 12×12 Double-Sided Paper –Back To Basics – Jade Collection Pack – Meadow: Floral
  • Recollections – 8.5×11-inch Solid 100 lb Cardstock – Flesh Tones
  • Whimzwhirled – Digital papers – Yellow Brick Road
  • Brown and Tan Cardstock
  • White Copier Paper
  • Blue Checked Cardstock
  • Fraser Papers for William House – A2 Envelope – Genesis Text Husk Smooth

Ink

  • Creative Craft Products – Dual Tipped Alcohol Markers – BG1 Blue Grey, 95 Burnt Sienna, WG1 Warm Grey
  • Memento – Fade Resistant Dye ink – Espresso Truffle and Tuxedo Black
  • Pigma – Mircon 01 Fine Tip Pen – Black
  • Sakura – Gelly Roll Pen – Medium – White
  • Scrapbook.com – Glitter Brush Marker – Red
  • Sharpie – Permanent Marker – Ultra Fine Tip – Black, Red
  • StazOn -Solvent Ink – Jet Black

Adhesives

Tools

  • Die Cutting Machine
  • Paper Trimmer
  • Bone Folder
  • Score Board
  • Stamping Platform
  • LDRS – Stampendable Stamping Tool
  • Stamping Blocks
  • Scissors
  • Pencil
  • Paper Masking Tape
  • We R Memories – QuickStick
  • Tweezers
  • Ruler

Square Pop-Up Birthday Card

This card was made for Craft Roulette #269 whose parameters included a square card, butterfly colors, cloud element, and tied.

Front of Card

Watch the process video to see how I made this card.

Back of Card

Cardbase: Start with a 4 x 8-inch piece of double-sided patterned cardstock and fold in half to form a top-fold 4-inch square card.

Pop-Up:  Watch the assembly videos for the Little Twist Panel Pop-Up. Cut from double-sided patterned paper one of the pop-up base, two large, rounded corners panel, one of the strip panel and the two flag banner pieces. Add flag banner pieces to strip panel before attaching the strip panel to pop-up base arms. Stamp and decorate large panels before attaching them to strip panel.

Sentiments:  All the sentiments used on the card come from the Bouquet Sayings stamp set except for the card front’s “Celebrate your big awesome super day” which is from the Photo Memories set. All are stamped in black ink. Clouds and hearts come from the Long Nature Edges 2 die set.

Envelope:  The card fits into an A2 (4.25x 5.5-inches) size envelope. A piece of decorative paper and stamps from the Craft Roulette Basics stamp set decorate the back of the envelope.

___________________________________

Thank you for experiencing this blog post.

I hope this inspires you and makes you smile.

Please like and leave comments 😊

___________________________________

Disclaimer: Karen Burniston products are provided free of charge by the manufacturer for review and use. All other items were personally purchased. Compensated affiliate links used where or when possible, meaning I will receive a small percentage commission from these manufacturers at no cost to you. This will allow me to add more content to my YouTube channel and help out a lot. Thank you.

___________________________________

Materials Used:

Dies

Stamps

Papers

  • Carabelle Studio – 12×12 Double-Sided Cardstock – Sorbet designed by Azoline
  • Pale Gray Cardstock
  • Fraser Papers for William House – A2 Envelope – Genesis Text Milkweed Smooth

Ink

  • Memento – Fade Resistant Dye ink – Gray Flannel and Tuxedo Black
  • Pigma – Mircon 01 Fine Tip Pen – Black

Adhesives

Tools

  • Die Cutting Machine
  • Paper Trimmer
  • Bone Folder
  • Score Board
  • Stamping Blocks
  • Scissors
  • Pencil
  • Paper Masking Tape
  • We R Memories – QuickStick
  • We R Memories – Piercing Tool
  • Pear Blossom Press – Cardmaker’s T-Square A2 Ruler

Miscellaneous

  • Yellow Satin Ribbon Bow

Dress-Shaped Card

This card was made for Craft Roulette #268 whose parameters included a card for a student, modern colors, clothing element, and abstract blob(s). I made an A9  shaped-card of encouragement for a student of life.

Watch the process video to see how I made this card.

Cardbase:  Using a 5.5×8.5 sheet of paper fold in half- long ways and draw one side of a dress. Cut the dress out and use as a pattern to trace for two dresses on an 8.5×11 sheet of cardstock. Add tabs to shoulders of one dress as hinges to create the shaped card.   

Sentiments:  All the sentiments are stamped using rubber stamps from Riley & Company’s Funny Bones collection, except for the “Go Girl Go” which was die cut using Karen Burniston’s Mini Alphabet die set.

Envelope:  The card fits into a catalog envelope (6×9-inches).

___________________________________

Thank you for experiencing this blog post.

I hope this inspires you and makes you smile.

Please like and leave comments 😊

___________________________________

Disclaimer: Karen Burniston products are provided free of charge by the manufacturer for review and use. All other items were personally purchased. Compensated affiliate links used where or when possible, meaning I will receive a small percentage commission from these manufacturers at no cost to you. This will allow me to add more content to my YouTube channel and help out a lot. Thank you.

Materials Used:

Dies

Stamps

  • Riley & Co. – Funny Bones – Rubber Stamp – Whatever You Do – RWD-822
  • Riley & Co. – Funny Bones – Rubber Stamp – Life is Better – RWD-464

Stencils

  • Honey Bee Stamps – Stencil set – Winter Wonder Scene Builder – HBSL-11

Papers

  • White 80lb. Cardstock

Ink

  • Sunbird Spark – Velvety Dye Ink – Ochre, Olive Grove, Puya

Adhesives

Tools

  • Die Cutting Machine

Miscellaneous

  • Mint Green Ribbon

Small Quilt Themed Pop-Up Birthday Card

This card was made for Craft Roulette #267whose parameters included a 4 Bar card, craft store colors, se(s)/(ing)/sewn element, and stencil. I made a birthday card using dies by Karen Burniston and PinkFresh and sentiment stripes by Waffle Flower

Watch the process video to see how I made this card.

Cardbase:  Score and fold a 7×5-inch piece of heavy white cardstock into 3.5×5-inch side fold card. 

Stenciled Quilt Top Background:  Follow directions in video to stencil the background. To create the stencils use 6×8.5-inch sheets of 100lb cardstock that have the stitched diamond die cut into the center of each of the four sheets. Using the stitch marks as your guide, cut the stencils using a craft knife and a metal straight edge or ruler.

Pop-up Twist Panel:  Watch the assembly video at the bottom of the linked page. Stamp the quilt stamp onto medium weight cardstock. Die-cut the large mechanism from the Little Twist Panel Pop-Up set out of the stamped cardstock. Cut the panel from white cardstock. Cut decorative panels using the dies in set with your stamped cardstock.

Sewing Charms:  Assemble as directed in Karen’s assembly video located at the bottom of the linked page for the Sewing Charms.

Envelope:  The card fits into an A2 (4.25x 5.5-inches) size envelope.

___________________________________

Thank you for experiencing this blog post.

I hope this inspires you and makes you smile.

Please like and leave comments 😊

___________________________________

Disclaimer: Karen Burniston products are provided free of charge by the manufacturer for review and use. All other items were personally purchased. Compensated affiliate links used where or when possible, meaning I will receive a small percentage commission from these manufacturers at no cost to you. This will allow me to add more content to my YouTube channel and help out a lot. Thank you.

___________________________________

Materials Used:

Dies

Stamps

  • Spellbinders – Cling Stamp Set – Stephanie Low – Designer Series – Cool Vibes – SBS-150

Papers

  • Waffle Flower – Sentiments – Birthday Die Cut– SCP240
  • Waffle Flower – Sentiments  – View Die Cut – SCP253
  • White 100lb. Cardstock

Ink

  • Ranger – Tim Holtz – Distress Ink – Blueprint Sketch, Dried Marigold, Saltwater taffy, Salvaged Patina

Adhesives

Tools

  • Die Cutting Machine
  • Paper Trimmer
  • Scissors
  • Paper Masking Tape
  • Tweezers
  • Blending Brushes
  • Craft Knife
  • Metal Ruler or Straight Edge