A Valentine for my sweetie! Made with Simon Says Stamp’s collaboration with Pink & Main stamp set called Snow-One Like You and a heart die.
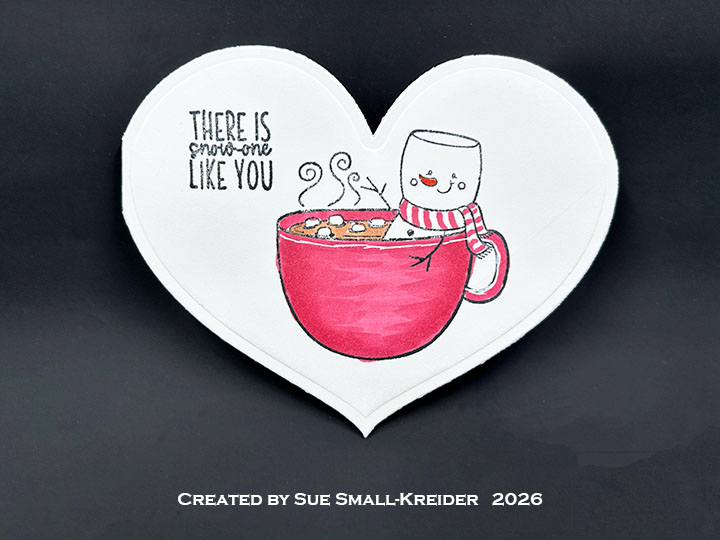
Cardbase: I folded an 8.5×11 sheet of white 65lb. cardstock in half to create a 4.25×5.5-inch rectangle that I cut two heart shaped cardbases from with the left edge of the die slightly over the folded edge. One cardbase I cut apart to glue over the back sides of the colored images.
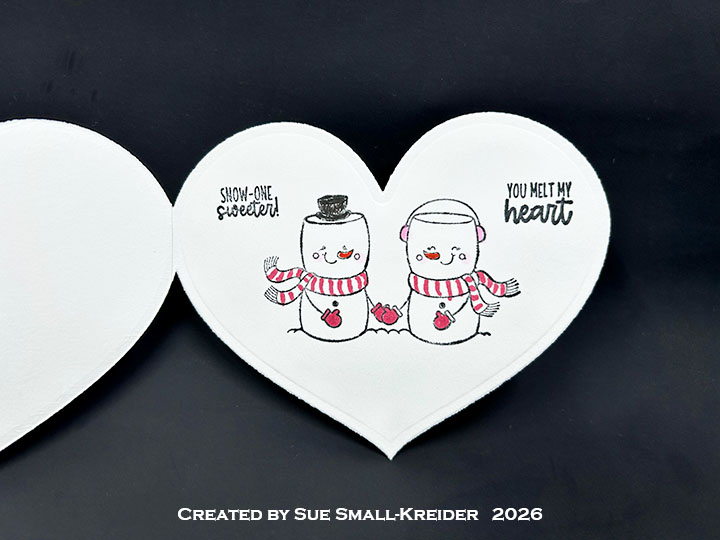
Sentiments: On the front the cocoa cup reads “There is Snow-One Like You” and inside “Snow-one Sweeter!” and You melt my Heart.” All the sentiments come from Snow-One Like You stamp set.
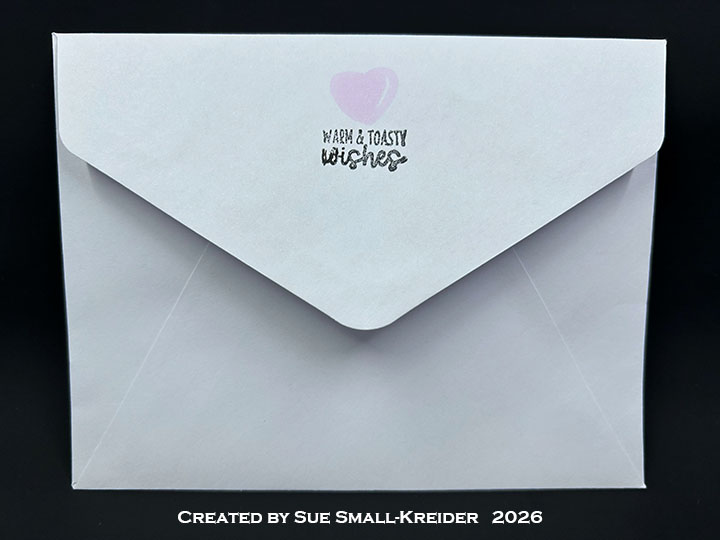
Envelope: The card fits into an A2 (4.25x 5.5-inches) size envelope.
___________________________________
Thank you for experiencing this blog post.
I hope this inspires you and makes you smile.
Please subscribe, like and leave comments 😊
Follow my YouTube channel, Instagram and Pinterest as well.
___________________________________
Disclaimer: Karen Burniston products are provided free of charge by the manufacturer for review and use. All other items were personally purchased. Compensated affiliate links used where or when possible, meaning I will receive a small percentage commission from these manufacturers at no cost to you. This will allow me to add more content to my YouTube channel and help out a lot. Thank you.
Materials Used:
Dies
- Fun Stampers Journey – Steel Dies – Heart-Felt – DI-0033
Stamps
- Simon Says Stamp’s collaboration with Pink & Main – Clear Stamps – Snow-One Like You
Papers
- White Cardstock
- White A2 Envelope
Ink
- Memento – Fade Resistant Dye ink – Tuxedo Black
- OLO – Markers – Bubble Gum, Cotton Candy, Dragon Fruit
- Pigma – Mircon 005 Fine Tip Pen – Black
- Sakura – Gelly Roll Pen – Medium – White
- Sharpie – Permanent Marker – Fine Tip – Orange
- Stampin’ Up – Stampin’ Blends Marker – Light Copper Clay
Adhesives
Tools
- Die Cutting Machine
- Bone Folder
- Stamping Platform
- LDRS – Stampendable Stamping Tool
- Stamping Block
- Scissors
- Paper Masking Tape