Let’s Coffee Soon

Fresh ground coffee smells amazing and to share it with a friend is even better.

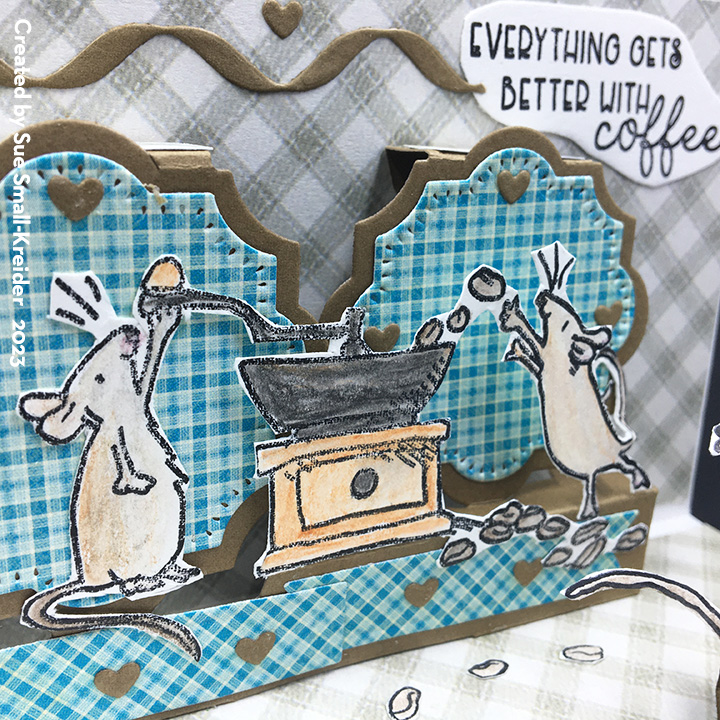
This slimline card features mice making coffee as drawn by Anita Jeram. These delightful illustrations are popped-up on dies by Karen Burniston.

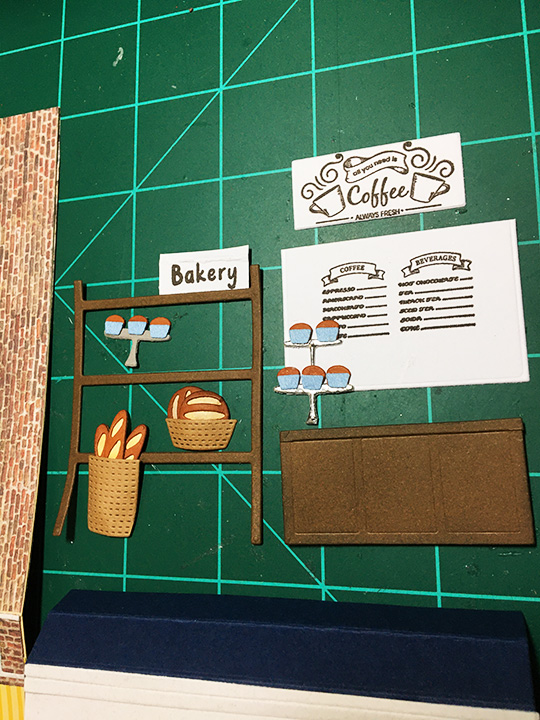
I did some test layouts with the stamps and dies before stamping the images on to white 110lb. cardstock with permanent black ink. I find stamping several of the needed images is useful to test colors. The images were colored with watercolor pencils and then water brushed to blend. Using fine-tipped surgical scissors, I fussy cut the images out. For delicate cuts and enclosed spaces, I used a craft knife to cut away excess cardstock.

I covered the four panels of 7×8 1/2-9nch white cardstock cardbase that was folded in half with 3 1/2×8 1/2-inch rectangles of tan plaid paper.

Watching the assembly video for the Little Labels Pop-Up die set before I determined what cardstock to use saved me time. I die cut the largest of the fancy labels that are in the pop-up set from blue plaid cardstock and then glued them onto the brown pop-up mechanism. I also cut out the three ribbon pieces from blue plaid paper and adhered them to the lower half of the mechanism before attaching the mechanism to the card base.

Decorating the card with the images was the fun part, but feeling the card was lacking some grounding lines, I cut from the same brown cardstock as the mechanism some of Karen Burniston’s ribbon borders from her Border Blends Trims that also include tiny hearts. These ribbons were glued to the top and bottom of the card front and inside with the tiny hearts scattered along the ribbon. Additional tiny hearts were added to the mechanism and labels inside.

Because I didn’t like the look of the brown top arms of the three mechanism labels, I cut pieces of tan plaid paper to cover them and added a tiny heart to each.

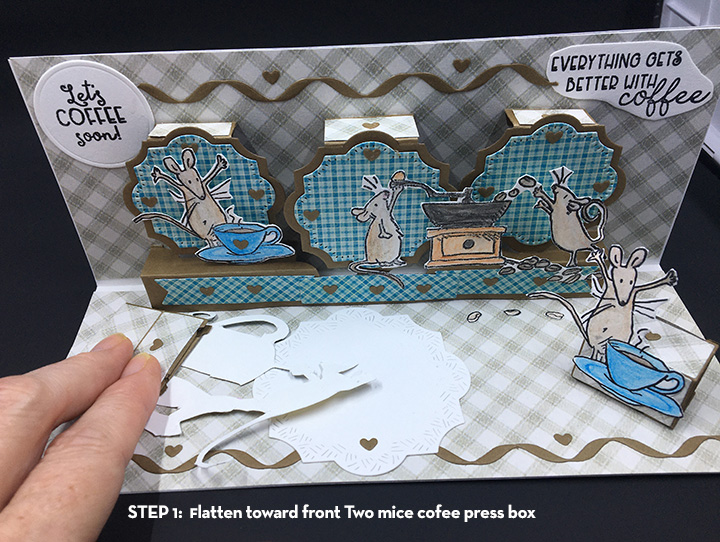
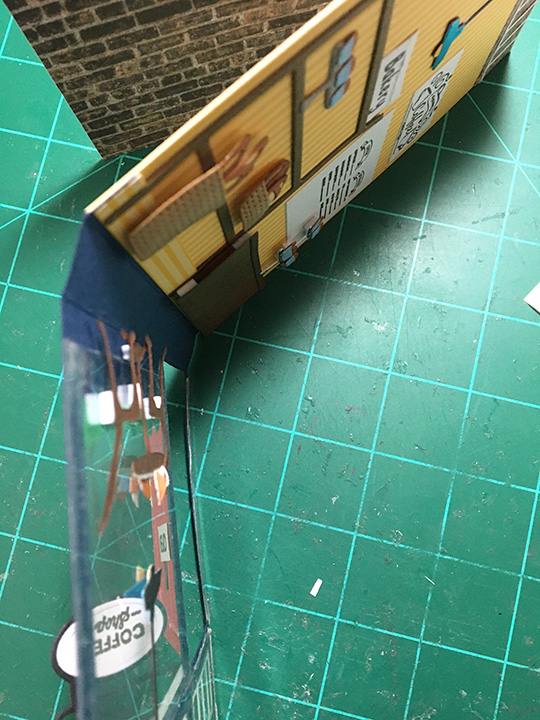
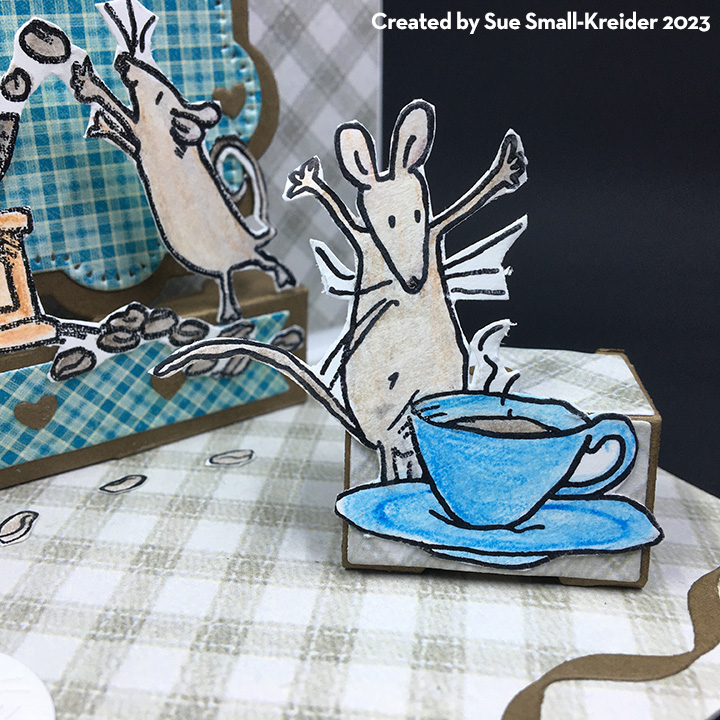
Two Bam Box, rubber band powered, pop-up mechanisms were used to animate the Coffee press image and a second coffee cup. (Go to assembly video on Bam Box shop page.) Because the coffee press image is almost 3×3-inches, I had to install the Bam Box at almost a 100-degree angle from the label pop-up mechanism to fit the image inside the card. To fix some catchpoints with both Bam Box images, I glued tails to the labels and trimmed the coffee press handle some. The bottom mouse tail of the coffee press is folded against the label pop-up platform, but not glued.

A white label from the crosshatch labels die set was adhered to the center of the inside of the card for a personal message. The stamped sentiments came from the coffee stamps and one was fussy cut with scissors while the other used a circle die from the crosshatch circles set.

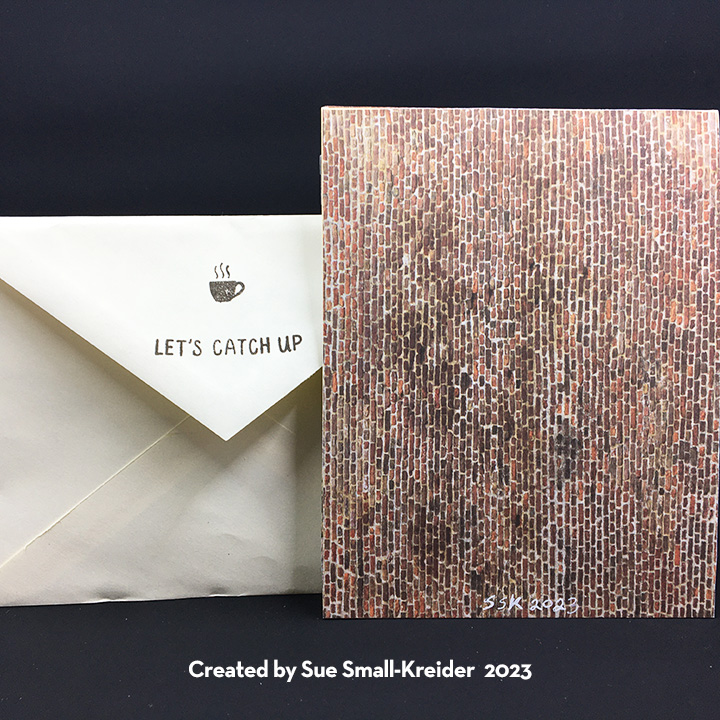
For the card back, I used off-cuts from the ribbon borders and stamped Anita Jeram’s name onto white cardstock and then die-cut a heart around it using a heart from Karen Burniston’s Hearts – Crosshatch set. Using a black pen, I credited Karen Burniston on the heart and added my initials and the year to the heart.

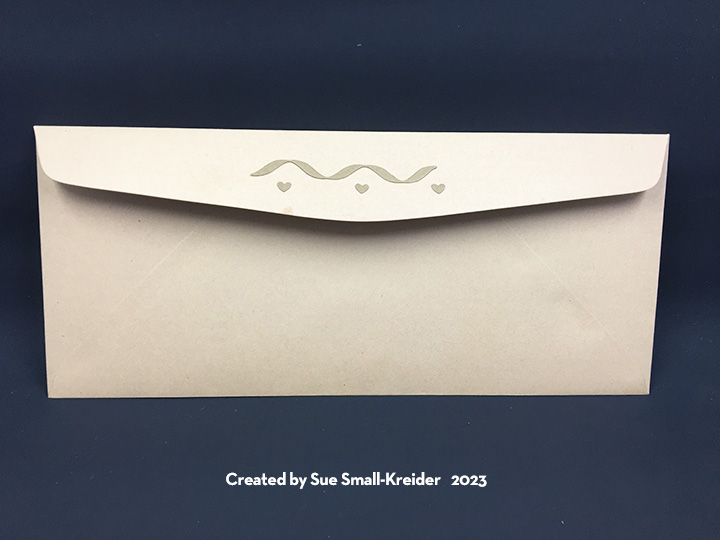
As is my style, I glued a leftover piece of ribbon border and three hearts to the envelope flap to hint at what is inside.

I like to enclose instructions on how to close the Bam Box. You can download the instructions below.

Thank you for reading this blog post. I hope this inspires you and makes you smile. Please like and leave comments 😊

Materials Used:

Dies

Stamps

  • Colorado Craft Company – Clear Stamps – Coffee House by Anita Jeram – AJ483

Papers

  • Crafter’s Companion – NitWit Collections 12×12 Double-Sided Sheets – Paws-itivity
  • Graphic 45 – 8×8 Paper Pad – Double-Sided Cardstock – Life’s A Bowl of Cherries Collection -Homemade Goodness
  • My Favorite Things – 8.5×11 Smooth 110lb. Cardstock – White
  • Brown Cardstock
  • #10 Business Envelope – Brown

Inks/Pens

  • StazOn – Solvent Ink – Jet Black
  • Rangerv- Tim Holtz Distress Watercolor Pencils – Sets 1-3
  • American Crafts – Metallic Marker – Silver – 62212
  • Pigma – Mircon 01 – Black

Adhesives

Tools

Miscellaneous

Cafe Coffee

Do you have that favorite cafΓ© with checkered tablecloths and oversized cups where you get that creamy cup of dark roasted coffee and while away the afternoon talking with friends? This card is for you.

Designed around two coffee themed Funny Bones rubber stamps, all the dies used to make this card are by Karen Burniston. (Please note the cup pop-stand, saucer, spoon and swirl of steam are from a die-set she designed for Elizabeth Craft Designs in 2015 and can be found on on-line craft resale shops.)

I recommend watching the assembly video for the cup pop stand before starting this card. To begin, I used a purchased A7 (5-inches tall by 7-inches wide) brown craft paper card base and envelope. I covered the two inside panels with thin red and white checked paper cut as 4 3/4-inches by 6 7/8-inches rectangles butted up almost to the fold, but not covering it. Next, I cut a black and white paper napkin into a 5-inch square and then cut it diagonally into two triangles. I cut and embossed the saucer as shown in the assembly video. Each napkin triangle is adhered to the card base with two pieces of double-sided tape forming a β€œT”. The saucer is attached using glue that will be absorbed into the napkin and adhering it to the card base.

To get a glossy red coffee cup, I used red cardboard packaging that I had saved from a child’s fast food meal box and cut three cups from it. The alphabet border on the cups is washi tape. The steam die cuts are made with clear vellum.

The humorous coffee spoon sentiment was stamped in brown ink onto a 1 1/2-inches by 3-inches piece of cream cardstock. The red rimmed circles (from the Coffee Cup Pop-Up die set) on the card are for personal messages. Washi tape borders and silver mirror card complete the inside decorations.

For the card front, I stamped the Coffeeology sentiment on a 3 1/4-inches x 2 3/4-inches rectangle and glued diagonally over a 5-inches x 5 1/4-inch piece of decorative paper after stenciling sides of the card using the coffee bean die from the Coffee Cup Pop-Up set with a mini cube of Distress Ink in walnut stain and adding washi tape. The third die-cut steaming coffee cup and another spoon cut from mirror cardstock complete the front.

As is my style, the envelope back flap has stenciled coffee beans in brown ink.

The tiny coffee cup on the card back comes from the coffee charms die set. (See charm assembly video.) White steam was added using a medium tipped opaque white marker with detailed swirls of a white gel pen. More washi tape and a strip of checked paper complete the back’s decorations.

See more coffee themed card by clicking here.

Thank you for reading this blog post. I hope it provides inspiration and joy. Please like and leave comments. 😊

Materials Used:

Dies

Stamps

Papers

  •  
  • American Crafts -DCWV – 12×12 Inch Paper -Bright Red Checks – CP-002-00171
  • Paper Napkin
  • Clear Vellum
  • Red and Silver Scrap Cardboard Packaging
  • White and Cream Cardstock
  • Park Lane Paperie – A7 Card Base and Envelope – Kraft

Ink

  • Stampin’ Up – Classic Stampin’ Pad – Early Espresso
  • Ranger – Tim Holtz – Distress Ink- Walnut Stain
  • Recollections Opaque Marker – Snow
  • Sakura – Gelly Roll Pen – Medium – White
  • Pigma Micron 05 Pen – Black
  • Pigma Micron 05 Pen – Brown

Adhesives

Tools

  • Die Cutting Machine
  • Stamping Platform
  • LDRS – Stampendable Stamping Tool
  • Stamping Cloth
  • Sponge Dauber
  • Scissors

Coffeeology

Some of us love the smell of a dark roast coffee. Others love a pumpkin spice latte. All of us need sometimes to just stop and smell the coffee and appreciate life. This is one of two coffee cards this week. Look for another tomorrow.

Designed around the Funny Bones Coffeeology rubber stamp on the card front, the inside pops up with a take-out cup of coffee that doubles as a gift card holder. All the dies used to make this card are by Karen Burniston.

I recommend watching the assembly video for the coffee cup pop-up before starting this card. The inside of the card mimics the card Karen Burniston demonstrates in the video for an A2 top fold card.

For the card front, I stamped the sentiment on a 3×3-inch square and glued diagonally over a 4×4-inch piece of decorative paper. The three tiny vessels of coffee come from the coffee charms die set. (See charm assembly video.) White steam was added using a medium tipped opaque white marker with detailed swirls of a white gel pen. Throughout the card there are inked coffee beans that were cut out of brown cardstock and covered using a mini cube of Distress Ink in walnut stain.The beans are in the coffee cup pop-up die set.

The card back has another 4×4-inch piece of decorative paper and is a place to write a lengthy personal message.

As is my style, the envelope back has a die-cut coffee mug with a heart that hints at what is inside.

See more coffee themed card by clicking here.

Thank you for reading this blog post. I hope it provides inspiration and joy. Please like and leave comments. 😊

Materials Used:

Dies

Stamps

Papers

  • Crafter’s Companion – 12×12 Double-Sided Paper Pad – Decadent Decor
  • Brown, White and Cream Cardstock
  • A2 ivory Envelope

Ink

  • Stampin’ Up – Classic Stampin’ Pad – Early Espresso
  • Ranger – Tim Holtz – Distress Ink- Walnut Stain
  • Dark Green Fine Tipped Maker
  • Recollections Opaque Marker – Snow
  • Sakura – Gelly Roll Pen – Medium – White

Adhesives

Tools

  • Die Cutting Machine
  • Stamping Platform
  • LDRS – Stampendable Stamping Tool
  • Stamping Cloth
  • Sponge Dauber
  • Craft Mat
  • Scissors

Shop Cards – Coffee and Books

Miniature houses and shops fascinate me. When I saw that Concord & 9TH had come out with a Pop-Up Shoppe Die set and add-on sets for a bakery and a bookstore, I knew I had to try them.

First try – Bookstore
Second try – Coffee/Bake Shop

Here are my first and second cards that I made from these die sets. The first one, a bookstore, was done without watching the assembly video and hence I attached the pop-up store front as an accordion fold rather than the β€œU” pop-up fold as the video shows. The second one, a coffee/bake shop, uses the β€œU” fold. (Bake shoppe video, Book shoppe video)

For the coffee/bake shop I cut a 4.25×5.5-inches piece of banana cream cardstock folded in half for a top fold A2 size card base. using double-sided tape I adhered the decorative papers on all but the front inside of the card.

I found that assembling the shop front from the acetate windows, door and, flower box and eaves dental molding first, made it easier to plan how to lay out the inside scene. On the coffee/bake shop I used the largest door die to do a partial die-cut of three sides on the shop front, so that the door could be opened. (I’ve also thought for my next card to use both door dies to cut in windows to the door.)

The acetate windows can be one large piece if you don’t make the door open or two or three pieces if you do cut the door to open. (I reinforced the narrow strip by the door with a piece of acetate.) You need the acetate to glue the window frames onto as well as tables and lights bumped out with foam squares.

The inside decor for the coffee/bake shop uses the bake shoppe dies as well as the counter made from the bookstore’s cabinet with the shelves cut off. The stamped coffee signs come from a coffee shop stamp set from My Favorite Things. The β€œOPEN” sign on the door is from a Lawn Fawn stamp set. “Bakery” is part of the Concord & 9TH stamp set.

All of the coffee and bakery elements were curved using fingers or flower shaping ball tools. The breads and baskets were inked with Distress inks. Printed watercolored papers were used for other elements like cups and flowers. Foam squares are used to adhere most of the elements to the card back.

Placement of items to be seen through the upper windows and open door may make the inside layout seem off-balance.

The inside of the card needs layers of matted sentiment and a decorative paper on the card back to balance out the weight of the card front.  I think the top fold card works best for the card design, but the side fold card is good too.

As is my way, I decorated the back flaps of both A2 envelopes with stamps from Hero Arts (bookstore) and Concord & 9TH (coffee/bake shop) to hint as to what is inside the envelope.

See more coffee themed cards by clicking here or shop cards click here.

Thank you for reading this blog post. I hope it brought you comfort and inspiration.  Please like and leave comments 😊

Materials Used:

Dies

Stamps

Papers

  • Clear Acetate Sheet
  • Craft Consortium – 6×6 Premium Paper Pad – Brick Textures
  • My Favorite Things – 6×6 Paper Pad – Finishes and Textiles
  • Funky Fossil Designs – 20cm x 20cm Paper Pad – Watercolour Rainbow
  • Fun Stampers Journey – 8.5×11 Cardstock – Banana Cream – CS-0087
  • White A2 Card Base
  • Colored Cardstock
  • Colored, Pattern and Foiled Paper Scraps
  • A2 Envelopes

Inks & Pigments

  • Ranger – Tim Holtz Distress Inks – Walnut Stain and Soot Black
  • Stampin’ Up – Classic Stampin’ Pad – Early Espresso
  • Pigma Micron 01 – Black
  • Sakura – Gelly Roll 08 – Gel Pen – White

Miscellaneous

  • Neutral PH Adhesive by LINECO
  • Fine-Tip Glue Bottle
  • Scrapebook.com – Double-sided Tape – 1/4-inch wide
  • Die Cutting Machine
  • Stamping Platform
  • LDER Creative – Stampendable Stamping Tool
  • Stamping Blocks
  • Sponge Daubers
  • Piercing Tool
  • Tweezers
  • Foam squares

Brr, It’s Cold Outside!

Sometimes it’s nice just to watch it snow with a warm cup of coffee or hot coco.

This fun mini-slim sized card is a blend of stenciled coffee cups and a die-cut snowflake collage pop-up. All the dies used are by Karen Burniston while the layered stencil is by Pretty Posh Pink. The coffee cups by both designers are similar in size and work well together.

I went through all my Karen Burniston die sets to find as many different single snowflakes as possible to use for the swirling collage mechanism inside the card. (I recommend watching the assembly video before starting your card. The video has useful tips and card base minimum sizes that will help you design your card.)

The sentiments all come from Karen Burniston’s Word Set 13 – Snow and include the shadow dies for the large words of β€œBrr!” and β€œSnow.” The mug and travel coffee cup inside are all die-cuts inked similar to the stenciled ones on the card front.

As with all my cards that are sent in an envelope, I have decorated the back flap with a hint of what’s inside. This time I stenciled a coffee mug on the flap.

See more coffee themed cards by clicking here.

Thank you for reading this blog post. Please like and leave comments 😊

Materials Used:

Dies

Stencils

  • Pretty Pink Posh – 6×6 Stencil – Layered Coffee Cups

Ink

  • Ranger – Tim Holtz – Distress Oxides – Festive Berries, Saltwater Taffy, Ground Espresso, Pumice Stone, Hickory Smoke, Mowed Lawn, Crushed Olive, Prize Ribbon and Tumbled Glass

Papers

  • Stampin’ Up – 6’ x6” Specialty Designer Series paper – Lights Aglow
  • Blue and White Medium Weight Cardstock
  • Simon Says Stamp – Mini Slimline envelope – Grocery Gag

Miscellaneous