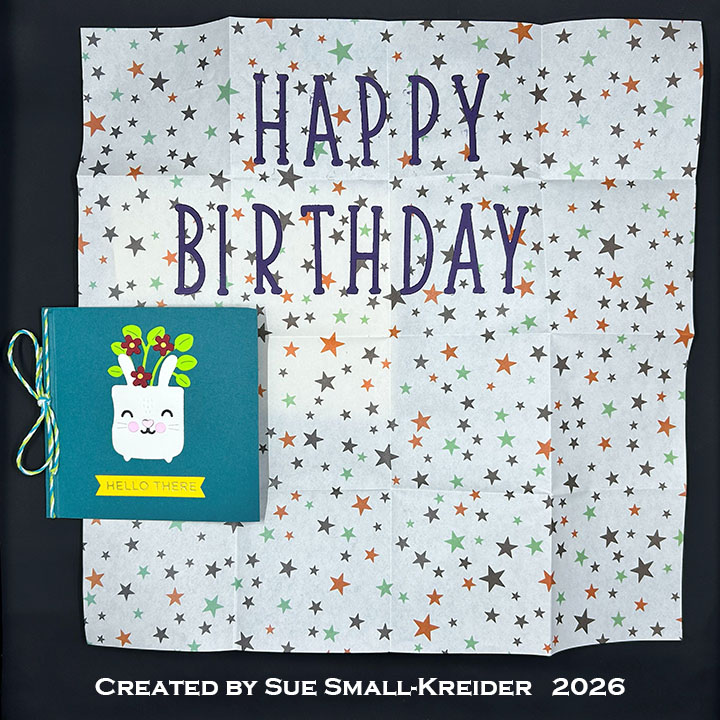
This card was made for Craft Roulette #329 whose parameters were: a book binding card, roadside market colors, plant (s) element and grid as random. I used Spellbinders and My Favorite Things dies to make this 4×4.25-inch card that opens up to 12×12-inches..
Watch the video below to learn how I made this card.
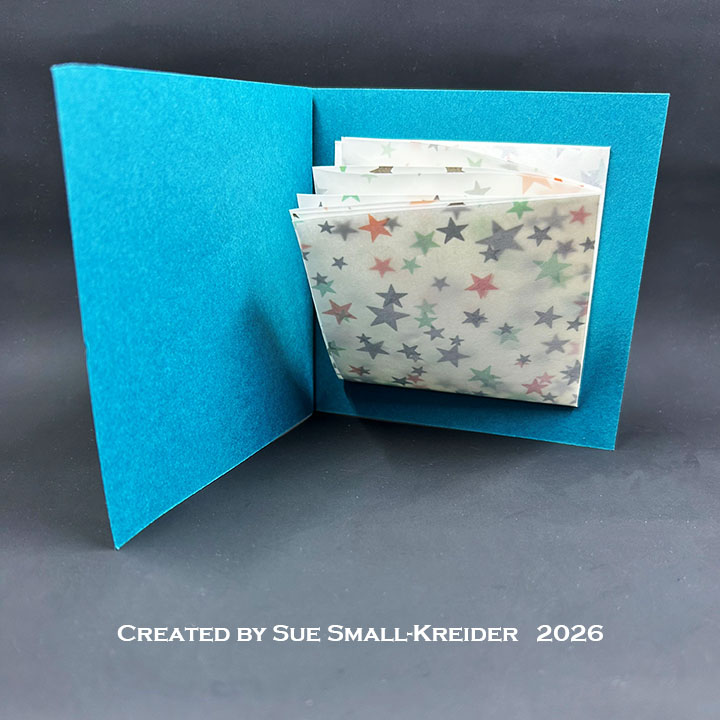
Cardbase: Score at 4-inches and at 4.25-inches an 8.5×4-inch teal rectangle of cardstock into a 4×4.25-inch book binding cardbase with a .25-inch “binding” on the left side of the card. Watch the video above for details.
Inside Grid: Using a thin paper that is 12×12-inches, fold in half and burnish fold with a bone folder. Repeat folding in half and burnishing until the paper has been folded down to a 3×3-inch square. Open up the paper and mark an x on the back side of the second square from bottom left corner. This will be the square that will be adhered to the cardbase. Watch the video above for details.
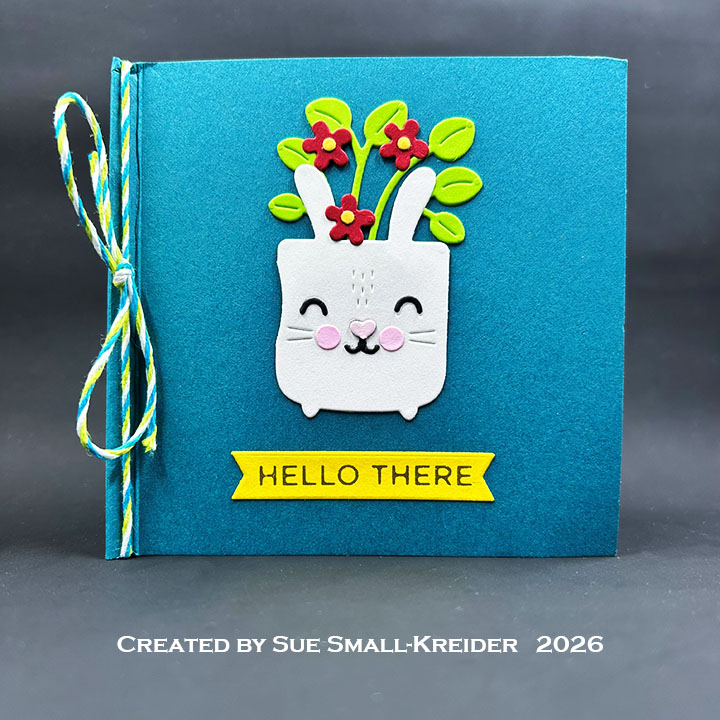
Planters: Using the Potted Pets die set from My Favorite Things, cut and assemble the bunny planter and the cat planter using the foliage and tiny flowers in the set so that the planters will fit onto the 3-inch square grid.
Sentiments: Using the Spellbinders How Does your Garden Grow Alphabet die set, cut “Happy Birthday” from eggplant cardstock and adhere onto the grid as shown in the video above. The from yellow banner foiled sentiment of “Hello There” was one I found in my stash from an early SpellbindersGlimmer Hot Foil Club of the Month set.
Envelope: The card fits into an A2 (4.25×5.5-inches) envelope with leftover floral decorations on the back flap.
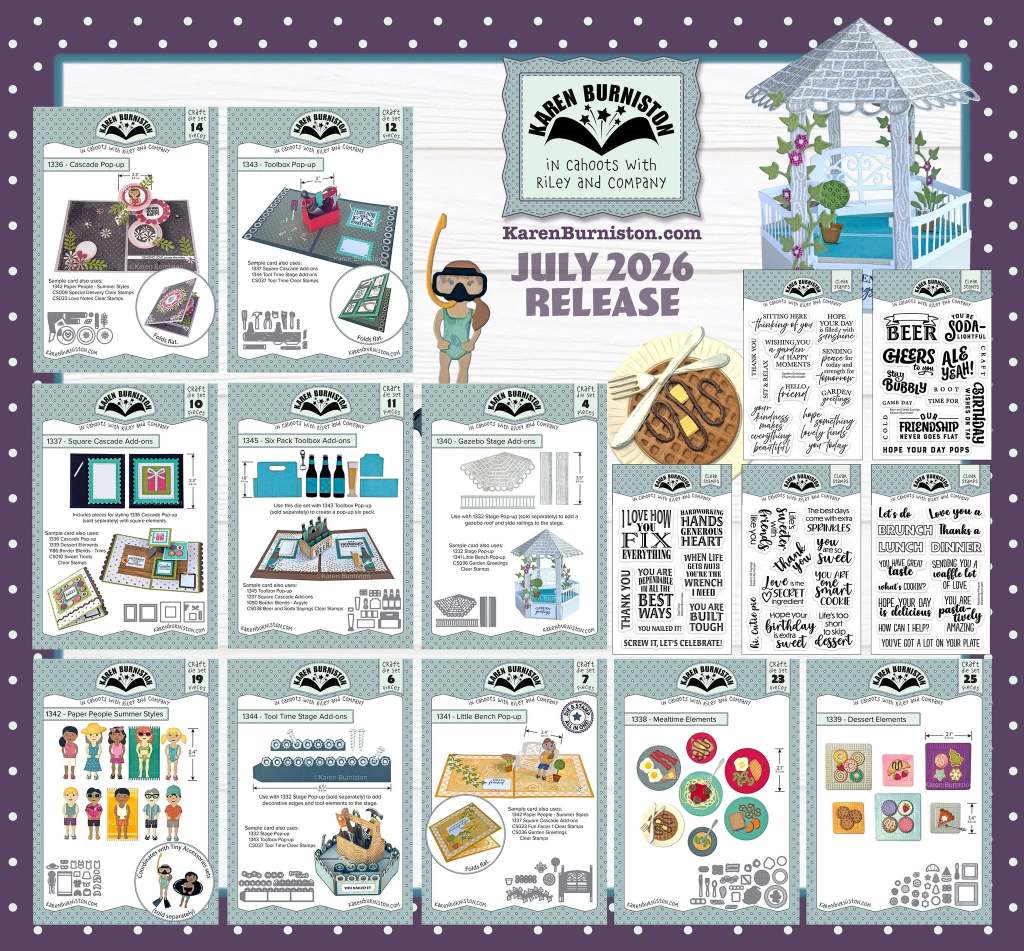
Welcome to our Karen Burniston Products – KB Riley LLC July 2026 Release Blog Hop. (See GIVEAWAY details at the end of this post for blog hop list.) The Design Team have come together with Karen today for a fun blog hop to celebrate the release of ten new die sets and five new stamp sets. Sneak peeks of the new release started last week, and the dies are available to order NOW on Karen Burniston’s website.
Watch the process video to see how I made this card.
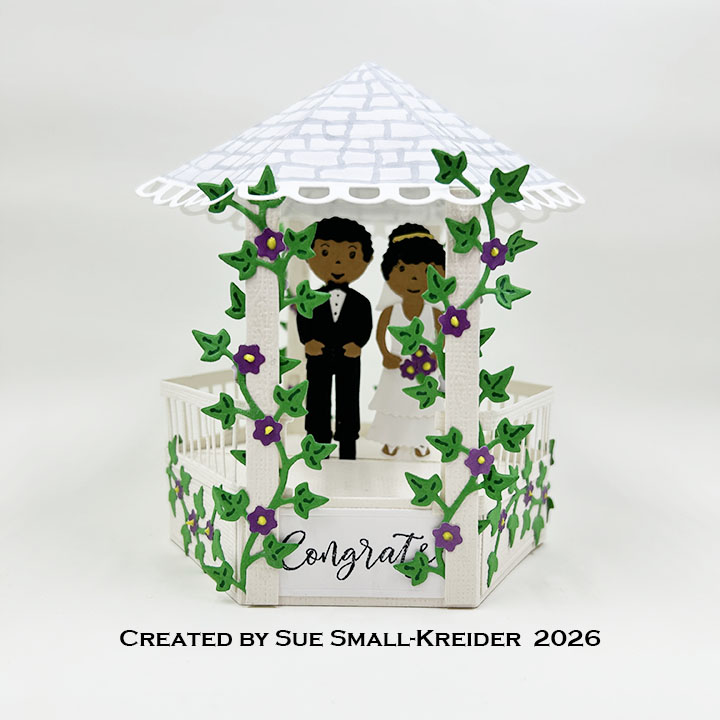
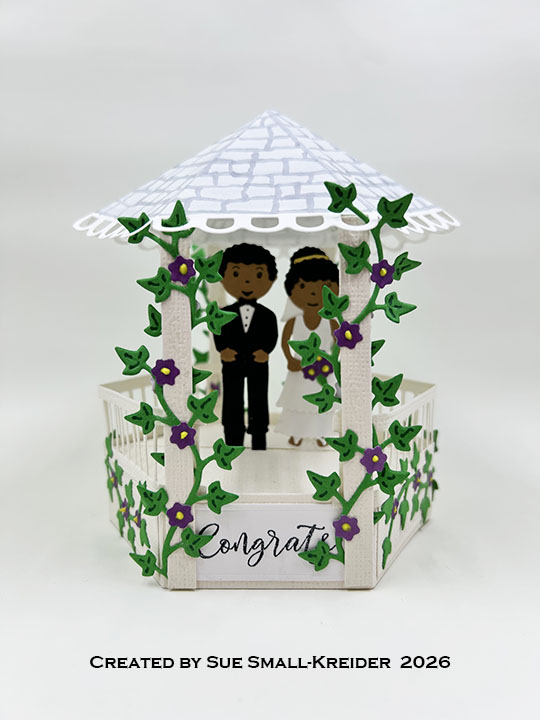
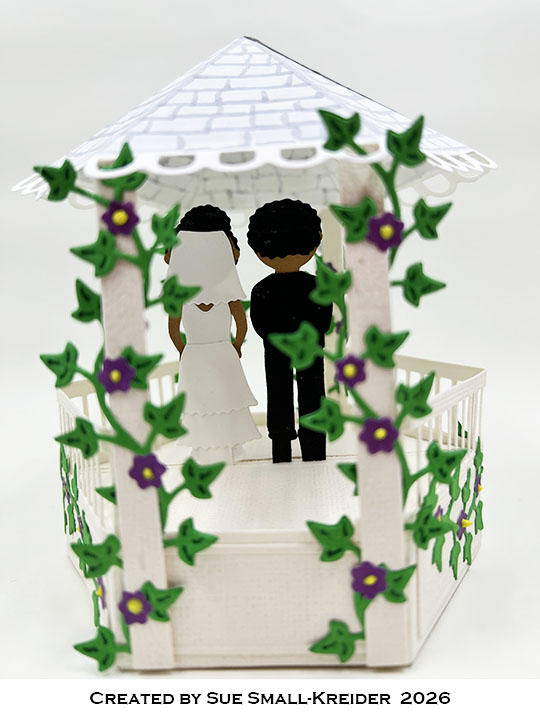
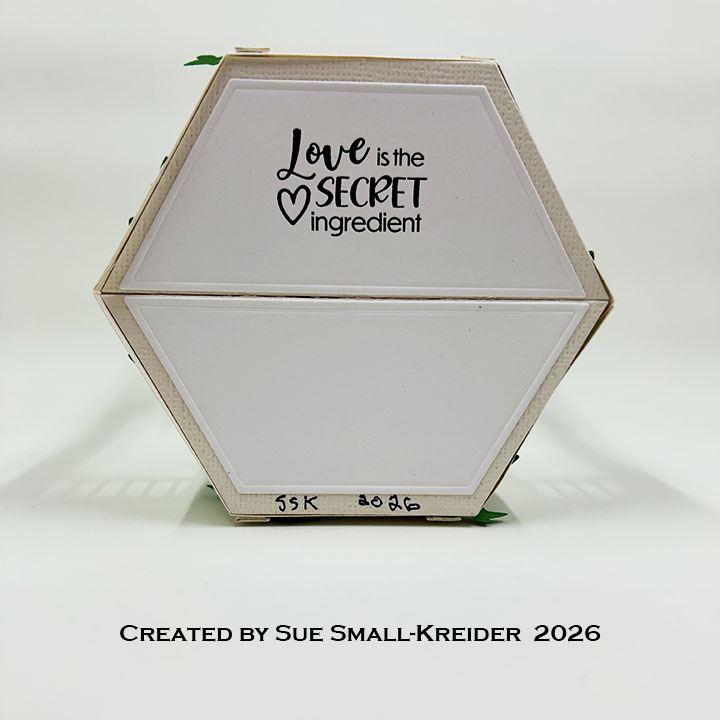
Stage Pop-Up Base: (Watch the assembly video at the bottom of the linked page for Stage Pop-Up.) Using the Stage Pop-Updie set and a medium weight cream textured cardstock, cut two of the large stage pieces, two of the side strips, two of the polygon decorator shapes and five of the rectangle side labels. From white cardstock cut two of the polygon decorator shapes and one of the rectangle side labels. Cut two of the “L” strips from black for the groom and one strip from white for the bride. Following the assembly steps in the video above, waiting to insert the bride & groom between the two stage sections, before gluing the base together. Stamp sentiment labels. Add the rectangle labels to the stage side strips before attaching to stage base.
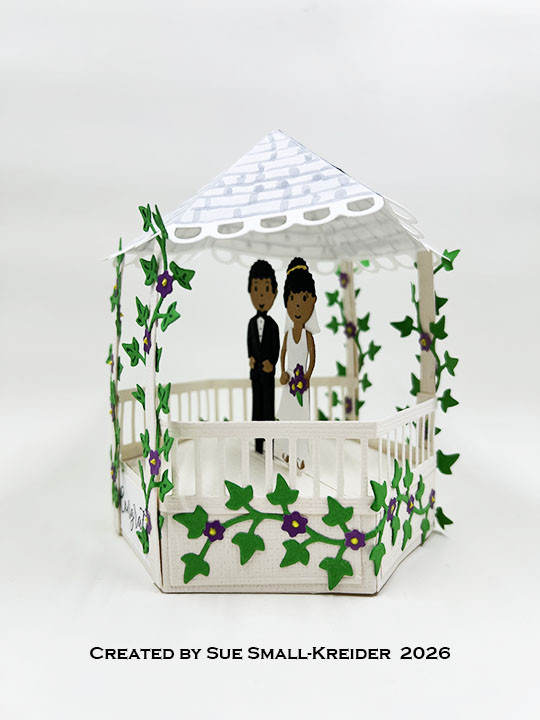
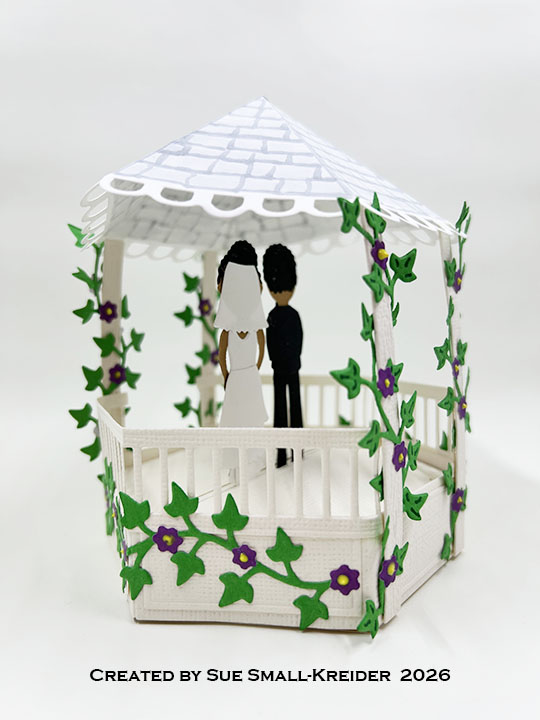
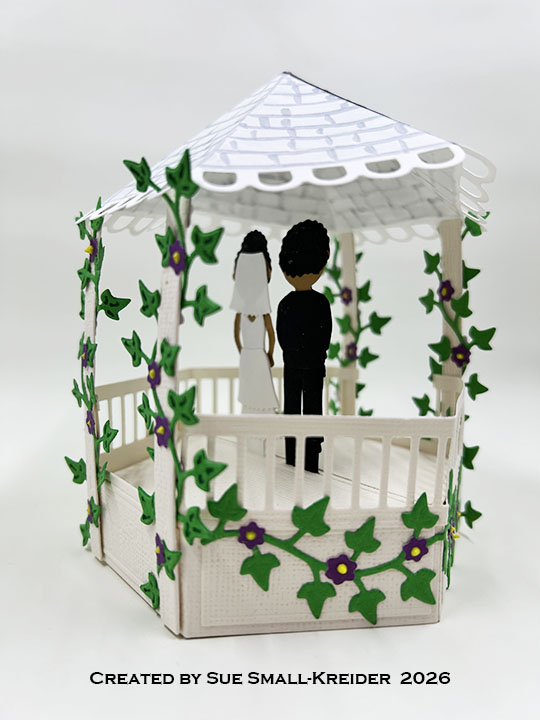
Gazebo Stage Add-Ons: Using the Gazebo Stage Add-Ons set, cut four of the woodgrain posts and two railings from cream cardstock. Cut two of the scalloped roof pieces from medium to lightweight white cardstock. Color the slate roof with alcohol markers. Assemble the gazebo as shown in the video above – adding the two posts to each roof section and then attaching the roof sections together. Cut and emboss six of the vine die from the Little Bench Pop-Upset and highlight the leaf veins with a fine tipped green marker. Weave four of the vine decorations around the four posts before gluing posts to the stage base. Once the posts are attached to base, glue down the remaining two vines to the sides.
Watch this video to see how I styled the bride and groom figures.
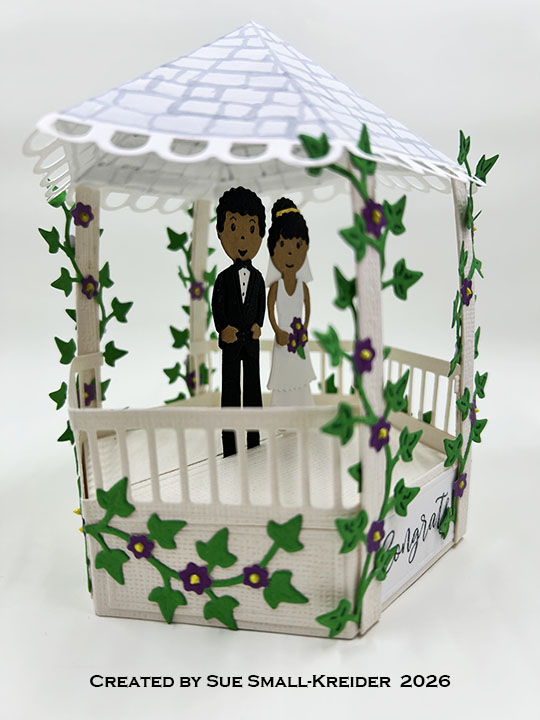
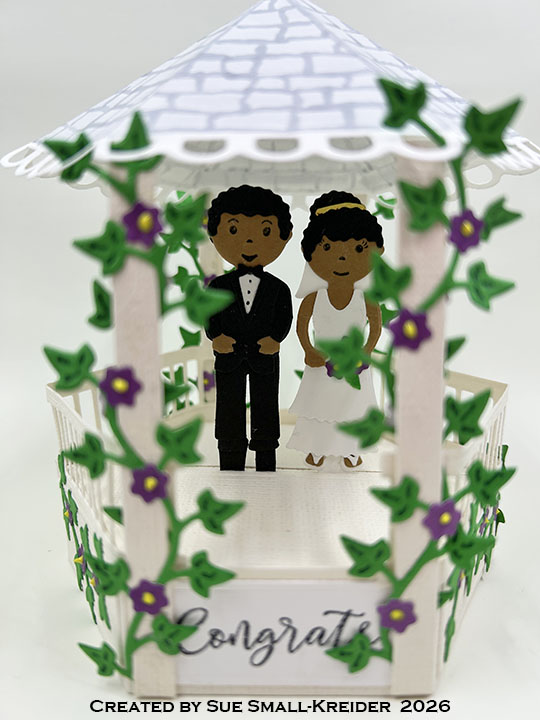
Bride: Using the Paper People Summer Styles die set, cut one of the figure, two sets of hair style pieces, five of the long skirt, two of the curvy top and one set of the flip-flop sandals. From gold foil cardstock, cut one diamond using the Wedding Charms die set. This will be the tiara that tucks behind the front hair piece. Assemble as shown in the video making sure to attach the “L” strip on to back side of the bride before gluing on her back skirts. (I used the Fun Faces 1 stamp set to stamp on her face before I added her hair.)
Groom: Using the Paper People die set, cut one of the figure, two sets of hair style pieces, two pants, two sets of shoes, one long sleeved shirt (use this shirt to trace the back piece with the open collar closed). Using the Wedding Charms die set, cut one tuxedo and one of the shirt triangle piece. Trim the tuxedo’s loop, sleeves and pants off. Glue in shirt triangle and assemble the coat as shown in the video above. (I used the Fun Faces 1 stamp set to stamp on his face before I added his hair.)
Flowers: Using theLittle Bench Pop-Upset, cut four or more sets of the flowers. Add yellow centers to the flowers. (I used a liquid resin to add the flower centers, so I did this first when cutting out all my pieces so the resin had time to dry.)
Sentiments: “Congrats” is from the Seasons stamp set While the “Love is the secret ingredient” is from Sweet Life Sayings set.
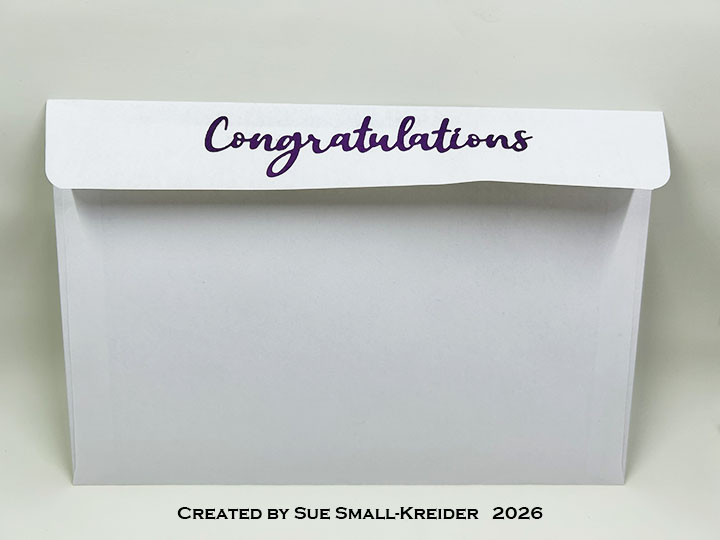
Envelope: The card fits into a catalog (6×9-inches) size envelope. The back envelope flap is decorated with the word “Congratulations” die-cut using Word Set 17 from the same purple paper that was used for the gazebo flowers.
Disclaimer: Karen Burniston products are provided free of charge by the manufacturer for review and use. All other items were personally purchased. Compensated affiliate links used where or when possible, meaning I will receive a small percentage commission from these manufacturers at no cost to you. This will allow me to add more content to my YouTube channel and help out a lot. Thank you.
To celebrate the release Karen Burniston and each of the Karen Burniston – KB Riley LLC Design Team members will be giving away a $25 Gift Certificate to some lucky person who comments on our blog posts, so make sure you join the hop and comment on everyone’s blog post. Winners will be randomly chosen from ALL of the blog hop comments received on our blog posts by Thursday, July 30, 2026. Lots of chances to win some goodies, so just leave a comment on this post or any other blog hop posts to enter! Don’t forget to leave some way for us to contact you, in case you are a lucky winner!
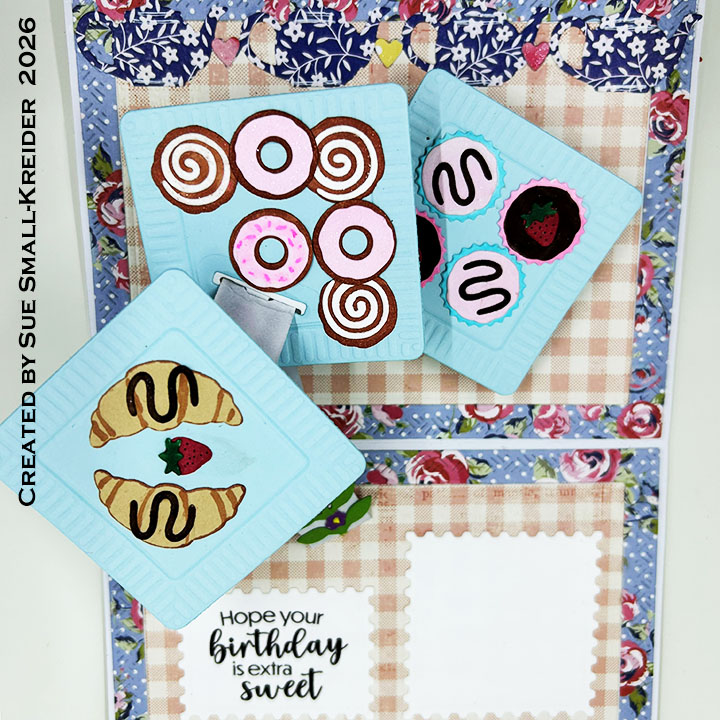
It’s time for Sneak Peek Week for Karen Burniston‘s July 2026 release of ten new die sets and five new stamp sets. This card features the new Cascade Pop-Up, Square Cascade Add-Ons, Dessert Elements and Little Bench Pop-Up die sets as well as Sweet Life Sayings stamp set. New dies and stamps will be available on July 23, 2026 on Karen Burniston’s website.
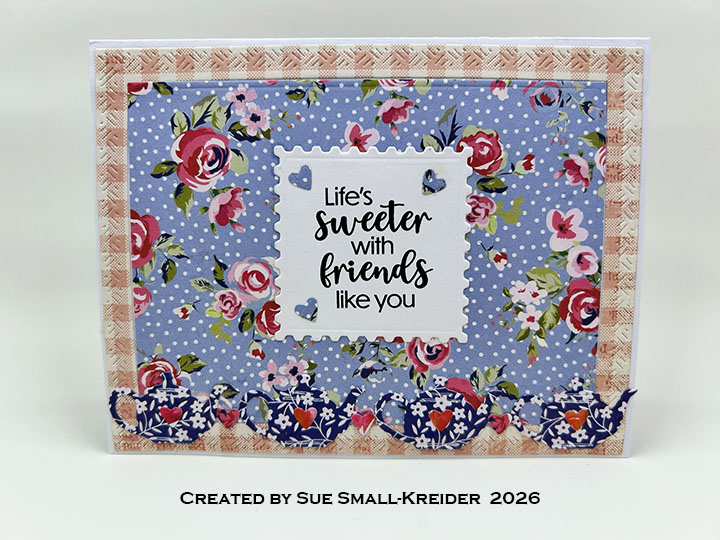
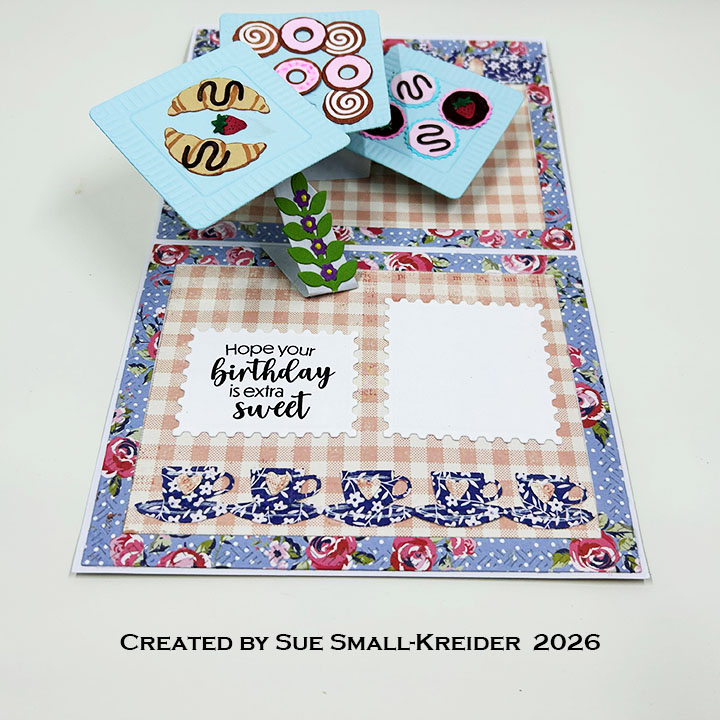
Cardbase: I used a purchased (4.25×5.5-inch) cardbase and covered the four panels, inside and out, with frames and rectangles of patterned paper cut using the the two largest dies in the Rectangles – Crosshatch set.
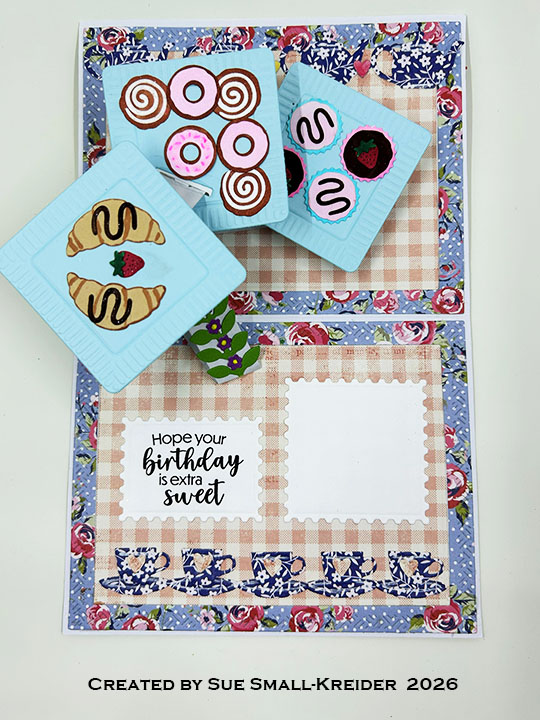
Tea Party: The teapot and tea cup borders used inside and out on the card are from the previously released Tea and Coffee Bordersdie set. The square plates of cupcakes, doughnuts and sticky buns along with the croissants are cut using the Dessert Elements dies. (I used white cardstock and alcohol markers to colour the food.) The square plate dies have an emboss feature which works well with heavy cardstock.
Cascading Circles Pop-Up: From medium to heavy cardstock, cut one of the large mechanism piece, and one of the small strip using the Cascade Pop-Up die set. (I cut these pieces from white and colored them with a gray marker.) Following the directions on the packaging, install the mechanism. (I cut the slotted square from the Square Cascade Add-Ons and then used one of the smaller squares in the set to make the platform smaller, but still retaining the slot. I positioned one large square plate die with the movable slot die to fit on the middle platform and still stay inside the card when closed.) Next, add the three square plates with the slotted square on the middle platform with the strip going through the slot. Decorate with food and flowers. ( I used the green leafy stem from the Cascade Pop-Up die set, with leftover tiny purple and yellow flowers that I had from the Little Bench Pop-Up set.)
Sentiments: All the stamped sentiments come from the Sweet Life Sayings stamp set. They are cut out with the postage edged dies from the Square Cascade Add-Ons set.
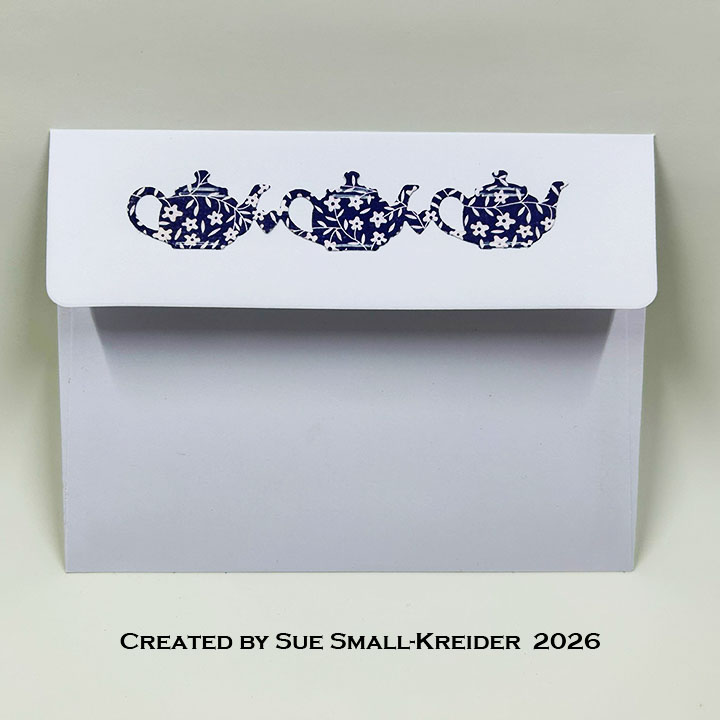
Envelope: This card fits into an A2 size envelope decorated with teapots cut from the Tea and Coffee Borders die set..
Disclaimer: Karen Burniston products are provided free of charge by the manufacturer for review and use. All other items were personally purchased. Compensated affiliate links used where or when possible, meaning I will receive a small percentage commission from these manufacturers at no cost to you. This will allow me to add more content to my YouTube channel and help out a lot. Thank you.
Materials Used:
Dies
Karen Burniston in cahoots with Riley and Company – Little Bench Pop-Up – 1341
Karen Burniston in cahoots with Riley and Company – Dessert Elements – 1339
Karen Burniston in cahoots with Riley and Company – Square Cascade Add-Ons – 1337
Karen Burniston in cahoots with Riley and Company – Cascade Pop-Up – 1336
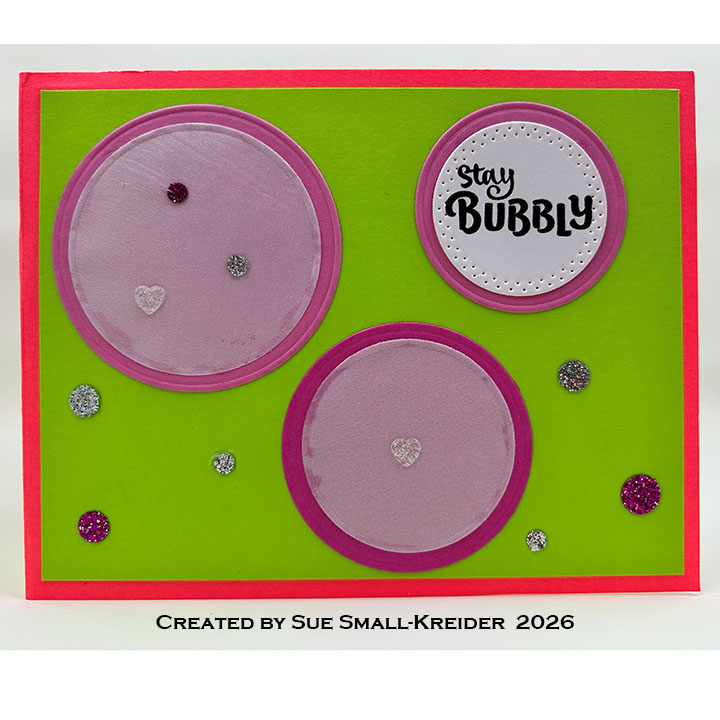
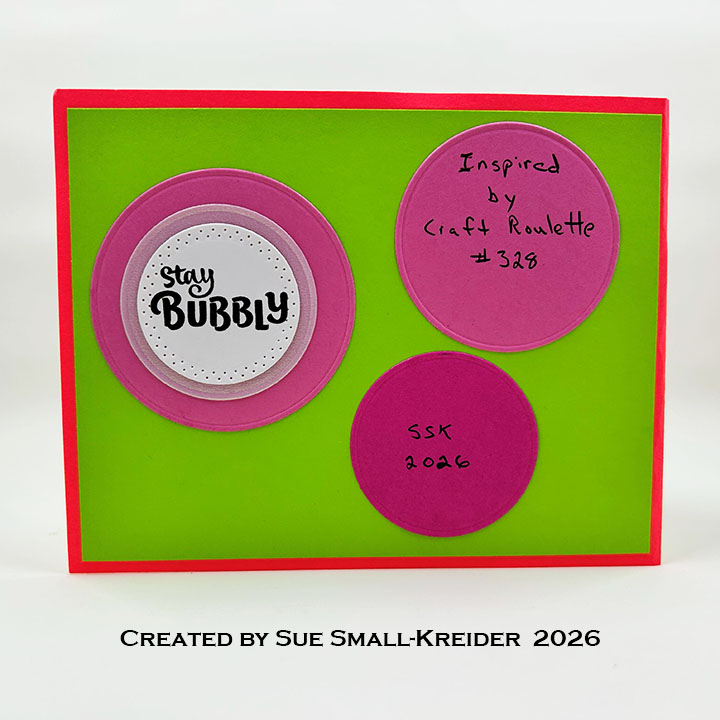
This card was made for Craft Roulette #328 whose parameters were: an A2 (4.25×5.5-inch) card, Tutti Fruiti colors, container(s) element and unusual color as random. I used Karen Burniston dies and stamp sets including the soon to be released Toolbox Pop-Up, Six Pack Toolbox Add-Ons, Cascade Pop-Up dies and the Beer and Soda Sayings stamps.
Watch the video below to learn how I made this card.
Cardbase: Score and fold an 11×4.25-inch neon pink rectangle of cardstock into a 4.25×5.5-inch cardbase. Cut four 4×5.25-inch rectangles of lime green cardstock and glue on to the cardbase panels.
Six Pack Root Beer Pop-Up: w.
Bubbles: The bubble decorations are created by using the circles in the Cascade Pop-Up set to cut various size and shades of pink circles as well as vellum and pearlescent vellum circle. Sparkle spots and hearts are added for accents and tiny bubbles.
Sentiments: Using the Beer and Soda Sayings stamp set, stamp the “Root Beer” labels twice from white and die cut using the rectangle die in the Six Pack Toolbox Add-Ons die set. Ink blend labels with a light pink ink. From the Stage Scenes set stamp “Happy Birthday to you” in black and die cut using the medium circle in the Cascade Pop-Up die set. Use the smallest banner die in the Greeting Labels die set to cut out ” Hope your day pops” from the Beer and Soda Sayings stamp set and glue on to the popping circle with uses the largest Fireworksdie and leaves from the leaf stem in the Cascade Pop-Up trimmed to droplets.
Envelope: The card fits into an A2 (4.25×5.5-inches) envelope.
This card was made for Craft Roulette #327 whose parameters were: an interactive card, Summer colors, “Here Comes The Bride” element and ink edging as random. I used Karen Burniston dies and stamp sets.
Watch the video below to learn how I made this card.
Cardbase: Score and fold a 10×7-inch white rectangle of cardstock into a 5×7-inch cardbase. Ink the edges with green ink cube. Cut two sets of crosshatch frame and rectangle from two different patterned papers using the largest two dies in the Rectangles and Labels – Crosshatch die set. Glue frames and rectangles onto the four panels of the cardbase as shown in video above.
Arch Pop-Up: Cut from all the Arch Pop-Up pieces. Using Peacock Add-Ons, cut one of the large base piece. Assemble as shown in the video above. Glue tabs on back of arch down before gluing on the decorator dies cut from the Rainbow Add-Ons set. Decorate with the bride and groom and floral pieces described below.
Bride: Using the Paper Peopledie set, cut one of the figure, one set of hair style pieces, one short skirt, one of the curvy v-neck t-shirt and one set of the slippers. From silver foil cardstock, cut one half circle. This will be the tiara that tucks behind the front hair piece.Using the Wedding Charms die set, cut one dress and trim off the bodice.This will be the skirt of the wedding dress. Trim figure at the waist and glue legs to back of the skirt so just the toes of the shoes pip out. Assemble as shown in the video (I used the Fun Faces 1 stamp set to stamp on her face before I added her hair.) Brush dress with Glitter Gloss for a shimmer.
Groom: Using the Paper Peopledie set, cut one of the figure, one hair, one pants, one set of shoes, one long sleeved shirt. Using the Wedding Charms die set, cut one tuxedo and one of the shirt triangle piece. Trim the tuxedo’s loop, sleeves and pants off. Glue in shirt triangle and assemble the coat as shown in the video above. (I used the Fun Faces 1 stamp set to stamp on his face before I added his hair.) Color shoes, jacket lapels and buttons with light gray marker. Brush tuxedo with Glitter Gloss for a shimmer.
Floral Decorations: Assemble flowers and three butterflies from the Flower Pot Add-On die set using a small sponge dauber to add inky highlights to the pieces. Cut and assemble six large daisies, two small daisies and several tiny flowers from the Flowers and Bee die set. Using the Twist Flower Pop-Up set, cut six daisy borders and a number of small daisies. Cut six of the bluebells from the Fence Add-Ons set.
Sentiments: Using the Wedding Charms die set, cut “Best Wishes” from matte gold cardstock and the shadow from white. Adhere to card front using the left over flowers to decorate. Cut two large fancy labels from the Rectangles and Labels – Crosshatch die set and brush the crosshatch frames with Glitter Gloss.
Envelope: The card fits into an A7 (5×7-inches) envelope with “Congratulations” stamped in gray ink using a stamp from the Grad Greetings stamp set.
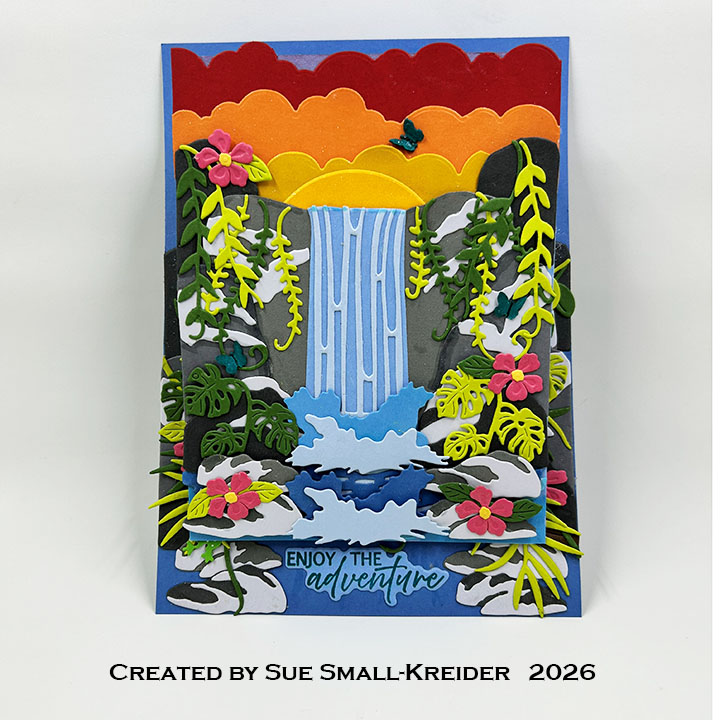
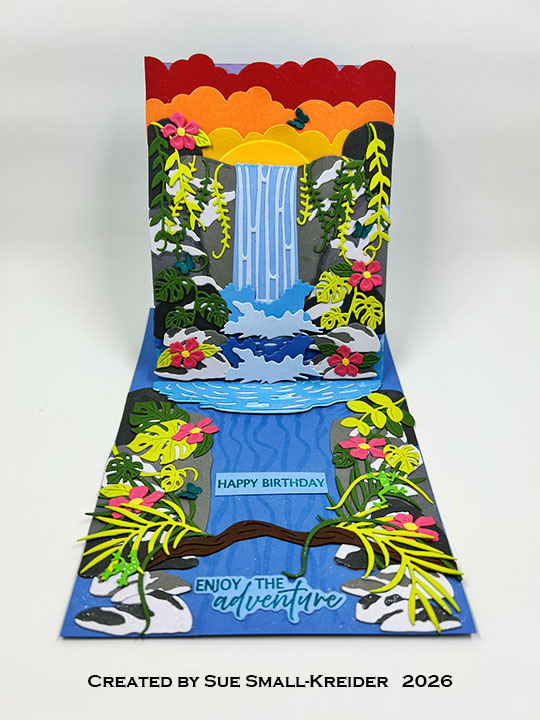
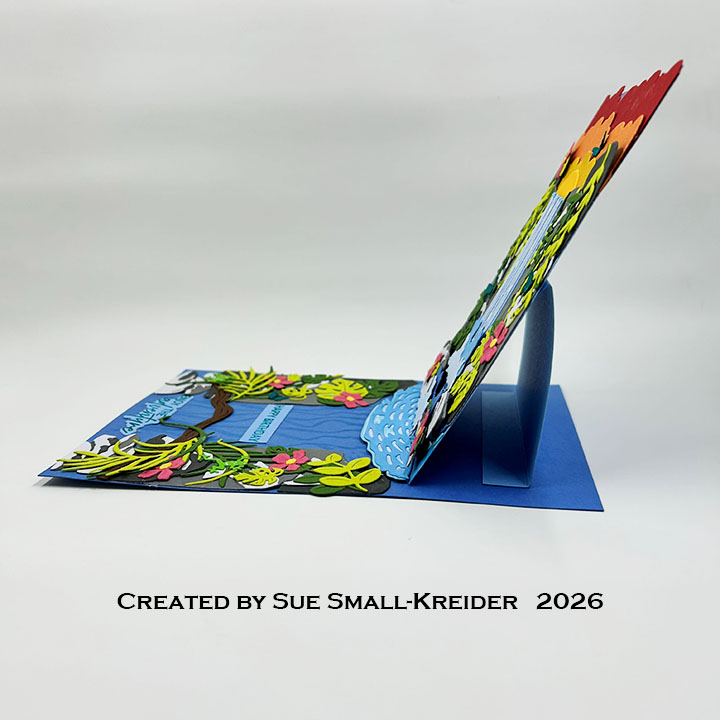
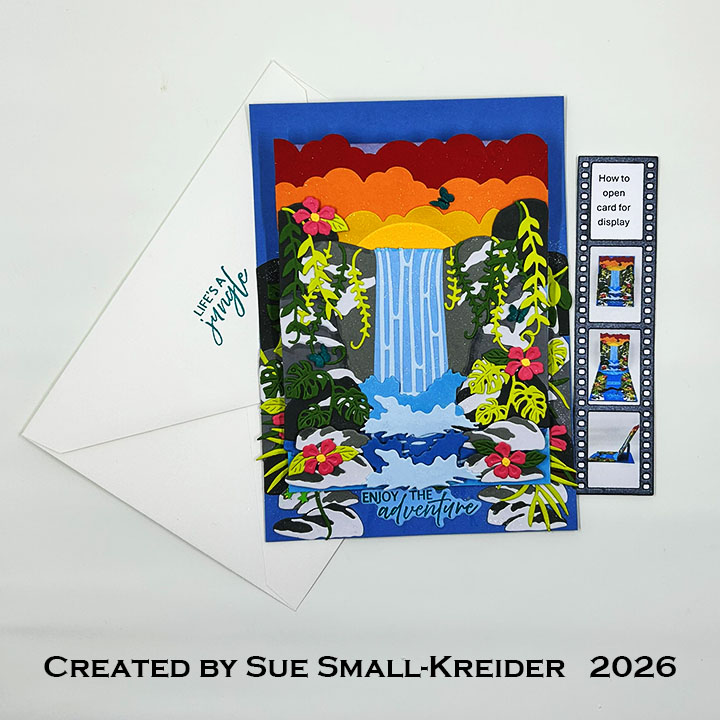
This card was made for Craft Roulette #323 whose parameters were: A7 card, pretty colors, photo booth element and geometric shapes for random. I used Spellbinders Weekender 2026 dies and stamps for an A7 easel (5×7-inch) card with a photo strip bookmark with photos of how to open and display the card.
Watch the process video to see how I made this card.
Cardbase: I cut three rectangles to make the cardbase: Dark Blue – 5×7-inches, Light Blue – 4.25×5.5-inches and 4×6-inches. Score and fold the 4×6 rectangle at .5-inches and 3-inches as shown in the video above.
Waterfall: Using the Rainforest Falls die set and instruction PDF, cut two sets of all the rock pieces using four to five shades of gray cardstock. Make a total of three of each of the two smallest rocks. (I used gray markers to get my extra shades of gray to make the rocks look different from each other.) Make two sets of the water splashes and pooling water using several shades of blue cardstock. Make one of the waterfall. (I added more contrast to my water features with a blue marker. I also brushed on Nuvo Glitter Gloss shimmer over all the water and areas on the rocks that might be splashed.)
Sky: Using the cloud edging dies in the Rainforest Falls die set, tape together the two dies to make a continuous cut on 5×1.5-inch strips of red, orange and yellow cardstock. Cut one semi-circle from the brightest yellow. Assemble card as shown in the video above. (I inked the top edge of my 4.25×5.5-inch rectangle panel to have a purplish hue to peak though behind the clouds.)
Decorations: Decorate the rocks with vines, foliage and flowers cut from the Jungle Blooms and Tiki Toucan die sets.I cut one of each foliage and vine dies in each set – once from light green and once from dark green. (I cut four each of the pink flowers with their yellow centers from the Jungle Blooms set.) In addition, I used Memory Box’s Tiny Frogs and Tonic Studio’s Tropical Rain Forest Silhouette‘s tiny butterfly die as embellishments. (There are three tiny frogs on the card and four tiny butterflies. Can you find them all?) Cut one brown branch from the Tiki Toucan die set to go across the stream.
Sentiments: The stamped sentiments come from the Go Wild stamp & die set and were stamped in a teal blue ink.
Photo Strip Bookmark: Once the card was finished I photographed it in the closed and open positions with a side view to demonstrate the easel. Next, I printed the photos as 1-inch wide and generated the title “How to open card for display.” Using Karen Burniston’s Movie Night Charms, I cut from black shimmer cardstock, the filmstrip. Next, I trimmed the photos and title to fit the film strip and glued them into the frames. I backed the entire strip with thin white computer paper. (For more Card Recipient eXperience slips (CRX) check out these posts on my blog.)
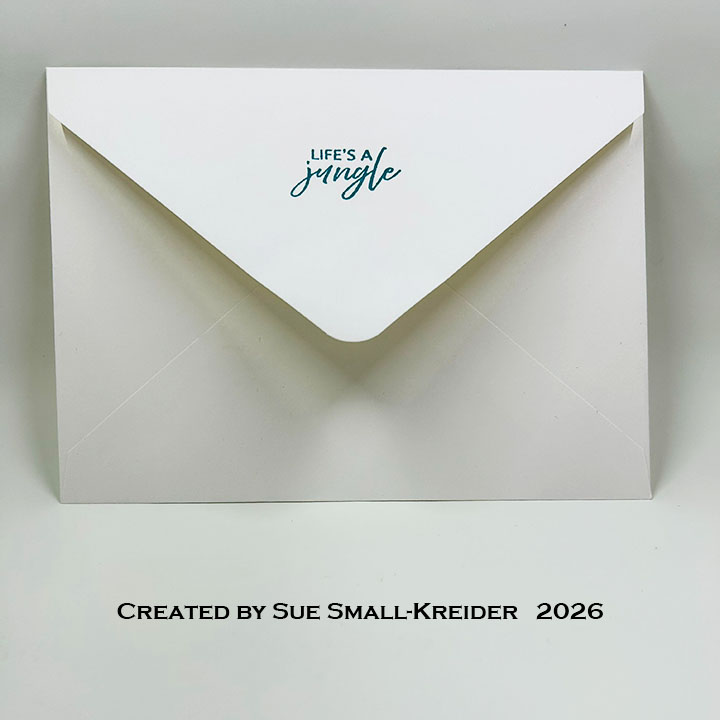
Envelope: The card fits into an A7 (5×7-inch) envelope with the sentiment from the Go Wild stamp set that says “Life’s a jungle.”
___________________________________
Thank you for experiencing this blog post. I hope this inspires you and makes you smile.
Disclaimer: Karen Burniston products are provided free of charge by the manufacturer for review and use. All other items were personally purchased. Compensated affiliate links used where or when possible, meaning I will receive a small percentage commission from these manufacturers at no cost to you. This will allow me to add more content to my YouTube channel and help out a lot. Thank you.
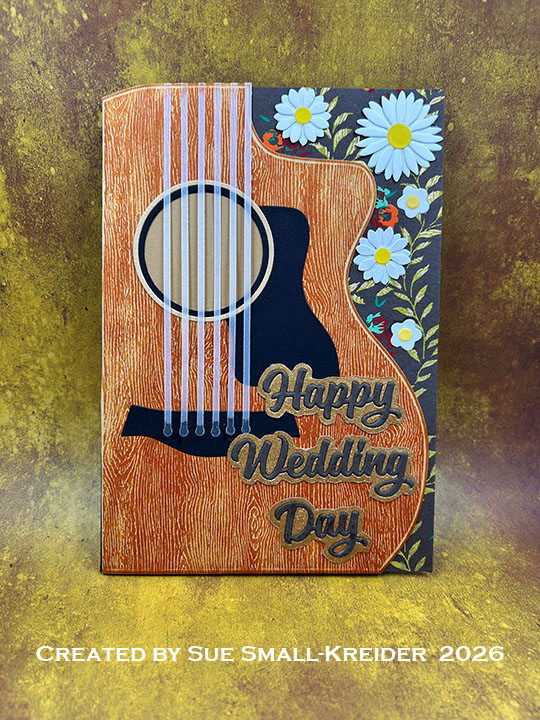
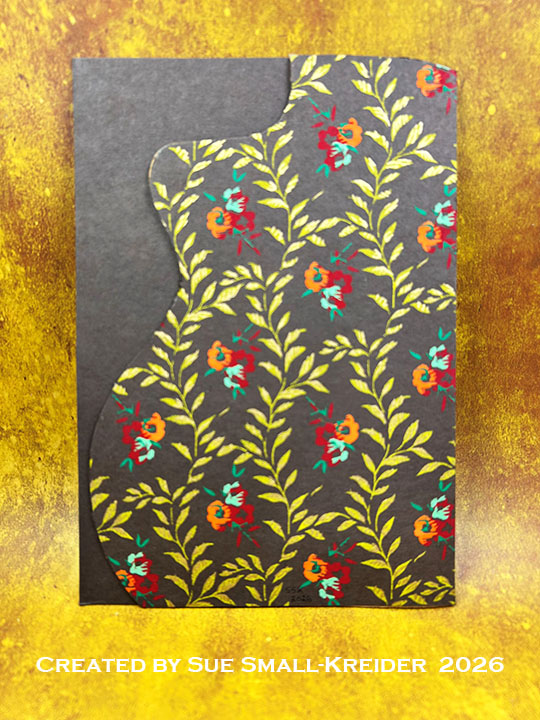
This wedding card was commissioned for a couple who love the mountains, music and want to live a life in sync with nature.
Cardbase: I folded an 8.5×11 sheet of caramel-colored 65lb. cardstock in half to create a 5.5×8.5-inch cardbase. Next, I used the large guitar die from the Paper Discovery Music – Play On -Guitar & Violin to cut a shaped cardbase on the fold.
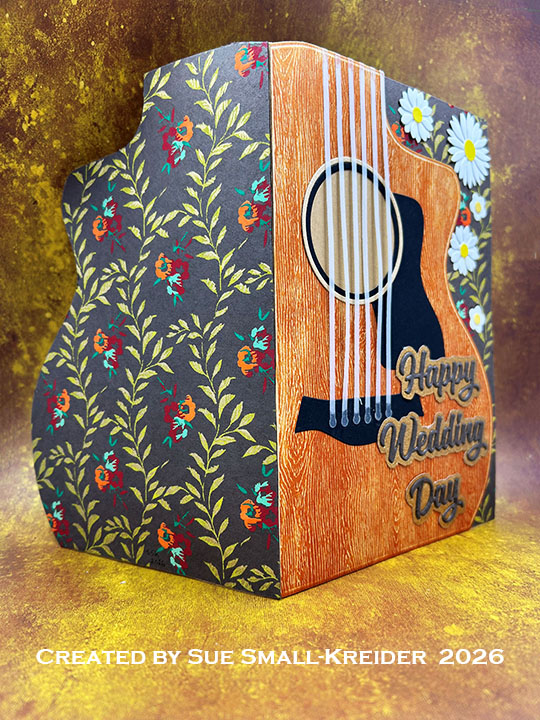
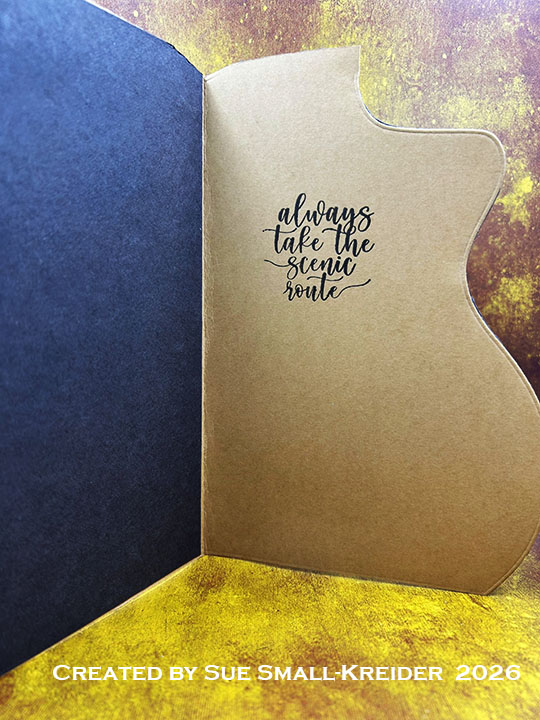
Outside of Card OpenCard Back Closed
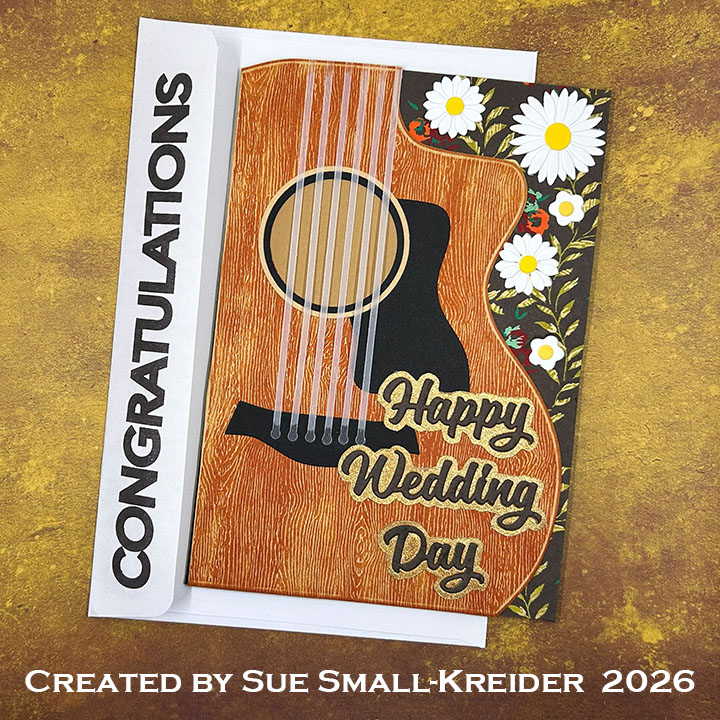
Guitar Front: Using the guitar die from Paper Discovery Music – Play On -Guitar & Violin, I cut a single layer guitar from woodgrain embossed cardstock and stained it using the ink cube of Rusty Hinge Distress ink. Next, I cut the sound hole circle into the woodgrain guitar. The trim pieces of the circle were cut from black and the un-stained woodgrain cardstock. The pickguard and bridge pieces were cut from black. Clear vellum was used for the strings. (I found using a clear ruler with 1/8-inch grid helped with gluing the strings on straight.)
Card Front: Glued the finished woodgrain guitar to cardbase front matching up the curved edges and trimming off the excess along the fold. Then I cut a 5.5×8.5-inch rectangle of brown handmade floral paper and glued it to the inside of the cardbase as a backing to the card front. (I trimmed off the top left corner of brown paper following the guitar shape. I made white daisies in three sized using Karen Burniston’s Flowers and Bees die set and glued five daisies onto the brown paper along the guitar’s right edge.
Sentiments: Karen Burniston’s Word Set 12 – Anniversarywas used for the front sentiment “Happy Wedding Day.” It was die-embossed from a shed-less glitter paper then a shadow was fussy-cut around the words. The words were cut again from the backside of the brown floral paper and glued onto the gold shadows. Inside, the sentiment of “Always take the scenic route” from i-Crafter’s Wonderful World was stamped in dark brown ink.
Envelope: The card fits into a catalog (6×9-inches) size envelope with “Congratulations” (by Simon Says Stamp!) stamped in dark brown ink on the back flap.
Disclaimer: Karen Burniston products are provided free of charge by the manufacturer for review and use. All other items were personally purchased. Compensated affiliate links used where or when possible, meaning I will receive a small percentage commission from these manufacturers at no cost to you. This will allow me to add more content to my YouTube channel and help out a lot. Thank you.
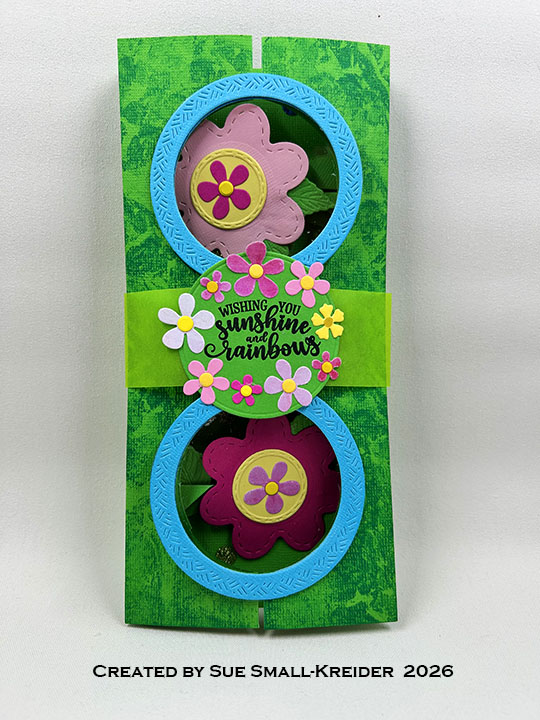
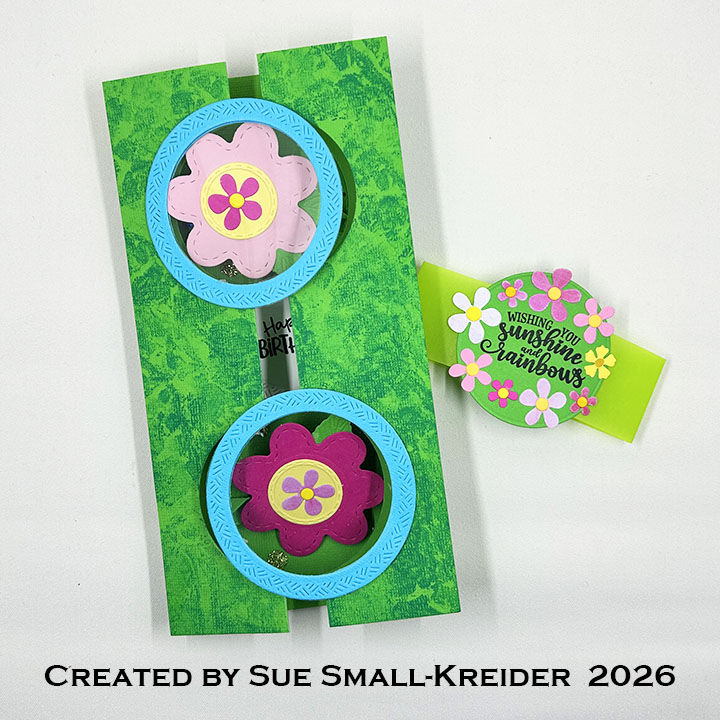
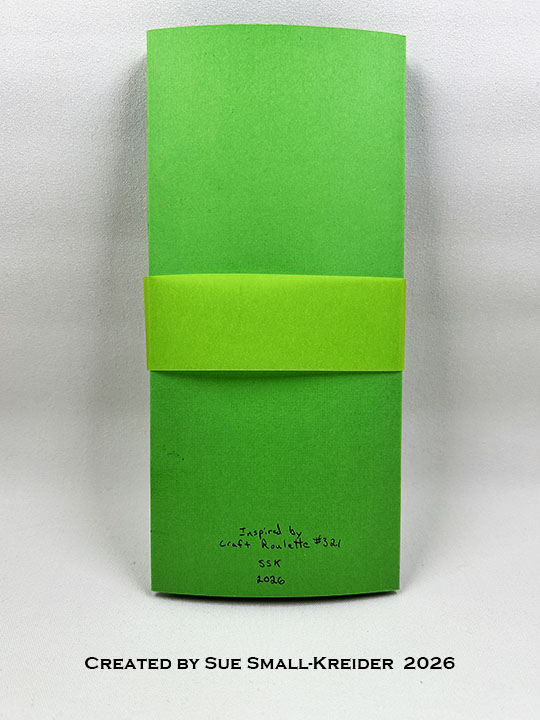
This card was made for Craft Roulette #321 whose parameters were: gatefold card, Monet colors, natural element and crinkle inkle (inking technique) random. I used Karen Burniston dies and stamps for this slimline (4×8 5/8-inch) card.
Watch the process video to see how I made this card.
Cardbase: Cut a 12×8 5/8-inch rectangle of green cardstock. Score at 2-inches, 4-inches, 8-inches and 10-inches. Fold as shown in the video above. Using the fourth smallest die from the Circles – Crosshatchset, cut four circles into the double gate fold sides as shown in the video.
Crinkle Inkle: Using bubble wrap as an inking tool, add blue ink texture to the closed front of the card. (Make sure to put scrap paper inside the card to mask the back panel from ink.)
Window Frames: Cut four circular frames from blue cardstock using the fourth and fifth smallest dies from the Circles – Crosshatchset. Using double-sided tape, attach the frames to both sides of a piece of acetate and trim the plastic to fit frames. Glue frames onto card front as shown in video.
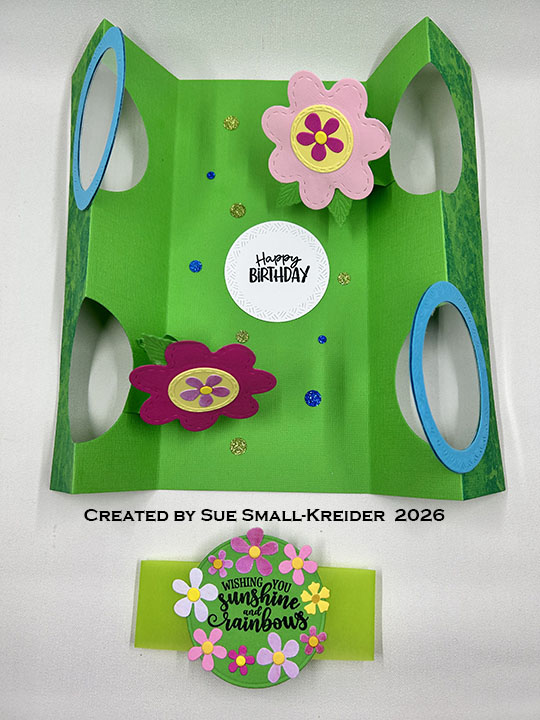
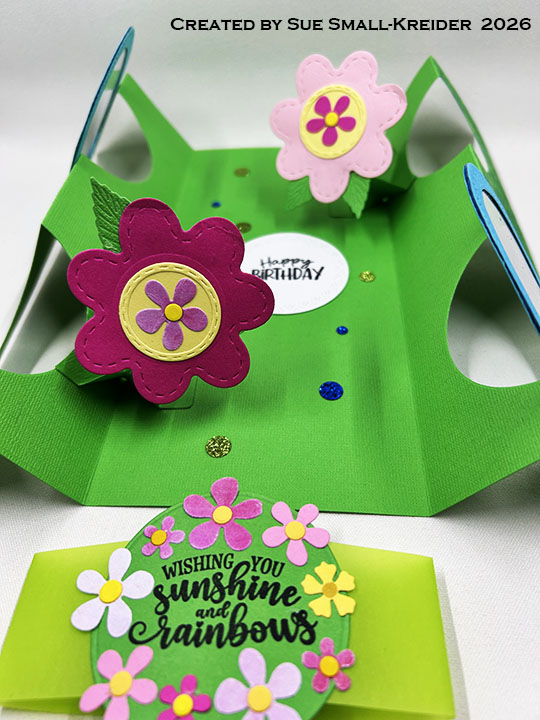
Flower Pop-Ups: (Watch the assembly video for the Twist Flower Pop-Up at the bottom of the linked page.) Cut two of the Twist Flower Pop-Up mechanism die from green cardstock and assemble as shown in the videos above. Cut two of the large flowers, centers and stitched rings. Assemble and attach to the pop-up mechanisms as shown in the video. From the Fun Flowers die set. Cut four green leaves and a variety of small flowers and flower centers. Decorate the large flower centers with a smaller flower and use the remaining small flowers for the belly band label.
Sentiments: The front, belly band sentiment “Wishing You Sunshine and Rainbows” and the inside “Happy Birthday” were stamped in black ink using the Rainbow Greetings stampset. The Circles – Crosshatchdies were used to cut the labels for the sentiments.
Belly Band: Wrap loosely around the center of the folded closed card a 1 ½-inch x 8 ½-inch strip of yellow – green vellum. Making sure that the strip will easily slide off the card, trim and glue the ends together. Attach the sentiment circle decorated with tiny flowers over the band glued seam.
Card Back with belly band
Envelope: The card fits into a #10 business (4. x 9-inches) size envelope.
___________________________________
Thank you for experiencing this blog post. I hope this inspires you and makes you smile.
Disclaimer: Karen Burniston products are provided free of charge by the manufacturer for review and use. All other items were personally purchased. Compensated affiliate links used where or when possible, meaning I will receive a small percentage commission from these manufacturers at no cost to you. This will allow me to add more content to my YouTube channel and help out a lot. Thank you.
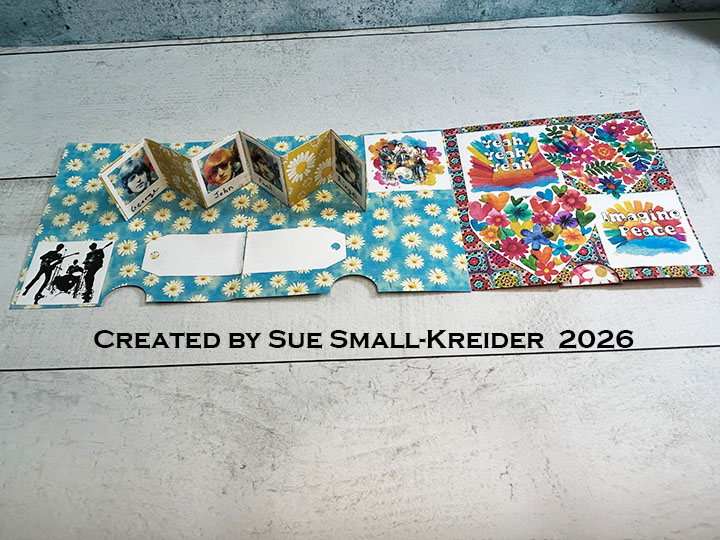
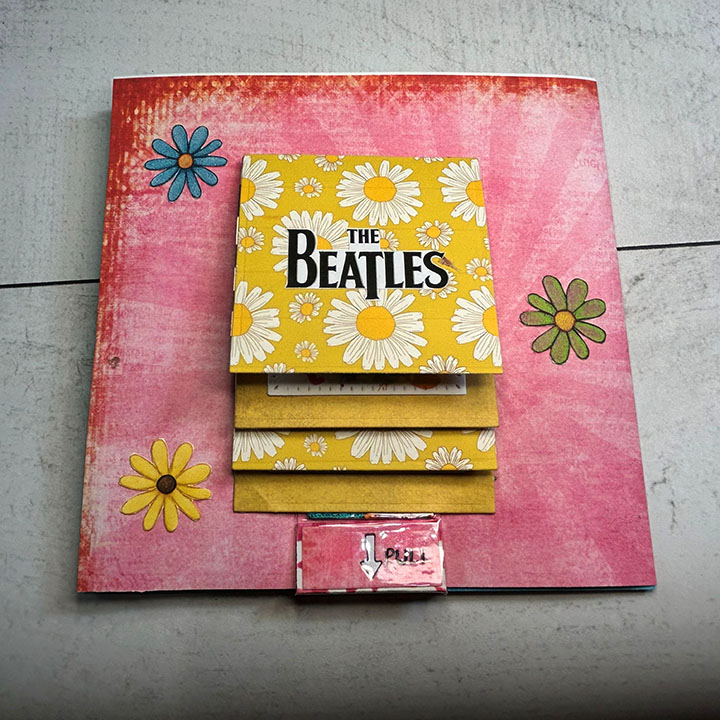
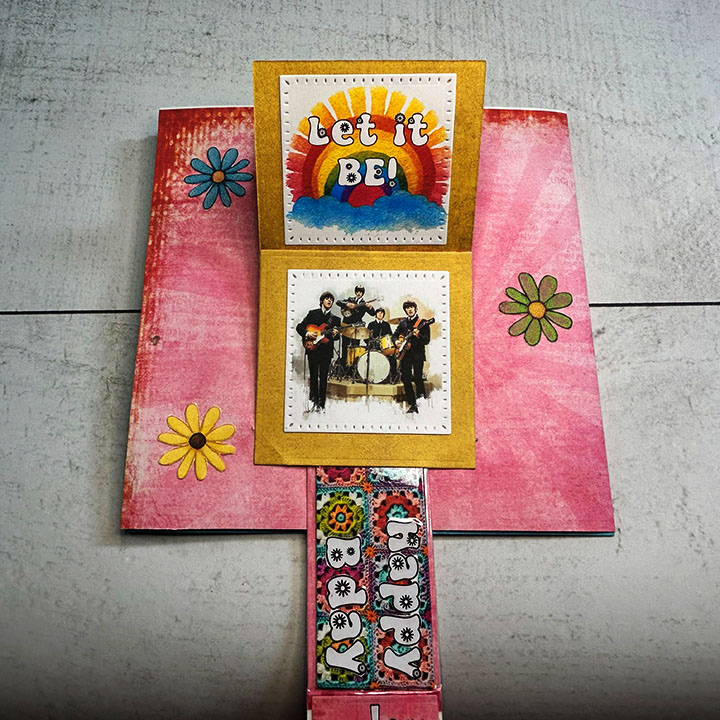
I’m here today with a pop-up junk journal birthday card full of the FAB FOUR using Relatively Thoughtful digital papers – A collection called Groovy Vibes.
Watch the process video to see how I use the paper collection.
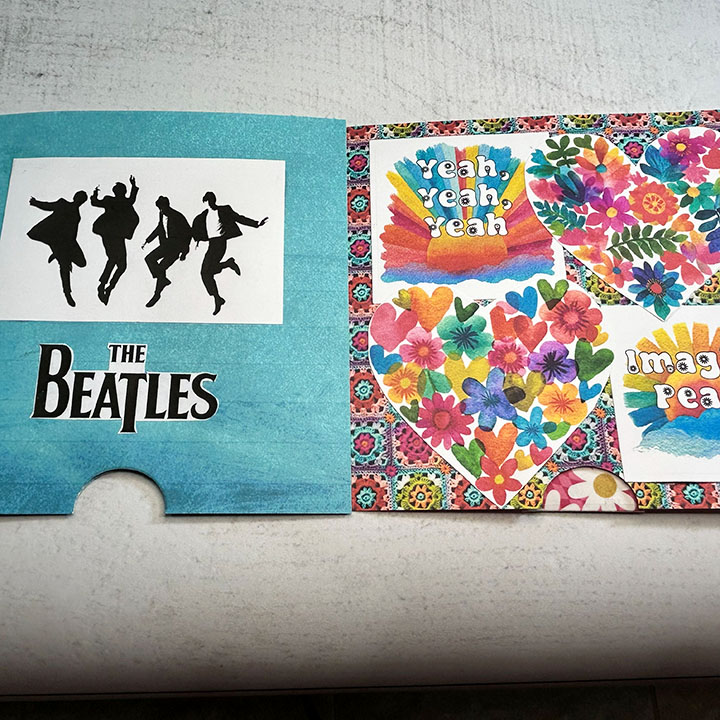
Cardbase: I printed double-sided papers of the blue daisies with solid blue on the back and the crocheted granny squares with the pink sunburst on the back. from the blue daisies I cut a 6-inch square and a 6.5×6-inch rectangle. From the granny squares paper I cut a 6.5×6-inch rectangle. The two rectangles were scored and folded at a half-inch to form 6-inch squares with a tab. Follow the video above on how to glue the two tabbed pieces to the 6-inch square.
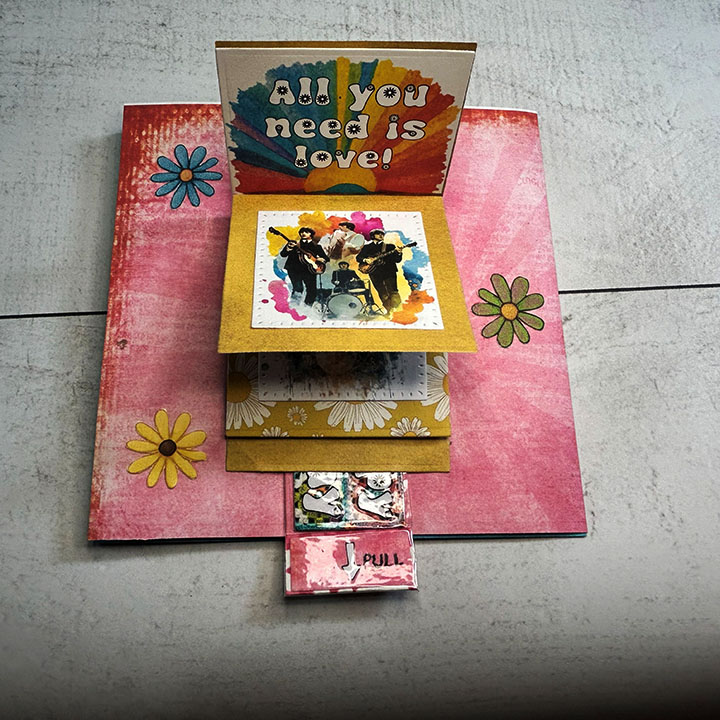
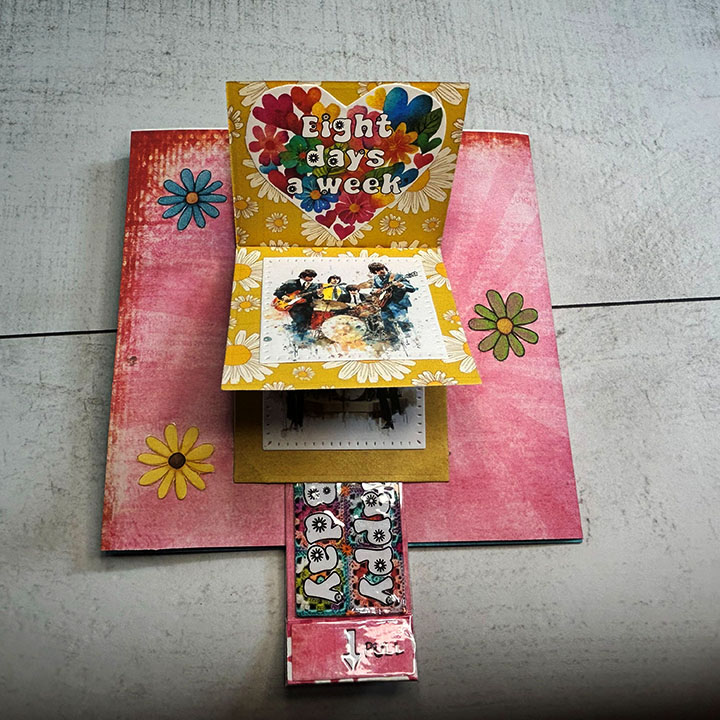
Waterfall Card Front: I printed double-sided paper of the pink daisies with the pink sunburst on the back, before cutting out the waterfall pieces using the Karen Burniston’s 1161 – Waterfall Card dies. Follow the directions in the video above to assemble. The Fab Four images were from the smaller images page of musicians while the song lyrics were from the larger rainbow page and the smaller hearts page.The square images were cut out using dies in the set. The title piece and birthday sentiment were fussy cut from the digital paper collection.
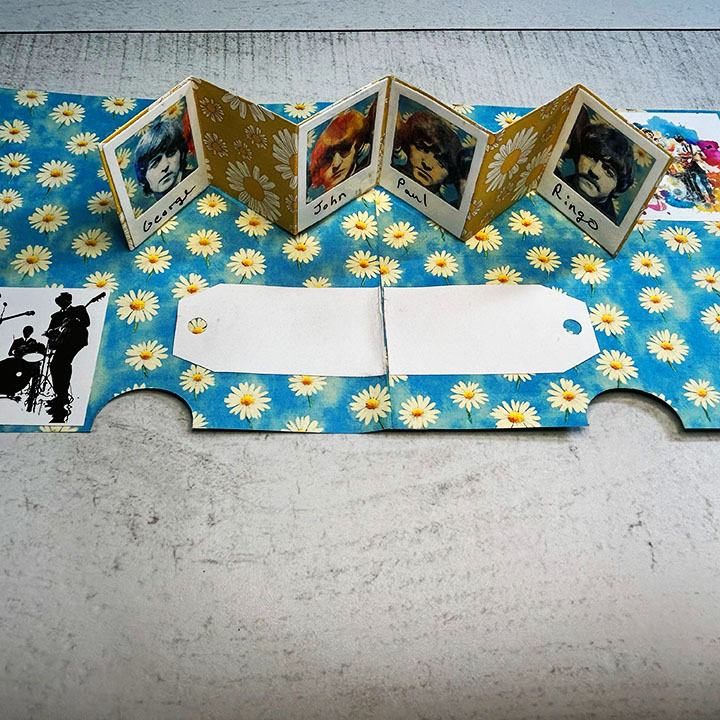
Photo Gallery Pop-Up: I used the Karen Burniston’s 1331 – Photo Gallery Pop-Up dies to create the pop-up gallery of head shots of the FAB Four. Follow the directions in the video above to assemble. The names were written on the white cardstock frames with a black fine-tipped marker before the clear packing tape was applied.
Sentiments: All the inside sentiments and images were hand-cut including the two white tags for a personal message.
Envelope: The card would need a custom envelope and because of its thickness, it would be best hand-delivered.
Disclaimer:Relatively Thoughtful and Karen Burniston products were provided for free or at a discount by the manufacturer for review and use. All other items were personally purchased. Compensated affiliate links used where or when possible, meaning I will receive a small percentage commission from these manufacturers at no cost to you. This will allow me to add more content to my YouTube channel and help out a lot. Thank you.
Materials Used:
Dies
Karen Burniston in cahoots with Riley and Company – Photo Gallery Pop-Up – 1331
Karen Burniston in cahoots with Riley and Company – Waterfall Card – 1161
Karen Burniston in cahoots with Riley and Company – Photo Collage Pop-Up – 1098