
For a baseball fan, having your favorite player on the injured list, is bad, having yourself on the list is even worse. This card is for a sports fan recovering from surgery.
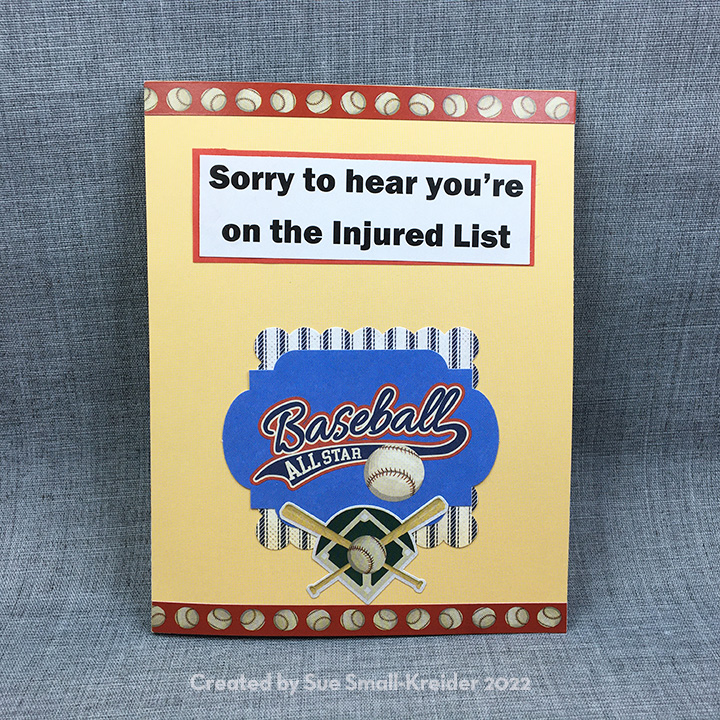
Echo Park Paper Co. makes a Baseball mega bundle of double-sided papers and ephemera that works well with Carta Bella’s Baseball element stickers. I used items from both these sets along with the circle twisting mechanism designed by Karen Burniston to make this card.

After watching Karen’s assembly video for the Snowman Twist Circle die set, I selected the largest two circle dies, cutting the largest from sand colored paper and the smaller stitched circle from white cardstock. I used a pencil to sketch where the red stitching would be on the white circle and used a fine tipped marker to mark the baseball’s stitching. The striped paper for the inside of the card was folded and die-cut as directed in the video. The arm piece was also cut from the striped paper.

A lightweight 5 x 6.5 inch card base was what I glued the striped inside paper to. For the outside I cut two 5 x 6.5 inch pieces of the sand colored paper. Decorating the card with the stickers and pre-cut ephemera was the fun part of the card. Using a computer, I created the two sentiments playing off the twisting action of the batter on the circle. “It won’t be long before your back in the swing of things!”

The envelope is also decorated with a baseball sticker.
Thank you for reading this blog post. Please like and leave comments 😊
Materials Used:
Dies
Inks
- Red fine-tipped pen
- Black fine-tipped pen
Papers
- Echo Park Paper Co. – Baseball by Steven Duncan Mega Bundle – CBBA95000TM
- Carta Bella Paper Company – Baseball Element Sticker – CBBA95014
- White card base from my stash
Miscellaneous
- Sizzix – Big Shot PLUS die cutting Machine
- Cosmic Shimmer – Specialist Acrylic Glue – 125ml
- Fineline 20 Gauge Applicator & Bottle

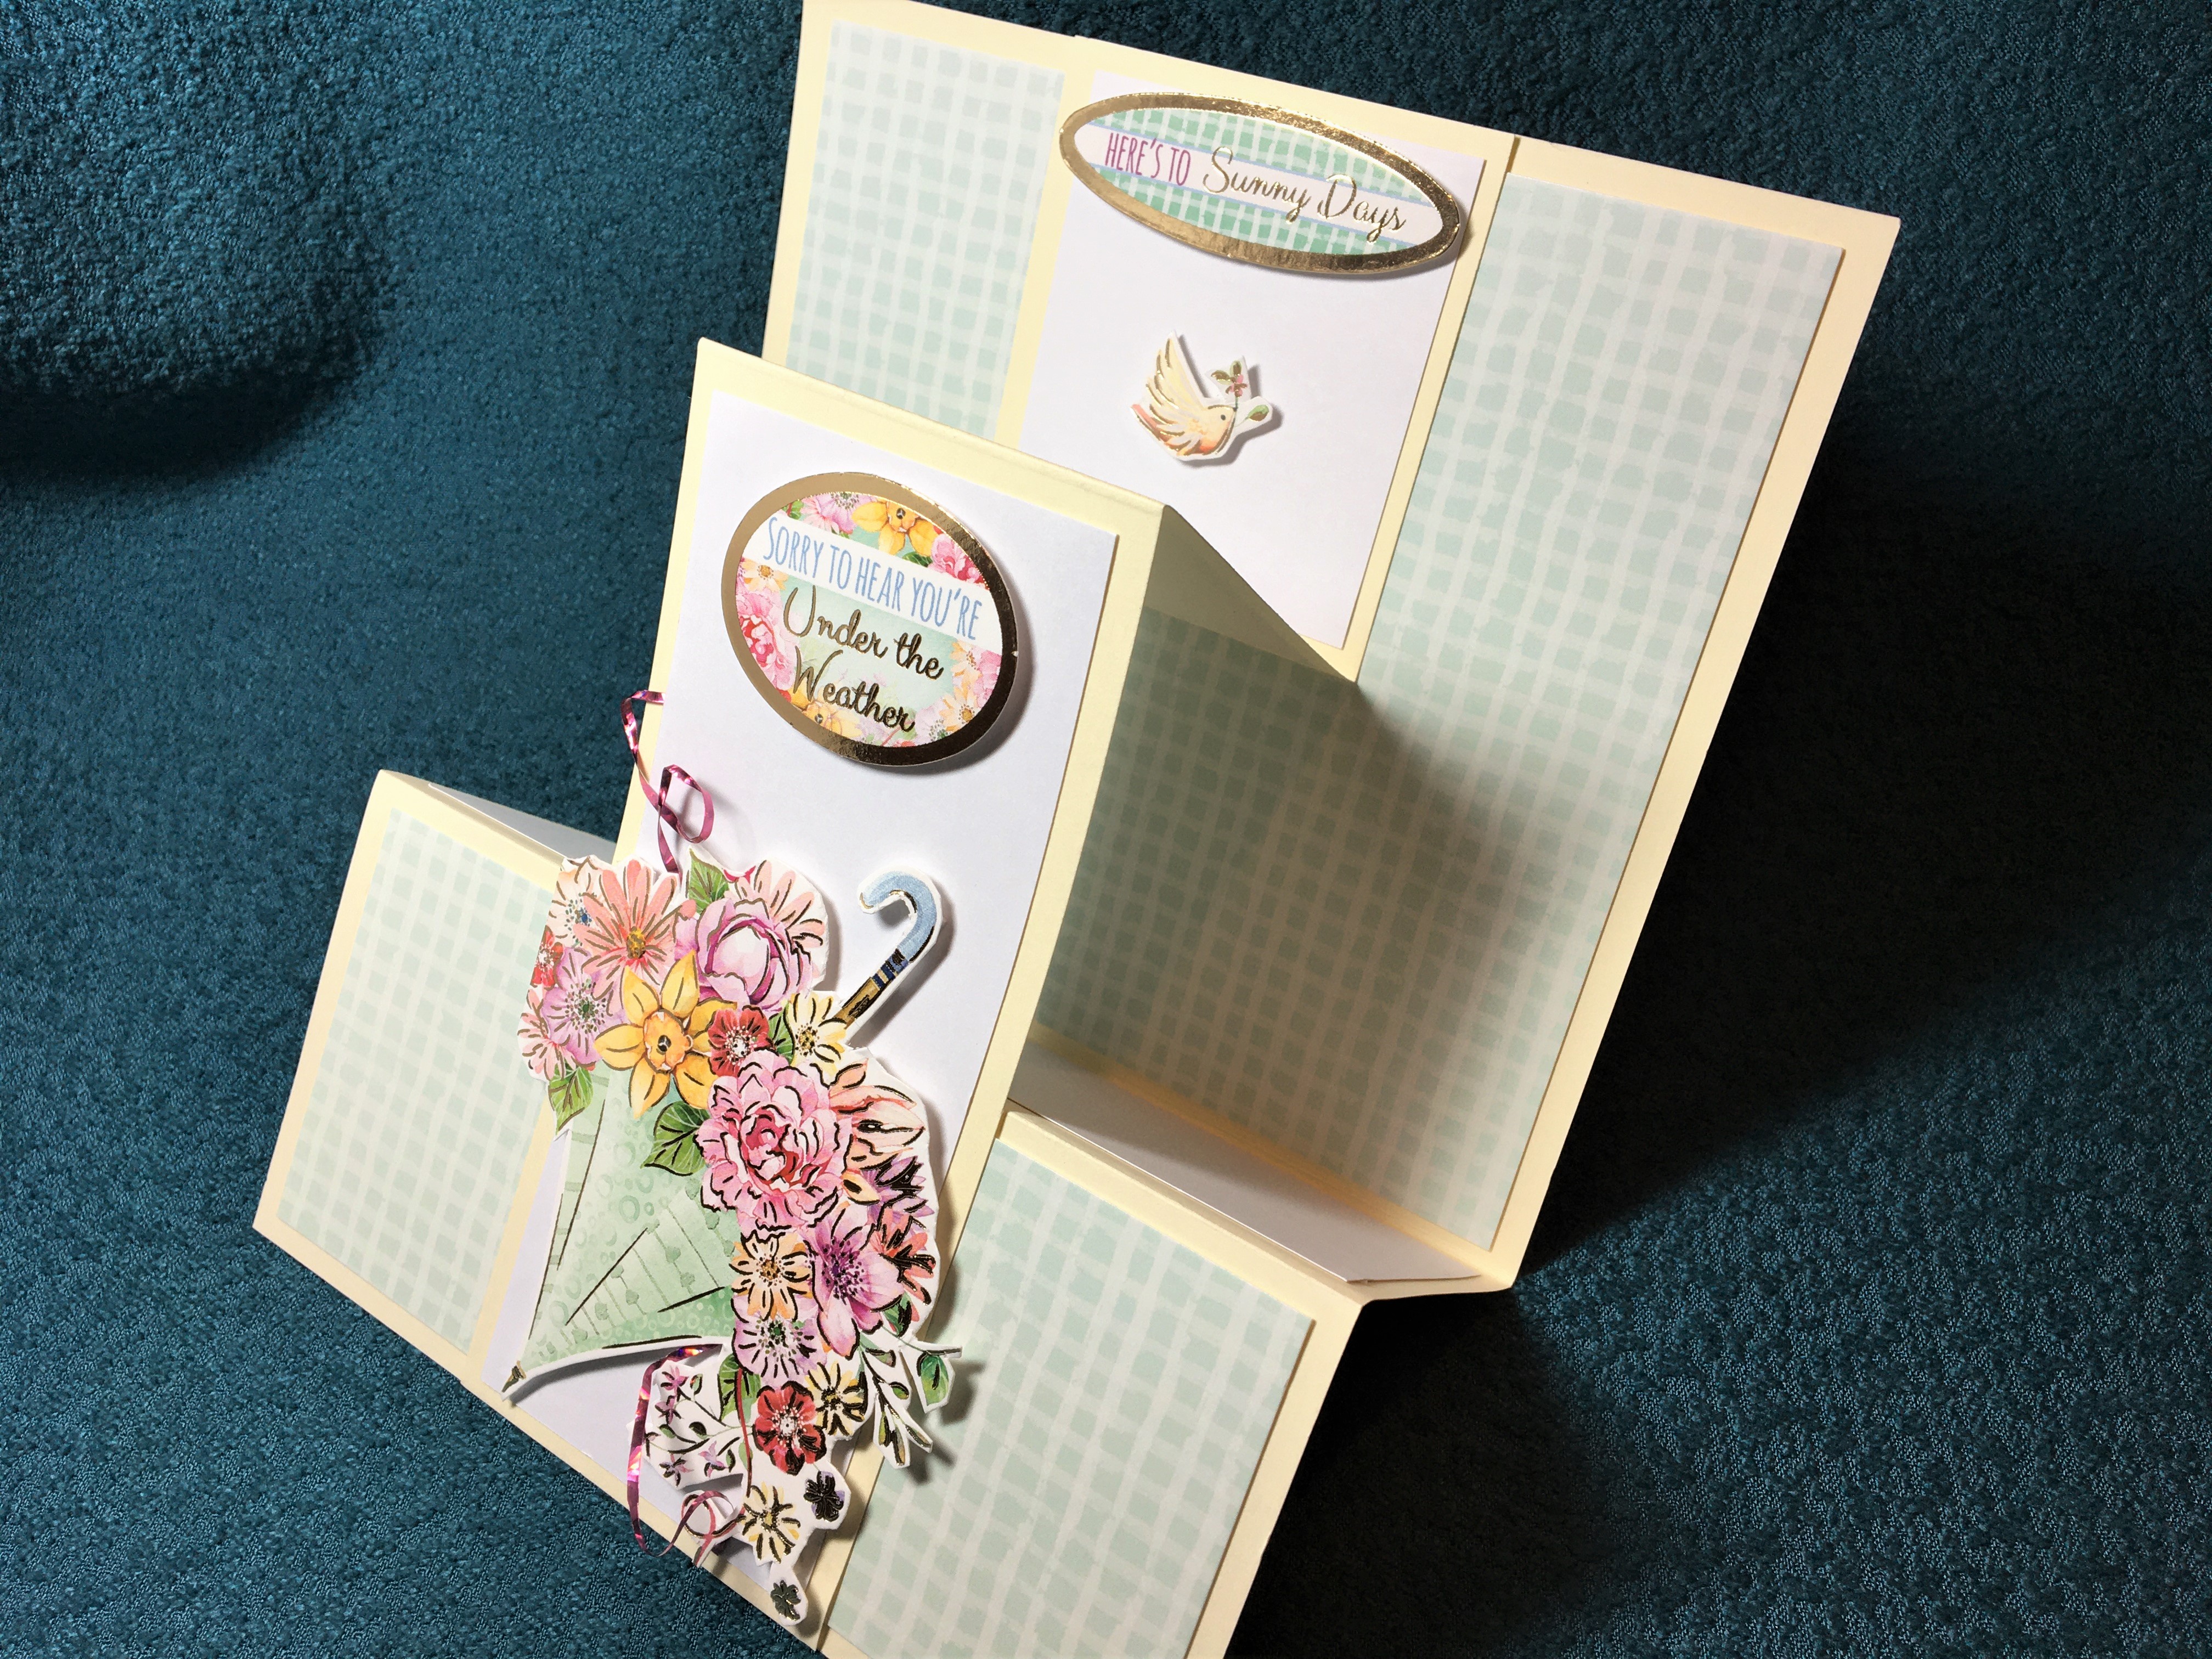 This is a double Z-fold card turned sideways using Hunkydory’s Happy Days – Adorable Scorables set and an 8.5 inches x 11 inches (21 cm x 28 cm) piece of cream card stock.
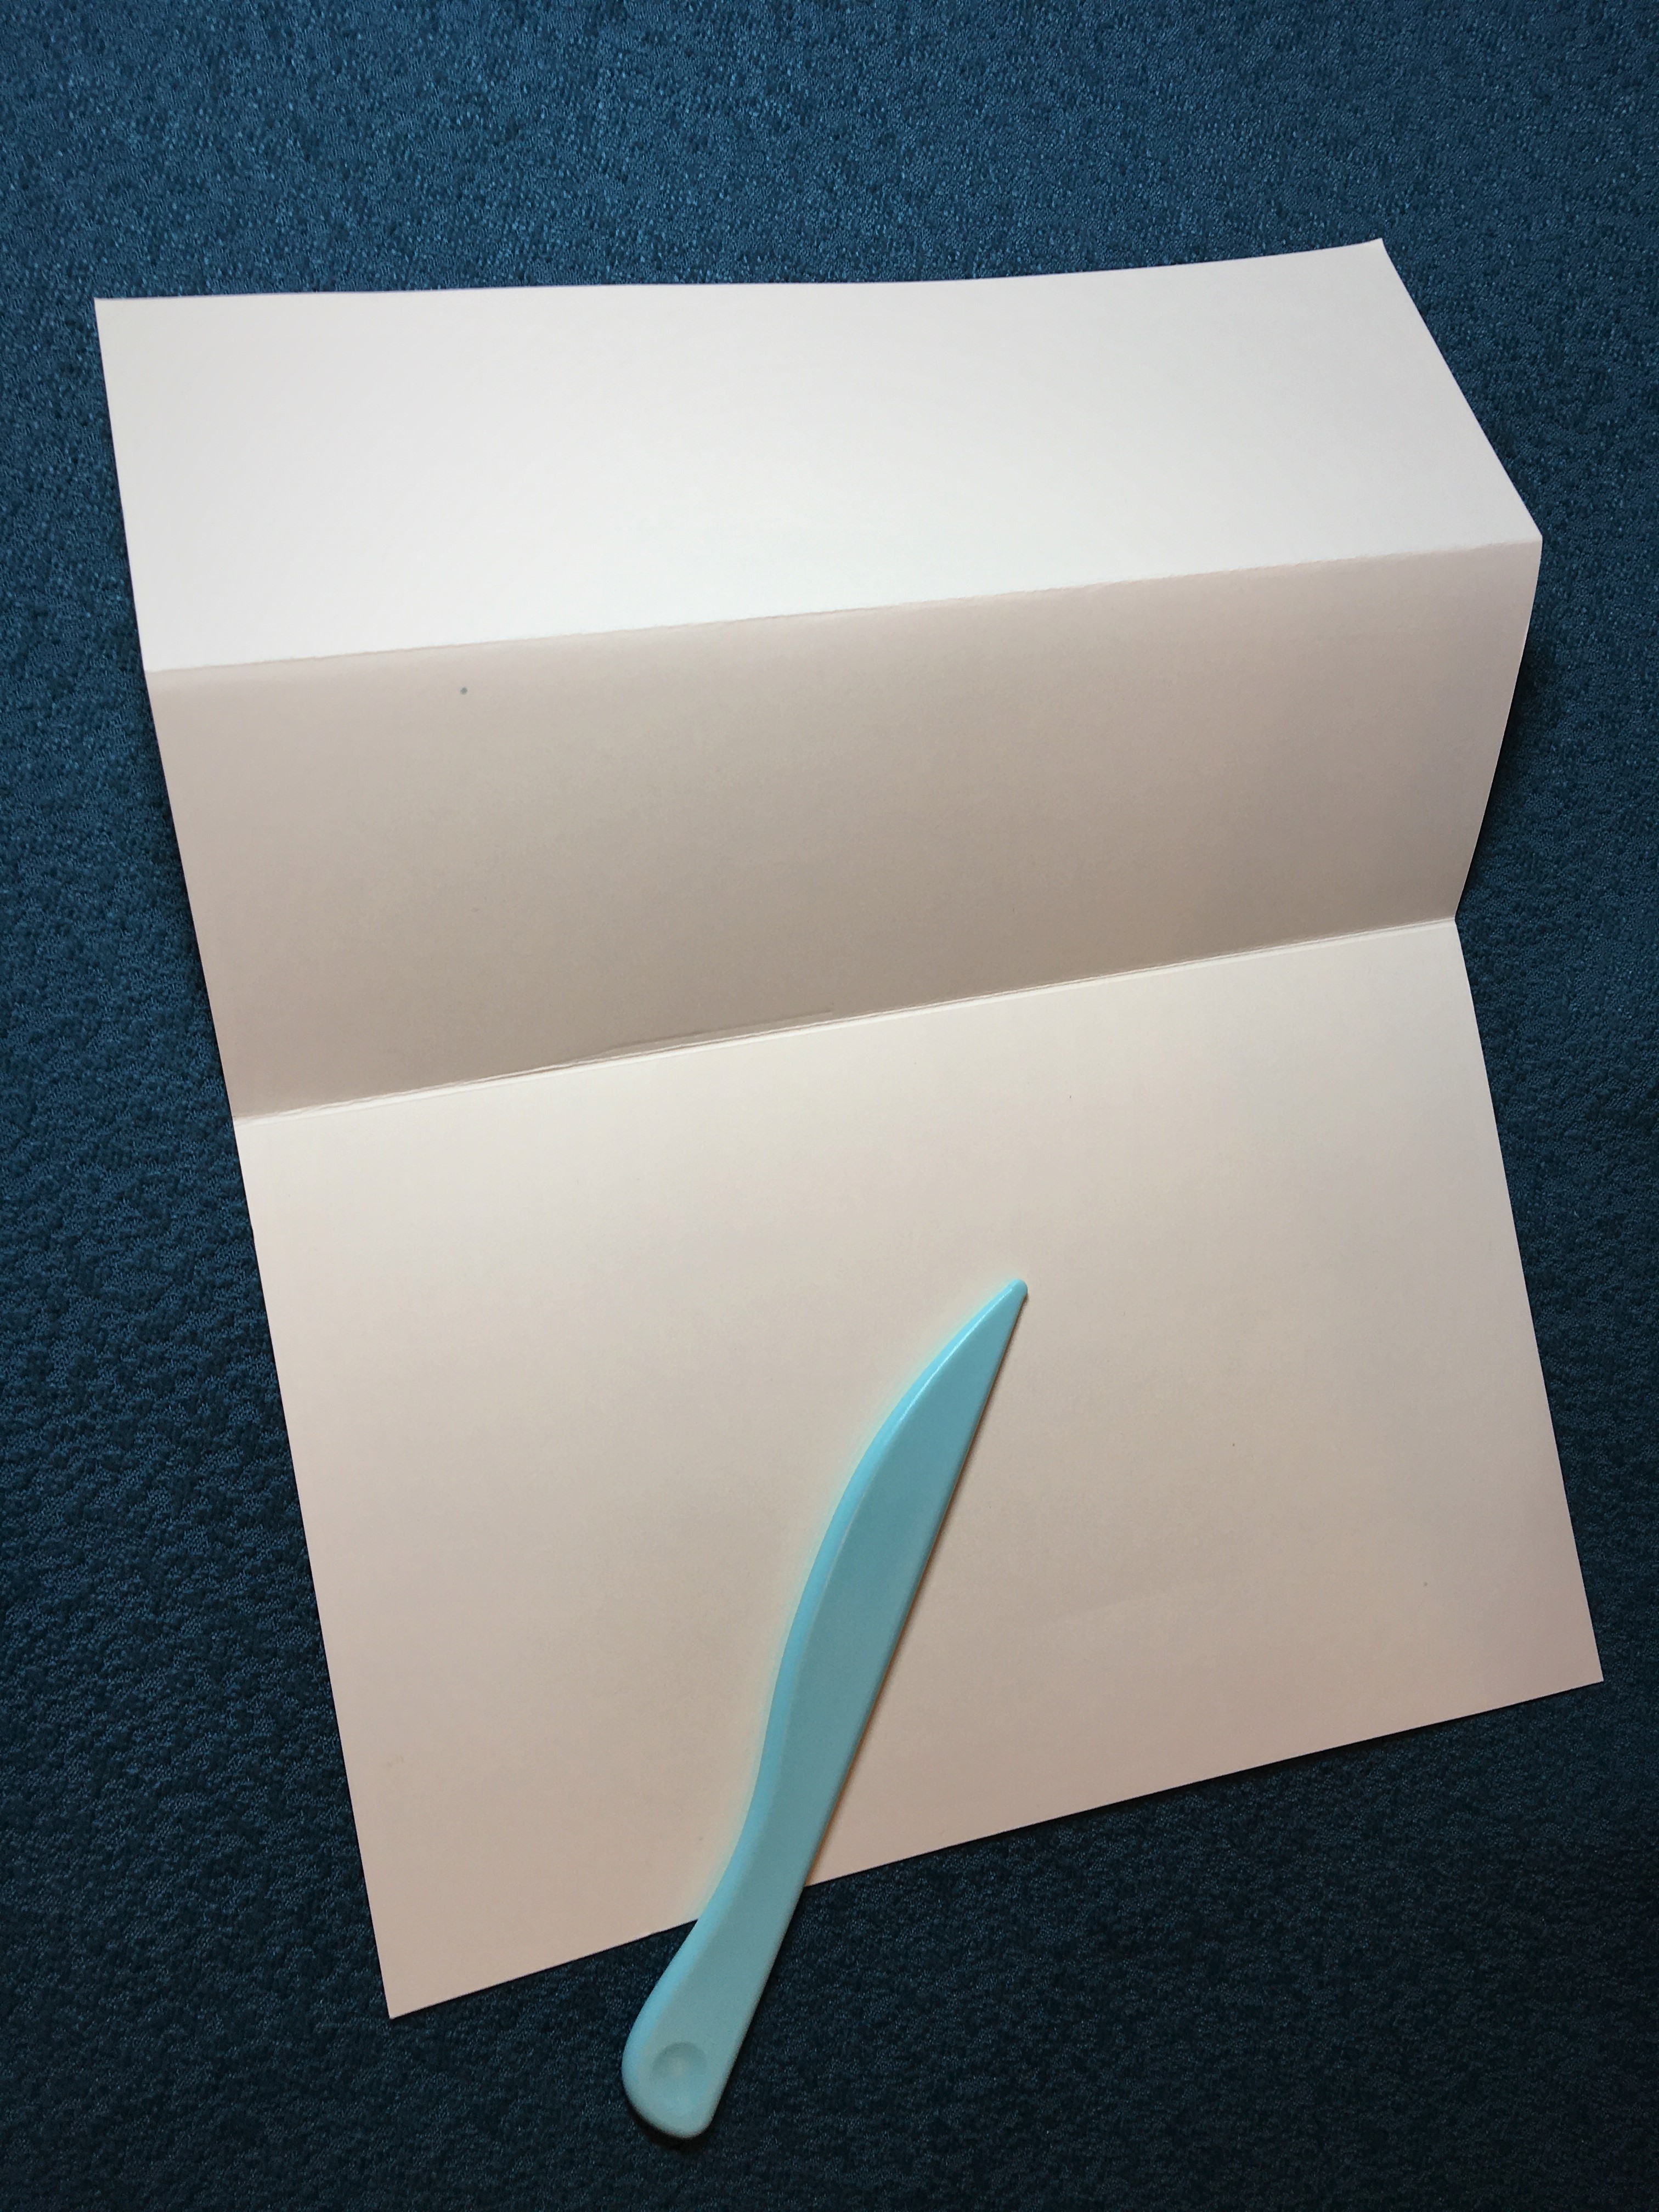 1 Fold in half to make 5.5 x 4.25 inches (140 x 107 mm) card. Burnish fold. Fold front in half to make 2.75 x 5.5 inches (70 x 140 mm) panel. Burnish fold.
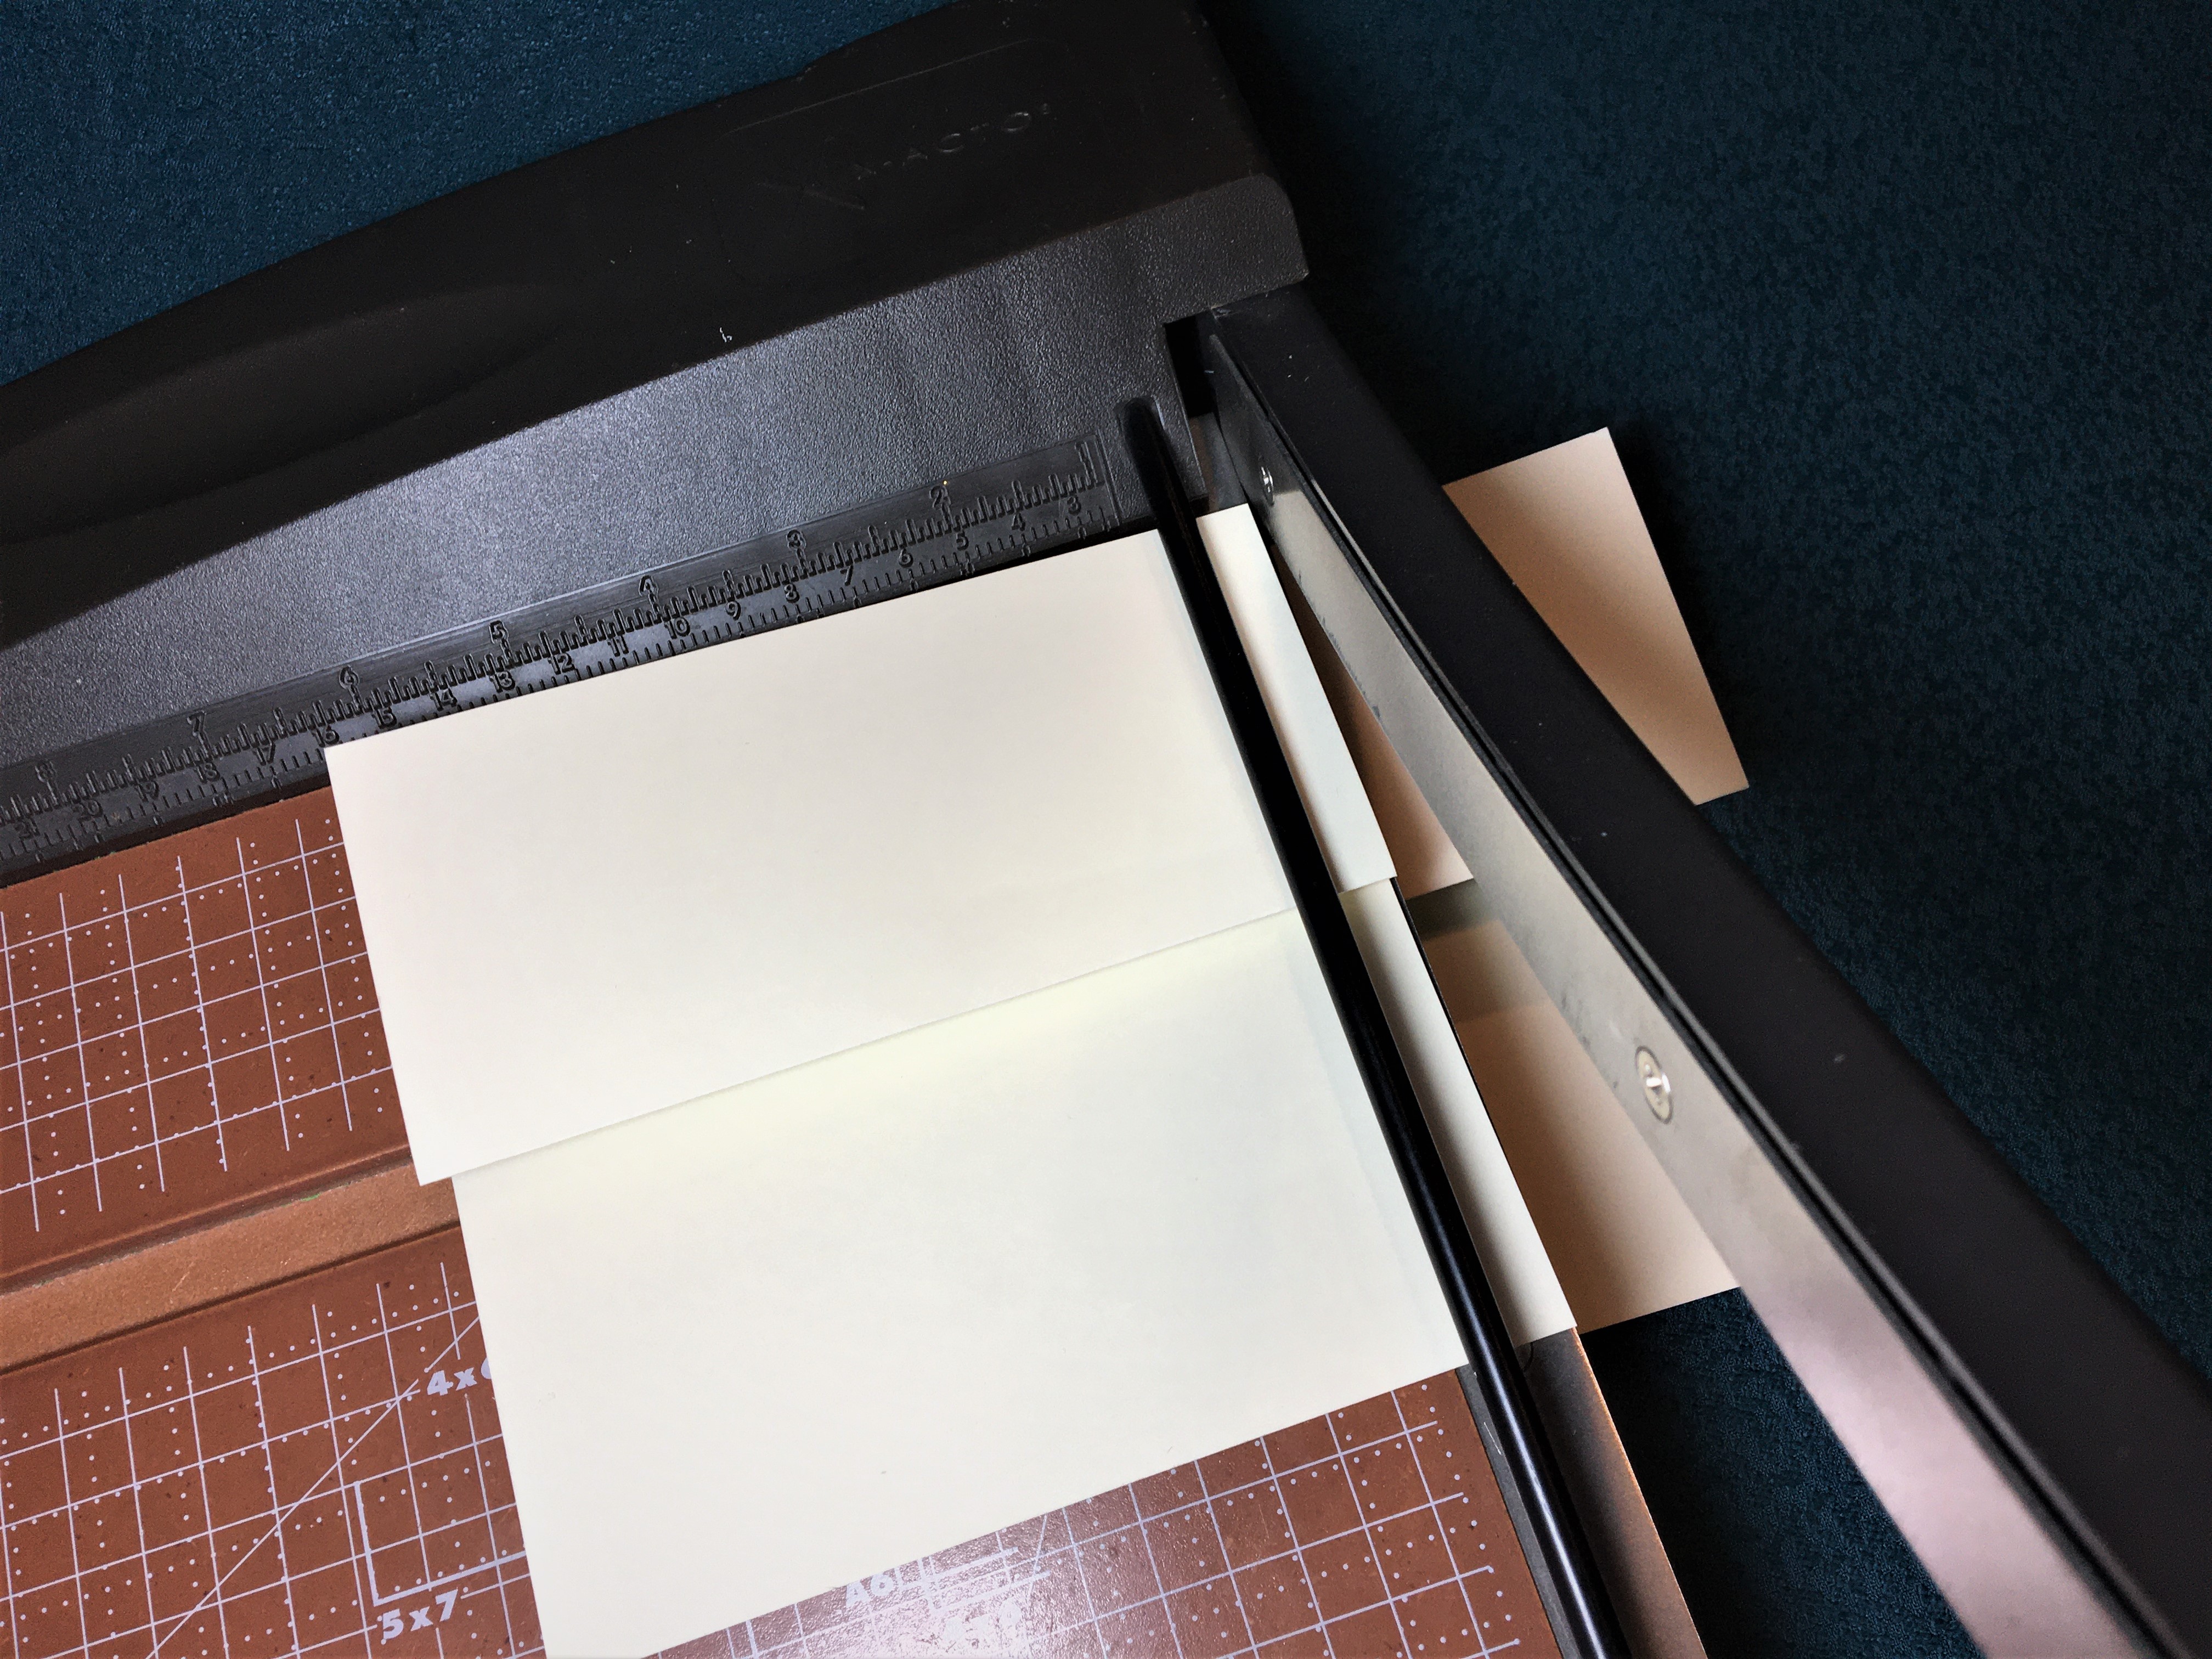 2 Cut folded card at 2.5 inches (63 mm) from the side.
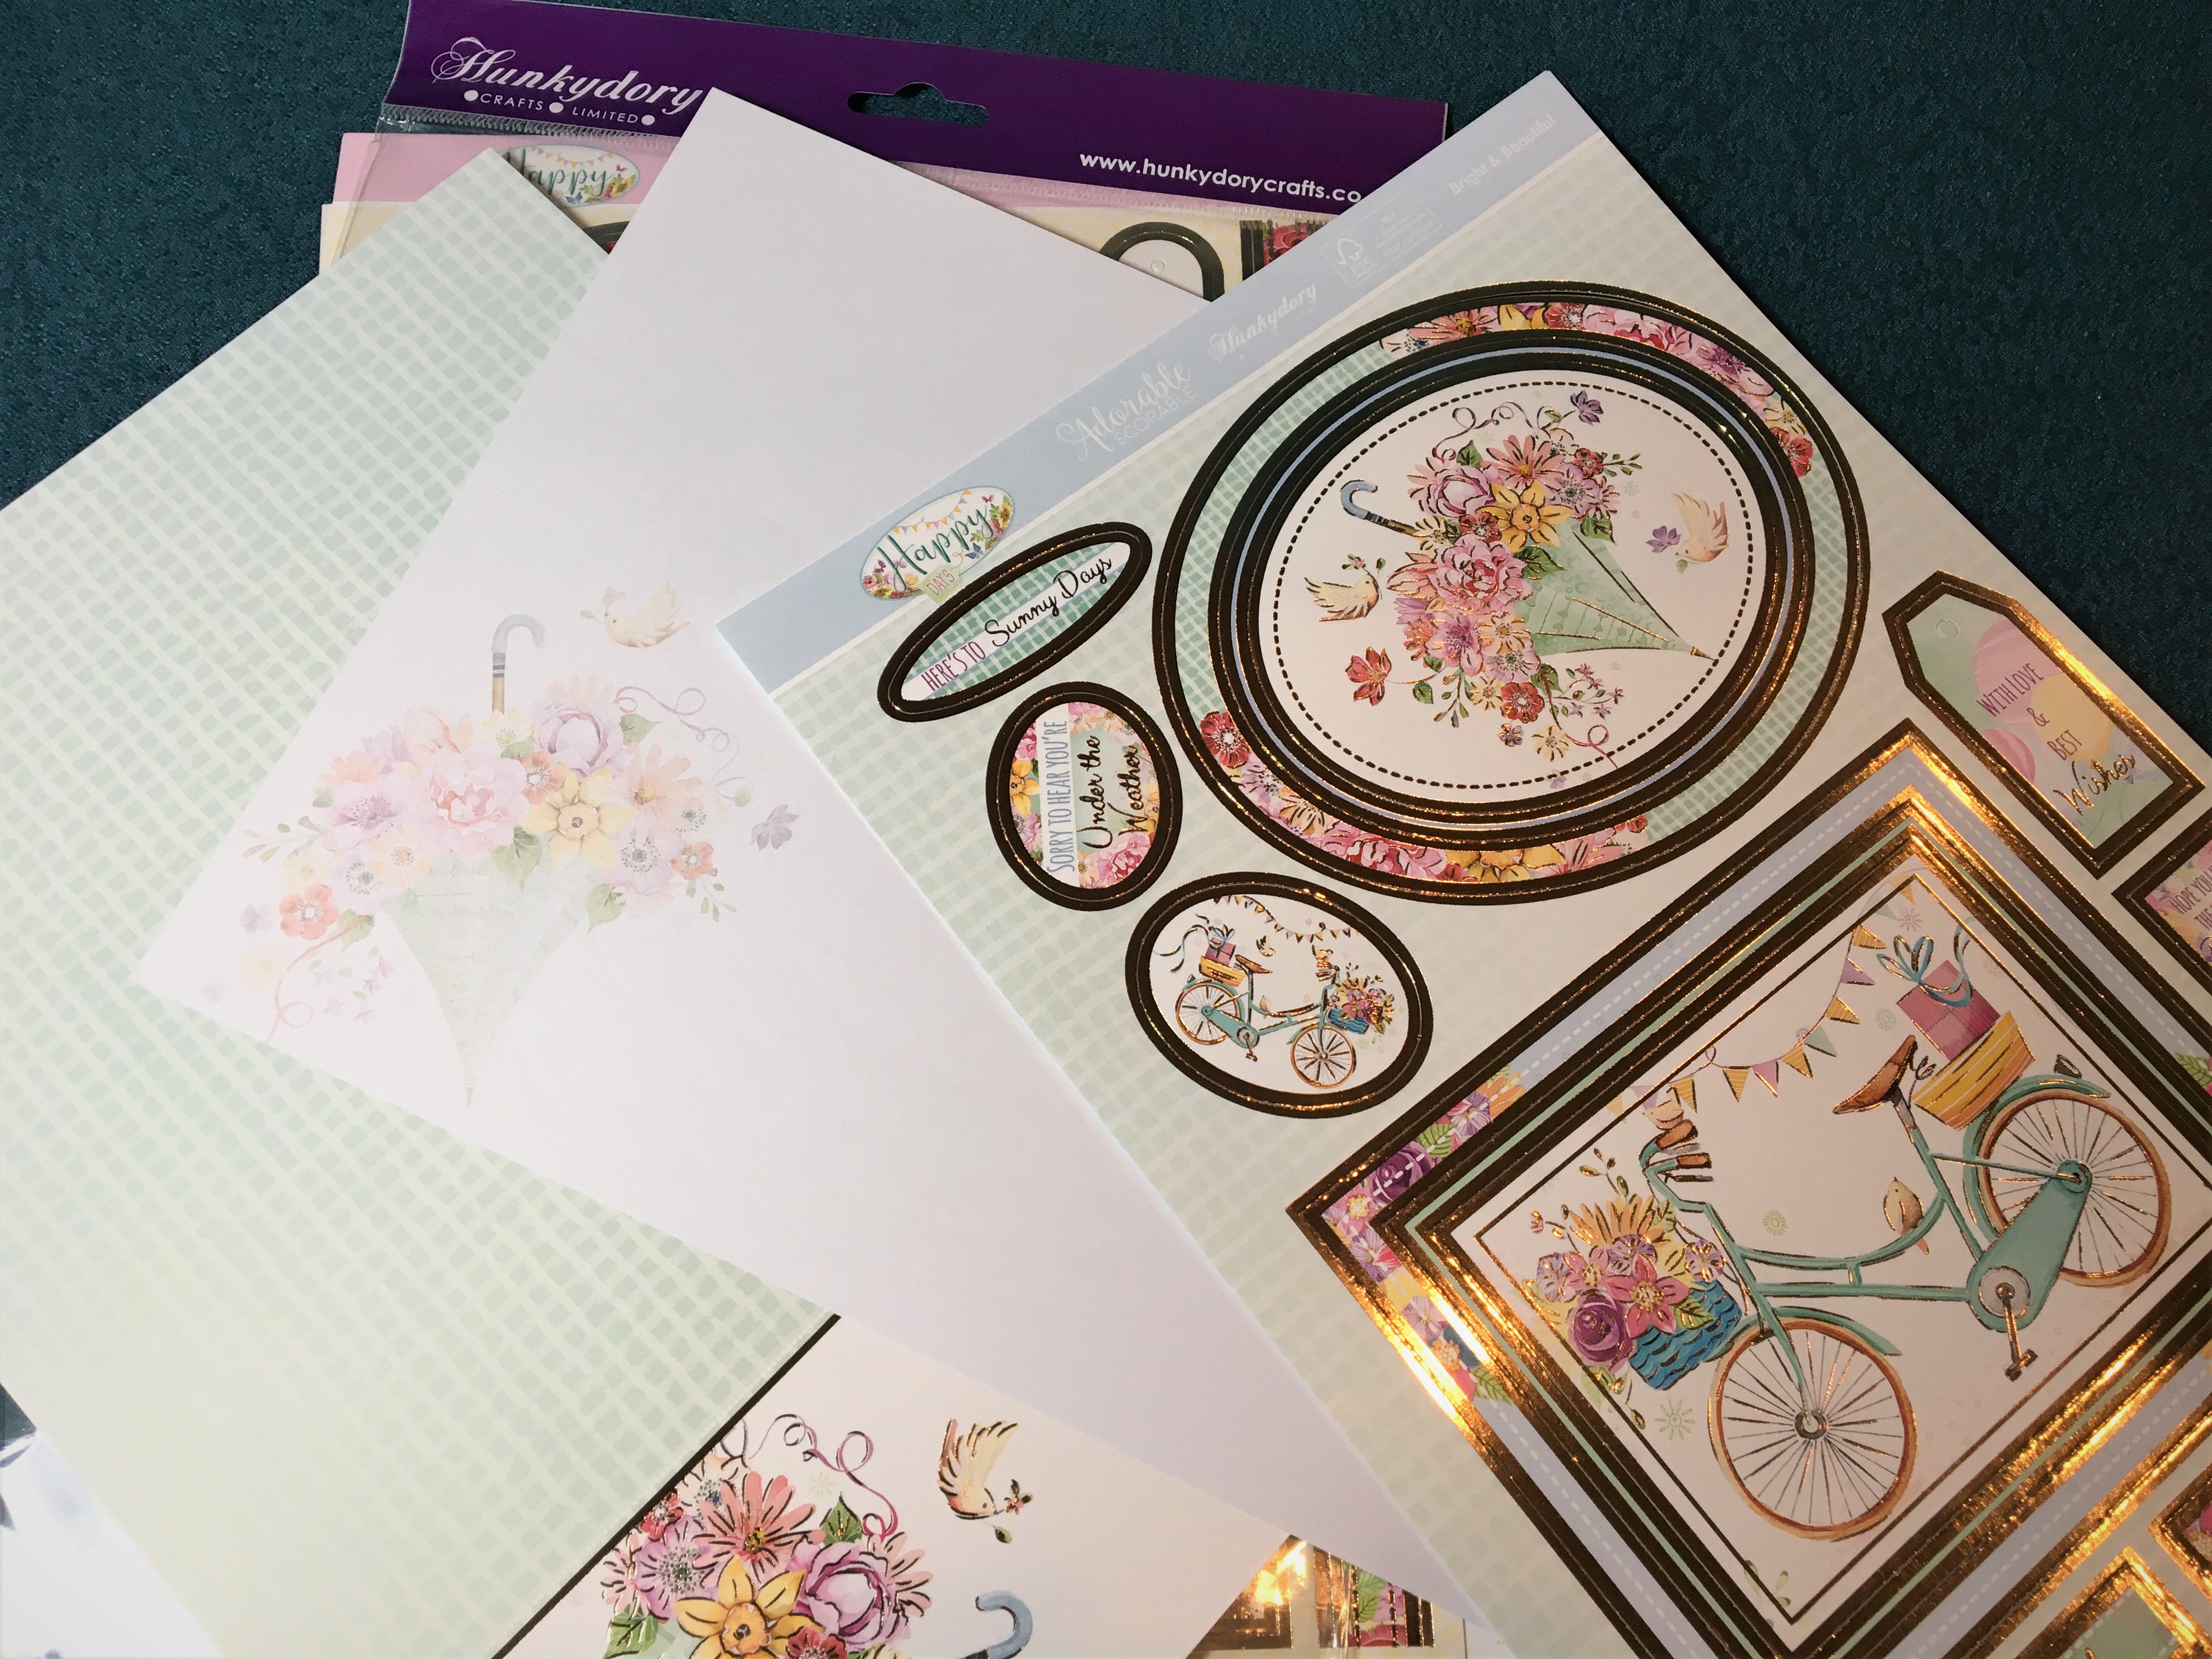 3 Pick your papers.
 4 Cut from pattern paper two pieces – 5.75 x 5.25 inches (146 x 133 mm) and 2.5 x 5.25 inches (63 x 133 mm). Cut four pieces of white – 2.5 x 5.25 inches (63 x 133 mm), 2.25 x 5.25 inches (58 x 133 mm) and two at 2.25 x 2.5 inches (58 x 63 mm)
 5 Fussy cut out front umbrella. Create thin ribbon by sticking back-to-back holographic tape and cutting into thin strips.
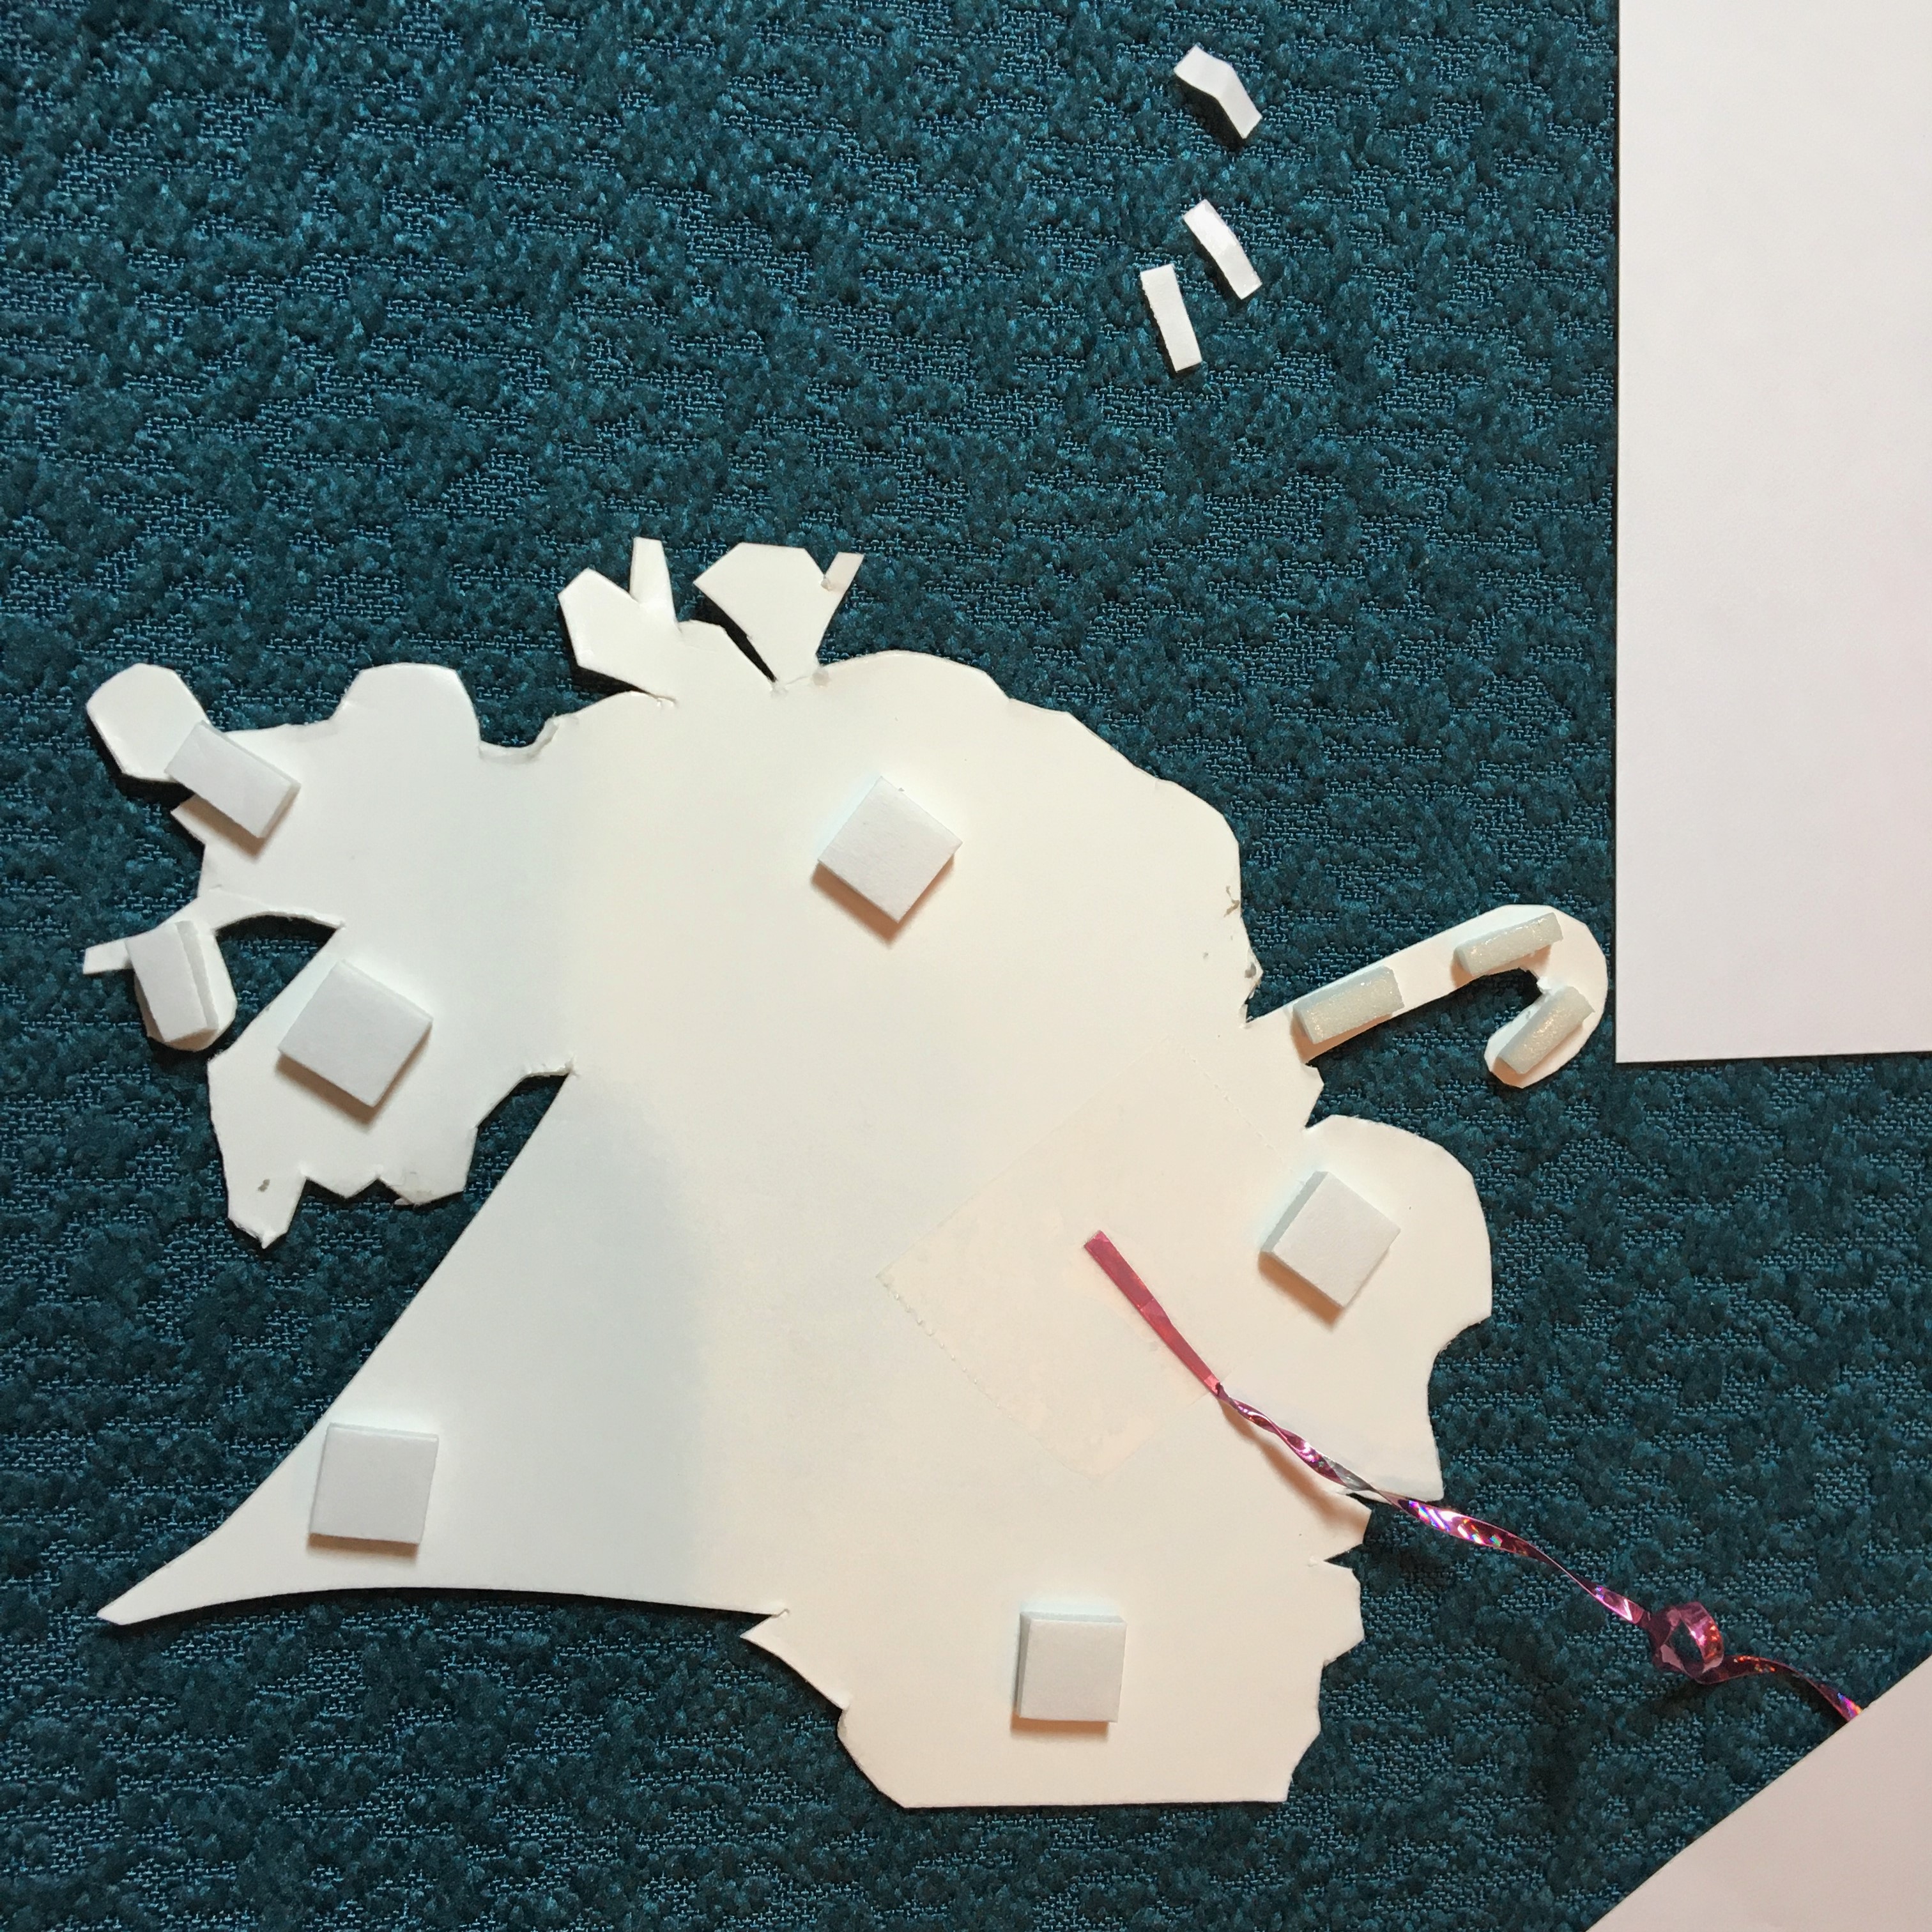 6 Figure-out placement of ribbon and tape on backside. Place foam squares on back.
 7 Adhere umbrella to white card (2.25 x 5.25 inches). Tape ends of ribbon to back of white card.
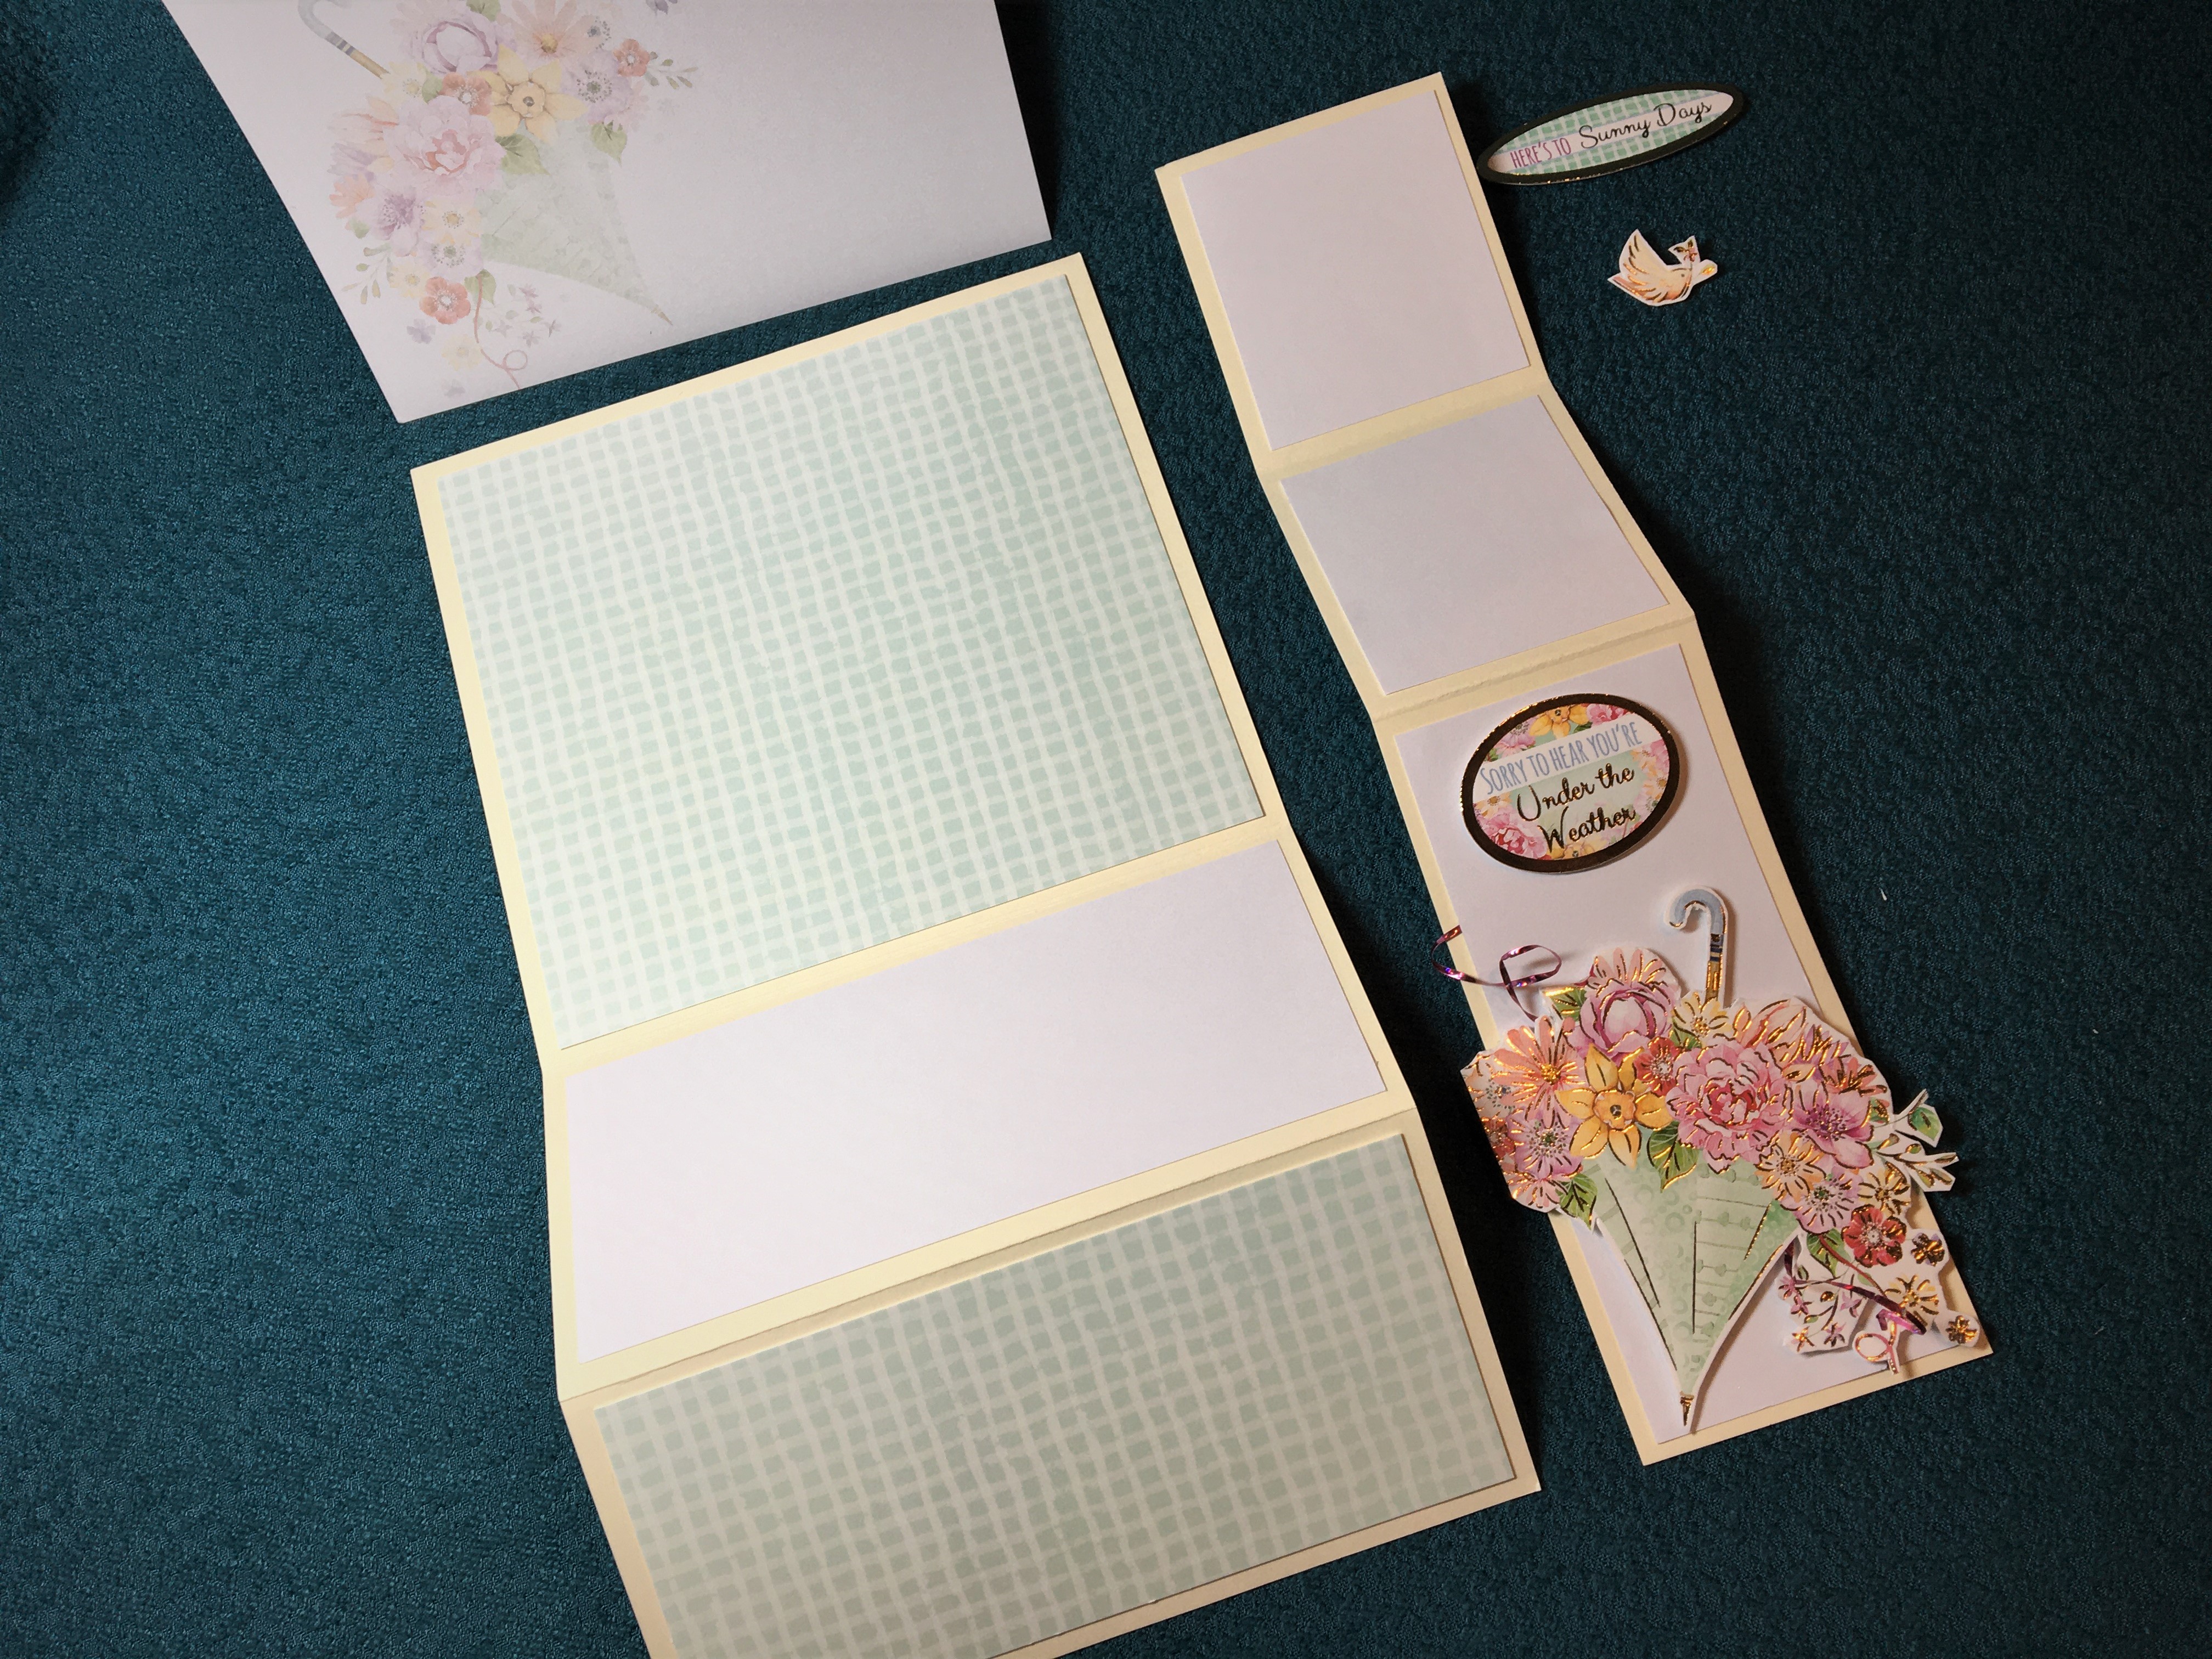 8 Adhere patterned and white papers to appropriate spaces. There should be an 1/8 inch (3 mm) bit of cream card showing all around each of the top layered pieces. Adhere sentiment with foam squares above umbrella.
 9 Add several rows of double-sided tape to the back edge section making sure the tape does not extend above fold marks.
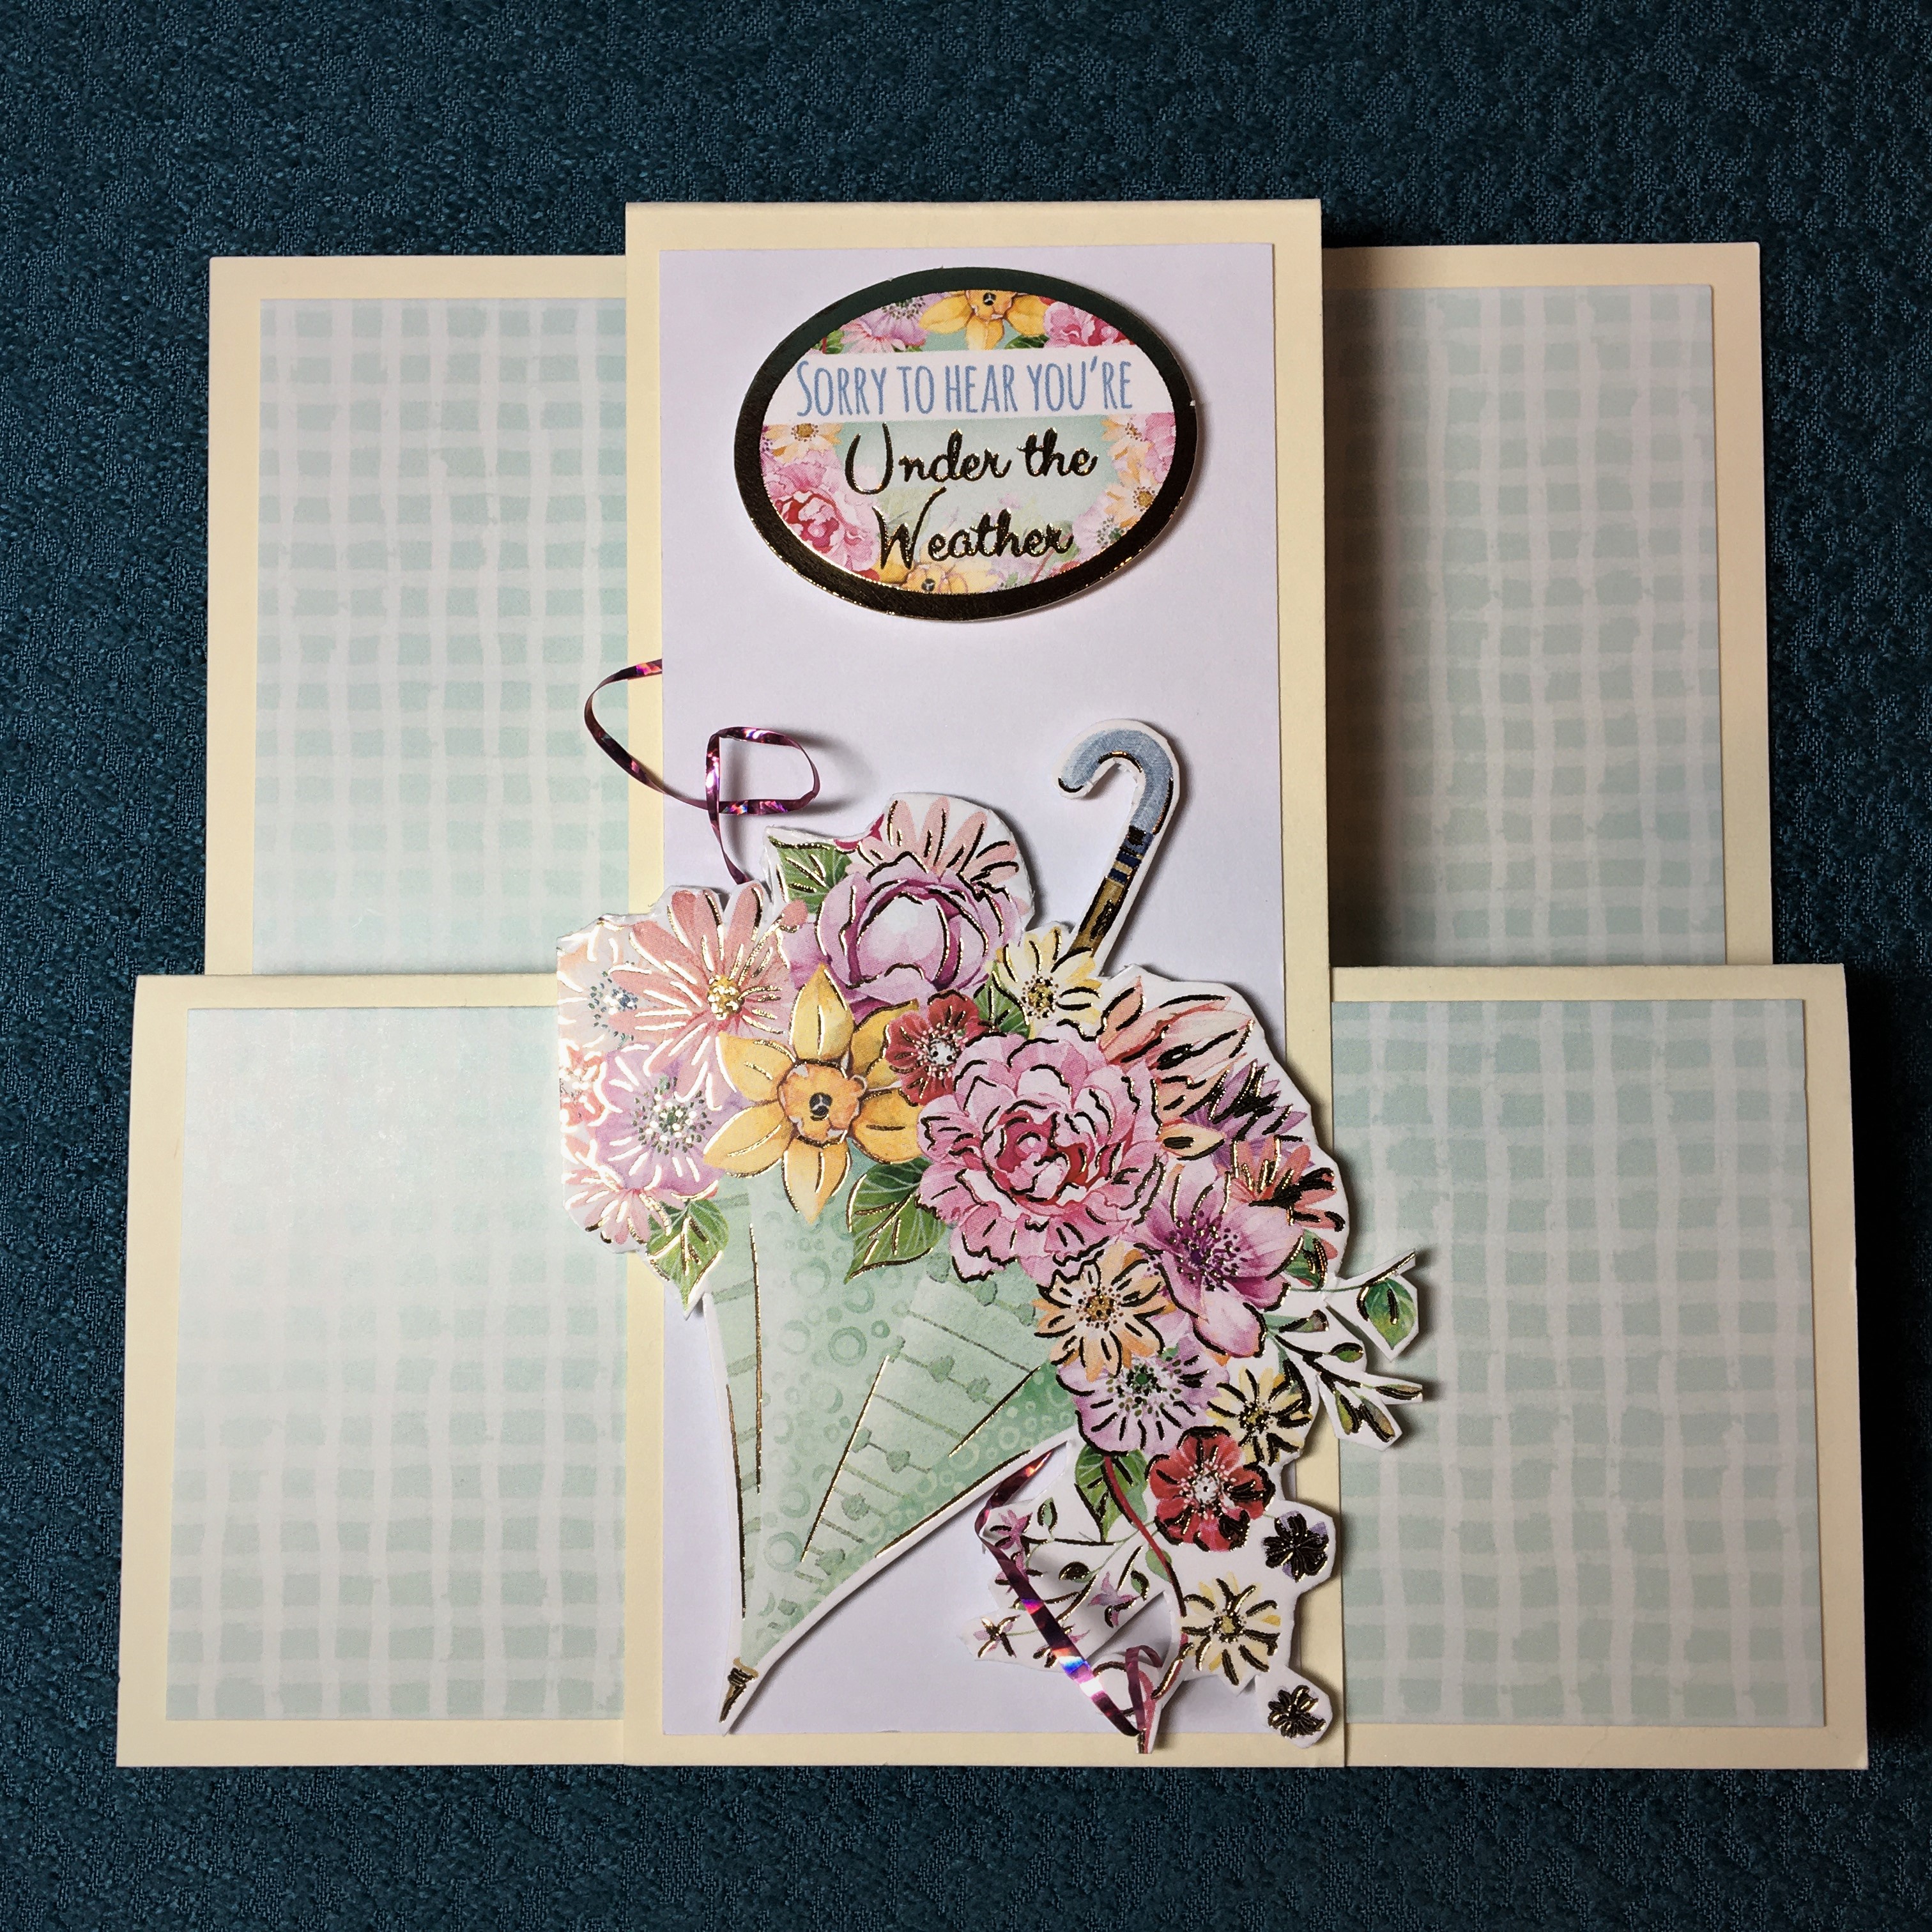 10 Peal off tape from behind umbrella section and adhere to front of car. Next pull off backing tape from back section and press card folded shut to adhere back of center layer to back layer of card.
 11 Add back sentiment and bird decoration.
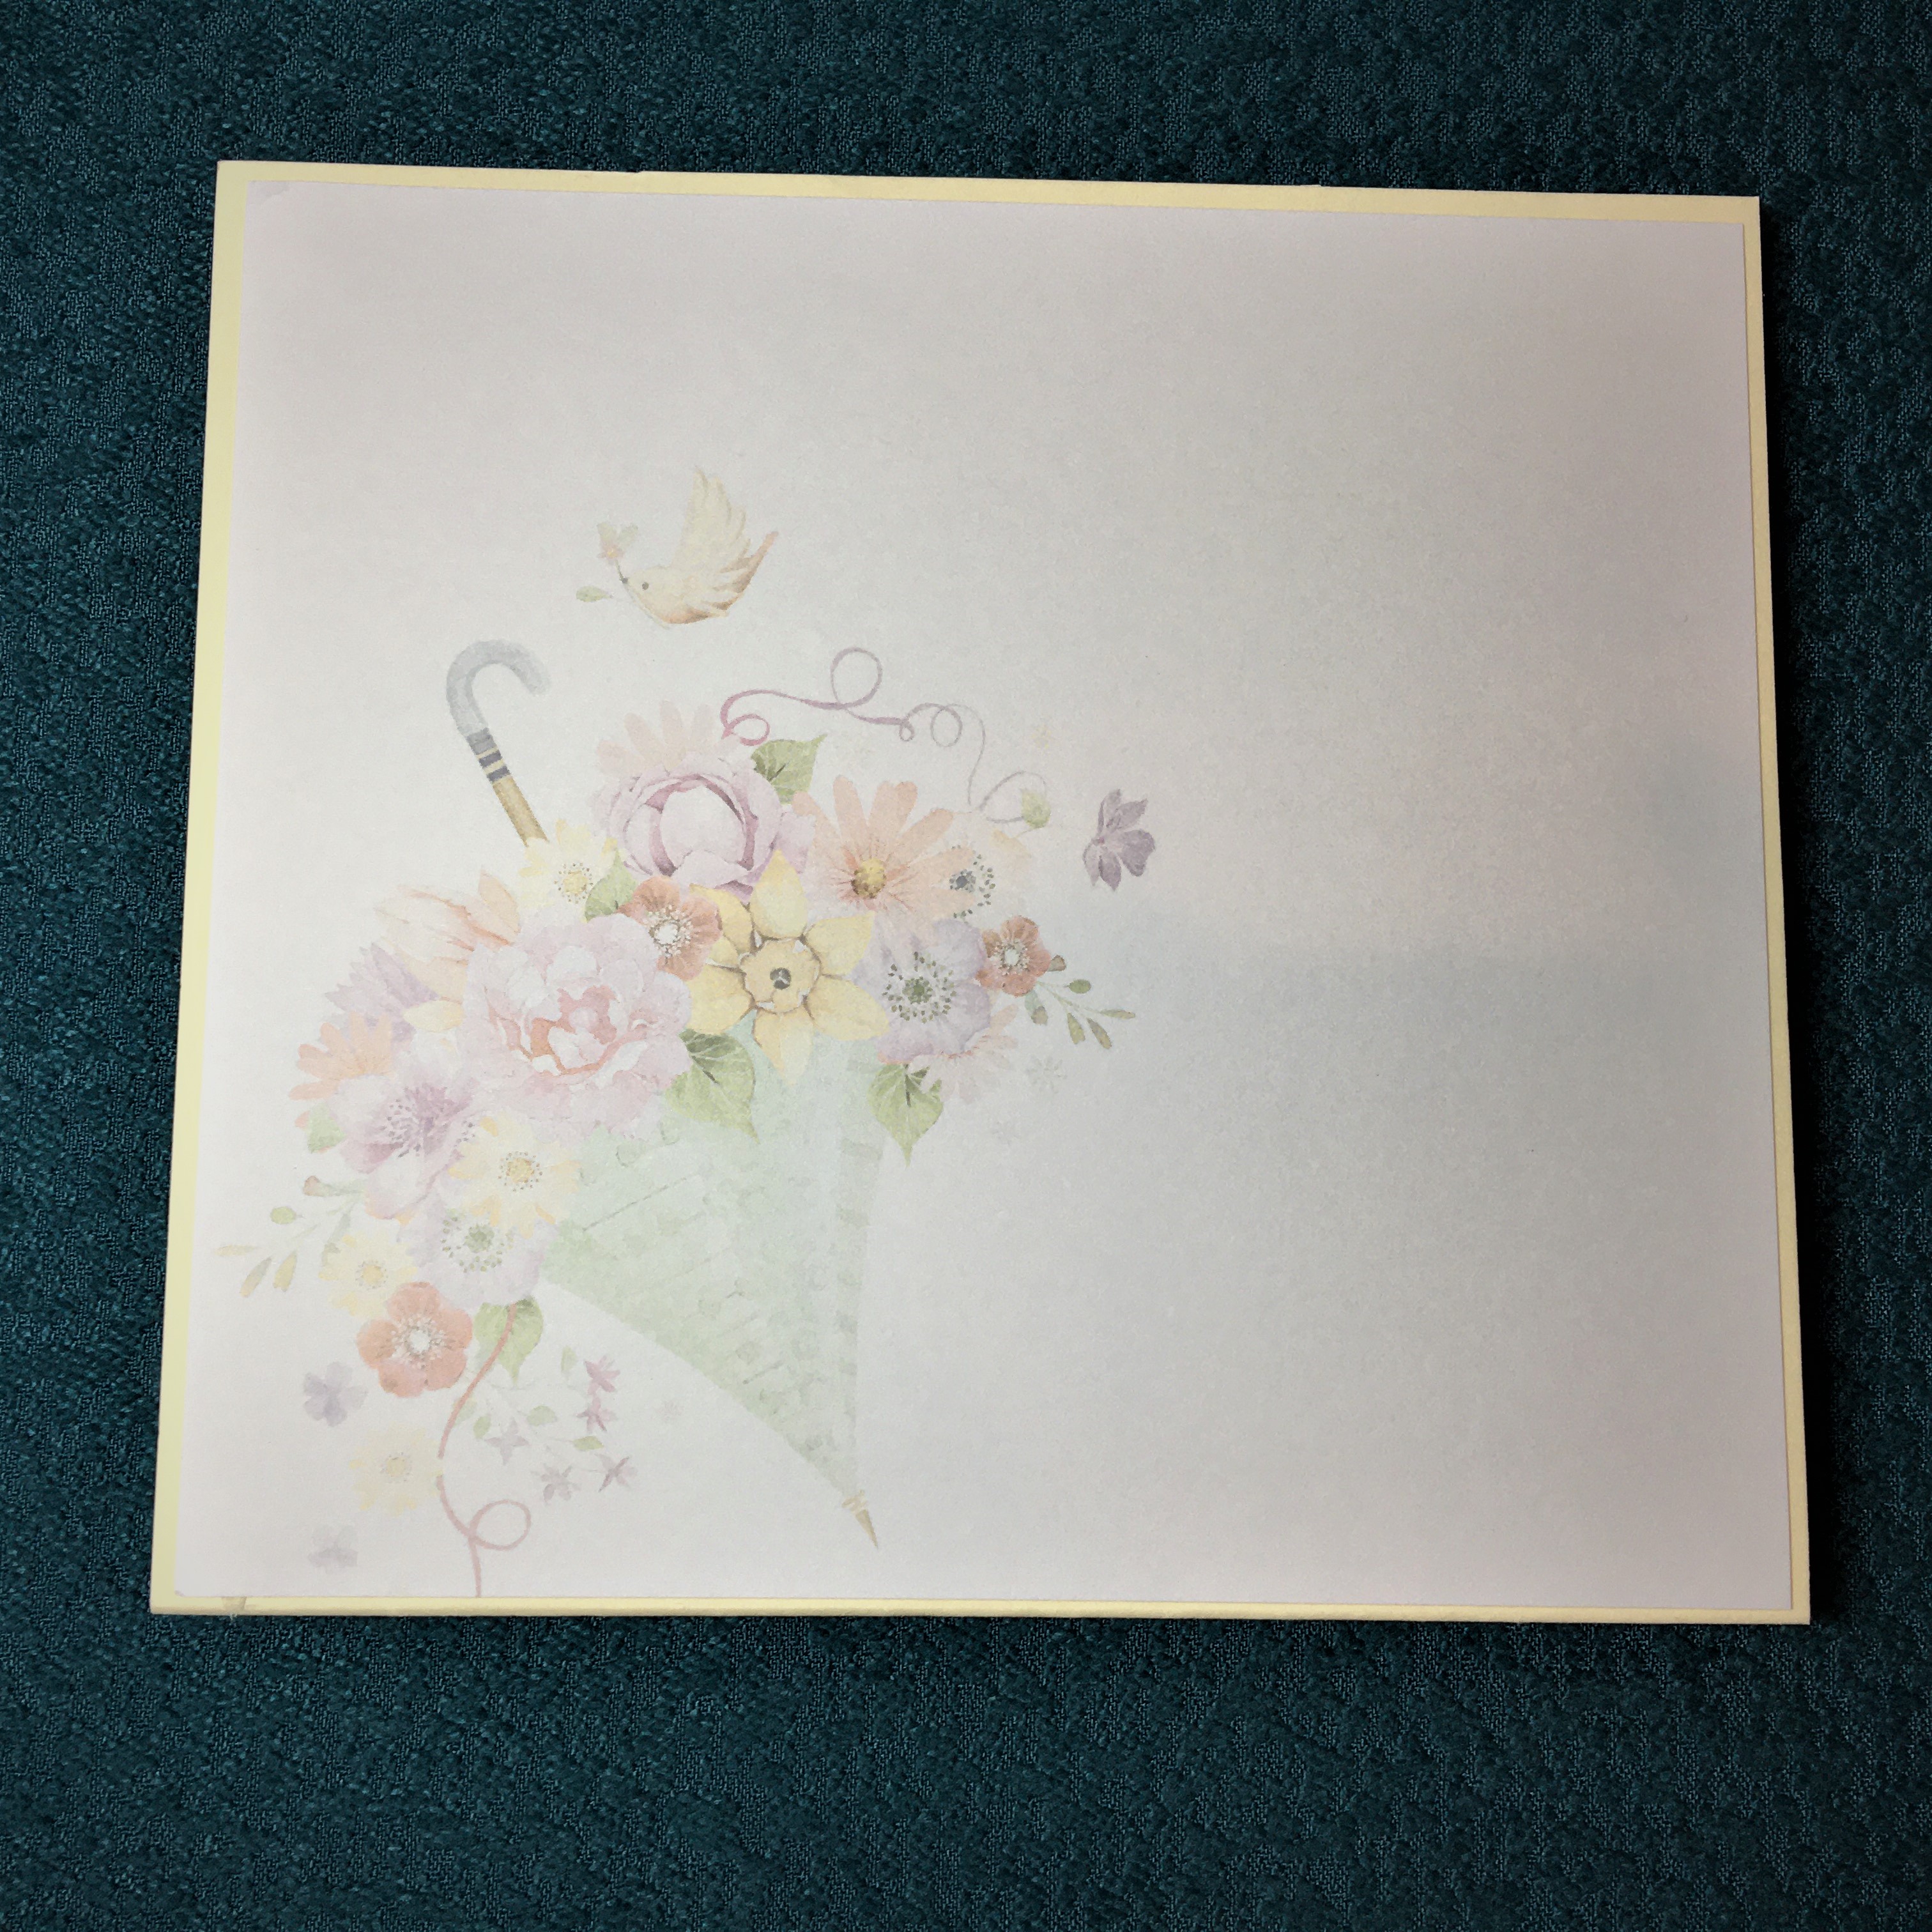 12 Adhere back paper to back of card as a place for a personal message.