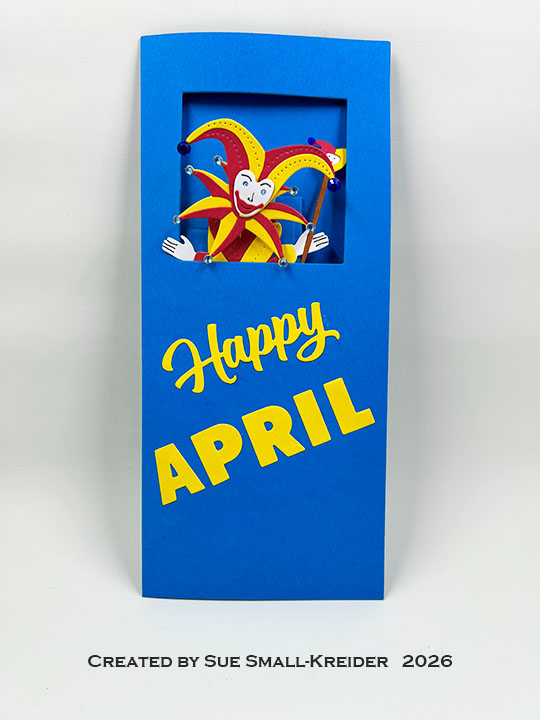
This card was made for Craft Roulette #312 whose parameters were: a slimline card, insects colors, April element and “twist(s)”in the corner.”. I created this 3.75×8.5-inch card using Karen Burniston and Spellbinders dies.
Watch the process video to see how I made this card.
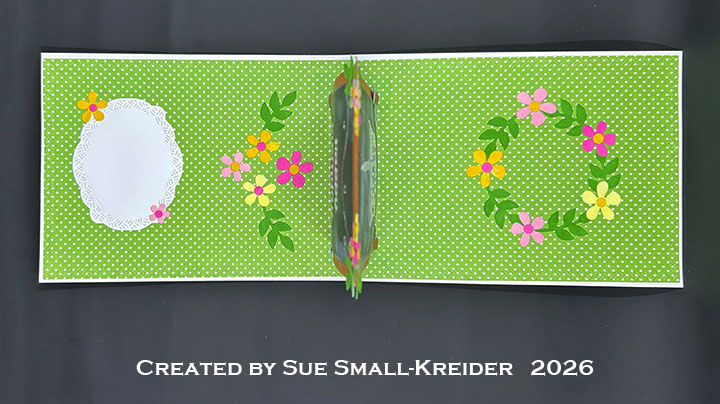
Cardbase: Watch the assembly video above for how to create the cardbase from a 7.5×8.5-inch rectangle. I used the 2.4-inch die from Karen Burniston’s Squares – Crosshatch set to cut the window in the card front centered about .875-inches from the top edge.
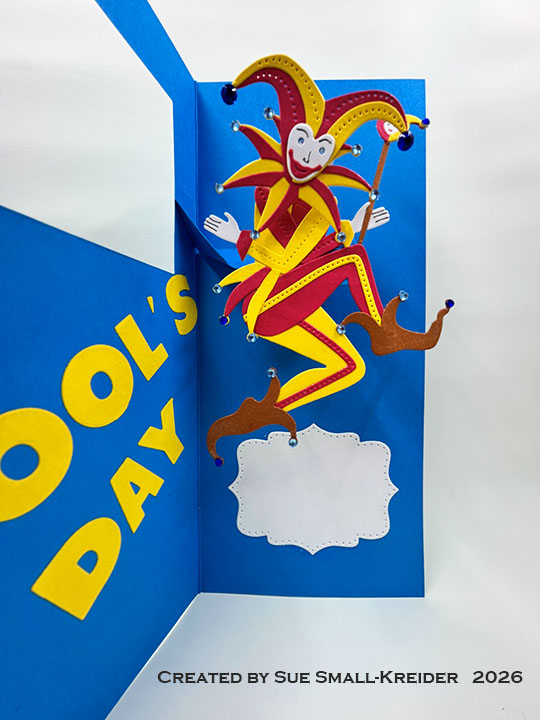
Fool/Jester: I used Spellbinders’ Wild Joker die set designed by Jaycee Gasper for my April Fool.I made him/her much like the package illustration, but cut all the dies twice – the clothing once in yellow and again in red – so I could mix up the clothing bits like a traditional jester’s costume. I cut down the middle of the main body piece and used scrap strips on the back to piece it together. I also place the collar with the head and hat on a wobble spring. Adhesive-backed gems were used as the round bells on the jester’s costume.
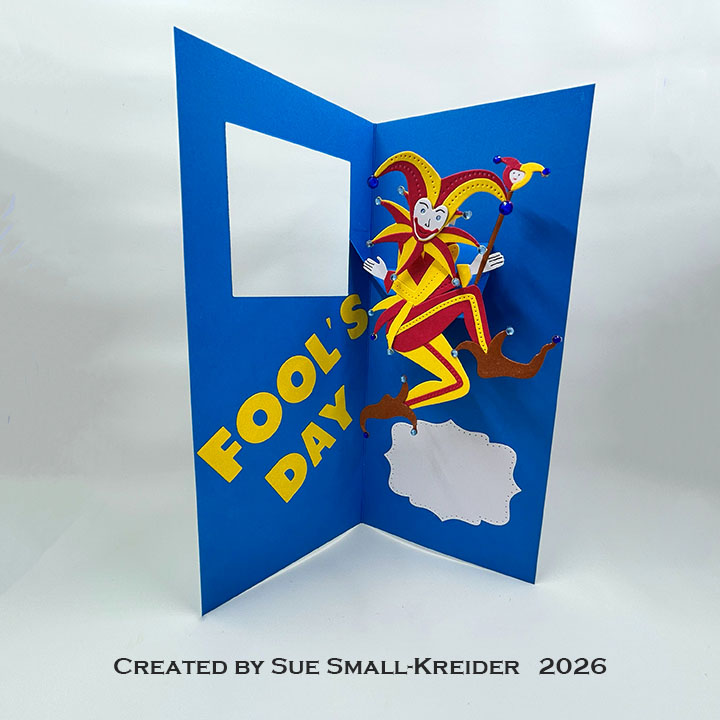
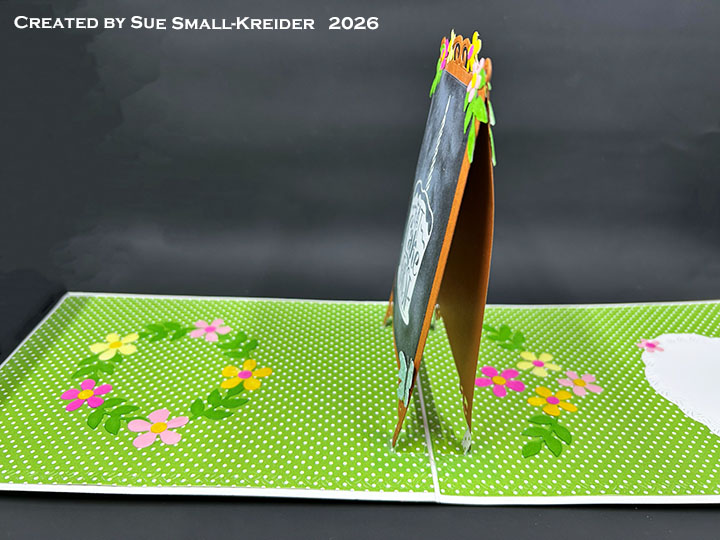
Pop-Up Mechanism: (Watch the assembly video at the bottom of the linked Katherine Label Pop-Up page.) Cut one of the mechanism from cardstock matching the cardbase. added to card as shown in the video above. Trim excess bit of mechanism that shows thru the window. Glue the jester onto the pop-up box so that the hand and hat don’t interfere with the mechanism and the jester’s foot stays inside the closed card.
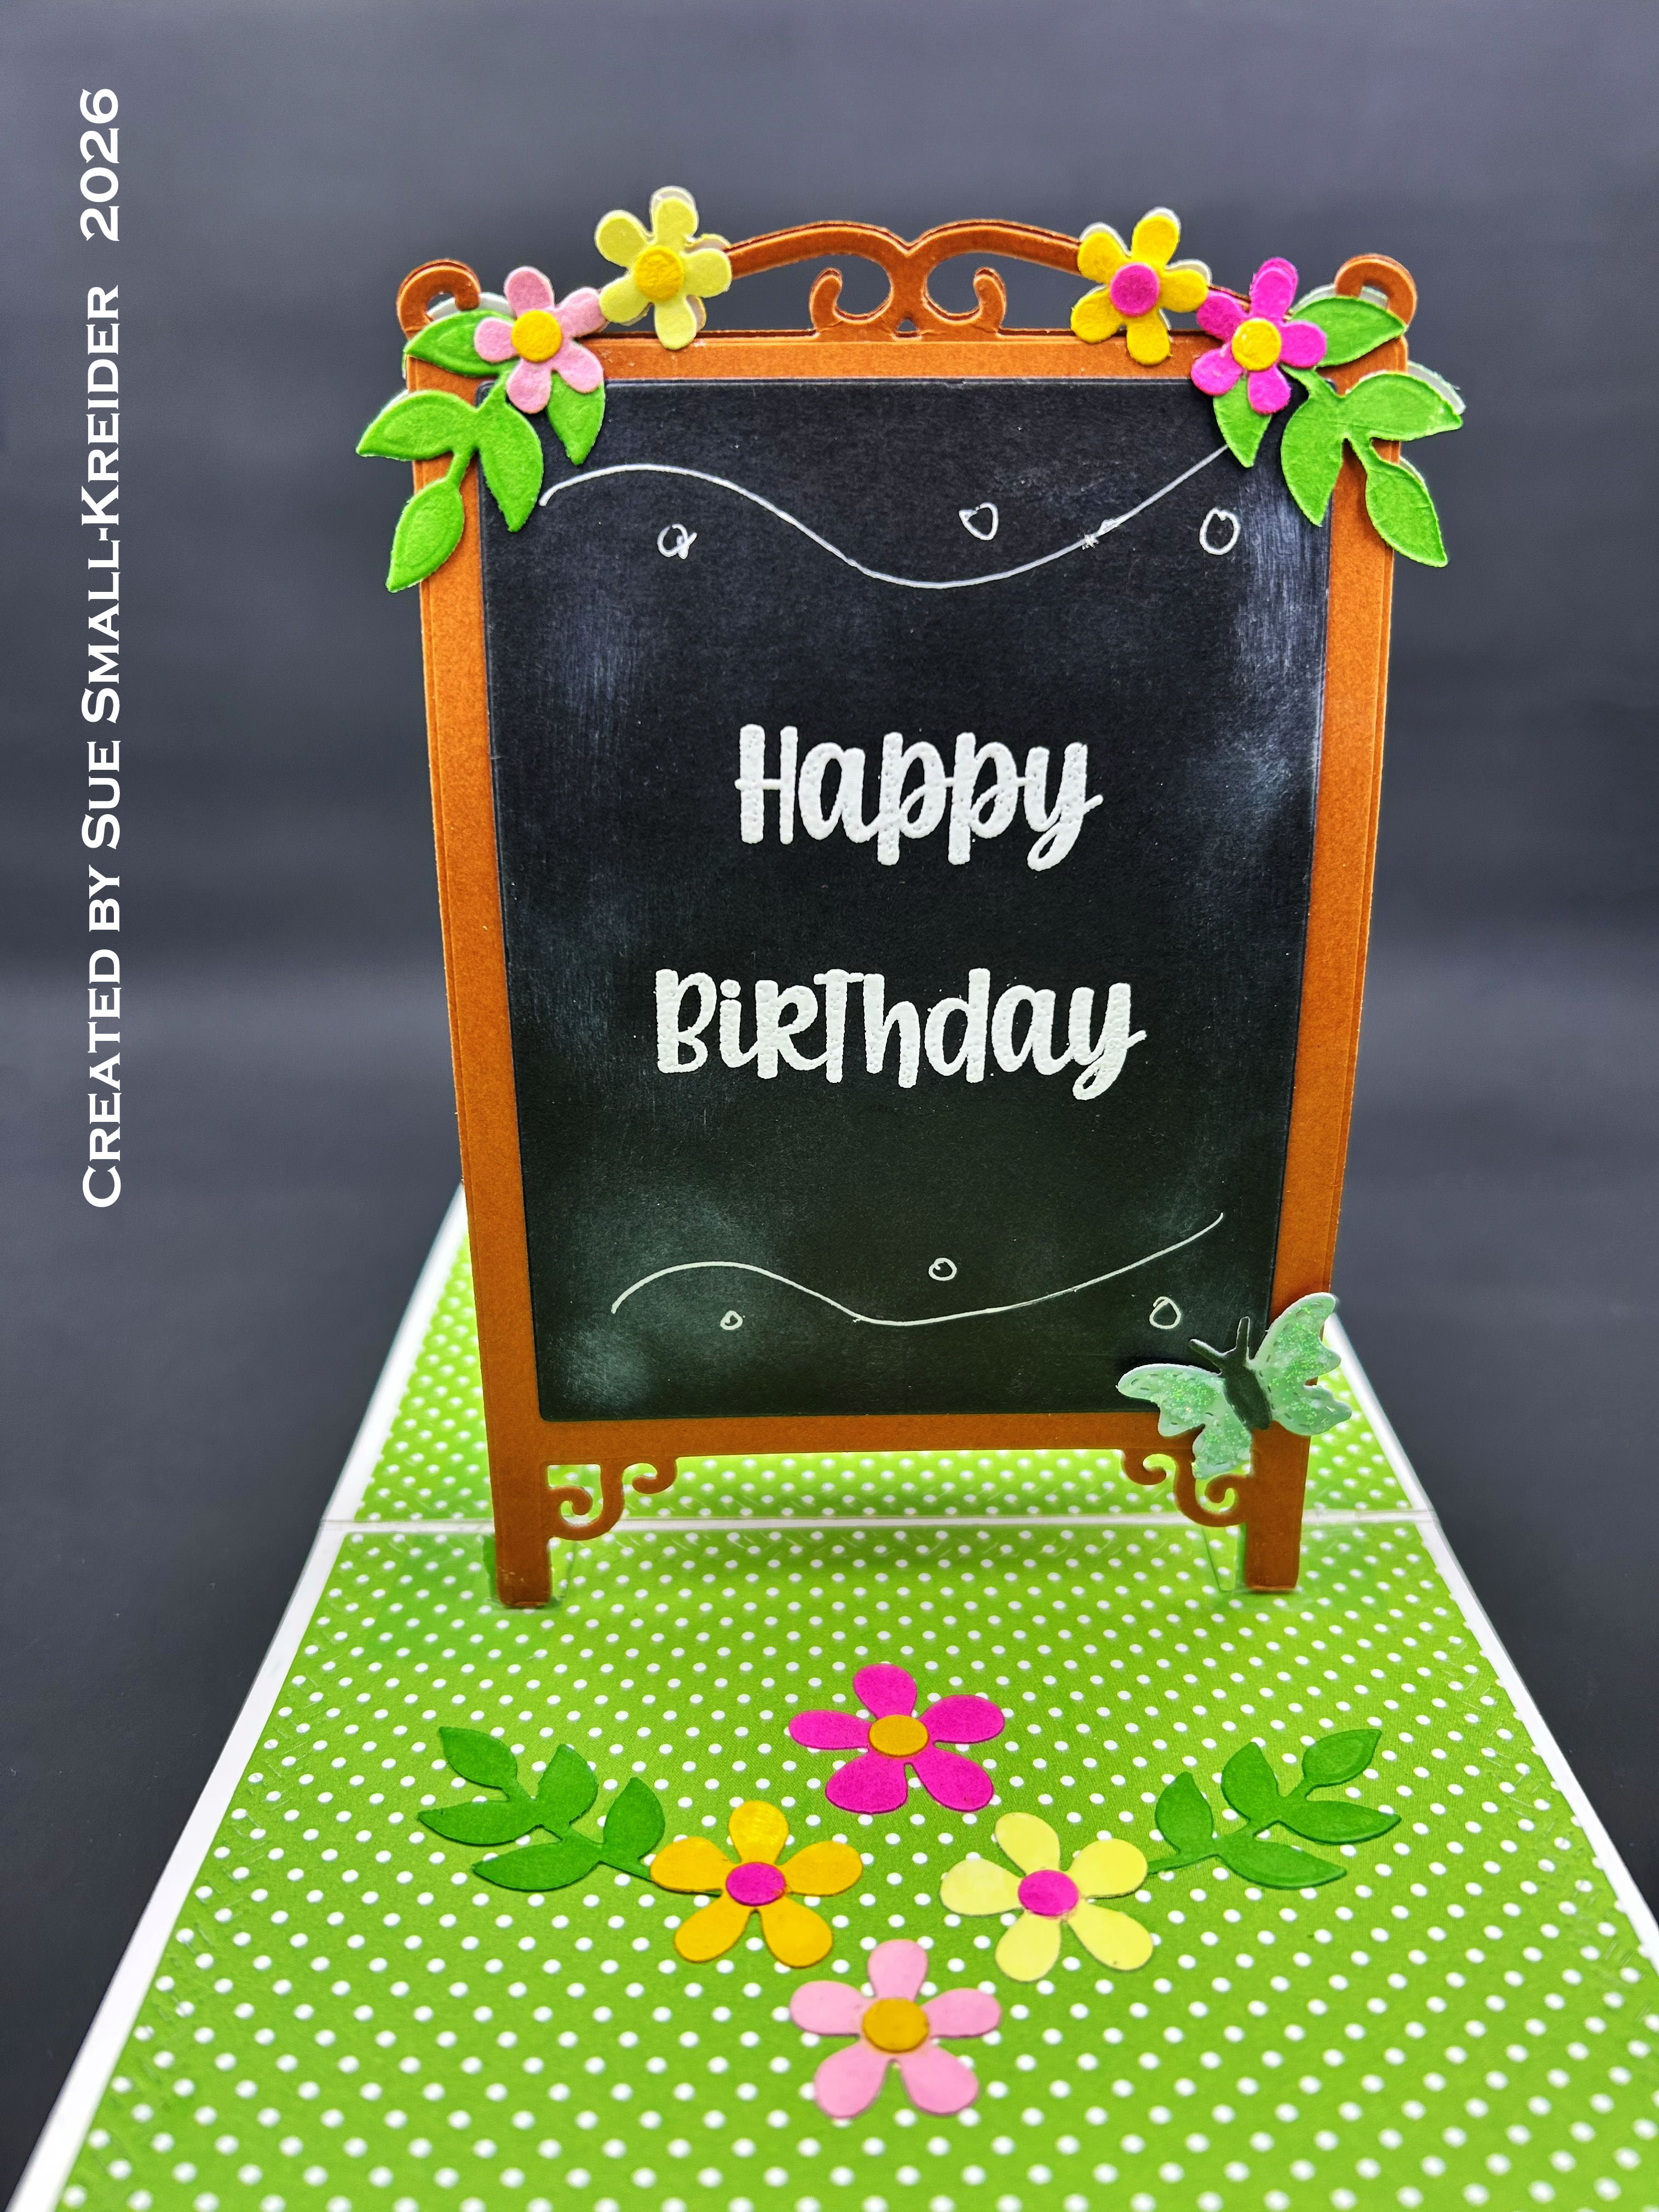
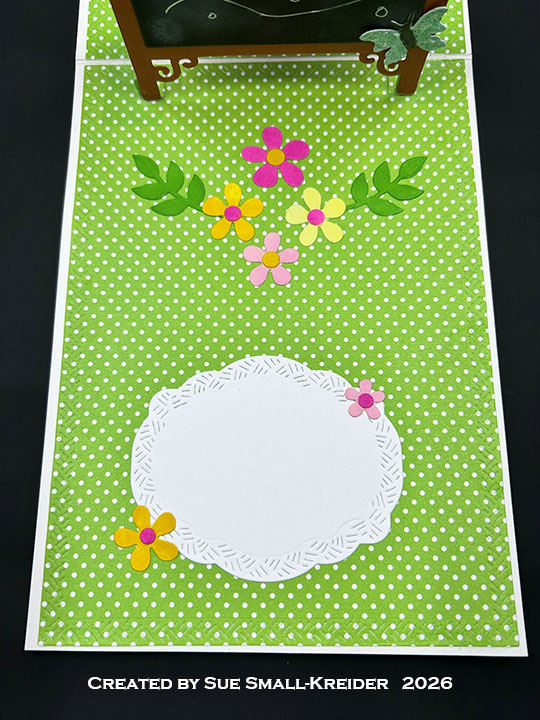
Sentiments: The “Happy” comes from Karen Burniston’s Happy Easter die set while the remaining “APRIL FOOL’S DAY” was cut using her Alphabet set. The white label for a personal message comes from Katherine Label Pop-Up.
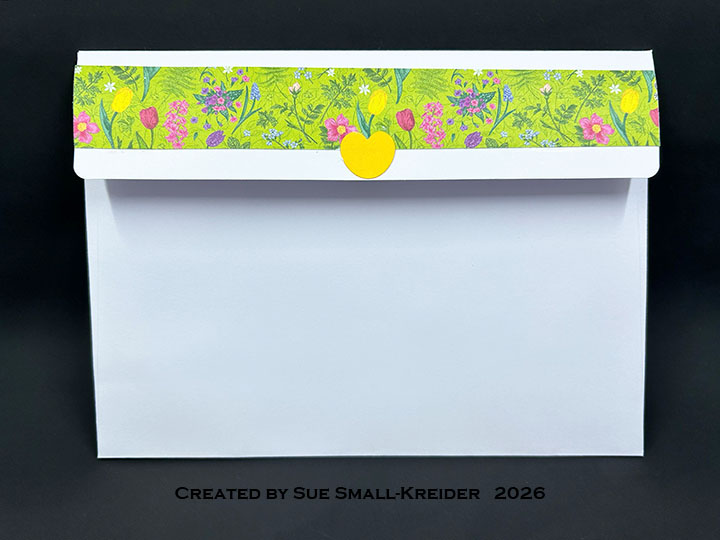
Envelope: The card fits into a #10 Business (9.5×4.25-inch) size envelope with the Funny Bones sentiment of “Handmade Cards because no one displays an email on the mantel” stamped in blue ink.
___________________________________
Thank you for experiencing this blog post. I hope this inspires you and makes you smile.
Please subscribe, like and leave comments 😊
Follow my YouTube channel, Instagram and Pinterest as well.
___________________________________
Disclaimer: Karen Burniston products are provided free of charge by the manufacturer for review and use. All other items were personally purchased. Compensated affiliate links used where or when possible, meaning I will receive a small percentage commission from these manufacturers at no cost to you. This will allow me to add more content to my YouTube channel and help out a lot. Thank you.
Materials Used:
Dies
- Karen Burniston in cahoots with Riley and Company – Happy Easter – 1263
- Karen Burniston in cahoots with Riley and Company – Squares – Crosshatch – 1056
- Karen Burniston in cahoots with Riley and Company – Alphabet– 1053
- Karen Burniston in cahoots with Riley and Company – Katherine Label Pop-Up – 1011
Stamps
- Funny Bones – Riley and Company – Clear Stamps – Handmade Cards – RWD-738
Papers
- Fun Stamper’s Journey – 8.5×11-inch Heavy Cardstock – Pumpkin Bread
- Gina K. – 8.5×11 100lb Cardstock – Blue Raspberry
- Recollections – 8.5×11 65lb Cardstock – Red & Yellow
- White Cardstock
- #10 Business Envelope (9.5×4.25-inch) – Ivory
Ink
- Memento – Fade Resistant Dye Ink – Paris Dusk
- Pigma – Mircon 005 Fine Tip Pen – Black
- Sakura – Gelly Roll Pen – Medium – White
- Sharpie – Permanent Marker – Ultra Fine Tip – Red
Adhesives
Tools
- Die Cutting Machine
- Stamping Platform
- Scissors
- Paper Masking Tape
- Pencil
- Tweezers
Miscellaneous
- BoBunny – Double Dot Jewels – Blue Hues
- Nuvo – Aqua Shimmer Brush Marker – Glitter Gloss
- Riley and Company – Action Wobbles – Mini Action Springs