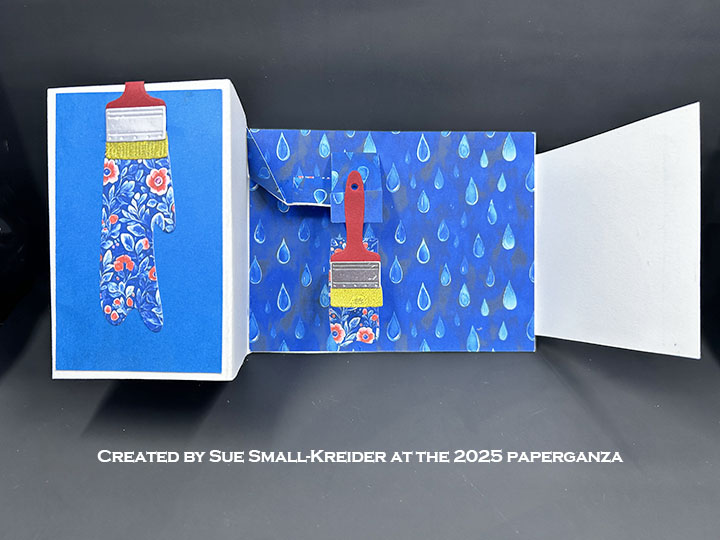
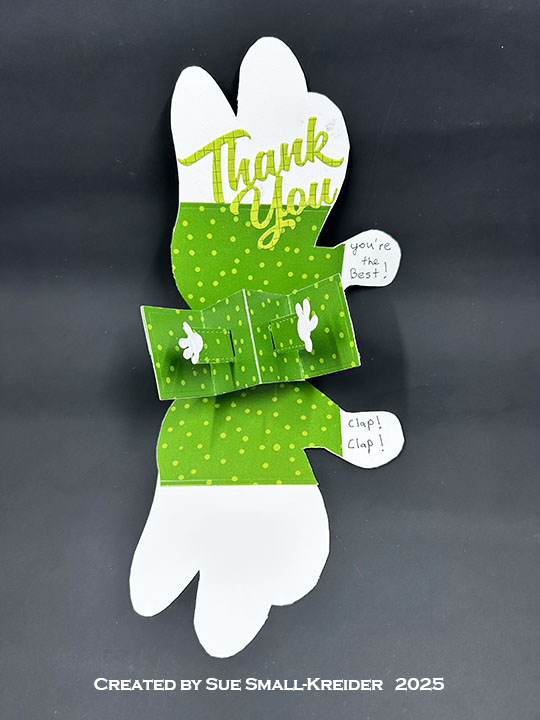
This card was made for CRAFT ROULETTE #278 whose parameters included a thank you card, bakery colors, shop (s) (ing) element, and ombre. I chose to make a a pop-up gift bag card that holds gift card using Karen Burniston dies.
Watch the process video to see how I made this card.
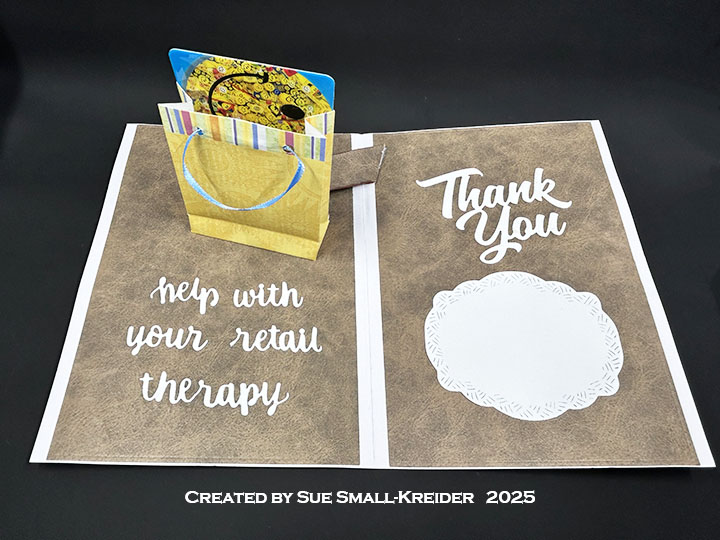
Cardbase: I started with a purchase A2 (4 5/8×6 1/8-inch) cardbase with matching envelope. The four panels are covered with the second and third larges rectangles and the scalloped die in the Rectangles and Labels – Crosshatch die set.

Gift Bag Pop-Up: Watch the assembly videos for the Flip Frame Pop-Up and Mini Gift Bag located at the bottom of each of the linked pages. Follow the directions in the video above to added to this card.
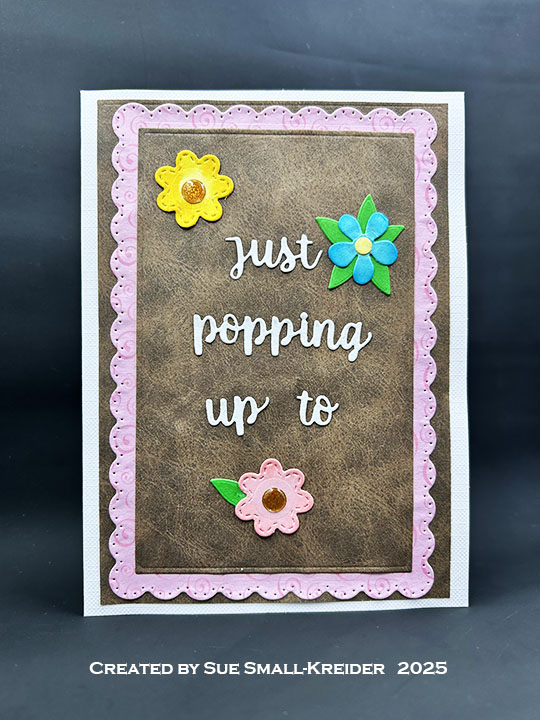

Sentiments: Die cut “Thank You” and glue inside card. Cut the largest crosshatch label in the Rectangles and Labels – Crosshatch die set to use as a space for a personal message. “Just popping up to” is from Word Set 4 – Just A Note. Dies from Word Set 2 – Birthday, Word Set 3 – Holiday, Word Set 17 – Congratulations and Word Set 18 – Connectors were used for word surgery to make “help with your retail therapy.” Flowers were cut from the Fun Flowers die set to decorate the card front and envelope.

Envelope: Extra flowers were die cut from the Fun Flowers Set.
___________________________________
Thank you for experiencing this blog post.
I hope this inspires you and makes you smile.
Please subscribe, like and leave comments 😊
Follow my YouTube channel, Instagram and Pinterest as well.
___________________________________
Disclaimer: Karen Burniston products are provided free of charge by the manufacturer for review and use. All other items were personally purchased. Compensated affiliate links used where or when possible, meaning I will receive a small percentage commission from these manufacturers at no cost to you. This will allow me to add more content to my YouTube channel and help out a lot. Thank you.
Materials Used:
Dies
- Karen Burniston in cahoots with Riley and Company – Word Set 18 – Connectors – 1261
- Karen Burniston in cahoots with Riley and Company – Mini Gift Bag – 1255
- Karen Burniston in cahoots with Riley and Company – Word Set 17 – Congratulations – 1237
- Karen Burniston in cahoots with Riley and Company – Fun Flowers – 1234
- Karen Burniston in cahoots with Riley and Company – Rectangles and Labels – Crosshatch – 1233
- Karen Burniston in cahoots with Riley and Company – Flip Frame Pop-Up – 1134
- Karen Burniston in cahoots with Riley and Company – Thank You – 1066
- Karen Burniston in cahoots with Riley and Company – Word Set 4 – Just A Note – 1027
- Karen Burniston in cahoots with Riley and Company – Word Set 3 – Holiday – 1022
- Karen Burniston in cahoots with Riley and Company – Word Set 2 – Birthday – 1003
Papers
- White 65lb Cardstock
- Hot Off The Press – Paper Pizazz – 12×12 Decorative Paper – Brown Leather, Soft Tints Pink Swirls & Suns Border
- Park Lane – A6 Cardbase and Envelope – Textured White
Ink
- Nuvo – Alcohol Marker – 428 Blueprint
- Sakura – Gelly Roll Pen – Medium – White
- Stampin’ Up – Stampin’ Blends Marker – Dark Copper Clay & Light Wild Wheat
Adhesives
- Neutral PH Adhesive by LINECO
- Fine-Tip Glue Bottle
- Double-Sided Tape – 1/8-inch
- Removable Tape
Tools
- Die Cutting Machine
- Paper Trimmer
- Pear Blossom Press – Cardmaker’s T-square A2
- Tweezers
- Scissors
- Pencil
- Paper Masking Tape
Miscellaneous
- Blue Satin Ribbon – 1/8-inch wide