This card was made for Craft Roulette. #188 whose parameters included a gift card, coffee shop colors, go wild element and number(s).
Have a friend who finds it hard to get going without coffee? This is the card for them complete with a coffee gift card.
It is made with Karen Burniston’s Coffee Cup Pop-Up that includes tabs to hold a gift card on the back side of the cup. The sweet dragon having his morning cuppa on the card front and the knight in shiny armor atop the coffee cup are also Karen Burniston dies.
Cardbase: Cut from green cardstock one 5×7-inch rectangle and one 5×7.5-inch rectangle. Score and fold 1/2-inch on the 5×7.5-inch rectangle to have a 5×7-inch rectangle with a tab. Glue the tab to the other green piece to make a 5×7-inch top fold card. Cut decorative papers to cover panels inside and out.
Dragon: (Watch the assembly video for the Knight and Dragon die set first.) I cut the dragon from two shades of green cardstock and inked some shading on him. I used the die stencil feature for his eyes, mouth and wings. His red cup is from the Coffee Charms die set.
Knight: (Watch the assembly video for the Knight and Dragon die set first.) I cut two bodies for the knight gluing them back-to-back but sandwiching the red plume behind the helmet first. Add his shield and sword before gluing on his gloves.
Coffee Cup: (Watch the assembly video towards the bottom of the link page Coffee Cup Pop-Up before starting.) I chose to use patterned paper with names of coffee drinks for the body of the cup, white cardstock for the cup lid and kraft cardstock for the cup band. The band die embossed the ridges on it, and I enhanced the ridges with brown ink. Yellow ink was used to shade the cup lid. I used the circle dies in the die set for the logo.
Sentiments: The “Go Wild!” is cut from brown paper using the die set of the same name by Karen Burniston. Th yellow banner inside says “and Slay the Day with Excalibur coffee,” which was computer generated.
Thank you for reading this blog post. I hope this inspires you and makes you smile. Please like and leave comments 😊
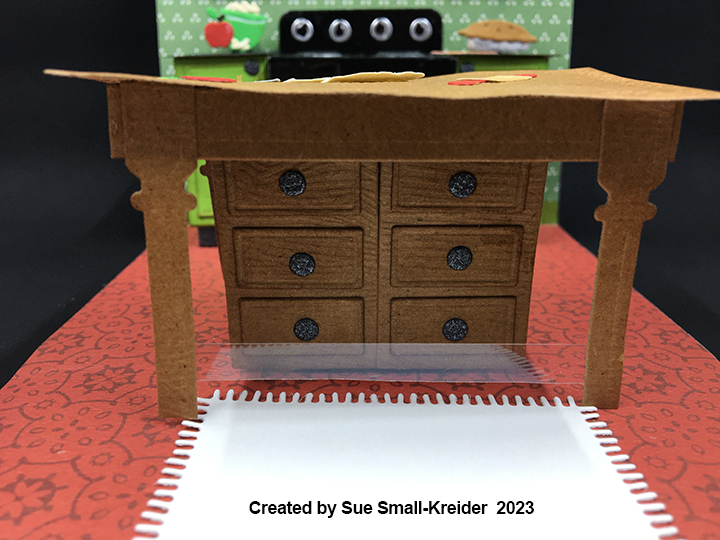
It’s the Karen Burniston design team challenge for November 2023 with the theme of “What’s Cooking” using the Oven Pop-Up die set. I chose to celebrate Pi Day with apple pie making in my card.
Before starting, I recommend watching the assembly videos of the pop-ups which are usually near the bottom of the linked pages for the various dies used.
Cardbase: I started with two rectangles of heavy weight cardstock one piece 5-inches by 7-inches and the second piece 5-inches by 11-inches, scored and folded at 7-inches. The short panel was glued to the back of the 5×7 rectangle to form an A7 top fold card. (The weight of this extra long tab is used to weigh down the floor of the card when open.)
Card Back
I cut a rectangle of the red and white tablecloth paper using the large crosshatch rectangle in the Rectangle and Labels – Crosshatch die set to cover the card front. Because I cut the front decorative paper on an angle, I had some triangles of the paper left over and so I made a table on the back of the card.
Oven/Stove: I followed the basic way to make the oven and cabinets on the assembly video using the cabinet doors from the oven extra’s set. The black mirror cardstock used for the oven can be hard to get glue to stick to, so I often use double-sided tape to stick on the burners, knobs, and window acetate and Glossy Accents to attach the door handle.
Cabinets: Once the stove is attached, you can add the side cabinets. I cut the cabinets from apple green cardstock and then inked them with a brown ink to age them. The upper cabinets and lower cabinet door fronts are cut using the larger rectangle die in the Oven Extras set and then covered with the small rectangle die pieces. Upper cabinets are attached with foam tape to add some dimension to them. A stove hood was cut from silver cardstock and is hidden mostly behind the small upper middle cabinet.
To make the table legs more stable, I added a piece of wood grain cardstock under the tabletop connecting the two legs as well as a thin strip of clear acetate plastic near the bottom of the legs. Tabletop is the second smallest crosshatch rectangle in Rectangles-Crosshatch set. All tabletop parts are cut from woodgrain embossed cardstock and inked with brown ink to bring out the grain. (I think if I made this card again, I would use two layers of cardstock for the tabletop and glue the items on to the tabletop before assembling it so the top would lay flat.)
Decorations: Between the two oven sets are lots of fun pieces that add dimension and realism to the pop-up scene. The Oven Pop-Up set includes the oven mitt, stove burners and knobs, oven rack and door handle. The Oven Extras set includes the cutting board and roasting pan that I used to make a small rolling pin, the knife and the green bowl that holds the apple slices. as well as three pop-up cube strips that I used to pop-up the oven rack, pie inside the oven and the items on the counter.
Apple slices are the leftover bits from cutting two burner plates. Pie crust on table was cut freehand and the burner circle die from the Oven Pop-Up set was rubbed to emboss the pie pan and then cut away to show the trimming of the piecrust. Burner circle is silver pie pan under the crust. The baked pies are cut from silver foil cardstock and brown kraft cardstock using the Picnic Elements set. Brown is inked around the edges of pie crust. The red apples are from the Tree Fruit die set.
Card Front
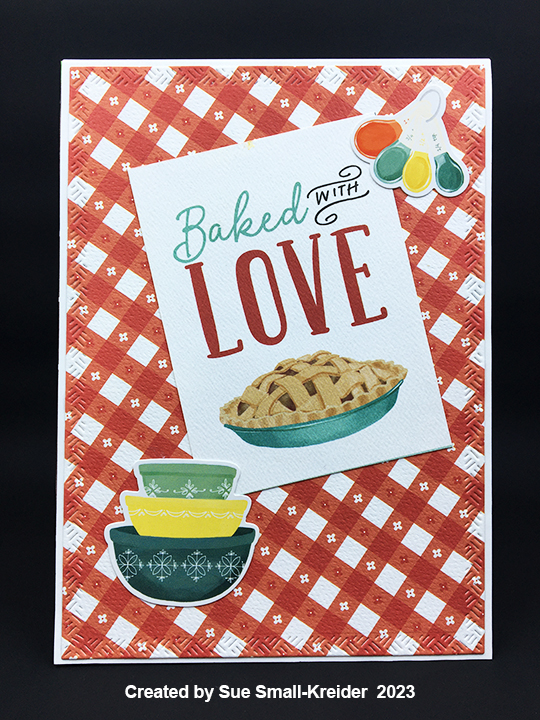
Sentiments: All the sentiments are either stickers, journaling cards or papers from the paper collection Sunflower Market by Carta Bella. The white rug inside the card is place for a personal message and is cut using the base blanket die in the Picnic Elements set.
Envelope: A strip of pie paper is glued to the back flap of the envelope to set the tone for the card inside and are from the paper collection. Two red apples left over from inside the card were also glued on the flap.
Thank you for reading this blog post. I hope this inspires you and makes you smile. Please like and leave comments 😊
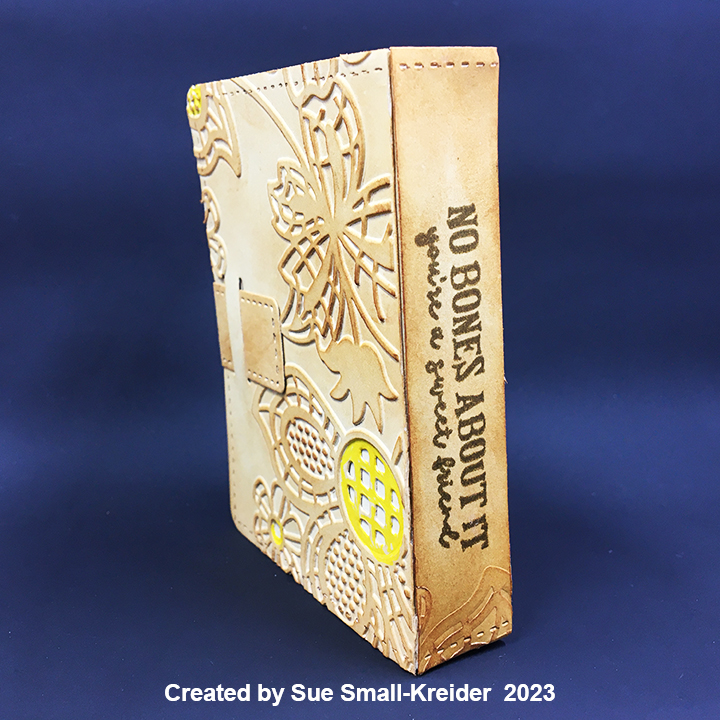
This card was made for Craft Roulette #186 whose parameters included a dude card, library colors, large flower(s) and stitched.
These parameters suggested a book box with a pop-up surprise to me. I followed Nicki Baxley’s idea of using an embossing folder with flowers for the cover of the book and Mary Gunn’s idea of a 3D book.
Before the show, I had been experimenting with a new Stampin’ Up stamp and die bundle of skeletons so I had a number of heat embossed skeletons ready. I also had been playing with a Whimsey Stamps ATC Book die set.
Book Box: Watch this video to see how the book box is assembled. Next, die cut two book cover pieces from kraft cardstock along with one of the box base piece from kraft cardstock and another from textured black cardstock. Run over one book cover with an embossing folder and color the flower centers with a yellow marker. Then trim off the front embossed cover and glue it to the top of the other book cover piece. Stamp the book title sentiment onto the embossed book spine and trim it off to be glued onto the top of the other book cover piece. With Distress Ink, age the book cover along the edges, spine and over the embossed flowers. Use a thin brown marker to color stitch marks embossed into book cover and closure strap.
Assemble the kraft box base. Cut off the tabs of the black box base piece and then trim off the four side pieces. Glue the black base into the kraft box bottom and then glue in black side pieces. Stamp sentiments to inside of book cover. Glue box onto inside bottom panel of plain book cover piece.
Book Pages: Cut three pieces of white cardstock the same width as the end sides and then trim to fit the outside of the box. Glue the white strips to the outside edges of the box. With a fine tipped dark marker, draw thin lines on all the white strips to represent page edges.
Skeletons: Stamp skeleton pieces onto black cardstock with watermark ink. Heat emboss with white detail embossing powder. Use dies to cut out pieces. Glue a jumping skeleton together. Cut an 11-inch by 1/4-inch strip of black cardstock. Fold strip in half and begin folding one strip end over the other to form a spring. Glue spring to the back of skeleton. Attach spring to inside of box. Add cat skeleton below the skeleton’s feet.
Sentiments: Stamp the “No Bones about it, you’re a sweet friend” sentiment on embossed book spine before gluing the piece onto book cover. Stamp the inside sentiments “Happy Halloween” and “BOO to you” before the box is glued inside the cover.
Thank you for reading this blog post. I hope this inspires you and makes you smile. Please like and leave comments 😊
Materials Used:
Dies
Stampin’ Up – Cut & Emboss Dies – Bag of Bones
Whimsey Stamps – Metal Craft Dies – ATC Book – WSD569
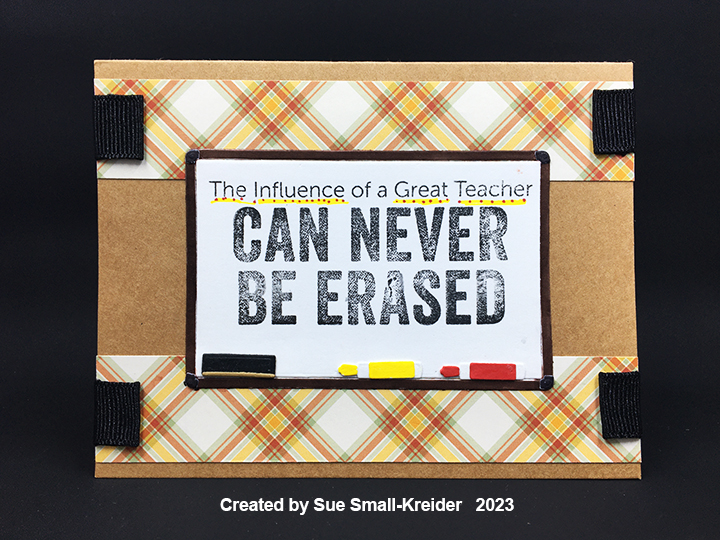
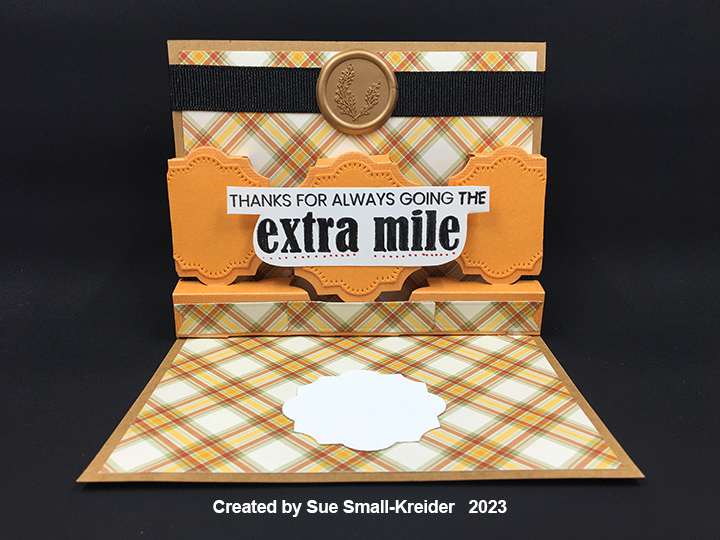
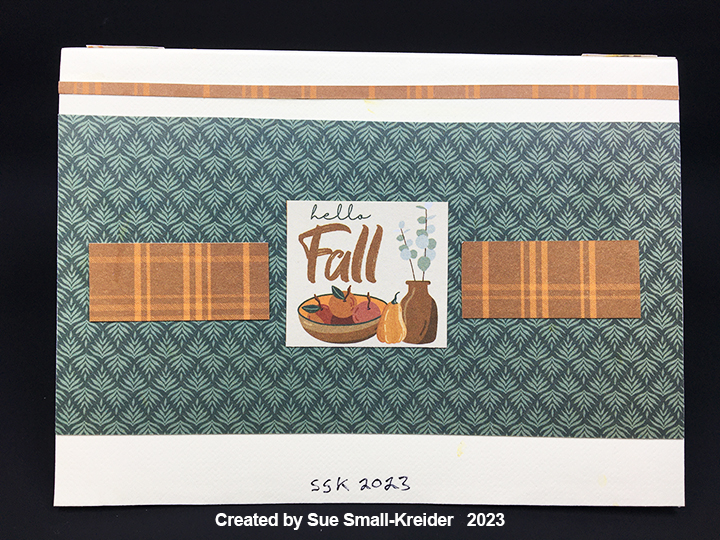
This card was made for Craft Roulette #184 whose parameters included a card for a teacher, tartan colors, Autumn or Spring scene and wrap.
Everyone has influenced someone’s life. Teachers specifically help shape lives with their explanation of the way things work. This is a card to say thank you and offer encouragement to teachers who may feel under appreciated in public schools.
I used My Favorite Things Dry Erase, Whiteboard die set along with their clear stamp set Teach, Sleep, Repeat for this card along with Karen Burniston’s Little Label Pop-Up to make the inside sentiment feel like a special award.
To decorate the envelope, I glued strips of the plaid paper to the back flap.
Thank you for reading this blog post. I hope this inspires you and makes you smile. Please like and leave comments 😊
Materials Used:
Dies
My Favorite Things – Die-Namics – Dry Erase, Whiteboard -MFT-2532
Cart Drawer:The cart is based around the Slider Box. Watch the assembly video before die-cutting pieces. I used kraft brown 65 lb. cardstock for the box and drawer. A piece of striped satin ribbon was used as a drawer pull.
A Bam Box (see assembly video) is what pops up the green hands and message of “BOO!” which are from the Halloween Elements die set. There is space to place a special treat in the drawer over the pop-up. When the treat is picked-up the pop-up hands will make a grab at the gift recipient.
Cart Base:The cart’s frame made by die-cutting two of the Fancy Label Accordion panels and removing the center pivot panel and side tab to create a square frame. Fold in half. Glue the u-shape together. I took the two smallest of the off-cuts from the die cut to make the cart handles. (Glue the pieces back-to-back for stability.) Glue handles on to slider box at open end before adhering the u-shape frame to slider box.
Roof Frame: The striped roof awning is cut from some digital striped paper using the large scalloped edged rectangle in the Rectangles and Labels – Crosshatch set. It is held up by a frame made by die-cutting two of the Fancy Label Accordion in white cardstock and cutting off the center pivot panel and side tab. Fold each of the frames at 2 3/4-inches. Glue the frames on to the sides of the cart base, lining up the bottom edge of the white frame to the inside edge of the blue cart frame.
Cut two strips of brown cardstock 1 1/2-inches long by 1/2-inch wide. Fold each strip in half. Pinch the top halves of the roof frames towards each other to form triangular frame. Glue the frame together with the two strips.
Pumpkins:The Halloween Border die set has a row of pumpkins that are the right size to layer onto the cart sides with glue and foam squares.
Jack-O-Lantern: The four-sided jack-o-lantern lights up with an EZ-Light. I created a cube from two strips of clear packaging each folded in half and creased with a bone folder and then folding each half to the middle and creasing so that each strip has four sections to it. Weave one strip over the other to form a cube. Snake the coil of wires of the EZ-Light into the center of the cube.
Position the lighted cube and control piece onto the cart and secure with double sided tape or foam tape. Cut a rectangle of 1 1/2 x 7/8 inches from kraft brown cardstock, center over the control piece and stamp “push here” on the end that has the button.
The large pumpkin die from the Autumn Elements was used to cut out four pumpkins for the jack-o-lantern. The face was cut out using the face insert die from the Halloween Elements set. The pumpkins were inked blended and the ridges outlined with a thin black pen. A green marker was used to color the stems. To lessen light leakage, an orange square was attached to the top of the clear plastic cube and the pumpkin faces attached with foam squares. As part of the final decorations. A small pumpkin from the Skeleton and Bat set was added to the top of the jack-o-lantern.
Roof and Sign: For the roof, the scalloped rectangle from the Rectangles and Labels – Crosshatch set was used with orange and white striped cardstock. (I created my own digital paper.) The sign was created by cutting two of the sentiment oval from the Halloween Charms from black cardstock and glued them onto orange cardstock and fussy cut around the oval frame.
A strip of white cardstock 5-inches long by 1/2-inch wide was folded in half and then the folded end was sandwiched between the two ovals and the ovals glued together. (You now have the equivalent of a large paper brad with two legs.) A slit was cut in the roof fold center for the legs of the sign to slide through and be glued to the underside of the roof.
Cut two of each of the bird dies in the Halloween Elements from black cardstock. Glue the bodies together leaving the legs free. Use the legs as the tabs to glue the birds to the roof ridge on either end of the roof.
Wheels: For the wheels I made a template using middle plain and crosshatched circles from the Circles – Crosshatch set. Cut the plain circle from scrap paper and the place the crosshatch circle die in the middle of the paper circle. Trace around the center of crosshatch die. Fold the paper in half, then half again and once more in half to come up with eight sections of the circle. Using a see-through ruler, mark and draw 5mm wide spokes interesting in the middle of the circle.
Die-cut from dark brown cardstock two plain circles. (Because my cardstock was thin, I cut four circles and glue two together before cutting the spokes.) On the back side of the circles use the paper template to trace the triangles that need to be cute out using a craft knife and straight edge.
Die cut two 1/2 inch circles from black cardstock. (I used the burner dies from the Oven Pop-up set because it was handy. You could use other dies to cover the wheel axle.) Adhere half rounded pearls over the black circles, glue each gem circle to the center of the wheels to make the axle caps.
Glue wheels onto cart’s front posts. Add large pumpkins to hide the cart leg behind the wheel. Additional pumpkins cut from the Autumn Elements (large pumpkin) and Halloween Elements (medium pumpkin) and two black cats from the Skeleton and Bat set, were added to the cart legs.
Finished Measurements: This is a card/gift box is designed to be hand-delivered and measures approximately 8-inches high, 6 1/2-inches wide and 3-inches deep.
Thank you for reading this blog post. I hope this inspires you and makes you smile. Please like and leave comments 😊
This card was made for Craft Roulette #183 whose parameters included a card with ribbon, circus colors, September and hand cut.
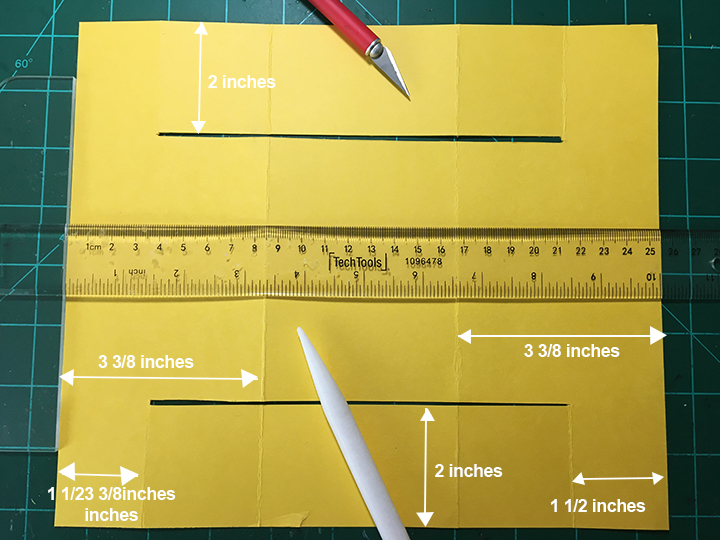
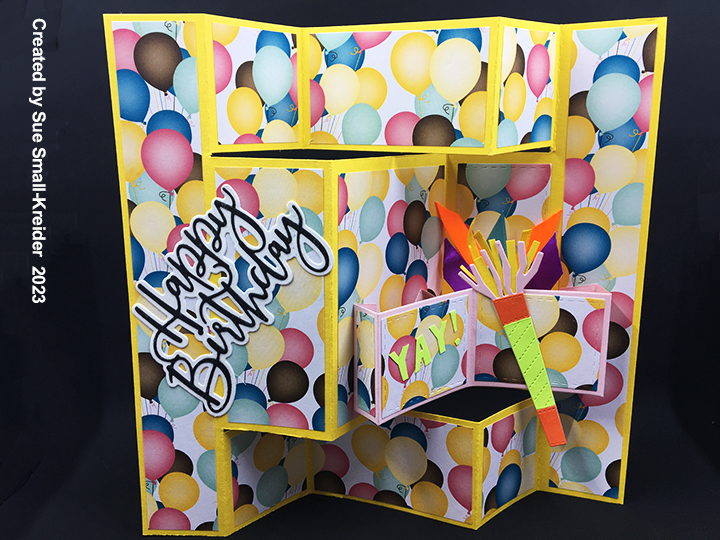
I made this card for a family member whose birthday is in September using a fancy fold display template that I had seen in a Die-cutting Essentials magazine a few years ago. I modified the template for an 8.5×11 inch piece of cardstock and to allow for the Karen Burniston Stocking Pop-Up mechanism that I wanted to use in it.
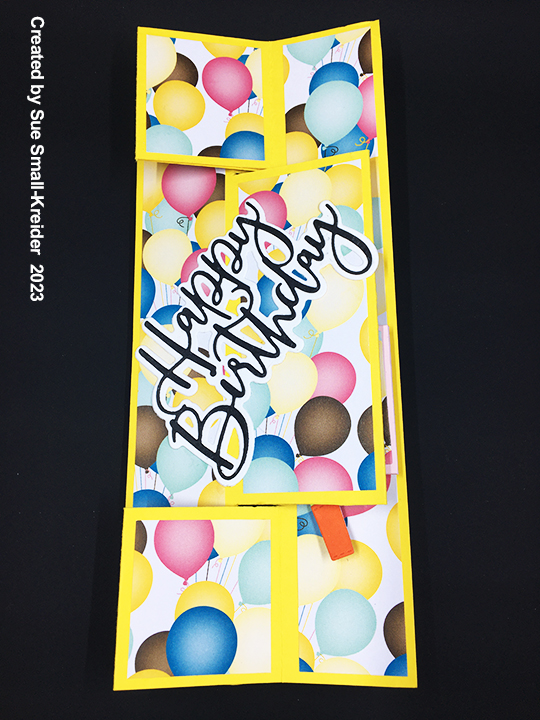
Cardbase
Cardbase: I started with an 8.5×10 inch piece of heavy yellow cardstock. Using a pencil and a T-ruler to mark where horizontal slots need to be cut as well as vertical scoring for the various folds. See photo for measurements. Measure the various sections and cut decorative paper 1/4 inch smaller than the measurement for each section. Glue in place before moving onto the mechanism. (I forgot and had to remove and then re-glue the mechanism.)
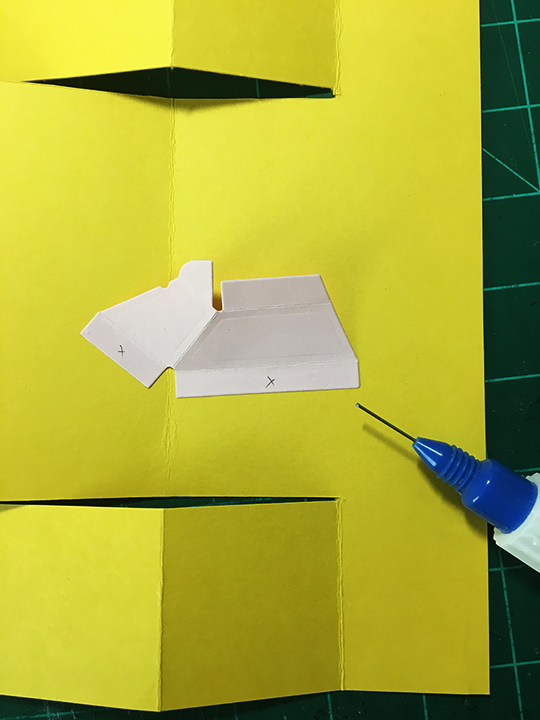
Lower MechanismTombstone piece on lower mechanism
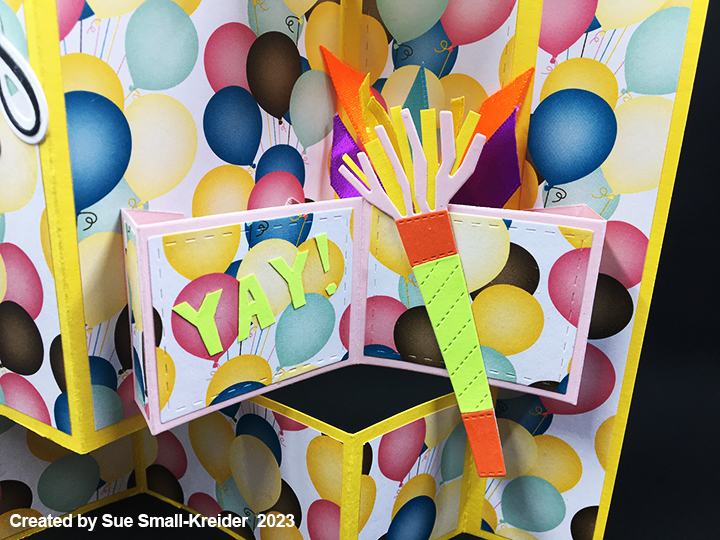
Pop-Up Mechanism: (Watch the assembly video for the Stocking Pop-Up located at the bottom of the linked page before starting this portion of the card.) Play with the placement of the mechanism and noise maker using a temporary tape runner before committing to permanent glue. Make sure the noisemaker doesn’t create any catchpoints with the cardbase folds. Add ribbon to the pop-up “tombstone” shape using liquid glue and glue dots before attaching the top cover piece.
Sentiments: I used Chloe’s Happy Birthday dies for the white shadow behind the script words. I sketched out the word “YAY!” on green cardstock and fussy cut the pieces out.
Envelope: The card, when folded, fits into a #10 business envelope but will require extra USA postage for the weight and thickness.
Thank you for reading this blog post. I hope this inspires you and makes you smile. Please like and leave comments 😊
This card was made for Craft Roulette #182 whose parameters included a card with circles, vegetable garden colors, screen element and fuzz.
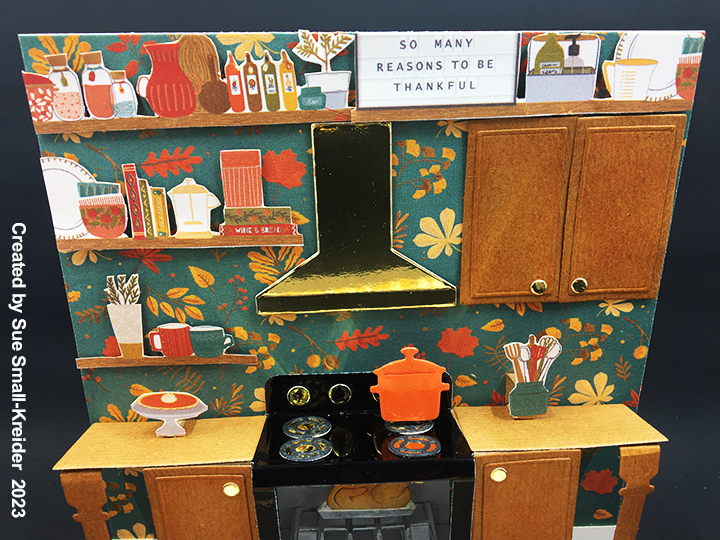
For this pop-up card for a crafting friend, I converted Karen Burniston’s new Oven Pop-Up and Small Script – Christmas, along with along with a number of her previously released dies into a laundry/crafting room.
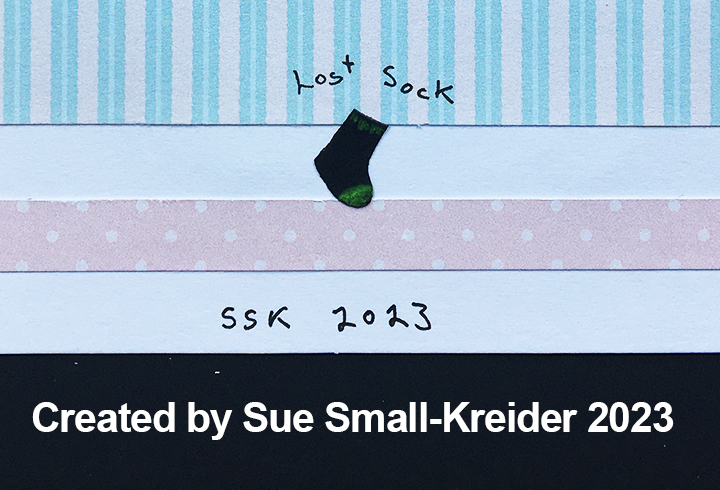
Cardbase: I used a purchased A7 cardbase. Each of the inside panels are covered with papers from the Cosy Kitchen paper collection. The front of the card has a computer-generated panel while the card back uses scraps from the inside of the card including the lost sock.
Washer/Dryer:Watch the assembly video at the bottom of the linked page before starting the card. Both the washer and dryer are made the same way with different shaker contents and knobs using the Oven Pop-Up.
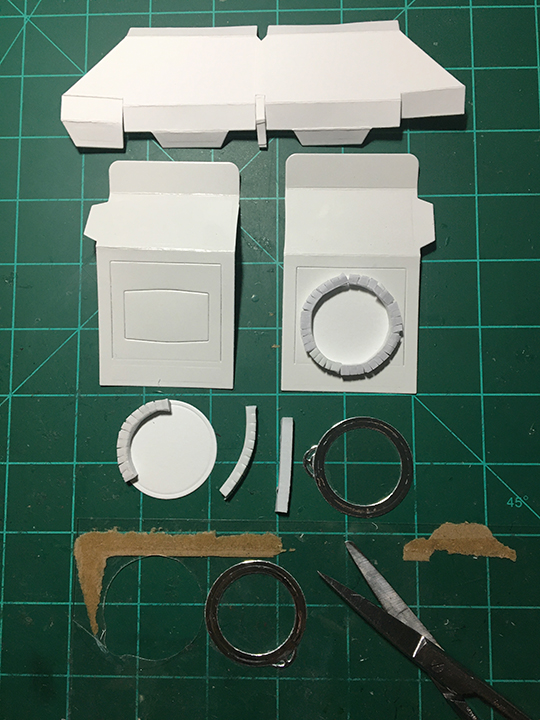
I created a double platform by cutting two oven platforms from white cardstock and trimming the sides that come together to a 1/4 inch or less. These cut sections are glued together making sure the tabs are all aligned straight. (Fold on all the score lines with a bone folder before gluing.)
Mark with a pencil the center point of the card fold. Center the double platform and attach the back tabs with glue. Fold the platform and front tabs as shown in the photo and add glue to tabs, close card to attach the platform to floor of card.
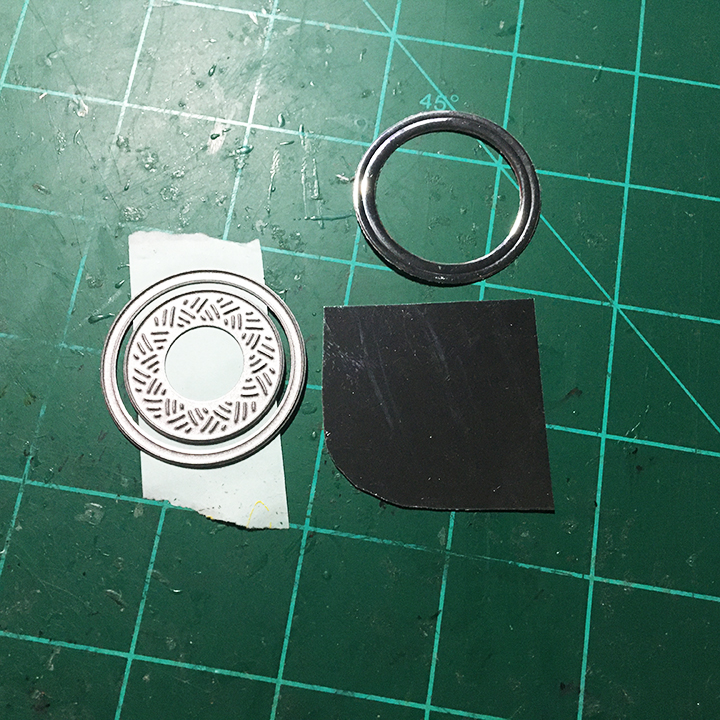
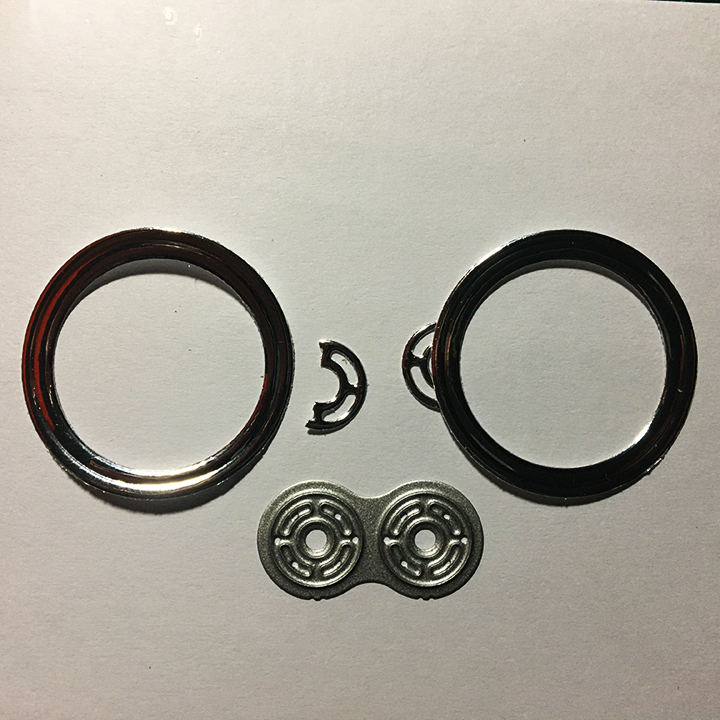
Cut two circle frames by using the smallest circle dies in the Circles – Crosshatch set from silver foil cardstock. Cut one of the stove burners from the Oven Pop-Up set and cut it in half for the clasp on the washer/dryer doors.
Cut two stove pieces from glossy white cardstock. Trim off one of the side tabs from each piece as shown in photo. Tape the oven door and window piece in place using packing tape on the backside. Glue the silver doors with clasps onto clear plastic and cut them out. (I used a piece plastic that had been a window in packaging.) Take foam strips and snip along one edge to make them bend easily. Place the snipped foam strips around the edge of two white circles (cut using the larger of the silver frame dies.) Cut socks from the gnome boots in the Gnome and Santa set. Use gel pens to add details to the socks. Glue four socks to the back of each white circle. Add circle confetti to washer shaker and a single black sock to dryer shaker. Glue the silver framed doors to the shaker circles.
Side Tables:Once the stove is attached, you can add the side tables which are made with the cabinet and drawer dies from the Oven Pop-Up. Cut a narrow rectangle in the middle of the long section of the cabinet piece to create the legs. attach to the stove and platform as normal. Pink ink was lightly sponged onto the tabletops and drawers.
TV:The TV set from the Memory Charms die set has had its antenna and feet trimmed off and Nuvo Drops added for knobs. I screen shot a photo from the Craft Roulette episode #182 and resized it to a 1-inch rectangle, print on white paper and die-cut it with the TV screen die.
Decorations: Actual dryer lint fuzz is glued to the top of the blue trash can cut from the Coffee Charms tall coffee cup. The laundry basket is the picnic basket cut from white cardstock covered with clear packing tape and stenciled with a teal permanent marker. A piece of thin white felt is the folded laundry in the basket. Two wall decorations are threaded needle and scissors from the Sewing Charms set. A tiny sweet pea green birthday card is the right table.
Sentiments: The front of the card sentiment “My Head Says Laundry” is computer generated. Inside the “my heart says Craft!” is a combination of die cut letters and tomato red heart with a computer generated “Craft!” (For “my” and “says,” I did word surgery using the words “merry christmas.”) The oval rug with its white label for a personal message come from the Crosshatch Ovals set. Blue ink was used on the die-cut letters and rug to make them standout from their backgrounds.
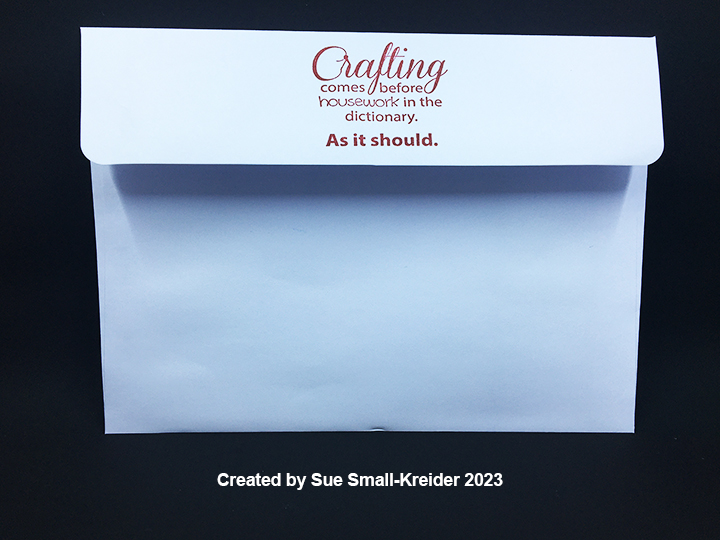
Envelope: To hint at what’s inside, the sentiment stamp of “Crafting comes before housework in the dictionary. As it should” is stamped in red on the back flap.
Thank you for reading this blog post. I hope this inspires you and makes you smile. Please like and leave comments 😊
Before starting, I recommend watching the assembly videos of the pop-ups which are usually near the bottom of the linked pages for the various dies used.
Cardbase: I started with a rectangle of patterned cardstock 12×6 inches that was folded in half to form a 6-inch square, top fold card. The outside was left to the beautiful autumn trees (Photoplay Autumn Vibes-Crunchy Leaves) while the inside top panel with a teal blue leaf wallpaper and the bottom panel a brown textured cardstock.
Oven/Stove: I was genuinely surprised at how easy the pop-up oven is assembled. It has just two pieces -the outer shell which I cut from black mirror cardstock and the inner platform which I cut from a gray cardstock. The platform attaches much like the Little Labels Pop-Up with the front tabs gluing to the floor of the card and the back tab gluing to the wall of the card. Before I attached the outer shell, I added a 1 3/8-inch square of clear plastic packaging to the back of the oven door with double-sided tape. Then I cut another oven door from gray cardstock trimming the bottom 1/8-inch shy of the fold line to cover the plastic inside when the door was opened. I also cut a 2-inch square of gray cardstock and glued it to the back wall just above the pop-up platform. This will be the inside wall of the oven. It is easier to add the items inside the oven before the outer shell is attached. I glued a silver rack to the platform and then added two pop-up cubes for the top oven rack which I trimmed one of the long edges from. Once the top rack was glued in place on the two cubes, I added another cube on top for the turkey pan which is in the Oven Extras set.
I find it easier to glue all the knobs, burners and door handle to the stove while it is still flat. (For this stove I cut all the knobs, burner base circles and door handle from gold foil cardstock). To attach the oven shell, glue the bottom to the center of the platform and then fold the oven flat and add adhesive to the back of the stove knob panel. Close the card and the top panel will be positioned on the card wall so that it forms the stove. On the tabs that come off the sides of the stove top add glue. Now position the squares of the cabinet pieces’ onto the tabs. Glue cabinet bottoms to the top edge of the platform, so that there is a toe kick below the cabinets.
Cabinets: Once the stove is attached, you can add the side cabinets. I cut the cabinets from some embossed wood grain cardstock and then inked them with Rusty Hinge ink to bring out the grain. The upper cabinets and lower cabinet door fronts are cut using the larger rectangle die in the Oven Extras set and then covered with the small rectangle die pieces.
To make the counter tops longer to fill the card, I followed Sandy Diller’s idea to use the larger rectangle door die for the countertops and two trimmed lampposts from the Street Lantern Pop-Up set for the turned legs that support the extended countertops.
Decorations: Between the two oven sets are lots of fun pieces that add dimension and realism to the pop-up scene. The Oven Pop-Up set includes the stove burners and knobs, oven rack and door handle. The Oven Extras set includes the turkey and roasting pan in the oven and pot on the stove as well as three pop-up cube strips that I used to pop-up the oven rack, pan inside the oven and pot on the stove. The turkey is cut in two pieces – leg bone base in pan and the bird body. The body I cut from kraft cardstock and inked with Fossilized Amber and Vintage Photo inks. The bone/pan base was cut from white cardstock and the pan colored with a silver marker, the body piece glued on so it sits in the pan and the bone was inked with rusty hinge ink.
For the orange pot, I used clear packing taper over orange cardstock to die-cut the pot. The plaid rug is cut from the second largest crosshatch die from the Rectangle Crosshatch set. I found a patterned paper (Photoplay Thankful Collection) with shelves of kitchen items and a message board that I fussy cut and adhered to the wall with foam squares. The cooking hood was cut from gold foil cardstock using the hood die from the Oven Extras set. The large pumpkin on the floor is from the Autumn Elements set.
Sentiments: The small strip sentiments of “give thanks with a grateful heart” (card front) and “thankful hearts” on envelope flap are from the same paper collection as the autumn trees paper used on the card front. “Happy Thanksgiving” was cut into the plaid rug with the waste pieces saved and glued on to the card floor once the rung was glued in place. These words are from Word Set 7.
Envelope: The sticker leaves and sentiment strip on the back of the envelope set the tone for the card inside and are from the Photoplay Autumn Vibes paper collection.
Thank you for reading this blog post. I hope this inspires you and makes you smile. Please like and leave comments 😊
Cardbase: I used a purchased A6 cardbase that I trimmed down to 4.5×6 inches.Each of the four panels are covered with papers from the Cozy Fall paper collection. The front of the card has a stenciled wreath of leaves using oxide inks.
Oven/Stove:Watch the assembly video at the bottom of the linked page before starting the card. I cut my stove from a piece of orange cardstock covered with clear packing tape. I found that the silver foil oven door handle did not like to stay glued to the packing tape, so I reverted to glue dots to hold the handle on. The inside of the oven and pop-up platform were cut from a metallic coated black textured cardstock. I find it easier to add the stove knobs and burners to the stove in a flat position before attaching it to the card. Also it is easier to add any baking trays to the platform before attaching the oven to the platform.
Cabinets:Once the stove is attached; you can add the side cabinets. I cut the cabinets from some embossed wood grain cardstock and then inked them with brown ink to bring out the grain. The drawer and door (cookie tray) panels are part of the Oven Pop-Up set. Decorative paper was used for the countertops. The upper cabinets are cut using the cookie tray die.
TV:The TV set from the Memory Charms die set has had its antenna and feet trimmed off and Nuvo Drops added for knobs. I screen shot a photo from the Craft Roulette episode #182 and resized it to a 1-inch rectangle, print on white paper and die-cut it with the TV screen die.
Decorations: Cotton fuzz was pulled from a cotton ball to be the steam off the tray of cookies fresh from the oven. The cookie tray, cookies, turner utensil, oven rack, oven mitt, and cabinet knobs are all part of the Oven Pop-Up set. The oval rug with its white label for a personal message come from the Crosshatch Ovals set.
Sentiments: The sentiments on the front (“Happy Thanksgiving Day”) and back (“Hello Fall”) come from the Cozy Fall paper collection.
Thank you for reading this blog post. I hope it has provided some inspiration.