A Map To The Caribbean

Taking a sailing vacation around the Caribbean Sea deserves a special bon voyage card.

For this shape card, I used products from Scrappy Tails’ new Nautical 2023 June Collection.

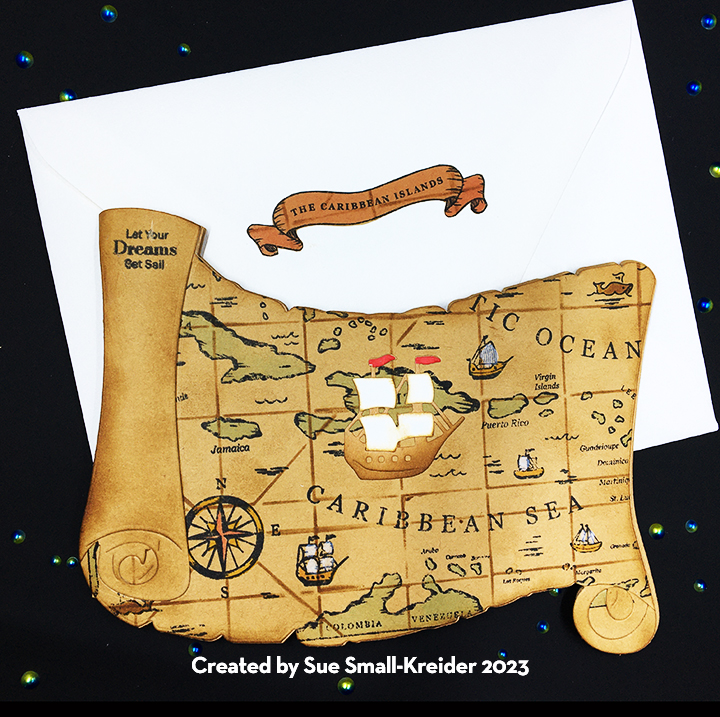
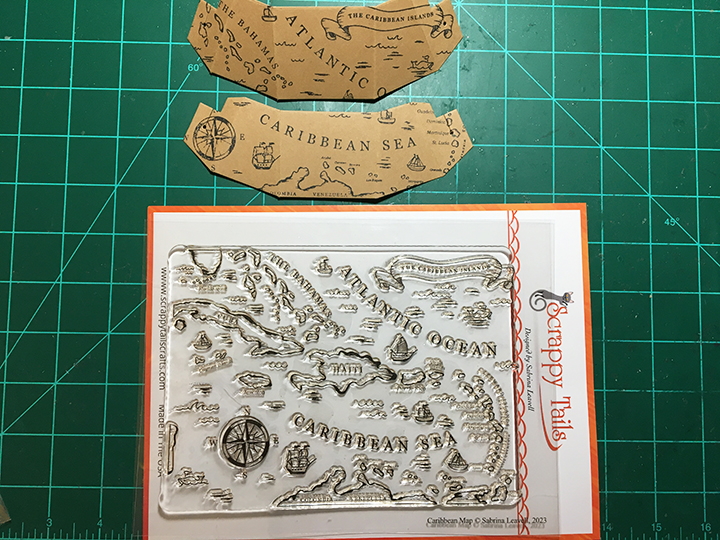
Map: Stamp on kraft paper the Caribbean Map Stamp. Using the coordinating stencil set –Layering Caribbean Map Trio, start with the grid stencil and brown ink. Use the next two stencils to add color to the land masses, ships, whales and compass. (I found it easier to use a white opaque marker to color the sails than use the stencil.) I used the A7 Compass Scroll die to cup the map making sure the words of “Caribbean Sea” were visible. To create the rolled back of the scroll, I die cut just the scroll portions of the die from kraft paper and trimmed to fit the map. I daubed brown ink to shade and age the scroll and map.

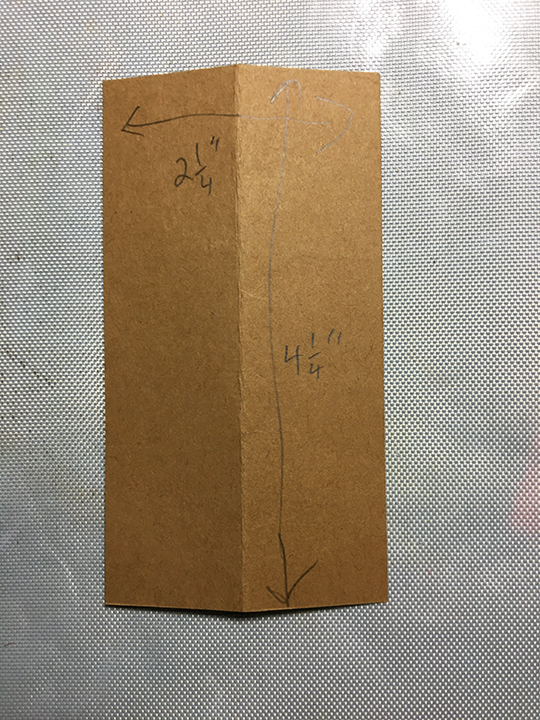
Cardbase:  Cut three scrolls from kraft paper using the A7 Compass Scroll die. Cut a 2 1/4-inch x 4 1/4-inch rectangle from kraft paper and fold in half longwise for the card hinge. Glue the hinge to one of the scrolls to be the cardback as shown in photo. Glue hinge to back of map scroll, matching the shape edges.

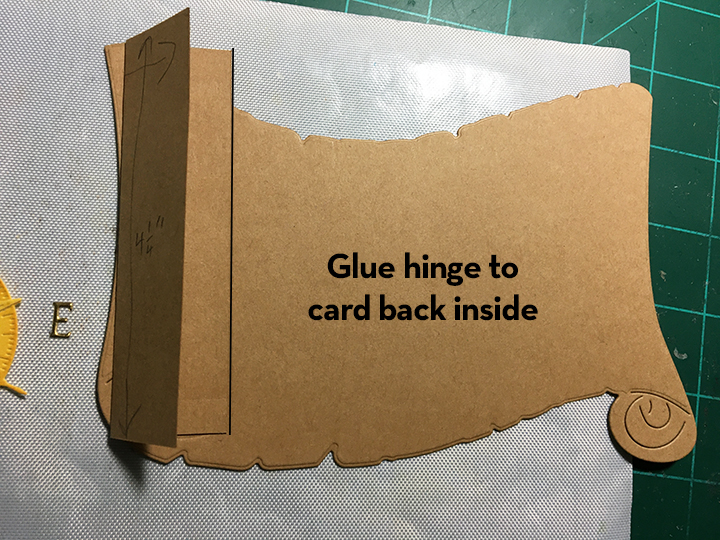
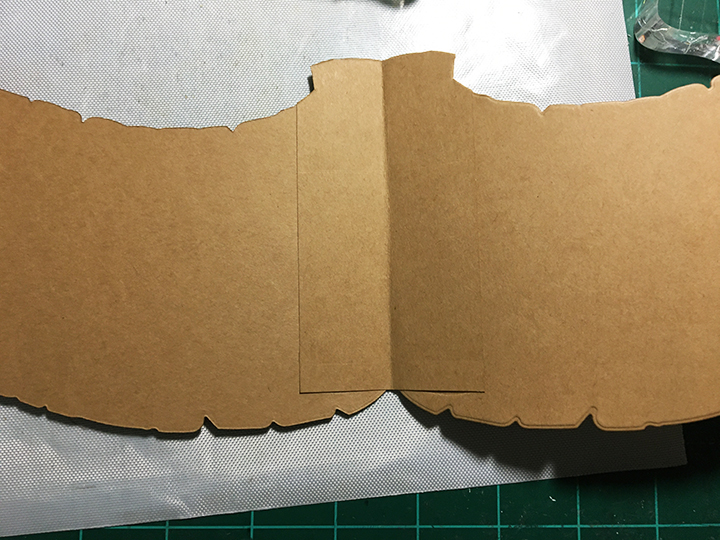
Trim over hanging bits of hinge. Glue the scroll edges together at hinge fold. Trim the remaining two kraft scrolls to fit inside the card and cover hinge.

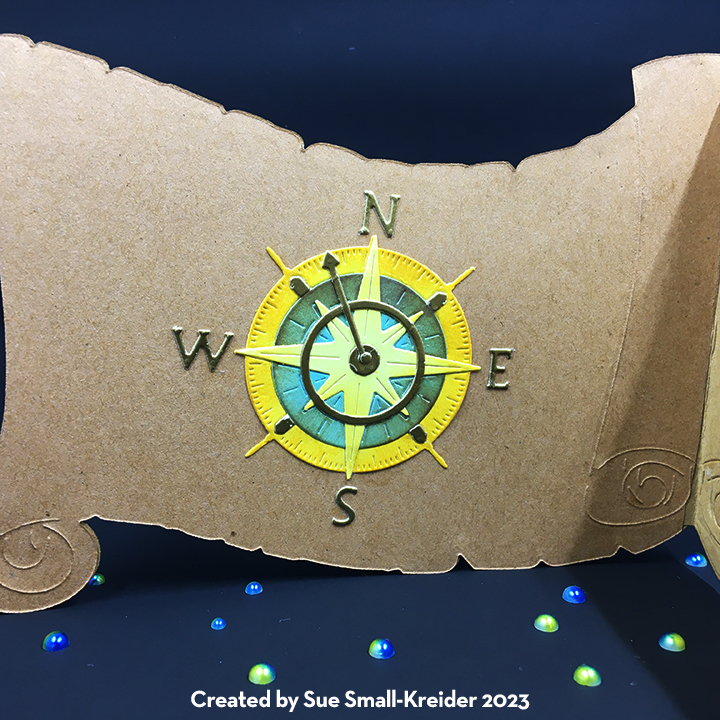
Compass: Cut the nine dies that make up the compass from the A7 Compass Scroll die set. Use lightweight colored cardstock for the three main parts and ink them to provide depth and shading. Cut the smaller bits from gold cardstock.  Glue completed compass to inside of card.

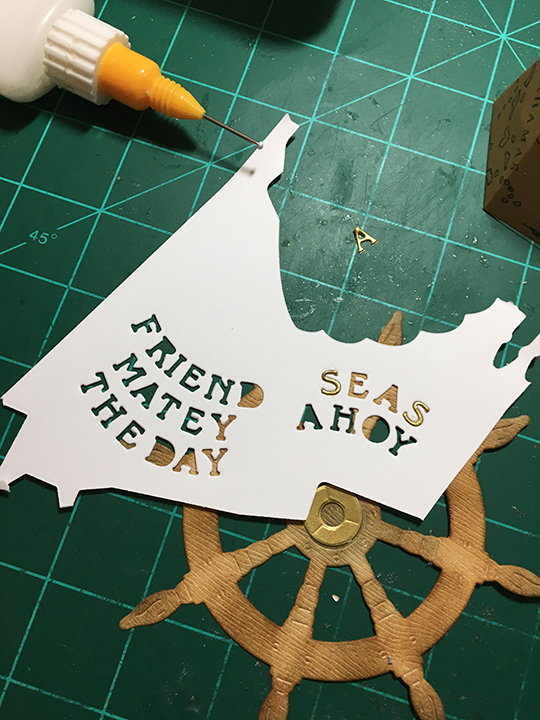
Sentiment: Stamp in black, the “Let your dreams set sail” from the Set Sail stamp set on the top left of the map scroll.

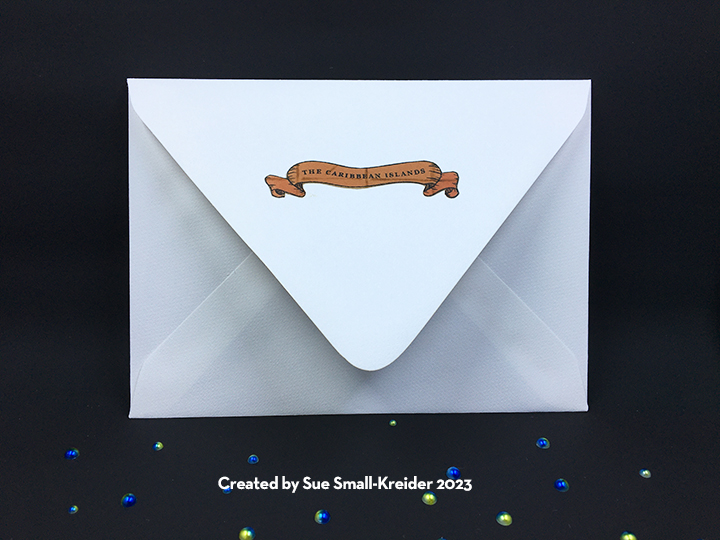
Envelope: The card fits into an A7 envelope that I decorated the back flap with the Caribbean Islands banner fussy cut from the map.

Thank you for reading this blog post. I hope this inspires you and makes you smile. Please like and leave comments 😊

Want to see more of the Scrappy Tails nautical collection? Check out my blog posts:

Materials Used:

Dies

Stamps and Stencils

Papers

  • Kraft Cardstock
  • Matte Gold Cardstock
  • Blue, Brown, White and Yellow Cardstock
  • A7 ivory Envelope

Ink

  • Memento – Fade-Resistant Dye ink – Tuxedo Black
  • Ranger – Tim Holtz – Distress Ink- gathered Twigs, Fossilized Amber, Saltwater Taffy, Abandon Coral, Cracked Pistachio
  • Recollections – Opaque Marker – Snow
  • Sharpie- Permanent Marker – Fine Point – Red

Adhesives

Tools

  • Die Cutting Machine
  • Stamping Platform
  • LDRS – Stampendable Stamping Tool
  • Stamping Cloth
  • Sponge Dauber
  • Quickstik Tool
  • Craft Mat
  • Scissors

You Are A Life Saver!

Needing a thank you card for a recent kindness from a friend, I made a life preserver pop-up card.

For this pop-up 3D card, I used products from Scrappy Tails’ new Nautical 2023 June Collection.

Base: Cut two of the Pop Up Stand from blue starfish cardstock from the Set Sail paper pad. Train the folds on each piece and glue tabs with slot for rubber band together. Add rubber band. (I used a #12 band.)

Preserver: Using the A7 Life Preserver die set, cut two preservers from heavy white cardstock as well as two sets of ropes. Cut a total of eight of the bands and C-rings from red. (I used packaging with a shinny coating). Ink the rope pieces before gluing to the preserver.  Glue the C-rings to the preserver and then glue the bands over them. Pick a side of the preserver to be the top and add a line of glue across the back and adhere to the top back of the second preserver. Glue the life preservers to base.

Sentiment Banners: Three of the six hot foil banners in the Nautical Banner hot foil plates set were used – “You’re A Lifesaver” and “Thank You So Much.” (I usually do batch hot foiling with my Spellbinders’ Glimmer Foil System because it takes time to set-up, heat-up and cool-down.) The coordinating dies make the banners easy to cut out.

Envelope: The card folds flat to fit into an A7 envelope that I stamped the back flap with the life preserver from the Set Sail stamp set in red ink.

Thank you for reading this blog post. I hope this inspires you and makes you smile. Please like and leave comments 😊

Want to see more of the Scrappy Tails nautical collection? Check out my blog posts:

Materials Used:

Dies & Foiling Plates

Stamps

Papers

Foils:

  • Spellbinders – Glimmer Hot Foil – Red

Ink

  • Ranger – Tim Holtz – Distress Ink- Antique Linen
  • Stampin’ Up – Classic Stampin’ Pad – Real Red

Adhesives

Tools

  • Die Cutting Machine
  • Stamping Platform
  • LDRS – Stampendable Stamping Tool
  • Stamping Cloth
  • Sponge Dauber
  • Craft Mat
  • Scissors
  • Spellbinders -Glimmer Hot Foil System
  • Spellbinders – Quick Trimmer

Miscellaneous

  • #12 Rubber Band

Charting A Nautical Birthday

I often make cards with my father in mind. Growing up I visited a lot of historic sailing ships around the world with him. This is a birthday card in his honor.

For this pop-up 3D card, I used products from Scrappy Tails’ new Nautical 2023 June Collection.

Base: Stamp on kraft paper the Caribbean Map Stamp. Cut two of the Pop Up Stand from the map. Train the folds on each piece and glue tabs with slot for rubber band together. Add rubber band. (I used a #12 band.)

Wheel: Cut two wheels from embossed woodgrain paper and two wheels from brown cardstock using the large die from the Ship Wheel die set. Using sponge daubers, ink the woodgrain wheels with browns and black. Glue the brown cardstock wheels to the back of the woodgrain wheels. Die cut from gold cardstock the “Seas the day” sentiment letters included in the Ship Wheel set. (I cut a letter placement guild from scrap cardstock. Putting a drop of glue on the back of my hand to drip the letters in before placing them on the wheel.)

Add from gold cardstock the center wheel tuning bearings and screw heads to wheel. (While the set comes with tiny circles to cover the screws on the wheel, I elected to use Nuvo Drops for the screw heads.) Glue top handles of the two wheels together before gluing wheels to base.

Sentiment Banners: Three of the six hot foil banners in the Nautical Banner hot foil plates set were used – “Lets sail-ebrate!” “Happy Birthday” and “Just for You.” (I usually do batch hot foiling with my Spellbinders’ Glimmer Foil System because it takes time to set-up, heat-up and cool-down.)

Envelope: The card folds flat to fit into an A7 envelope that I decorated the back flap with the “Let’s Sail-ebrate!” banner in red foil.

Thank you for reading this blog post. I hope this inspires you and makes you smile. Please like and leave comments 😊

Want to see more of the Scrappy Tails nautical collection? Check out my blog posts:

Materials Used:

Dies & Foiling Plates

Stamps

Papers

  • MemoryBoxCo.com – 8.5×11 Embossed Cardstock – Woodgrain
  • Kraft Cardstock
  • Matte Gold Cardstock
  • Brown, White and Cream Cardstock
  • A7 ivory Envelope

Foils:

  • Spellbinders – Glimmer Hot Foil – Red
  • Spellbinders – Glimmer Hot Foil – Polished Brass

Ink

  • Memento – Fade-Resistant Dye ink – Tuxedo Black
  • Ranger – Tim Holtz – Distress Ink- Vintage Photo, Walnut Stain and Black Soot

Adhesives

Tools

  • Die Cutting Machine
  • Stamping Platform
  • LDRS – Stampendable Stamping Tool
  • Stamping Cloth
  • Sponge Dauber
  • Craft Mat
  • Scissors
  • Spellbinders -Glimmer Hot Foil System
  • Spellbinders – Quick Trimmer

Miscellaneous

  • #12 Rubber Band
  • Nuvo – Crystal Drops – Bright Gold