Seafaring Tri-Fold Pop-Up Birthday Card

This card was made for CRAFT ROULETTE #286 whose parameters included a dude’s card, sunflower field colors, bird(s) element, and soot. Today’s card uses Spellbinders’ dies and embossing folder and Karen Burniston dies and stamps.

Watch the video below to see how this card was made.

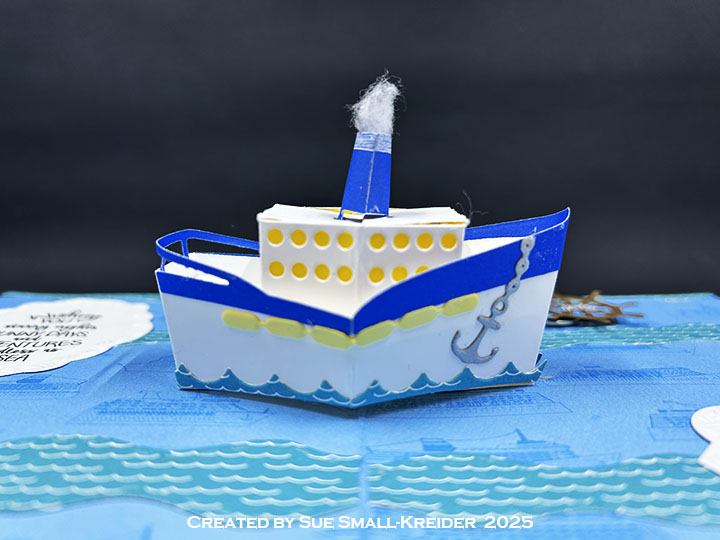
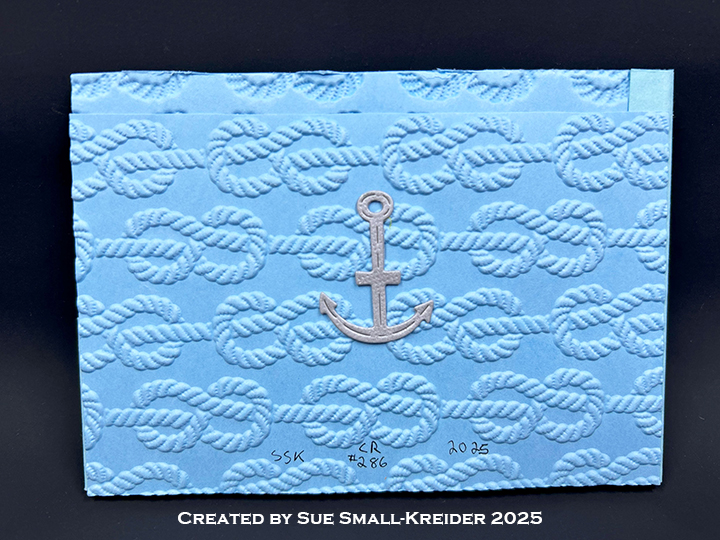
Cardbase: Cut from blue cardstock one 1.5×5.5-inch strip and one 3.5×5.5-inch rectangle. Score and fold .5-inch from the edge on both pieces to form 1.5×5-inch strip and 3.5 x5-inch rectangle. From an 8×6 sheet of heavy blue cardstock spritz with water and use the Spellbinder’s 3D Nautical Knots embossing folder to emboss the piece. Let piece dry flat. Trim down to two pieces that are 3.5×5-inches. (I made the mistake of cutting my cardstock to finished size I wanted before I embossed, forgetting that the embossing would consume some of my cardstock. So it is better to emboss a piece bigger than what you need and then trim down.)

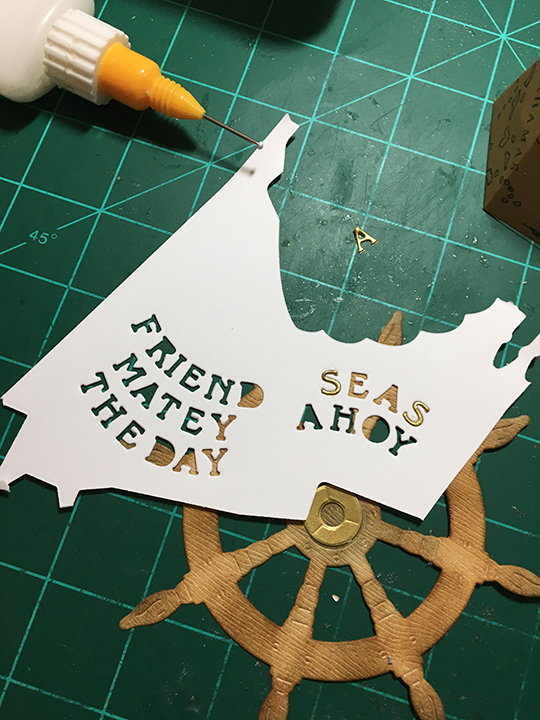
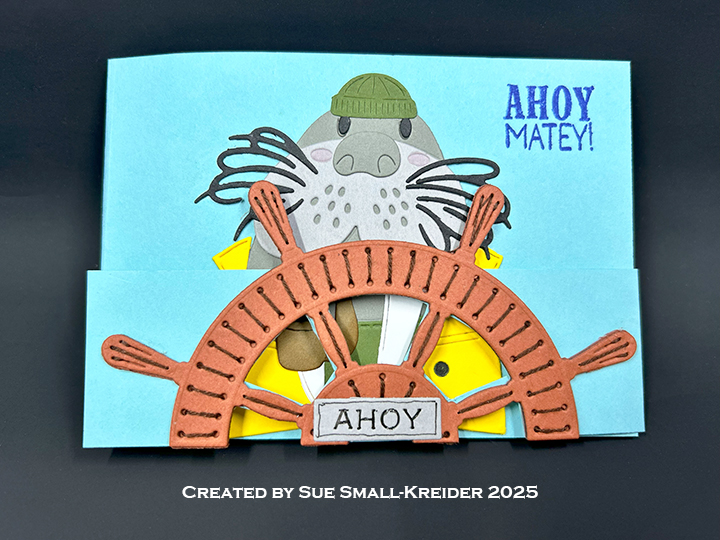
Ships Wheel: Cut two ships wheels with stitching holes – one from black and one from brown cardstock using the Spellbinder’s stitching Ahoy, Matey! die set. Cut one ships wheel without the stitching holes from brown. Glue the two with holes together, keeping the glue from filling the holes. Stitch the pattern using two strands of brown embroidery floss. Glue the last brown wheel to cover over the back threads. Cut one “Ahoy” sign from silver using the die in the same stitching die set. Go over the letters with a thin-tipped black marker. Glue to bottom center of wheel. Using a pencil trace the openings of the wheel onto the blue strip as shown in the video above. Cut the openings out using a kraft knife. Glue wheel to blue strip.

Walrus and Seagull: Follow the directions on packaging of the Spellbinders Shipmates die set to assemble the pair. (I glued black eyes onto the walrus and used a pink marker to color the cheeks on both animals. Also did some shading on pipe with brown ink. ) Attach each creature as shown in the video above.

Card Assembly: Glue the strip with the ships wheel to the lower right side of one of the 3.5×5-inch rope embossed rectangles. Glue the 3.5×5-inch rectangle with the walrus glued to it on the left side of the rope embossed rectangle. Glue the remaining rope embossed rectangle to the back of the card to cover the card flap tabs.

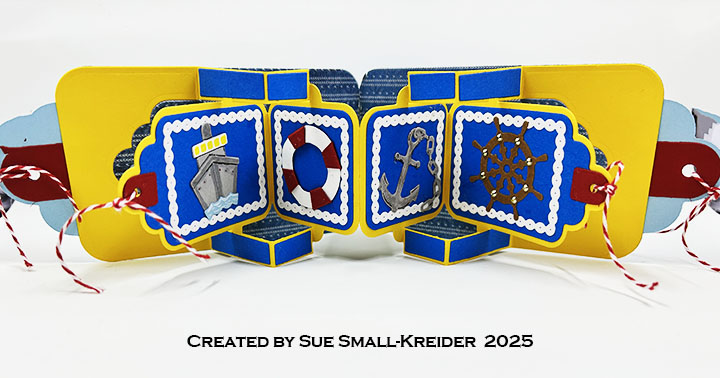
Pop-Up Mechanism: Cut one of the L-shaped mechanisms from blue cardstock using the Karen Burniston Katherine Label Pop-Up die set. (Watch the assembly video at the bottom of the linked page for the die set.) Attach inside the card as shown in the video above.

Sentiments: Using the Karen Burniston “Happy Birthday and its Shadow dies, cut the inside sentiment and glue together. Adhere the seagull to the top of the words. Glue entire piece onto the pop-up mechanism, checking that it is hidden inside the card and does not become a catchpoint for the mechanism. Stamp “Ahoy Matey!”to the card front using Karen Burniston’s Pirate Sentiments stamp set.

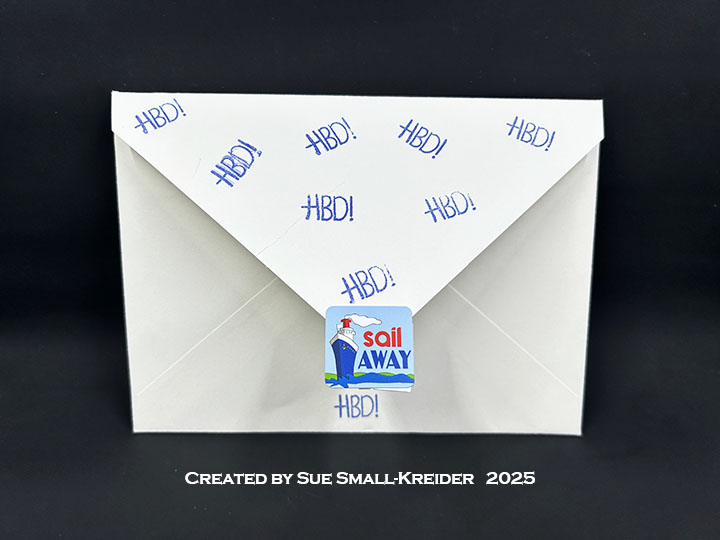
Envelope: Stamp in blue ink “Ahoy Matey!”to the back flap using Karen Burniston’s Pirate Sentiments stamp set.

___________________________________

Thank you for experiencing this blog post.

I hope this inspires you and makes you smile.

Please subscribe for email notices, like and leave comments 😊

___________________________________

Disclaimer: Karen Burniston products are provided free of charge by the manufacturer for review and use. All other items were personally purchased. Compensated affiliate links used where or when possible, meaning I will receive a small percentage commission from these manufacturers at no cost to you. This will allow me to add more content to my YouTube channel and help out a lot. Thank you.

Materials Used:

Dies & Embossing Folder

Stamps

Papers

  • Bazzill – 8.5×11 Cardstock – Tiara -18-1002
  • Spellbinders – 8.5×11 100lb Cardstock – Lunar Gray & Raindrop
  • Stampin’ Up – 8.5×11 110lb Cardstock – Copper Clay
  • Blue 65lb Cardstock
  • Black, Green, White and Yellow Cardstock

Ink

  • Crafter’s Square – Metallic Marker – .05in/1.2 mm Point – Silver
  • Memento – Fade Resistant Dye ink – Paris Dusk
  • OLO – Marker – Cotton Candy
  • Pigma – Mircon 01 Fine Tip Pen – Black
  • Ranger – Tim Holtz – Distress Ink – Vintage Photo
  • Sakura – Gelly Roll Pen – Medium – White

Adhesives

Tools

  • Die Cutting Machine
  • Paper Trimmer
  • Riley and Company – Pick & Poke Tool
  • Stamping Blocks
  • Scissors
  • Paper Masking Tape
  • Pencil
  • Self-Healing Cutting Mat
  • Excel Blades – K71 Fingertip Craft Knife

Miscellaneous

  • Brown Embroidery Floss – 838

Cruising On Your Birthday!

This card was made for Craft Roulette #252 whose parameters included a card for a teenager, morning colors, fairy (fairies), and bow(s). I choose to interpret fairy as fairy lights and bow as a bow of a ship.

Watch the process video to see how I made this card.

Cardbase: My double sided paper from Carta Bella was cut into a 6.5×10-inch rectangle and folded in-half. The wave decorations were cut using Karen Burniston’s Ocean Edges die set.

Cruise Ship Pop-Up: The cruise ship is made with two die sets by Karen Burniston – Boat Pop-Up and Cruise Ship Add-ons. (You can watch assembly videos for both sets by clicking on their links and going to the bottom of the linked pages.)

Pear Blossom Press Twinkle Lights were used to light-up the ship and the ship’s wheel (from Karen Burniston’s Cruise Charms die set with Pear Blossom Press’ “push” stamp) covers the battery and indicates where to press to turn on the lights.

Sentiments:  The “Wishing you…” sentiment is from Karen Burniston’s Cruise Greetings stamp set and the “HBD!” is from Craft Roulette’s Funn Friends #02 stamp set. The sentiments are stamped in black ink on labels cut from Karen Burniston’s Rectangles and Labels – Crosshatch and Labels – Crosshatch die sets. You can download the paperclip slip.

Envelope:  The card fits into an A7 (5x 7-inches) size envelope with “HBD!” stamped all over the back flap and sealed with a sticker from the paper collection.

___________________________________

Thank you for experiencing this blog post.

I hope this inspires you and makes you smile.

Please like and leave comments 😊

___________________________________

Disclaimer: Karen Burniston products are provided free of charge by the manufacturer for review and use. All other items were personally purchased. Compensated affiliate links used where or when possible, meaning I will receive a small percentage commission from these manufacturers at no cost to you. This will allow me to add more content to my YouTube channel and help out a lot. Thank you.

Materials Used:

Dies

Stamps

Papers

  • Carta Bella – 12×12 inch Double-Sided Textured Cardstock – Bon Voyage by Steven Duncan
  • Bazzill – 8.5×11 Cardstock – Tiara -18-1002
  • Your Paper Insider – 8.5×11 Cardstock 100# Smooth – UltraWhite
  • Yellow Vellum
  • Blue Cardstock
  • Recollections – A7 Envelope – Cream

Ink

Adhesives

Tools

  • Die Cutting Machine
  • Paper Trimmer
  • Bone Folder
  • Score Board
  • Stamping Platform
  • LDRS – Stampendable Stamping Tool
  • Stamping Blocks used as paperweights
  • Scissors
  • Craft Knife
  • Pencil
  • Paper Masking Tape
  • Metal Ruler

Miscellaneous

  • Pear Blossom Press – Twinkle Lights

A Pop-Up Tag Card with a Nautical Theme

This card was made for Craft Roulette #248 whose parameters included a tag(s) , Disney colors, January element, and branch (es) or (ing). I used a Craft Roulette stamp set and two Karen Burniston dies die sets.

Watch the process video to see how I made this card.

Cardbase:  Using Karen Burniston’s Tag Book Pop-Up die set, I cut two of the large tag frames from heavy weight light blue cardstock and two more from darker blue lightweight cardstock. The rectangular hinge die I cut once from light blue cardstock. The dark blue pieces I trimmed a 1/16-inch off all edges and then glued the dark blue on top of the light blue. The hinge was glued onto the inside of the light blue panels. (Watch Karen’s assembly video for her Tag Book Pop-Up.) You can cut two of the large tags from patterned paper to cover over the hinge on the inside. (It is easier to do the patterned paper background now than after you’ve glued in the yellow pop-up piece as I show in the process video above.) There are a number of decorator dies that come in the Tag Book Pop-Up Set such as the chain rope and hole protectors.

Pop-Up Panels: Cut two of the inside die piece from lightweight yellow cardstock. Cut two sets of the decorating strips die from dark blue. Follow the assembly instructions in her video.

Nautical Elements: The nautical elements of a ship, life preserver, anchor and ship’s wheel are all die cut and stenciled using dies from Karen Burniston’s Cruse Charms. (You can watch Karen’s assembly video for these charms at the bottom of this linked page Cruse Charms.) The chain rope borders and dark blue background mats are all dies in the Tag Book Pop-Up die set. The tags have red and white baker’s twine tied to them.

Sentiments:   The “Happy Birthday” and HBD sign are stamps in the Craft Roulette Funn Friend #1 stamp set. The “HBD” letters and yellow shade were cut using the stamp set’s coordinating dies.

Envelope:  The card fits into a purchased A6 (4.5x 6-inches) size envelope or larger.

Below is the Craft Roulette Community Showcase show on which I originally made this card.

___________________________________

Thank you for experiencing this blog post.

I hope this inspires you and makes you smile.

Please like and leave comments 😊

___________________________________

Disclaimer: Karen Burniston products are provided free of charge by the manufacturer for review and use. All other items were personally purchased. Compensated affiliate links used where or when possible, meaning I will receive a small percentage commission from these manufacturers at no cost to you. This will allow me to add more content to my YouTube channel and help out a lot. Thank you.

Materials Used:

Dies

Stamps

  • Craft Roulette – Funn Sentiments Clear Stamps – #1

Papers

  • Bazzill – 8.5×11 Cardstock – Tiara -18-1002
  • Concord & 9th – 8.5×11 Cardstock – Harbor
  • Graphic 45 – 12×12 Double-Sided Pattern and Solids Paper – Let’s Get Cozy
  • Recollections – 8.5×11 65 lb. Cardstock – White
  • Dark Blue, Red and Yellow Cardstock

Ink and Watercolors

  • Memento – Fade Resistant Dye ink – Tuxedo Black
  • Pigma – Mircon 005 Fine Tip Pen – Black
  • Ranger – Tim Holtz – Distress Watercolor Pencils – Hickory Smoke
  • Sakura – Gelly Roll Pen – Medium – White
  • Sharpie – Permanent Marker – Ultra Fine Tip – Red & Yellow
  • Stampin’ Up – Classic Ink Pad – Real Red

Adhesives

Tools

  • Spellbinders – Platinum Die Cutting Machine
  • Paper Trimmer
  • Bone Folder
  • Stamping Platform
  • LDRS – Stampendable Stamping Tool
  • Stamping Blocks used as paperweights
  • Scissors
  • Paper Masking Tape
  • Waterbrush

Miscellaneous

  • Red & White Baker’s Twine

Charting A Nautical Birthday

I often make cards with my father in mind. Growing up I visited a lot of historic sailing ships around the world with him. This is a birthday card in his honor.

For this pop-up 3D card, I used products from Scrappy Tails’ new Nautical 2023 June Collection.

Base: Stamp on kraft paper the Caribbean Map Stamp. Cut two of the Pop Up Stand from the map. Train the folds on each piece and glue tabs with slot for rubber band together. Add rubber band. (I used a #12 band.)

Wheel: Cut two wheels from embossed woodgrain paper and two wheels from brown cardstock using the large die from the Ship Wheel die set. Using sponge daubers, ink the woodgrain wheels with browns and black. Glue the brown cardstock wheels to the back of the woodgrain wheels. Die cut from gold cardstock the “Seas the day” sentiment letters included in the Ship Wheel set. (I cut a letter placement guild from scrap cardstock. Putting a drop of glue on the back of my hand to drip the letters in before placing them on the wheel.)

Add from gold cardstock the center wheel tuning bearings and screw heads to wheel. (While the set comes with tiny circles to cover the screws on the wheel, I elected to use Nuvo Drops for the screw heads.) Glue top handles of the two wheels together before gluing wheels to base.

Sentiment Banners: Three of the six hot foil banners in the Nautical Banner hot foil plates set were used – “Lets sail-ebrate!” “Happy Birthday” and “Just for You.” (I usually do batch hot foiling with my Spellbinders’ Glimmer Foil System because it takes time to set-up, heat-up and cool-down.)

Envelope: The card folds flat to fit into an A7 envelope that I decorated the back flap with the “Let’s Sail-ebrate!” banner in red foil.

Thank you for reading this blog post. I hope this inspires you and makes you smile. Please like and leave comments 😊

Want to see more of the Scrappy Tails nautical collection? Check out my blog posts:

Materials Used:

Dies & Foiling Plates

Stamps

Papers

  • MemoryBoxCo.com – 8.5×11 Embossed Cardstock – Woodgrain
  • Kraft Cardstock
  • Matte Gold Cardstock
  • Brown, White and Cream Cardstock
  • A7 ivory Envelope

Foils:

  • Spellbinders – Glimmer Hot Foil – Red
  • Spellbinders – Glimmer Hot Foil – Polished Brass

Ink

  • Memento – Fade-Resistant Dye ink – Tuxedo Black
  • Ranger – Tim Holtz – Distress Ink- Vintage Photo, Walnut Stain and Black Soot

Adhesives

Tools

  • Die Cutting Machine
  • Stamping Platform
  • LDRS – Stampendable Stamping Tool
  • Stamping Cloth
  • Sponge Dauber
  • Craft Mat
  • Scissors
  • Spellbinders -Glimmer Hot Foil System
  • Spellbinders – Quick Trimmer

Miscellaneous

  • #12 Rubber Band
  • Nuvo – Crystal Drops – Bright Gold