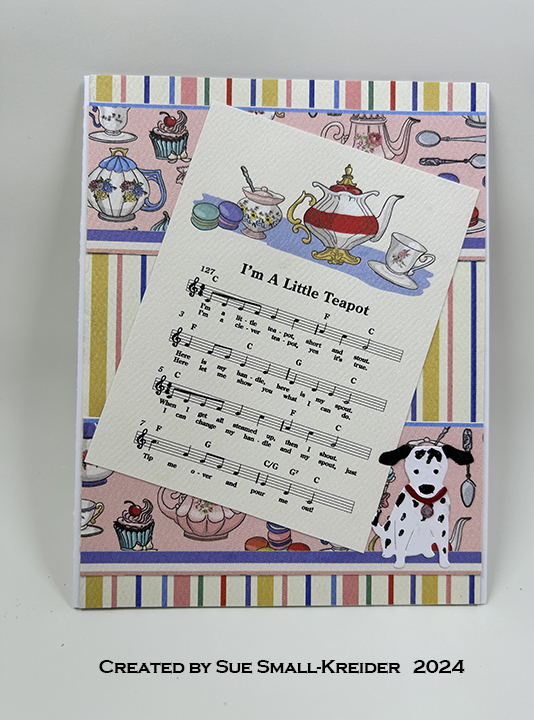
This card was made for Craft Roulette #225 whose parameters included an A2 project, tea party colors, a house pet(s) element and stripes.
Watch the video to see how I made the card.
___________________________________
Thank you for reading this blog post.
I hope this inspires you and makes you smile.
Please like and leave comments 😊
___________________________________
Disclaimer: Karen Burniston products are provided free of charge by the manufacturer for review and use. All other items were personally purchased. Compensated affiliate links used where or when possible, meaning I will receive a small percentage commission from these manufacturers at no cost to you. This will allow me to add more content to my YouTube channel and help out a lot. Thank you.
It’s time to see more of Karen Burniston’s February 2024 release of new dies.
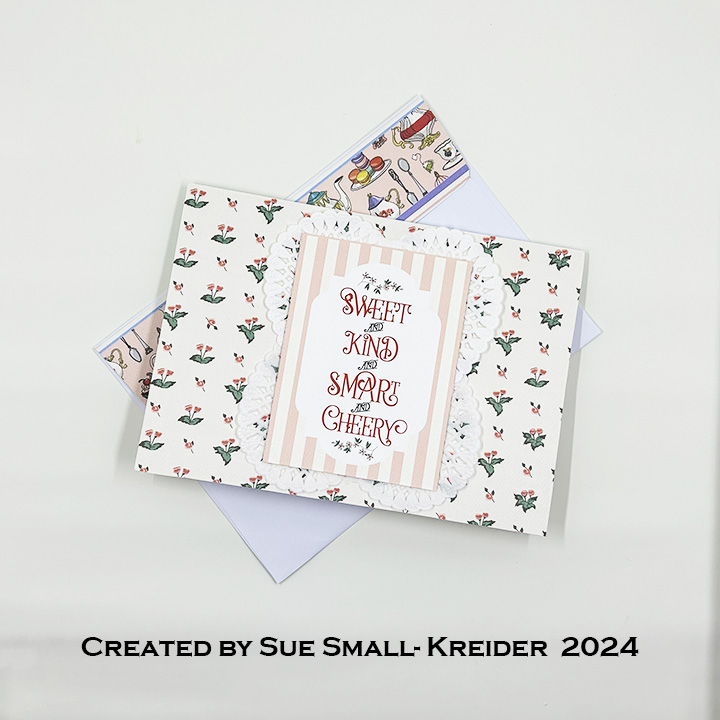
There is a wonderful scene in the Julie Andrew’s movie Mary Poppins, where she takes measure of the children with her tape measure and when her measure is taken it says “practically perfect.” This is a birthday card for the “practically perfect” person in everyone’s life.
Cardbase: I used a purchased A7 (5×7-inch) cardbase and envelope. Cut four 5×7 panels of decorative paper. (I used a Mary Poppins themed paper collection from Carta Bella.) Glue two to the outside and two to the inside of the cardbase leaving the center fold uncovered. (I used two panels of striped paper inside the card, matching up the stripes at the fold.) Decorate the front and back with journaling cards from the paper collection. (I used two heart paper doilies to go under the front journaling card which was popped-up with foam tape, while the back had a copier paper scalloped border cut using the scalloped rectangle die in the Rectangles and Labels – Crosshatch set and trimmed to fit.)
Double Lorna Platform: Fold a piece of pink decorative cardstock 4×8-inches to form a 4-inch square. Using a bone folder, make the fold crisp. With the paper folded, place the largest die from the Lorna Label Pop-Up set with the open tab above the fold matching the score line with the fold. (I found that I had to use a shim to cut through the double thickness of the cardstock to get the die to cut through both layers. You may have to adjust the sandwich for your die cutting machine. Test first before cutting your decorative cardstock.)
Train the folds. Place the center fold of the double mechanism along the inside center fold of the cardbase. Tuck the tiny tabs on either side of the label base under and glue to the cardbase with both the mechanism and cardbase flat. Close card to train label base to pop-out. (I used a pencil to pop the tube-like base out the first time.) Glue the upper tabs to cardbase as shown on package directions.
Cut a label from white copier paper using the largest stitched label die and glue to the bottom label platform.
Tea Cup and Spoon Mechanism: When gluing the mechanism from the Tea and Coffee Pop-Up set onto the double Lorna platform, a strip the width of the Lorna platform must be cut from the bottom tab of the mechanism.
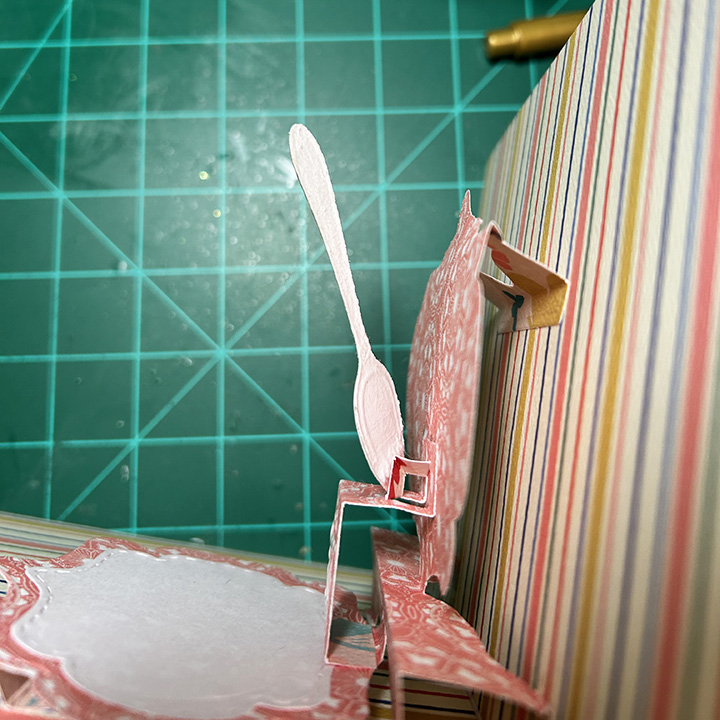
Spoon: Cut from a heavy silver foil cardstock using the spoon die in the Tea and Coffee Pop-Up set. (I used some silver packaging.) Glue the back of spoon to angled top mechanism making sure the position will be within the cup when open and within the card when closed.
Tea Cup and Saucer: Emboss the cup and saucer onto lightweight pink cardstock the die cut using the cup and saucer dies in the Tea and Coffee Pop-Up set. Leaving the cup in the die, ink through the stencil feature with pink ink. Remove from die and ink the cup’s handle, base and rim stripe with pink ink. Ink saucer base. With gold marker trace embossed lines on cup and saucer. Glue to front of mechanism.
Sentiments: A journaling card with “Sweet and Kind and Smart and Cheery” and a word tape measure border from the paper collection were used for the front and back of the card. “Happy Birthday” was cut from light blue cardstock using Word Set 2 – Birthday.
Envelope: The back flap of the envelope is covered with a border strip of a tea party.
Thank you for reading this blog post. I hope this inspires you and makes you smile. Please like and leave comments 😊
Love to have a cup of tea with your friend, but COVID-19 measures making you have to do it long distance? Here is a card to let your friend know you are thinking of them.
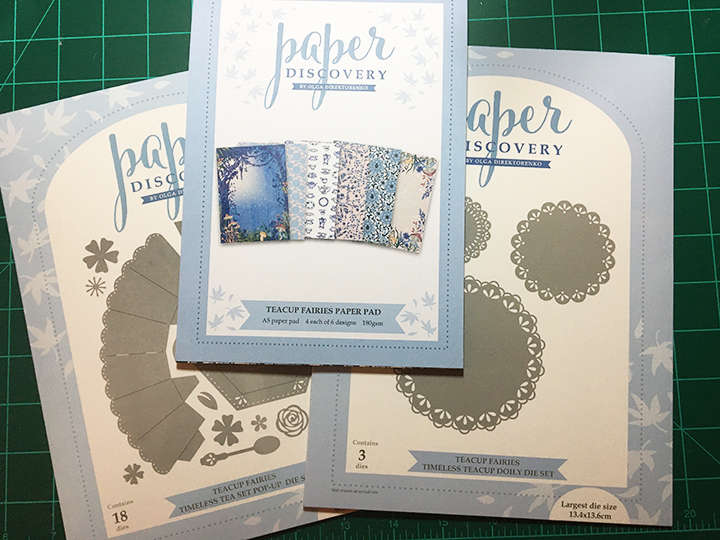
This card uses Paper Discovery products from the Teacup Fairies collection and the Papercraft Society box 17 which also has a tea theme.
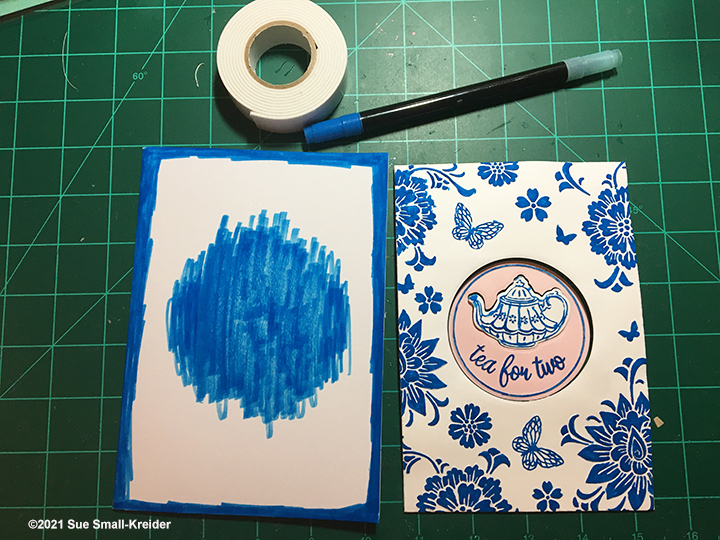
The front is made using the cut and embossing folder with white card stock that I spritzed with water for a good impression. I used a blue watercolor marker to color the embossed areas.
The card base is a 7 x 5 inches folded which had the front edges and center colored with the blue marker as well.
I cut the small circle area a second time from pink card stock to get the pink used inside the card onto the front. Embossed piece was raised up with foam tape. The pink circle was glued to base and teapot raised on foam tape. Using the medium doily die and a circle die the same diameter as the pink circle, cut a scalloped frame from lightweight paper. Glue frame to embossed layer.
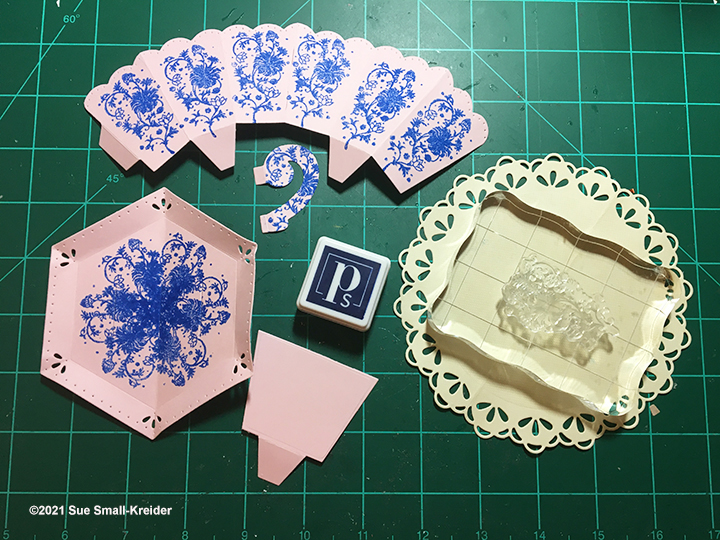
The teacup inside is made in two pieces – the cup and the saucer. I stamped the pieces before I assembled. The saucer is cut into two parts to make for a smoother fold of the card. (The multiple layers of paper on this card means that the fold cannot be covered up.) To assemble, glue cup side tab to form cup and slide in handle. Glue handle tabs inside. Slide cup bottom tabs into saucer slots and glue to underside. Glue cup inside piece tab to underside of saucer. Glue patterned papers and doily to inside of card keeping center fold uncovered. Fold cup and saucer flat ad glue one side of saucer along card fold. Then glue other side.
Add rectangle “calling cards” and die cut spoon to decorate inside. Glue another piece of pattered paper to back of card to have even weight to front and back of card.
The back flap of envelope is stamped with teas set from the Papercraft Society box in China blue ink.
Thank you for reading this blog post. Please like and leave a comment. 😊
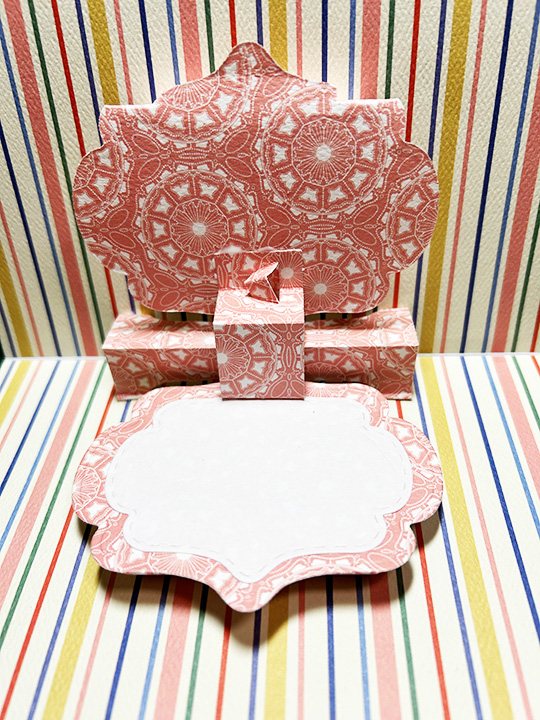
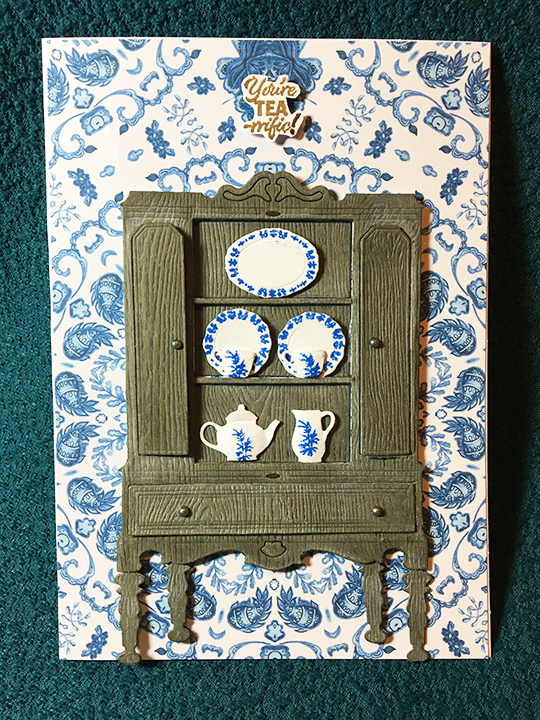
Olga Direktarenko is known for designing dies and stamps under her Paper Discovery brand that allow you to create scenes from rooms to dioramas. Her love of tea, books and old furniture were her inspiration for this kit.
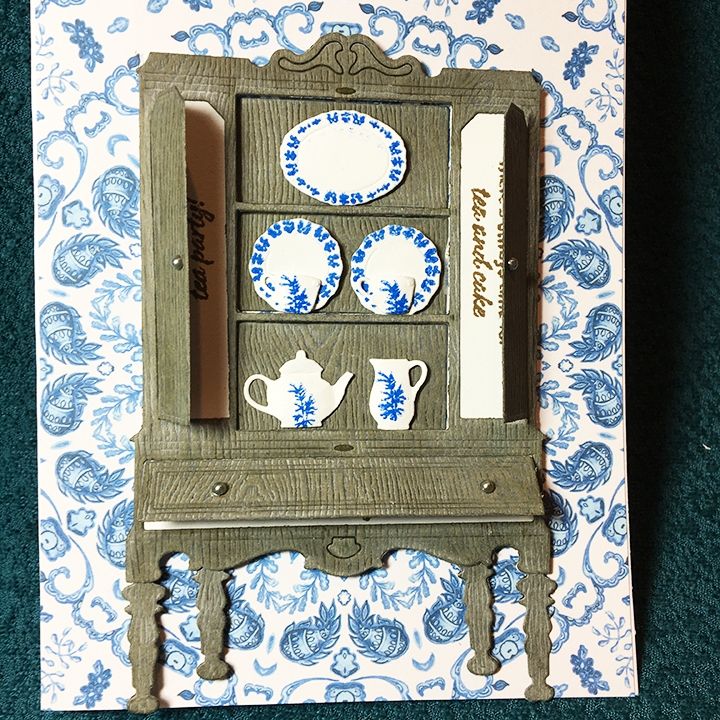
All the pieces for the cabinet were die cut from some heavy brown, wood grained cardstock which then was covered with ink to age it. The doors were then taped on using clear tape on the back side of the cabinet. A second large cabinet piece was cut without cutting any of the doors from white cardstock and glued to the back of the wood grained piece. With the doors taped open with removable tape, the sentiments from behind the doors were stamped in brown ink.
In order to achieve the 3-D look of the cabinet shelves having depth, the cabinet is raised on foam squares while the backs of the three shelves are adhered to the blue patterned paper with double sided tape. The legs were added after the cabinet was adhered to the card front. Tiny pewter colored stick-on pearls from the Papercraft Society kit were added as decorative knobs for the cabinet doors.
The dishes were die cut first and then stamped using a stamping platform and removeable taped doubled up on itself to hold the tiny dishes in place to be stamped. The dishes were then shaped using a ball tipped shaping tool (often used to shape flower petals) on the foam back of the stamping platform. Foam squares were used to adhere the dishes to the cupboard shelves.
As a finishing touch to the front of the card, a stamped and fussy cut “You’re TEA-rrific” sentiment was attached to the top with foam squares. The inside of the card is stamped in China blue “But first tea” with a tea set.
Stamped on the back flap of the envelope in China blue ink is the same tea set stamped inside the card.
Thank you for reading this blog post. Please like and leave comments. 😊
Celebrating Mother with May flowers is a tradition. I was happy to see that Anna Griffin’s new teacup die set includes the ability to emboss flowers onto the edges and side of the cup and saucer.
This was my first try at using the new die set as well as some of Anna’s sentiment stamps. The teacup goes together easily following the enclosed instructions. I embossed the cup and saucer first using an embossing mat/plate and then die cut all the pieces.
By using a preprinted card base from a card kit by Punch Studio that has been in my stash for a while, along with some of the butterfly toppers and pink flatback gems, the front of the card came together quickly. The inside paper is from Graphic 45. I cut two pieces so as not to cover the fold and used a green marker to color the inside edges of the card as a border to the floral paper.
I ended up heat embossing the decorative border on the gold metallic sentiment base with clear embossing powder. I learned that the metallic card I used is heat sensitive and had a minor curling effect happen.
To fill the cup I used flower embellishments from Anna Griffin as well. This vintage teacup card is perfect for celebrating Mother’s Day.


 Celebrating Mother with May flowers is a tradition. I was happy to see that Anna Griffin’s new teacup die set includes the ability to emboss flowers onto the edges and side of the cup and saucer.

