
I am always needing masculine birthday cards, so having an underwater sea turtle card that has some pop-up motion is a good thing.
This card uses a new pop-up mechanism in Karen Burniston’s September 2023 release – Stocking Pop-Up. I also used Karen’s Sea Animals, and a variety of her word and alphabet sets.

Cardbase: I started with an A5 (148 x 210mm or 5.875 x 8.25 inches) piece of heavy sea blue cardstock and folded in in half to form card that is (148 x 105mm or 5.875 x 4.125 inches) with a side fold. I had two sheets of the same A5 size printed underwater background. One I cut in half for the two panels inside. From the matching sheet I cut the decorative panels needed for the pop-up mechanism and used the remaining paper to cover the top half of the card front and the final two scraps to cover the card back. Any exposed areas on the outside of the card were covered with printed wave vellum.

Turtle Pop-Up: While the Stocking Pop-Up comes with a large stocking and Christmas decorations, you don’t need them to make the pop-up mechanism. I cut the large rectangular cover piece, the tombstone piece with baby tombstone and the triangular shaped piece with tabs from sea blue cardstock. I followed the directions on the packaging to assemble on to the card. (I practiced with some scrap cardstock first to get the placement right.) I assembled up to the point where I needed to glue the second tab of the large cover piece to the card. This so I could easily adhere the turtle to the mechanism.

Once I had the turtle from the Sea Animals die set assembled, I glued it to the large tombstone matching the upper edge of the turtle shell to the curve of the tombstone, so the arms and head of the turtle are above the tombstone. Next, I trimmed the tombstone down to fit the turtle’s shell.
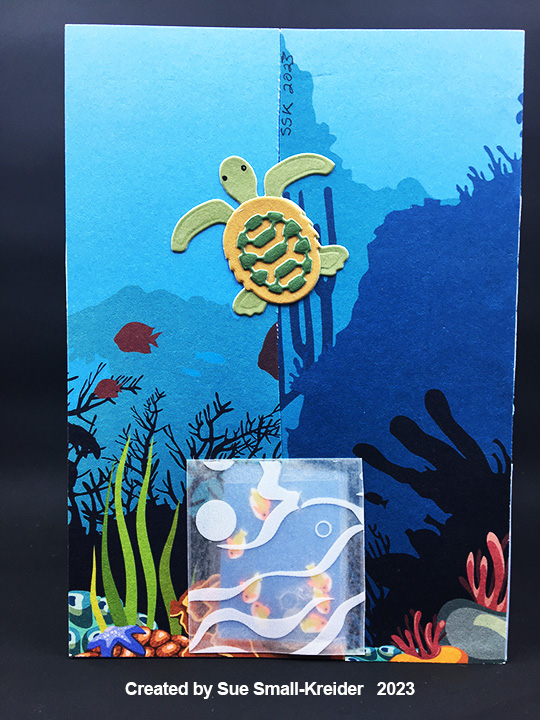
Decorations: Plastic droplets were used on the card front along with trails of glitter gloss to simulate bubbles. A strip of vellum printed with waves adds to the sense of underwater motion.
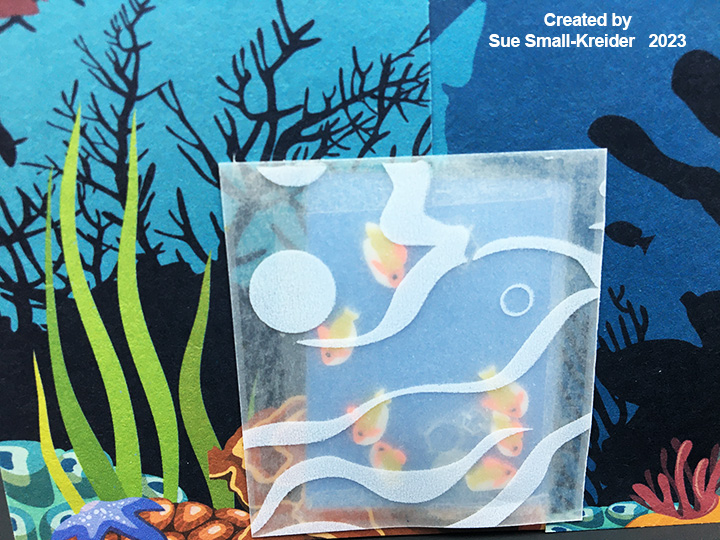
The back of the card uses scraps of the underwater paper with a turtle swimming upward. A tiny shaker element is under the vellum piece with tiny yellow and orange fish and clear sequins.

Sentiments: Three different die sets were used to create “Seas the Day.” The Mini Alphabet was uses for “Seas.” The “the” comes from Word Set 11 and “Day” is from Word Set 17. Both the Happy Birthday die and its shadow die were used. The shadow was cut from shimmer cardstock and the “Happy Birthday” was coated with glitter gloss.

Envelope: The A6 white envelope has a school of fish stamped on its back flap in blue ink.
Thank you for reading this blog post. I hope this inspires you and makes you smile. Please like and leave comments 😊
Materials Used:
Dies
- Karen Burniston in cahoots with Riley and Company – Stocking Pop-Up – 1248
- Karen Burniston in cahoots with Riley and Company – Word Set 17 – Congratulations – 1237
- Karen Burniston in cahoots with Riley and Company – Mini Alphabet and Numbers – 1197
- Karen Burniston in cahoots with Riley and Company – Happy Birthday Shadow – 1179
- Karen Burniston in cahoots with Riley and Company – Word Set 11 – Treasure – 1120
- Karen Burniston in cahoots with Riley and Company – Sea Animals – 1037
- Karen Burniston in cahoots with Riley and Company – Happy Birthday – 1030
Stamps
- Papercraft Society – Sam Calcott’s Underwater & Nautical Box – Clear Stamps
Papers
- Papercraft Society – Sam Calcott’s Underwater & Nautical Box – A5 Size Papers -Underwater Background, Wave Vellum and Blue(s) Cardstock
- Craft Consortium – A4 Size Double-Sided 200gsm Papers – Gardeners Delight – Greens & Browns
- Recollections – 8.5×11 White Gold Shimmer Cardstock
- Dark Green Foil Cardstock
- White, and Black Cardstock
- A6 Envelope – White
Ink
- Papercraft Society – Sam Calcott’s Underwater & Nautical Box – Mini Ink Pad – Aquamarine
- Pigma – Mircon 01 Fine Tip Pen – Black
- Nuvo – Aqua Shimmer – Glitter Gloss
Adhesives
- Neutral PH Adhesive by LINECO
- Fine-Tip Glue Bottle
- Double-Sided Tape -1/4-inch wide
Tools
- Die Cutting Machine
- Bone Folder
- Stamping Platform
- LDRS – Stampendable Stamping Tool
- Stamping Cloth
- Scissors
Miscellaneous
- Kat Scrappiness – Sparkling Clear Droplets- Sampler Pack
- Picket Fence Studios – Sequin Mix – Fishy Wishes


