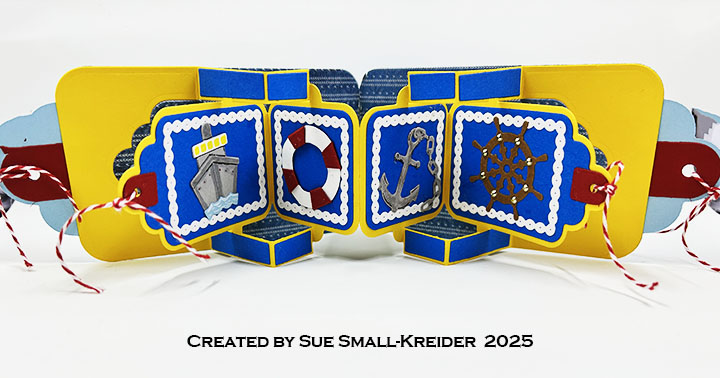
It’s Sneak Peek Week for Karen Burniston’s January 2025 release of eight new dies and four new clear stamps. For this Father’s Day card I used several of the new sets including: Paper People and Fishing Boat Add-Ons along with the previously released Boat Pop-Up dies and the new Fishing Phrases stamps. The new release will be available on January 27, 2025.
Watch the video below to see how this card was made.
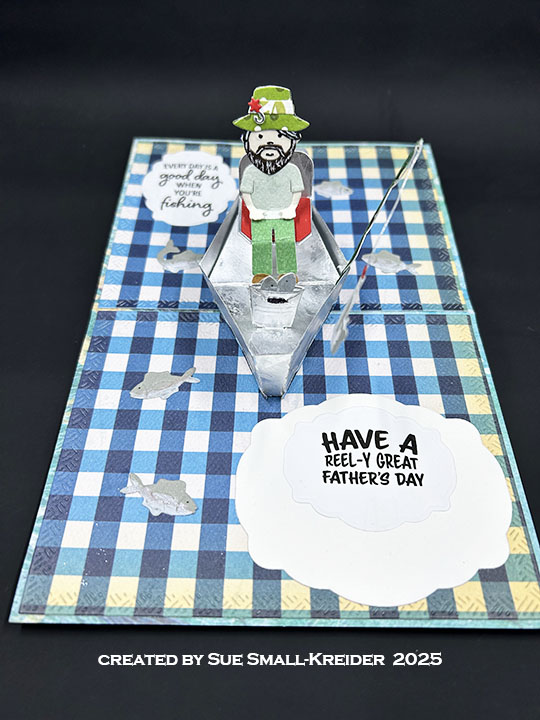
Cardbase: I started with an underwater pattern cardstock rectangle that was 5.5 x 8.5-inches and folded it in half to form a top-fold horizontal 4.25 x 5.55-inch slimline card. Next, I cut two of the largest die in the Rectangles – Crosshatch set from blue and white checkered paper and covered the inside panels. The outside panels used journaling cards from the coordinating paper collection.

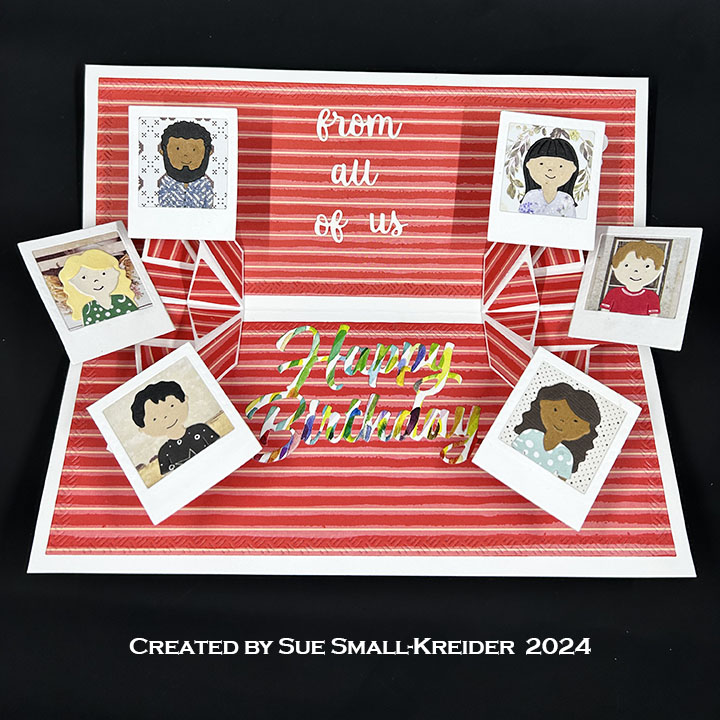
Fisherman: Using the Paper People die set cut one figure from flesh colored paper. (It is best to use your thinnest cardstock and decorative papers as the figure will need to be covered on both front and back from the waist up.) Cut hair and clothes to suit your card recipient. The hat with a fishing lure attached comes from the Fishing Boat Add-Ons set.

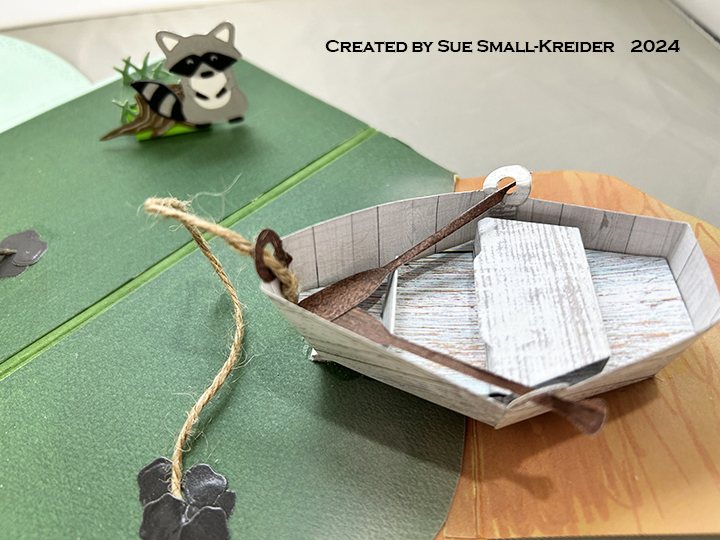
Fish and Fishing Rod: The Fishing Boat Add-Ons set includes dies to cut three different fish as well as a pail with a handle and a fishing rod, fishing line and three hooks. (It also includes an outboard motor, motor mount, and a hat.) I cut all the fish twice for this card from a greenish gray cardstock and colored the fish with glitter brush makers. The rod I cut twice from a dark green cardstock and the line once from silver cardstock. the line is sandwiched between the two layers of the rod. Take two of the jumping fish and glue them back to back except at the mouth. Feed the fish onto the hook and glue shut. The pail I cut twice from silver cardstock and the handle just once. (The handle knob is colored with a black marker.) There is a slot at the top of the pail that you can slide the small fish through.
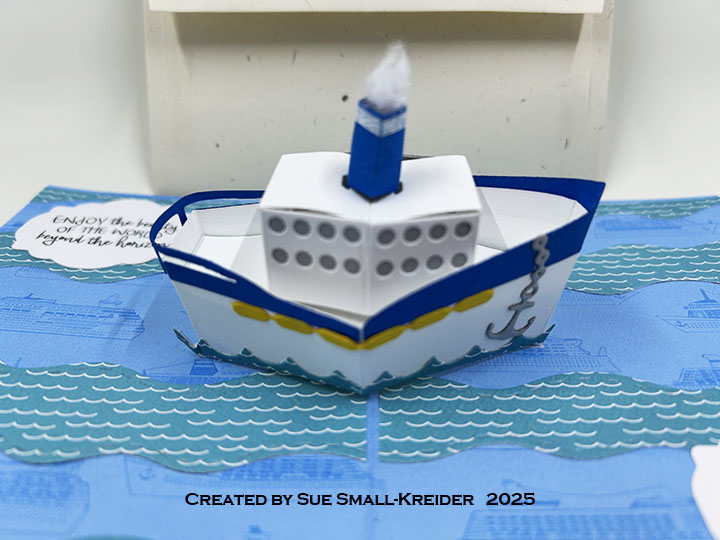
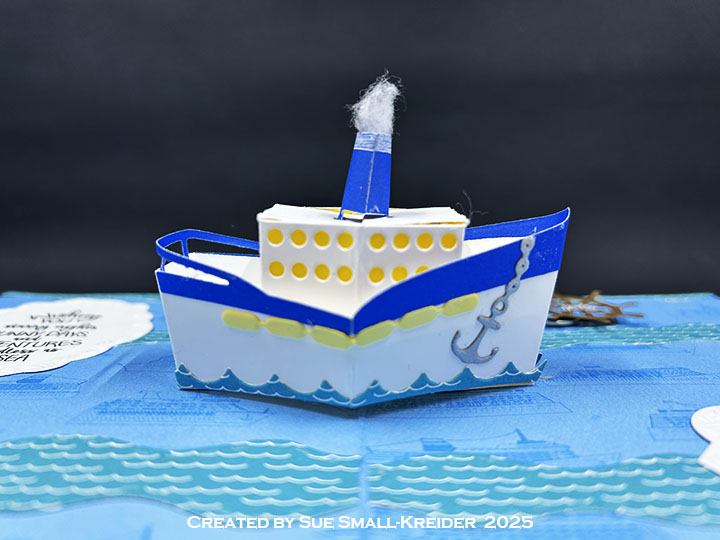
Boat Pop-Up: Using the Boat Pop-Up die set, cut one of the boat’s hull or sides and one of the boat deck from matte silver cardstock (or use my trick of dulling the shine with dried layer of glue.) Cut two of the tabbed mechanism strips from a lightweight cardstock. (Assembly video for Boat Pop-Up set is at the bottom of the linked page.) Follow the directions to assemble boat except replace the rowboat seat with the fishing seat and use the pail of fish to cover front tab. Attach outboard motor using the slotted mount strip. No need for oar locks or oars.

Sentiments: There are two sentiments on the card – “Every day is a good day when you’re fishing” and “Have A Reel-y Great Father’s Day.” Both were stamped using the Fishing Phrases clear stamp set with black ink onto white copier paper and die cutting with the smallest fancy label in the Rectangles and Labels- Crosshatch set.

Envelope: The card fits into an A2 size envelope which was has the last of the die-cut jumping fish glued to the back flap.
___________________________________
Thank you for reading this blog post.
I hope this inspires you and makes you smile.
Please like and leave comments 😊
___________________________________
Materials Used:
Dies
- Karen Burniston in cahoots with Riley and Company – Paper People – 1299
- Karen Burniston in cahoots with Riley and Company –Fishing Boat Add-Ons – 1297
- Karen Burniston in cahoots with Riley and Company – Boat Pop-Up – 1277
- Karen Burniston in cahoots with Riley and Company – Rectangles and Labels- Crosshatch – 1233
- Karen Burniston in cahoots with Riley and Company – Rectangles – Crosshatch – 1054
Stamps
Papers
- Carta Bella – 12×12 Double-Sided Cardstock – Gone Camping
- Crafter’s Companion – 12×12 Double-Sided Cardstock – Gone Camping
- DCWV – 4.5×6.5 Cardstock Mat Stack – The Spooky Time
- Keep It Simple – 12×12 Double-Sided Cardstock – Signature Collection by Sara Davies – Enchanted Ocean
- Recollections – 8.5×11 65 lb. Cardstock – White
- Silver Cardstock
- Colored Cardstock Scraps
- White Copier Paper
- Fraser Papers for William House – A2 Envelope – Genesis Text Milkweed Smooth
Ink
- Memento – Fade Resistant Dye ink – Tuxedo Black
- Pigma – Mircon 005 Fine Tip Pen – Black
- Sakura – Gelly Roll Pen – Medium – White
- Sharpie – Permanent Marker – Ultra Fine Tip – Black & Blue
- Nuvo – Aqua Shimmer Brush – Glitter Gloss
- Scrapbook.com – Shimmer Glitter Brush Marker – Pretty Pink, Frosty Blue & White
Adhesives
- Neutral PH Adhesive by LINECO
- Fine-Tip Glue Bottle
- Double-Sided Tape – 1/4-inch wide
- Glue Dots
Tools
- Die Cutting Machine
- Paper Trimmer
- Stamping Platform
- LDRS – Stampendable Stamping Tool
- Stamping Blocks
- Scissors
- Craft Mat
- Paper Masking Tape
- We R Memories – QuickStick