ALL STAR Birthday Basket

What to give to an all-star athlete who enjoys playing a variety of team sports? A basket of sport balls of course.

This pop-up birthday card features some of Karen Burniston’s December 2022 release die sets – Wide Woven Basket Box Card, Bam Box and Sports Charms.

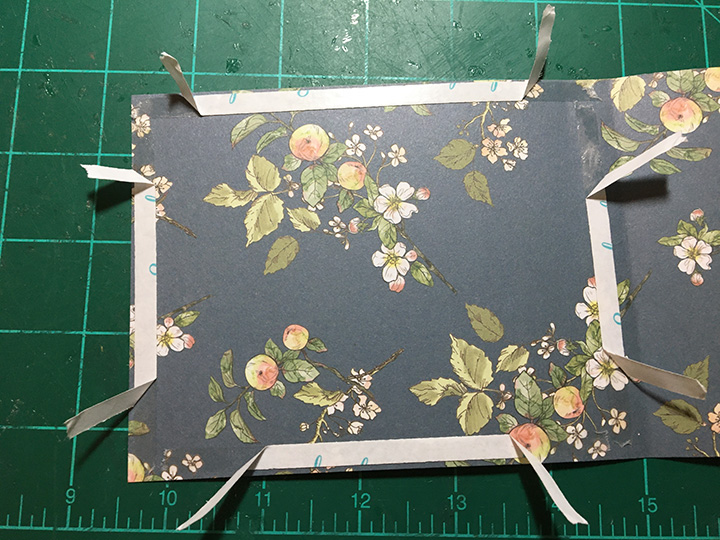
Wide Woven Basket: This die set makes it easy to create a rectangular pop-up basket. (Prior to this set you had to die cut an extra set of pieces to widen the basket sides and grass. See video.) When used with the previously released Woven Basket Box Card, you cut two sets of the original size sides and two sets of the wide size sides. Follow the directions on the package or the assembly video to weave the basket and join the sides together. (I choose to leave the top decorative full width rather than folding over as directed in the video.)

Adding Crossbars of Grass: The Wide Woven Basket Box Card includes the wide grass crossbars used to attach the various balls. (I cut four to make a full basket.)

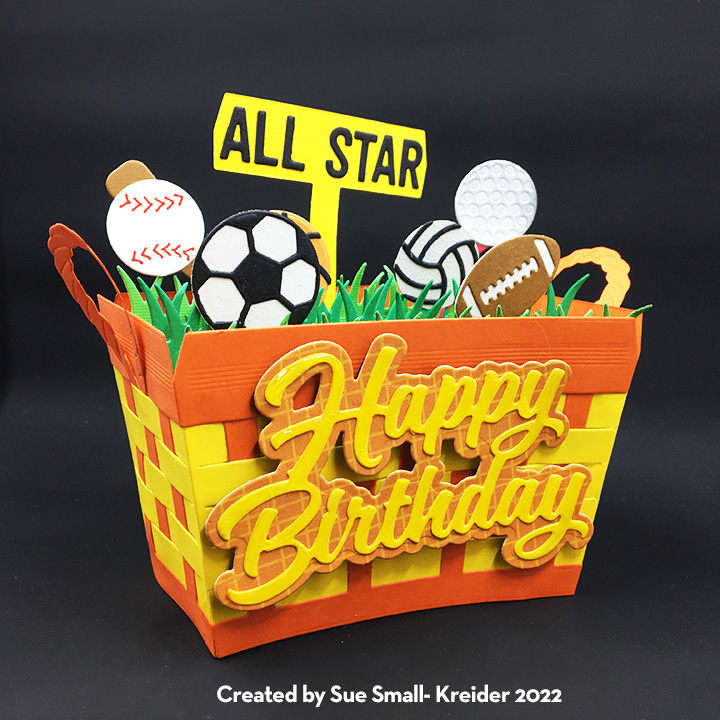
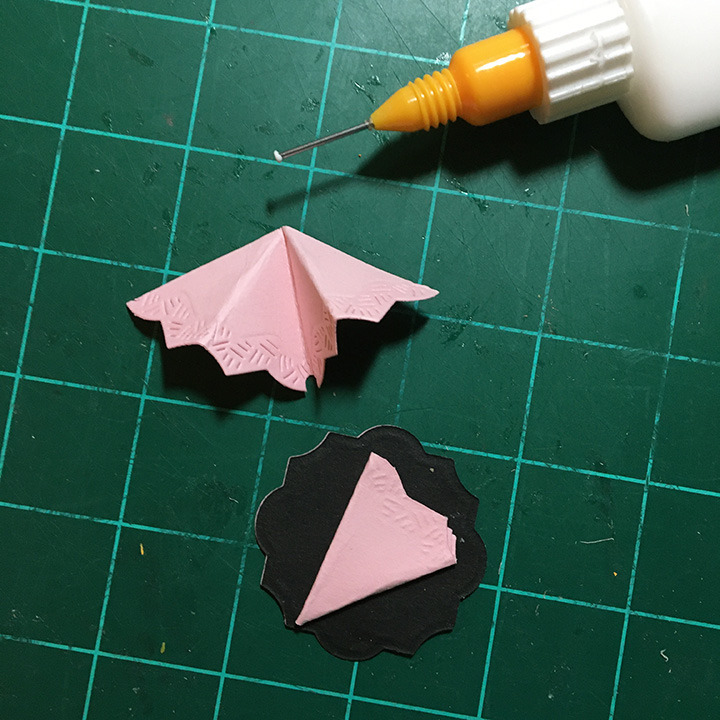
Sports Charms: In the Sports Charm set there are a softball and bat, a golf ball and tee, a basketball, a volleyball, a soccer ball and an American football. All but the softball and golf ball use two dies to create the stitching patterns of the various balls. The softball has embossed stitching lines that I highlighted with a fine-tipped red marker. I inked the golf ball’s indentations lightly with a black ink. (See assembly video for Sports charms.)

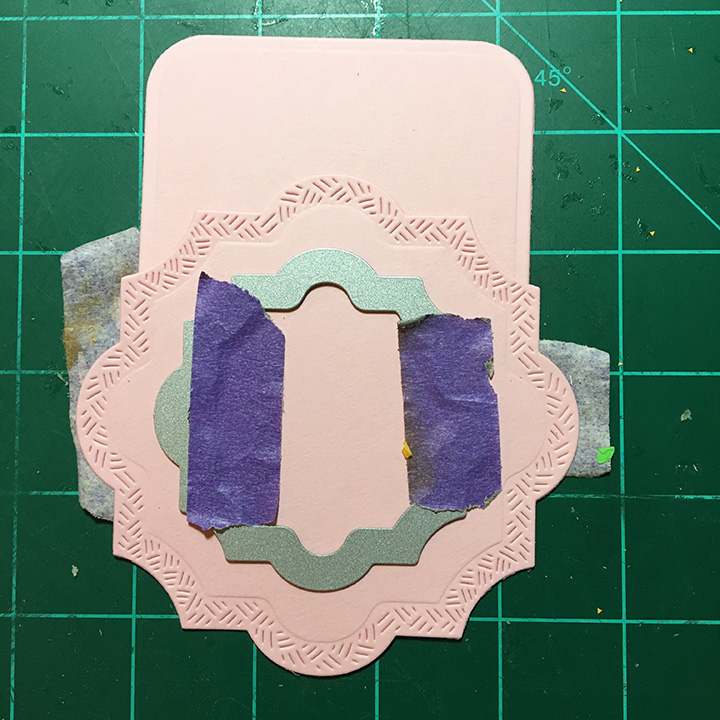
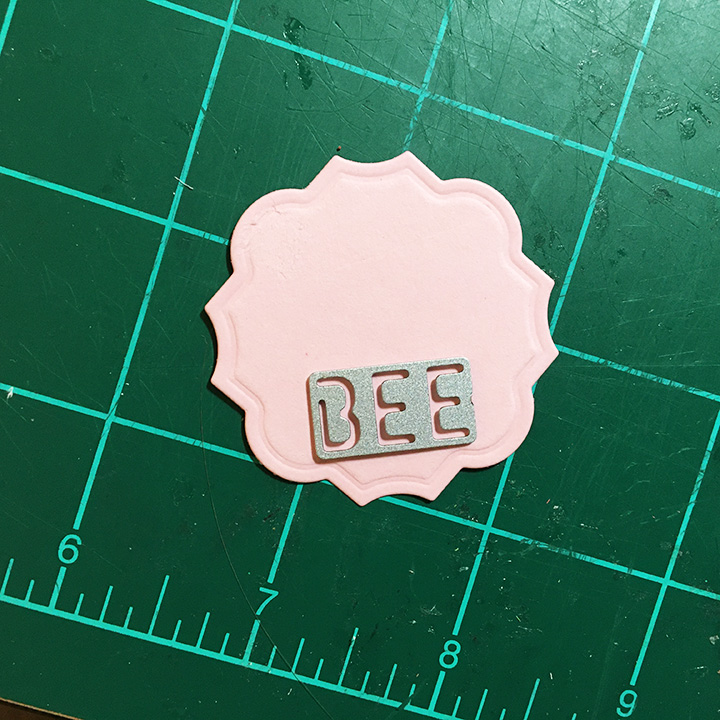
Sentiments: I cut an extra set of the weaving panels from the original basket set and folded the two-prong piece in half to glue behind the “T” piece to create a signpost to glue “ALL STAR” from the mini alphabet set. When I glued the signpost onto the back of the basket, I laid it out over the A7 envelope to know how tall I could make it and still fit into the envelope. The “Happy Birthday” used both the sentiment set and its matching shadow set cut from a contrasting color. (I used Glassy Accents on the “Happy Birthday” to make it have some shine which doesn’t show very well in the photos.) The shadow piece is popped up on two foam dots to give some dimension from the basket.

Bam Boxes: To animate the basket when it comes out of the envelope and pops into shape, two small “Bam Boxes” were used. (Assembly video) These easy to make rectangular boxes are powered by a small rubber band. (I used #8 size bands.) These go in diagonally opposite corners of the basket. Once glued in, the basket will only fold flat in one direction.

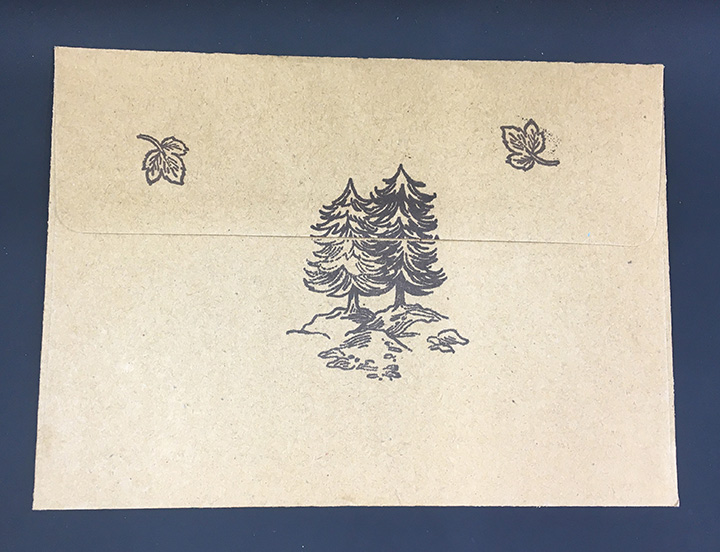
Envelope: As with all my cards that are sent in an envelope, I have stamped the back flap to hint at what’s inside. This is an A7 envelope.

Thank you for reading this blog post. Please like and leave comments 😊

Materials Used:

Dies

Papers

  • Colored Cardstock Scraps
  • Light-Weight Yellow and Orange Cardstock
  • A7 White Envelope

Pens, Inks & Stamps

  • Red Fine-Tipped Marker
  • Catherine Pooler – Premium Dye Ink – Spa Collection – Mandarin Spice
  • Fun Stampers Journey – Rubber Stamp – Winners -SS-0362

Miscellaneous

Poppin’ Hexagon Flower

Karen Burniston’s December 2022 release of new dies has a lot of pop in it. This hexagon flower card is a cross between an explosion box and a flower bud slowly opening.

To make cut eight of the largest hexagons in the Hexagons – Crosshatch die set and six hinges from the Tag Book Pop-Up set which are 1 x 2 inch rectangles. Fold the hinges at the score lines.

Pick one hexagon to be the flower center. Begin gluing one hinge to the underside of the center hexagon matching the edge of the hexagon to the lowest fold on the hinge. Glue a petal hexagon to the hinge matching the petal edge to the highest fold of the hinge.  Continue attaching hinges and petals to center hexagon until all sides are completed.  Glue the remaining hexagon over the hinges on the underside of the center hexagon. (This will be where a personal message can be written.)

Using the smaller crosshatch hexagon dies, cut decorative papers to attach to the petals and center hexagons.

Make a Mini Ball Pop-Up in yellow.  Glue to center hexagon. Make and attach a bee from Flutter Charms die set.

The sentiment uses both the Happy Birthday and its shadow die cut in the polka-dot paper. I used some Nuvo Aroma Drops to cover the words and to add some scent to this flower card.

For the sentiment band I used two pieces of decorative cardstock one piece long enough to wrap around the closed flower and the second piece cut to the width of the closed flower.

Thank you for reading this blog post. Please like and leave comments 😊

Materials Used:

Dies

Papers

  • American Crafts – The Color of Memories – 12×12 patterned paper -320473
  • Crafter’s Companion – Vintage Tea Party from Cardmaking & Papercraft magazine
  • Hot Off The Press – 12 x12 double-sided paper – Dotted Duos #2 – pink
  • Echo Park – Happy Easter by Laura Passage and Nicole Seitler – Easter Eggs
  • Pink lightweight cardstock
  • Yellow heavyweight cardstock

Miscellaneous

Patchwork Birthday Pop-Up

Quilts are cozy and so is this patchwork pop-up birthday card.

This card uses newly released Karen Burniston Hexagon Crosshatch dies to create both the patchwork both inside and outside. It also uses the pop-up mechanism from the Oval Frames Pop-up set. The sewing charms finish the card with decorative elements.

I wanted to create the effect of a flapping fabric quilt on the inside when the card opens. Cheese cloth is the inside patchwork’s backing. Glue stiffened the piece, but it has some movement. A white gel pen was used to add the stitching and sentiment of “Happy Birthday!”

Baker’s twine was threaded through the buttons from the charm set. The buttons are popped-up on foam dots to allow for motion from the twine.

The outside of the card is covered with large crosshatch hexagons and the overhanging pieces are trimmed and the scraps are used to fill in the other half hexagon edges of the card.

The front sentiment is one I used on another card that uses “word surgery” to create the word “sewing”.

I like to decorate the back panel of my cards using elements from the card.

As with all my cards that are sent in an envelope, I decorated the back flap with a birthday sentiment and a note that it was made with love.

Thank you for reading this blog post. Please like and leave comments 😊

Materials Used:

Dies

Stamps

  • Lawn Fawn – Clear Stamp – made with love
  • Waffle Flower – Clear Stamps – Sweet Sentiments – 271296

Inks

  • Stampin’ Up – Classic Stampin’ Pad – Cherry Cobbler and Crushed Curry

Papers

  • DCWV – 8.5 x 11 inches Printed paper – The Everyday Essentials Stack
  • Craft Consortium – A4vPremium Quality Papers – Double-sided Solids – Candy Christmas
  • A7 White Envelope

Miscellaneous

A Hunting Cabin Birthday

A cabin in the woods, good times with friends and family are what this card is about.

This simple log cabin scene pop-up card uses Karen Burniston’s new fireplace die set and a die designed to cut out trapazoids for pop-up balls, but here I use it to cut a 6-pane window.

Card Base with Window: Starting with a 10 x 7 inch piece of cardstock, scored and folded in half to create a 5 x 7 inch top folded card base. Position the Mini-Ball Double-Ups die so that it will look good from the outside as well as the inside next to the fireplace. The orientation of the widow will be up-side down from what is on the opposite side of the card. Die-cut the window with the card open on a die-cutting machine. (This is the only time you’ll need a wide platform die-cutting machine. If you only have a 6-inch-wide machine you can cut you card base in half, cut your window and glue a strip of paper as the card hinge.)

Cut “logs” from wood grain paper, ink the edges to create roundness and glue in place both on the outside of the card and the inside wall. Cut thinner strips of the woodgrain paper for the floor of the cabin, ink edges and glue in place alternating the seams as a real floor would be installed. (I had left over pieces of woodgrain paper from cutting Karen Burniston’s Landscape Rectangle Accordion that I used to frame the window.)

The back of the card is covered with leftover pieces from this and other cards made from the Craft Consortium papers In The Forest by Clare Therese.

Fireplace:  Watch the assembly video before assembling. Cut TWO of the fireplace fronts and emboss them both to show the bricks.  I tried several different crayons until I found a three color-mixed crayon in the Crayola True-to-Life series of crayons that blended brown, black and burnt orange to color the bricks.

I glued one of the brick fireplace fronts upside down as the back wall of the fireplace. Next is the hearth piece colored to be sooty sandstone that glued to the floor of the card.

I find it easier to attach anything hanging from the fireplace mechanism before I install the mechanism. After experimenting with how best to attach the pot from the Good Luck Charms set, I ended with gluing the charm circle loop to the part of the mechanism where the Santa boots would dangle. I glued some flames to the bottom of the pot to make the fire be all around the pot. The pot moves a little when opening and closing the card.

Glue together the fire and logs and then attach the cube-like pop-up strip into the card base and attach the fire. Glue the fireplace mechanism into card base. Then attach brick fireplace front and mantel. I use thin foam squares to attach the mantel to the brick fireplace front.

Accessories:  Fireplace tools and fender are from the Fireplace Extras 1 set. The lantern is cut from silver holographic cardstock colored with black permanent marker using the small lantern die from the Camping Charms set. The fish is also cut using a die from the camping charms and uses shimmer cardstock with distress inks. The metal plate the fish is on uses the circle from the snowman set. The rugs are from the oval crosshatch set and the deer head is the Christmas animals set on a plaque cut from the smallest crosshatch labels’ set covered in Glossy Accents. The only die that is not Karen Burniston is the fishing rod by Tayored Expressions.

Card Front:  Large tree is from the Christmas trees pop-up set with the center tree inked with Mowed Lawn Distress ink. The inked small trees are from the evergreen pivot panels set. The wee birds are from the tiny trees pop-up set and the turkey is from the feathered animals set.

Sentiments:  “Happy Birthday” is a single die while “DAD” is double cut from the large alphabet dies from green and black and then slightly over-laid for a shadow effect.

Envelope:  A brown kraft paper envelope completes the card with stamped images from the companion stamps of the patterned papers by Craft Consortium.

Thank you for reading this blog post. Please like and leave comments 😊

Materials Used:

Dies

Stamps

  • Craft Consortium – Clear Stamps – In The Forest by Clare Therese

Papers

  • Craft Consortium – Premium Quality Papers – 12” x 12” – In The Forest by Clare Therese
  • Craft Consortium – Premium Quality Papers – 6” x 6” – In The Forest by Clare Therese
  • American Crafts – Peebles – Spooky – 12 x12 Double-sided – Candy Toss – 736981
  • Colored Cardstock Scraps
  • Park Lane – 6×6 Paper Pad – Silver Holographic
  • 100 lb. Yellow cardstock 7 x 10 inches
  • American Crafts- A7 Envelope – Brown Kraft Paper

Pens, Crayons, Inks & Coatings

  • Sharpie – Permanent Marker –Fine Point – Black
  • Gelly Roll 08 Pen – White
  • Pigma Micron 05 – Archival Ink .045mm – Dark Brown
  • Crayola – True to Life Crayons -Grand Canyon
  • Ranger – Tim Holtz – Distress Ink – Mowed Lawn, Fired Brick, Black Soot, and Walnut Stain
  • Ranger – Glossy Accents
  • Nuvo – Aqua Shimmer – Glitter Gloss
  • Stampin’Up – Classic Stampin’ Pad – Early Espresso

Miscellaneous

A Riley & Simon Birthday Flip-Book Pop-up

It’s Stamp-tember at Simon Says Stamp and today it’s Riley & Co’s turn to team up with them.

Moose Riley and pup Simon have decided to do an old-style, silent video using signs to give some birthday greetings which pop-up when you pull the tab.  They wanted to show off all their dress-up accessories in the stamp set, so each image has different accessories – from balloons to glasses, ties and hats.

My card base is a top fold mini slimline card, I cut in two pieces (3×6 inches and 3×6 ¼ inches) scored and folded the longer piece into a tab to be glued over the other piece.

To make the scenes change, I’ve use Karen Burniston’s Waterfall Card die set which makes it very easy to create a flip-book style card without having to do a lot of math. (Watch the assembly video before assembling.)

I’ve added two small mini-pop-up cubes behind each image. You can use any of the small pop-up tabs from other sets such as the Frame Pull-Pop-up. (I cut mine from a thin strip of matching paper about ¼ x 1 ¼ inches, folded into five sections of ¼ inch long. Glue fifth section as a tab to make cube.)

I’ve added a zig-zag border to one of the pages to help hid the small bit of moose antler that sticks out on the left side.

Leftover dress-up accessories were used to decorate the envelope flap hinting at what’s inside.

Thank you for reading this blog post. Please like and leave comments 😊

Materials Used:

Dies

Papers

Stamps

Miscellaneous

Pirate Treasure

Lost treasure, pirates, tropical islands, “Arrrr…,” stories of Long John Silver and Jack Sparrow and International Talk Like a Pirate Day, which happens to be today, September 19, 2022, are what today’s card is all about. (And maybe a little Snoopy too.)

I just love little Skellie, the skeleton from Karen Burniston’s new fall 2022 release of dies. Influenced by the many talented designers on KB’s design team, who have used Skellie as a variety of characters, I had to have him as a pirate popping up in a treasurer chest of gold coins, sword aloft. The Tiny Accessories Set 1 provide the eye patch, sword and head scarf to turn Skellie into a pirate.

The treasure chest is its own set of dies that play well with the Parcel Pop-Up mechanism. I viewed both the assembly videos for the Treasure Chest and the Parcel Pop-Up before making the card. Having worked with 19th century traveling trunks, I know that many had decorative paper lining the inside of them, so I chose a patterned kraft paper using the plain side to be wood embossed side (I used the ink the die method from Karen’s video with a brown ink cube) and the patterned side for inside the trunk. The trim is a mirrored brown cardstock with the raised circles colored with a fine-tipped permanent marker.

For the front of the card, I used the side palm trees from the Palm Tree Pop-Up and the wavy sand from the Long Nature Edges set. The Long nature Edges stitched hills die cuts two sets of hills, so the second piece is used inside the card instead of the sand pile die that comes with the Treasure Chest set. Shells inked pink from the Tropical Scene die set complete the front of the card and a starfish on the back of the card for fun. The small island with palm trees inside the card are also from this set.

I’ve been wanting to use my pirate sentiment stamps for some time, and this was the card for them. The “Happy Birthday” that comes with the stamp set is small, so I went with KB’s larger sentiment die and shadow die.

Thank you for reading this blog post. Please like and leave comments 😊

Materials Used:

Dies

Papers

  • Echo Park Paper Co. – 6×6 Paper Pad Double-sided Papers – Paradise Beach by Michelle Coleman
  • Tan, brown, green and white cardstock scraps
  • Gold foiled packaging scraps
  • American Crafts – 5 x7 Kraft cards & A7 envelopes

Stamps & Ink

  • Crackerbox Stamps – Arrr Pirate Sayings set of 4
  • Memento – fade-resistant Dye Ink – Tuxedo Black
  • Ranger – Tim Holtz – Distress Ink – Walnut Stain, Antique Linen and Abandoned Coral

Miscellaneous

A Gardening Birthday

The love of being outdoors and helping plants grow is what being a green thumb is all about. This is a birthday card for a lovely lady whose happy place is working with her plants.

Using Karen Burniston’s August 2022 release of the Label Charm Pop-Up die set makes it easy to add a hanging water can charm from her previously released Garden Charms set.  The double-sided papers are all from Craft Consortium’s Hackney & Co.’s Gardeners Delight collection. Watch an assembly video for a charm pop-up card before starting the card.

For the card base I used an 11 x 4.25-inch piece of patterned paper (strawberries on front and dark gray with flowers on the back.) With the pivot label dies, I like to use double-sided tape to adhere the decorative backing paper. If you put tape around the edges and pull back the tape’s backing paper at the corners only, you can re-position the decorative backing paper until it fits and then pull the all the tape’s backing paper.

Fold the card base in half and place the pivot label die in the center of the card front. Tape in place with removable tape and open the card base out to die-cut.  (Save the cut-out waste pieces to use as decorations for other parts of your card.)

Cut three of the label die from the patterned paper. Tape two of the labels together and then die-cut the oval from it. Trim the tab off one of the oval frames. Glue the tab from the solid label to one of the oval frames then glue the other oval frame to cover up the tab.  Punch a hole for the charm to hang from (The die has a hole to use a stencil.) I reverse cut the watering can to pour to the right from silver card stock. The metal jump ring I used has a rhinestone dangle. I find it easier to attach the jump ring with the charm to the oval frame before I glue the label and oval frame into the card.

Now to decorate the card. I had garden charms left from another project where I had “dirtied-up” the tools and gloves with brown ink dabbed on with a small finger sponge dauber.  The tiny hearts are from the heart eyeglasses in the Tiny Accessories 2 set. The plant is from the Garden Charms set. I used the cut-out waste pieces from the front pivot label to frame the inside label with slicing patterned with solid color pieces.

I felt the inside of the card need more decorative elements, so I cut strips of flowers from the Long Nature Edges 2 set from white and used yellow Nuvo drops to make them into strawberry blossoms. (Remember to let the Nuvo Drops dry at least 16-24 hours before gluing them into the card. They will stick to each other until totally dry.)

The Sentiments come from the Garden Charms set and Word set 2.  The various white labels are part of the Label Charms Pop-Up set as are the white outline flowers on the front of the card.

Thank you for reading this blog post. Please like and leave comments 😊

Materials Used:

Dies

Papers

Inks

  • Ranger – Tim Holtz’s Distress Ink – Vintage Photo
  • Fine-tipped green marker

Miscellaneous

Sweet Queen Bee

This fun easel card was inspired by Sharon-Elaine Jones’s floral wreaths and spinner cards on Craftworld.com, Sandy Diller’s recent crosshatch label and tag book card and a challenge to myself to make an interactive card with Karen Burniston’s fancy shaped labels that didn’t involve them being used as flat labels.

This spinning honeycomb with bees in a floral wreath easel card, uses the label dies in three different ways. The largest dis where used to create the wreath and its white inner frame. The smallest die was cut four times, each folded in half and glue together around a string. The second smallest die was used to cut the raised “Queen BEE” label that acts as the easel stop.

Using Karen Burniston’s Flutter Charms die set cut enough pieces for two bees and four honeycombs. Cut two of the largest label crosshatch die in pink. From Karen’s tag book die set cut two of the tags and one of the rectangle spine piece in pink.  

Cut from black the words “Queen” from Karen’s Word Set 5 and “sweet” from Word Set 6. Cut “Queen” a second time from orange and “sweet” from white. Ink the white “Sweet into a dark pink with Distress Ink. Glue the pair of words to create shadows or highlights by off-setting the words slightly.

Cut eight of the daisy flowers and four of the smaller butter cup flowers. Cut four pairs of the bee wings in green for leaves. Glue two of the daisy flowers one on top of the other alternating the petals. Repeat with remaining daisy flowers to end with four flowers.  Add flower centers using contrasting colors of Nuvo drops. Keep the flowers on a flat surface for at least 12 hours until they are hardened. (I was glad I had made a few extra as I accidentally flatten one of the orange daisy centers before it had hardened.)

Trim off the excess honeycomb to leave a 6 petal flower-like honeycomb that will fit inside the small yellow labels.

Glue honeycomb flowers to yellow labels.

Fold labels in half.

Glue two labels together on one folded half. Repeat with other two labels.

Glue piece of twine in the middle of the joined label halves.

Glue the other half of label to sandwich the twine in the middle. Let dry. Glue the egg shapes to the back of the bee bodies. Trim the charm circle off antenna.  Glue vellum wings to the bee body. (See assembly video.)

Position one of the large pink labels on the front of a tag. Using a pencil trace the outline of the tag onto the back of the label.

With removable tape, attach the tag to label.

On the front of the label, tape the third largest die to center of label.  Die cut through both label and tag. Using the first cut label as a guide to cut the second label’s center out.

I had to photoshop this picture to let you know to cut the entire label out and not partial as I did for my original picture.)

Fold the tag book so that the cut-out is fold in half. put glue only below the fold on the tag book piece. Glue the large label with pencil markings to the wreath to the front tag.

Glue the two tags together with the rectangle spine piece. (You can review the tag book assembly video for tips in assembling the book.)

Spread glue on the inside of pink wreath that is glued to card base. Stretch the twine centering the honeycomb with the bees glued to it. Using small pieces of permanent tape, adhere the twine in place making sure the twine is moderately taunt. Place the top pink wreath in place and press together make a tight seal to the two layers of wreath especially around the twine.

(Tip: Glue the bees on opposite sections of the honeycomb labels to have balanced weight. I made the mistake of gluing them both on the same side and it spins a bit lopsided.)

For the easel stop, cut two of the second smallest label dies once in pink and once in black. Die cut the word “BEE” from Word Set 5 in the pink label. Glue the black label to back.

I used half of the label that I cut from the large label, fold in half and half again to use as the spacer under the Bee label. (You could also use foam tape or foam dots.)

The card folds flat to fit into an A2 size envelope which I stamped the back flap with a bee in flight from Apple Blossom in black ink.

Thank you for reading this blog post. Please like and leave comments 😊

Materials Used:

Dies

Stamps

  • Apple Blossom – Bee Happy stamp set from Die-Cutting Essentials magazine issue 89

Inks & Pigments

  • Ranger – Jim Holtz Distress Ink – Saltwater Taffy
  • Memento Fade -Resistant Dye Ink – Tuxedo Black

Papers

  • Heavy weight pink cardstock from my stash
  • Yellow, orange, green and black cardstock scraps
  • White-gold shimmer paper scrap
  • Clear vellum

Miscellaneous

You’re the G.O.A.T.

While being told that you’re the G.O.A.T. may sound bad, it really means You’re the Greatest Of All Time. In my family of sports players, being told you’re the G.O.A.T. after a game is common, so letting Dad know he’s the G.O.A.T. is a fun thing. This card could be used for birthdays or Father’s Day.

In challenging myself to use Karen Burniston’s Little Labels Pop-up in a vertical position, I saw the labels as shelves for trophies. Some of my inspiration comes from Sam Calcott of Mixed Up Crafts when she makes her tower cards.

I started with a 7 x 8 inches rectangle of dark blue heavy cardstock.  The side panels are made up of two panels per side. Because of my limited amount of the dark blue cardstock, I cut two panels of 3.5 x 8 inches and two more panels 4 x 8 inches. (I recommend cutting four panels of 4 x8 inches rather than having to use washi tape to attach the front panels.) Score the 4 x 8 panels at 3.5 inches to make a long tab.

Cut decorative panels ¼ inches smaller thane the base panels. Glue side panels to large base. Adhere decorative panels to card base inside panels.

If you haven’t already die-cut your inside decorative labels and trophies do so now. (I find some of the best, thick foiled silvers and golds are on personal care and food packaging such as cookie/biscuit packets.)

Also, cut and assemble all letters need for the inside sentiment. (I sort mine in a tiny bag, so I don’t lose any letters.) Die cut two of the Little Labels Pop-ups. Space out the placement of the pop-up labels and sentiment. (While I adhered my sentiment after I installed the pop-up labels, it might be easier to add the letters first and then the pop-ups.)

To adhere the letters, line them up on a grid background and place removable tape over them. (I used Post-it Note yellow tape.) I trimmed the tape down to make it easy to line up the bottom edge with the pencil line I drew on the card. I added glue to the back of one word’s letters and then placed them onto the card, pressed down to adhere and then peeling off the tape.

I watched Karen Burniston’s assembly video before I glued in my pop-up labels. (I find reviewing the videos help me before I make a mistake using my special papers.) You need at least 3.5 inches of width to close one pop-up labels panel, unless you stager the panels, you will need at least 7 inches width to close the card.  Add decorations to pop-up labels.

If you cut all the side panels at 4 x 8 inches, then fold the ½ inch tab and glue panel to other side panels. If you end up needing to tape your front panels, use the widest washi tape you have. Mine was 2 inches wide.

I used Karen Burniston’s Mini Alphabet for the inside sentiment and her original alphabet for the larger outside letters as well as parts taken from two other sentiment dies – “You’re Sweet” and “Enjoy the Ride.” I saved the tiny circles and scraps from the arms and lid of the trophies to decorate the front of the card. The goat is also a Karen Burniston die.

The belly band or belt that holds the card closed is made from scrapes and leftover pieces from other projects. This is intended as a presentation card to be hand delivered as it is too big for most standard size envelopes.

Label on back is a place to add a personal message.

Thank you for reading this blog post. Please like and leave comments 😊

Materials Used:

Dies

Papers

  • Heavy weight dark blue and pale blue cardstock
  • Patterned papers from my stash
  • Silver and gold packaging
  • Holographic silver and gold scraps
  • Black and white cardstock scraps
  • White gold shimmer cardstock

Miscellaneous