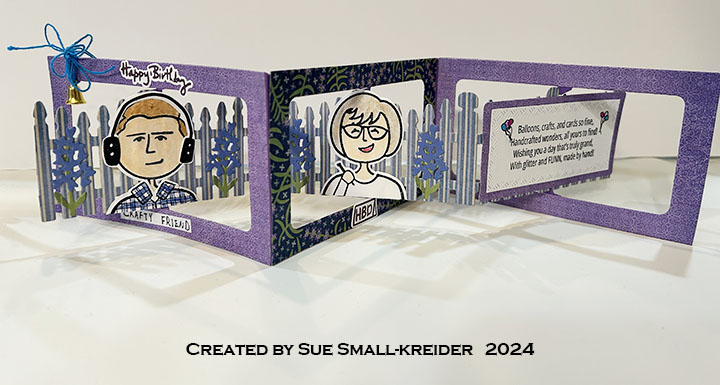
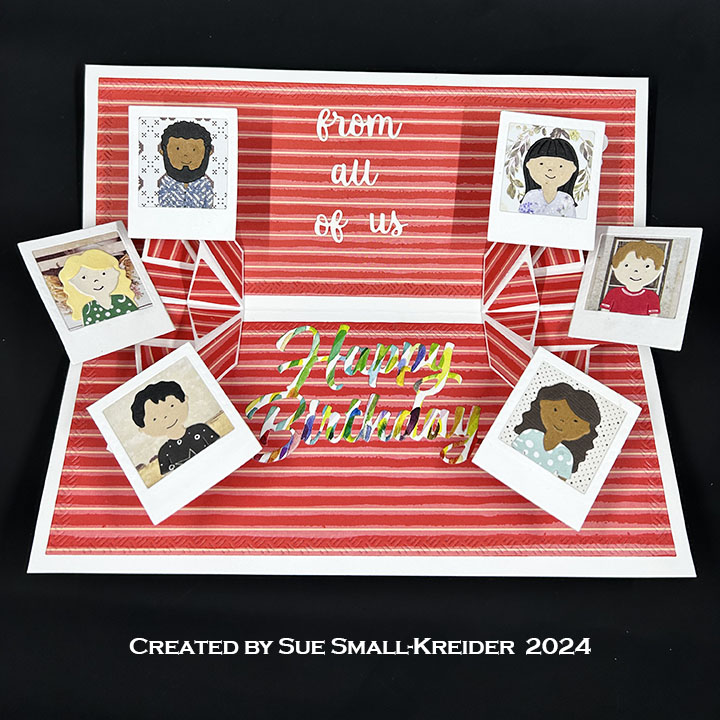
It’s Sneak Peek Week for Karen Burniston’s January 2025 release of eight new dies and four new clear stamps. For this Birthday card I used several of the new sets including: Popcorn, Paper People and Triple Platform Pop-Up die sets and the Popcorn Phrases clear stamp set. The new release will be available on January 27, 2025.
Watch the video below to see how this card was made.
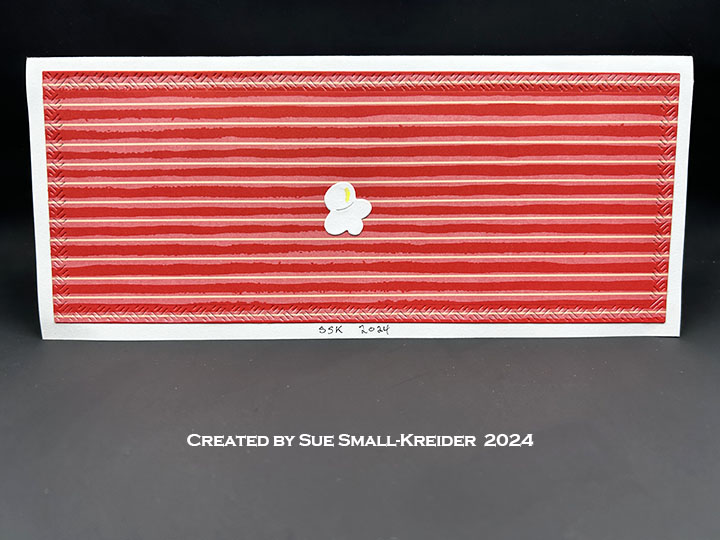
Cardbase: I started with a white 65lb cardstock rectangle that was 7.5 x 8.75-inches and folded it in half to form a top-fold horizontal 3.75 x 8.75-inch slimline card. Next, I cut four of the largest die in the Long Rectangles – Crosshatch set from striped red paper and cover each of the card panels.

Snapshots of People: Using the Paper People die set create six people from the waist up. Cut six white photo frames and back rectangles using the Photo Collage Pop-Up die set. Follow the instructions in the video on how to make the snapshots of people and how to install them onto the pop-up platforms.
Triple Platform Pop-Up: Using the Triple Platform Pop-Up die set, cut two of the large mechanism die from lightweight white cardstock. Cut six sets of the parallelograms and four sets of the triangles from pattered paper and two additional sets of parallelograms from white cardstock. Watch the video for how to assemble and install the mechanisms into the cardbase.

Sentiments: There are three sentiments on the card – “Hope your Birthday is poppin”, “from all of us” and “Happy Birthday.” The first was stamped using the Popcorn Phrases clear stamp set with black ink onto white cardstock and die cutting it using the fancy stitched label in the Triple Platform Pop-Up die set. The second phrase was die cut from the Word Set 18 – Connectors while the third was cut using the Happy Birthday die. All the die-cut words were cut from upcycled cardboard packaging/junk mail. Popcorn kernels (highlighted with a yellow marker) were added as decorations to the front and back of the card from the Popcorn die set.
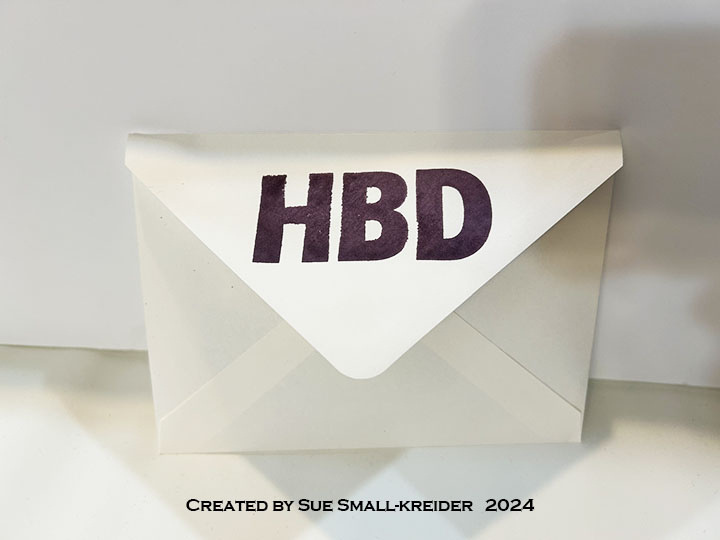
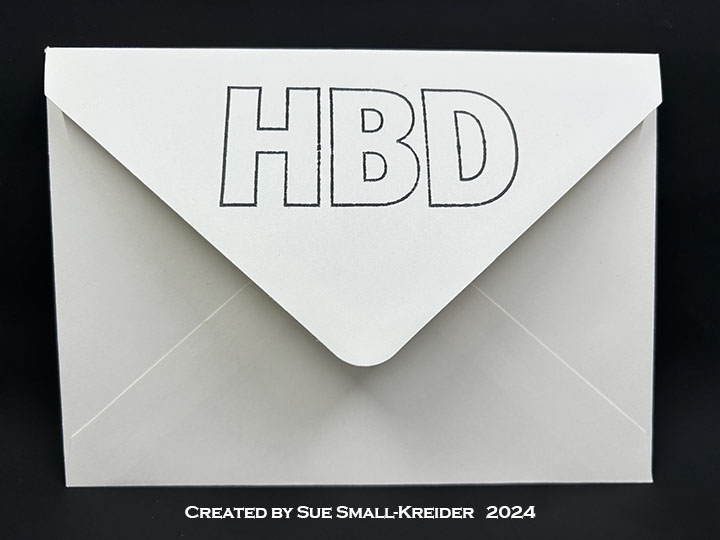
Envelope: The card fits into a #10 business size envelope which was stamped with another sentiment from the Popcorn Phrases stamp set – “You make everything Butter!”

___________________________________
Thank you for reading this blog post.
I hope this inspires you and makes you smile.
Please like and leave comments 😊
Follow my YouTube channel, Instagram and Pinterest as well.
___________________________________
Materials Used:
Dies
- Karen Burniston in cahoots with Riley and Company – Triple Platform Pop-Up – 1300
- Karen Burniston in cahoots with Riley and Company – Paper People – 1299
- Karen Burniston in cahoots with Riley and Company – Popcorn – 1295
- Karen Burniston in cahoots with Riley and Company – Photo Collage Pop-Up – 1098
- Karen Burniston in cahoots with Riley and Company – Happy Birthday – 1030
Stamps
Papers
- Recollections – 8.5×11 65 lb. Cardstock – White
- Stampin’ Up – 12×12 Specialty Designer Series Paper – Marbled Elegance
- Assorted Colored and Decorative Paper Scraps
Ink
- Memento – Fade Resistant Dye ink – Tuxedo Black
- Pigma – Mircon 01 Fine Tip Pen – Black
- Stampin’ Up – Stampin’ Blends Marker – Light Daffodil Delight
Adhesives
Tools
- Die Cutting Machine
- Bone Folder
- Stamping Platform
- LDRS – Stampendable Stamping Tool
- Stamping Blocks used as paperweights
- Scissors
- We R Memories – QuickStick