Here is a quick summary of cards using the new Karen Burniston Whirly Wheel die set.
(HINT: Click on the photo to go to the tutorial on how to make it.)
________________________
Thank you for experiencing this blog post.
I hope this inspires you and makes you smile.
Please like and leave comments 😊
________________________
Disclaimer: Karen Burniston products are provided free of charge by the manufacturer for review and use. All other items were personally purchased. Compensated affiliate links used where or when possible, meaning I will receive a small percentage commission from these manufacturers at no cost to you. This will allow me to add more content to my YouTube channel and help out a lot. Thank you.
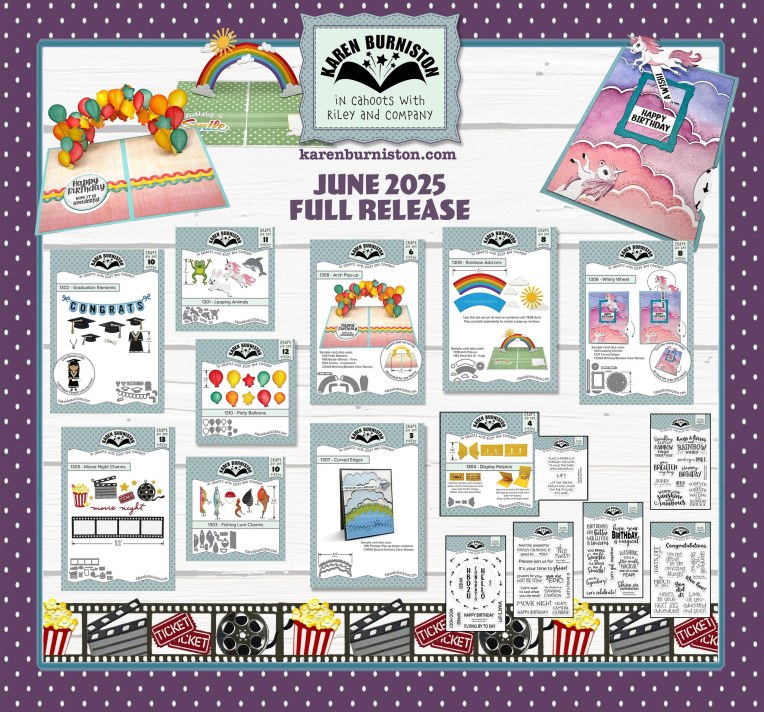
Welcome to our Karen Burniston Products – KB Riley LLC June Release Blog Hop. The Design Team have come together with Karen today for a fun blog hop to celebrate the release of 10 new dies and 5 new stamp sets. Sneak peeks of the new release started last week, and the dies are available to order NOW!(Giveaway details at the end of post.)
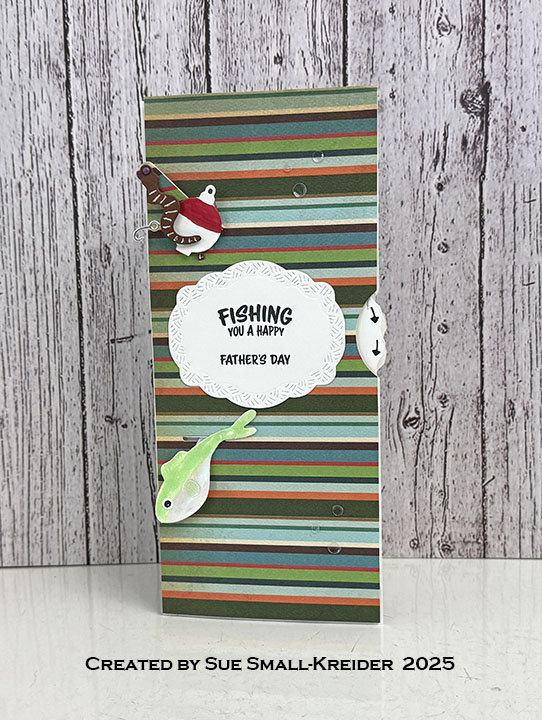
For my double Whirly Wheel Father’s Day card, I used several of the new dies including the Fishing Lures Charms and Whirly Wheel.
Watch the process video to see how I made this card.
Cardbase: From white 100 lb cardstock cut a 4×8.75-inch rectangle and a 3.75×8.75-inch rectangle. Score the white 4×8.75-inch rectangle down the long side .25-inch from the edge and fold up as a tab. From patterned cardstock cut a 3.75×8.75-inch rectangle. Assemble as shown in video above.
Cut decorator panels of patterned cardstock using the Long Rectangles – Crosshatchdies and glue inside the card.
Worms and Fish:Cut the largest fish lure and tail of one of the other fish lures from the Fish Lures Charms die set. Glue tail onto large fish and trim excess off the tail piece. Trim off loop at fish’s mouth. Color with glitter brush markers. Cut eight worms from brown cardstock. Add details with a white gel pen. Cut one large silver hook and add to one worm for the card front.
Double Whirly Wheels: Cut two wheels and two large thermometer arms from sturdy cardstock using the Whirly Wheel die set. Cut one washer form a sturdy cardstock. (Color doesn’t matter as it will be hidden.) Using stencil feature, ink on arrows on wheel. Assemble wheels as shown in video above.
The key to having double wheels is to glue the washers of each wheel to a separate front panel with a thin sheet of copier paper sandwiched between the two wheels to prevent any catchpoints.
Can of Worms: Cut A 3×3.5-inch piece of silver mirror cardstock. Score the backside of the piece at .5, .75, 1, 1.25, 1.5, 1.75, 2, 2.25, 2.5 inches. From the same cardstock, emboss and then cut out a circle using the Circles – Crosshatch dies as shown in the video above. Assemble as shown in the video. Decorate with worms.
Sentiments: The sentiments were stamped in black using the Fishing stamp set. The two smallest fancy label dies in the Rectangles and Labels – Crosshatch set were used for the sentiments.
Envelope: The card fits into a #10 business envelope.
Disclaimer: Karen Burniston products are provided free of charge by the manufacturer for review and use. All other items were personally purchased. Compensated affiliate links used where or when possible, meaning I will receive a small percentage commission from these manufacturers at no cost to you. This will allow me to add more content to my YouTube channel and help out a lot. Thank you.
To celebrate the release Karen Burniston and each of the Karen Burniston – KB Riley LLC Design Team members will be giving away a $25 Gift Certificate to some lucky person who comments on our blog posts, so make sure you join the hop and comment on everyone’s blog post. Winners will be randomly chosen from ALL of the blog hop comments received on our blog posts by Monday, 23rd June 2025. Lots of chances to win some goodies, so just leave a comment on this post or any other blog hop posts to enter! Don’t forget to leave some way for us to contact you, in case you are a lucky winner!
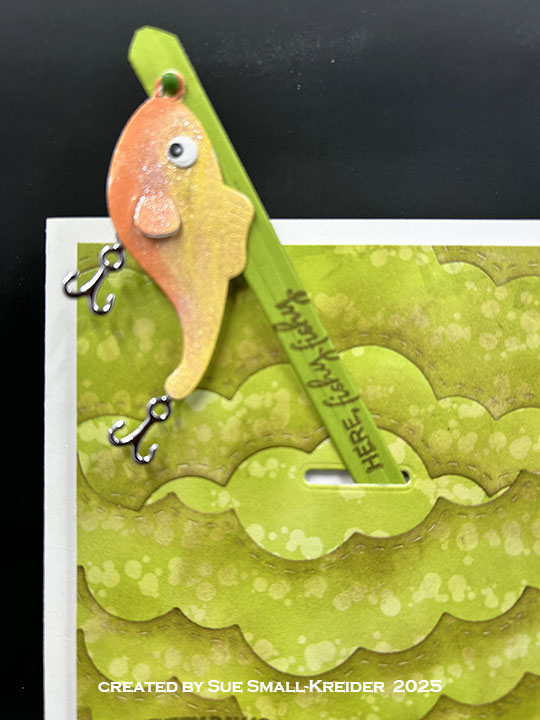
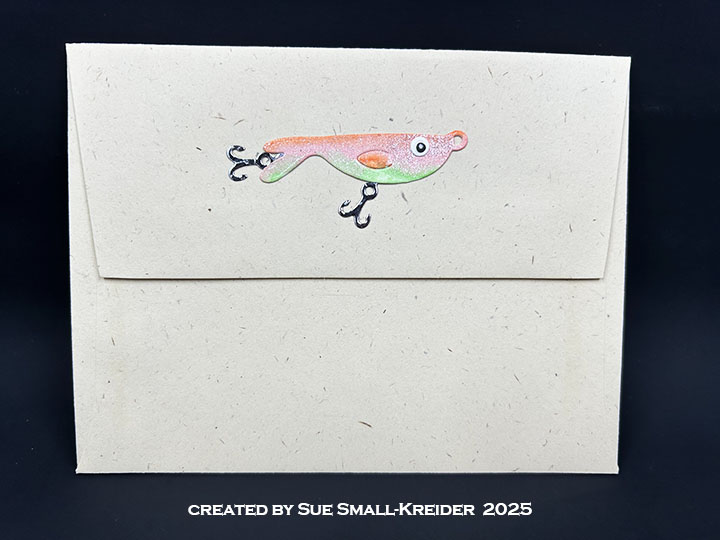
It’s Sneak Peek Week for Karen Burniston’s June 2025 release of ten new dies and five new clear stamps. For this bobbing fishing lure Father’s Day card I used several of the new sets including: Fishing Lure Charms, Whirly Wheel and Curved Edges.
Watch the process video to see how I made this card.
Cardbase: An 5.5×8.5-inch sheet of light weight white cardstock was scored and folded into a side-fold 4.5×5.5 size card. Watch the video above to see how I cut the half circle into the card.
Rippled Background Panel: Uses a 4.25×5.5-inch lightweight cardstock panel. (Could be cut down to 3.75×5-inches.) Cut seven 2-inch wide strips of patterned paper with the cloud die from the Curved Edges die set. Ink the edges with brown ink. Glue on as instructed in video above.
Bobbing Fishing Lure: Cut one large fish lure and one tiny circle eye piece from white cardstock using the Fishing Lure Charms die set. Cut two double hooks from silver. Color and assemble fishing as shown on packaging.
Whirly Wheel: Cut one wheel and one large thermometer from sturdy green cardstock using the Whirly Wheeldie set. Using stencil feature, ink on arrows on wheel. Assemble wheel as shown in video above.
Sentiments: All the sentiments were stamped using Karen Burniston’s Fishing stamp set with dark brown ink.
Envelope: The card fits into an A2 (4.25x 5.5-inches) size envelope with a die-cut fishing lure from the Fishing Lure Charms glued to the back flap.
_________________________
Thank you for experiencing this blog post.
I hope this inspires you and makes you smile.
Please like and leave comments 😊
_________________________
Disclaimer: Karen Burniston products are provided free of charge by the manufacturer for review and use. All other items were personally purchased. Compensated affiliate links used where or when possible, meaning I will receive a small percentage commission from these manufacturers at no cost to you. This will allow me to add more content to my YouTube channel and help out a lot. Thank you.
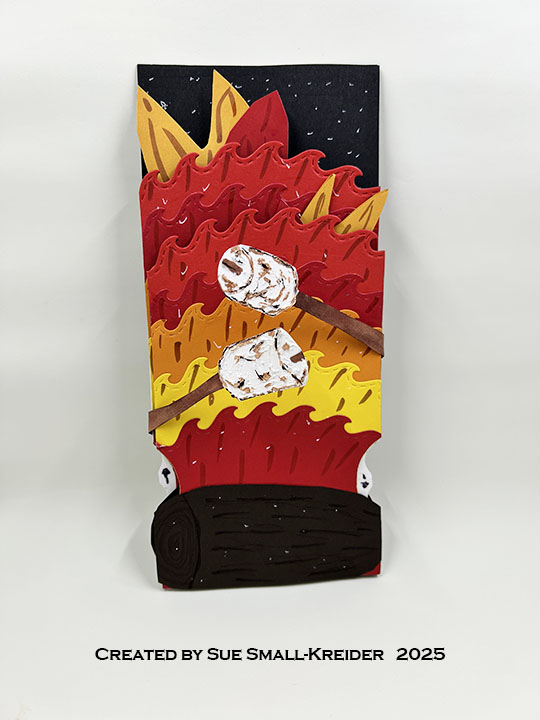
Papers • Stampin’ Up – 12×12 Double-Sided Designer Series Paper – Stargazing • Bazzill – 8.5×11 Smooth Cardstock – Easter Grass • White Cardstock • Fraser Papers for William House – A2 Envelope – Genesis Text Husk Smooth
Ink • Memento – Fade Resistant Dye ink – Rich Cocoa • Nuvo – Aqua Shimmer – Glitter Gloss • Ranger – Tim Holtz – Distress Ink – Gathered Twigs • Sakura – Gelly Roll Pen – Medium – White • Scrapbook.com – Glitter Brush Marker – Coral, Frosty Blue, Mint Green, Pretty Pink, Sunshine Yellow • Scrapbook.com – Brush Marker – White
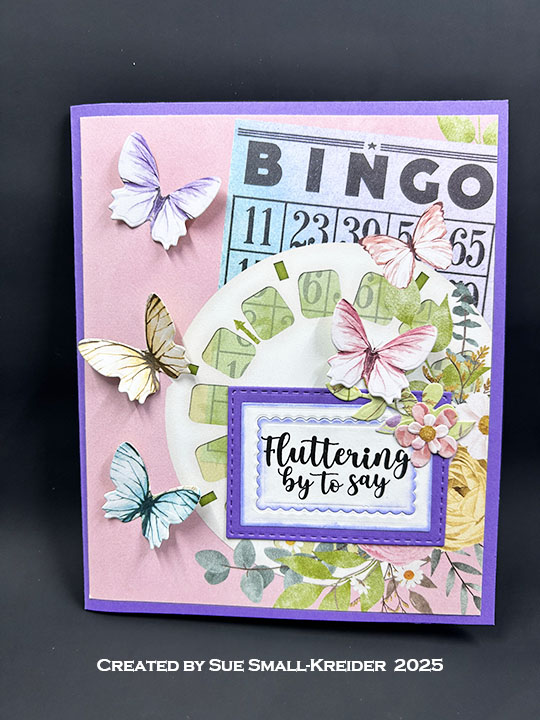
I started a new challenge for 2025 – the ATC calendar challenge. With a group of crafty friends, we are making a new image on a 4.25×5.5-inch calendar card for each month.
Disclaimer: Karen Burniston products are provided free of charge by the manufacturer for review and use. All other items were personally purchased. Compensated affiliate links used where or when possible, meaning I will receive a small percentage commission from these manufacturers at no cost to you. This will allow me to add more content to my YouTube channel and help out a lot. Thank you.
Disclaimer: Karen Burniston products are provided free of charge by the manufacturer for review and use. All other items were personally purchased. Compensated affiliate links used where or when possible, meaning I will receive a small percentage commission from these manufacturers at no cost to you. This will allow me to add more content to my YouTube channel and help out a lot. Thank you.
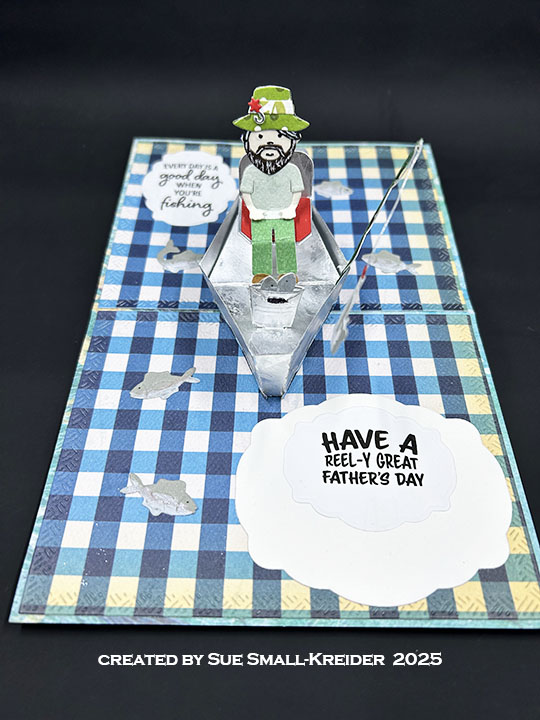
It’s Sneak Peek Week for Karen Burniston’s January 2025 release of eight new dies and four new clear stamps. For this Father’s Day card I used several of the new sets including: Paper People and Fishing Boat Add-Ons along with the previously released Boat Pop-Up dies and the new FishingPhrases stamps. The new release will be available on January 27, 2025.
Watch the video below to see how this card was made.
Cardbase: I started with an underwater pattern cardstock rectangle that was 5.5 x 8.5-inches and folded it in half to form a top-fold horizontal 4.25 x 5.55-inch slimline card. Next, I cut two of the largest die in the Rectangles – Crosshatch set from blue and white checkered paper and covered the inside panels. The outside panels used journaling cards from the coordinating paper collection.
Fisherman: Using the Paper Peopledie set cut one figure from flesh colored paper. (It is best to use your thinnest cardstock and decorative papers as the figure will need to be covered on both front and back from the waist up.) Cut hair and clothes to suit your card recipient. The hat with a fishing lure attached comes from the Fishing Boat Add-Ons set.
Fish and Fishing Rod: The Fishing Boat Add-Ons set includes dies to cut three different fish as well as a pail with a handle and a fishing rod, fishing line and three hooks. (It also includes an outboard motor, motor mount, and a hat.) I cut all the fish twice for this card from a greenish gray cardstock and colored the fish with glitter brush makers. The rod I cut twice from a dark green cardstock and the line once from silver cardstock. the line is sandwiched between the two layers of the rod. Take two of the jumping fish and glue them back to back except at the mouth. Feed the fish onto the hook and glue shut. The pail I cut twice from silver cardstock and the handle just once. (The handle knob is colored with a black marker.) There is a slot at the top of the pail that you can slide the small fish through.
Boat Pop-Up: Using the Boat Pop-Up die set, cut one of the boat’s hull or sides and one of the boat deck from matte silver cardstock (or use my trick of dulling the shine with dried layer of glue.) Cut two of the tabbed mechanism strips from a lightweight cardstock. (Assembly video for Boat Pop-Up set is at the bottom of the linked page.) Follow the directions to assemble boat except replace the rowboat seat with the fishing seat and use the pail of fish to cover front tab. Attach outboard motor using the slotted mount strip. No need for oar locks or oars.
Sentiments: There are two sentiments on the card – “Every day is a good day when you’re fishing” and “Have A Reel-y Great Father’s Day.” Both were stamped using the Fishing Phrasesclear stamp set with black ink onto white copier paper and die cutting with the smallest fancy label in the Rectangles and Labels- Crosshatch set.
Envelope: The card fits into an A2 size envelope which was has the last of the die-cut jumping fish glued to the back flap.
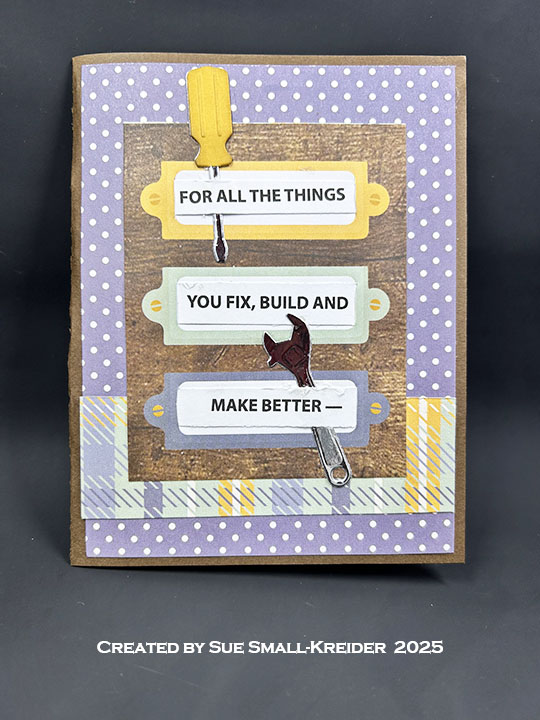
This is the third in a series of cards that have shelves as the main element of the card.
Today’s card is a tri-fold house card with a cozy room scene with a bookcase made using dies by My Favorite Things.
Watch the process video to see how I made this card.
Cardbase: The cardbase is a slimline size made from a 7 .75×8.5-inch rectangle folded in half and a 4.25×6.5-inch rectangle. Watch the tutorial video to see the details of the cardbase assembly.
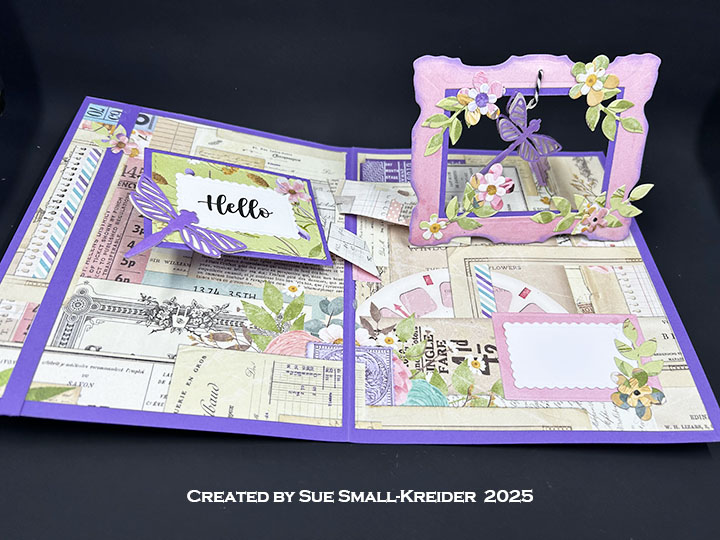
Sentiment: The “hello” on the card front is a die in the Concord & 9th On Display Pop-Up die set. There is a third panel that a personal message can be added to the card.
Envelope: The card fits into a #10 business envelope. The back flap is decorated with a coffee mug from the My Favorite Things Be Your Own Barista die set.
___________________________________
Thank you for experiencing this blog post.
I hope this inspires you and makes you smile.
Please like and leave comments 😊
___________________________________
Disclaimer: Karen Burniston products are provided free of charge by the manufacturer for review and use. All other items were personally purchased. Compensated affiliate links used where or when possible, meaning I will receive a small percentage commission from these manufacturers at no cost to you. This will allow me to add more content to my YouTube channel and help out a lot. Thank you.
Materials Used:
Dies
Concord and 9th – Metal Dies – On Display Pop-Up
My Favorite Things – Premium Steel Die – Be Your Own Barista
My Favorite Things – Premium Steel Die – Décor and More
My Favorite Things – Premium Steel Die – Fundamental Furnishings
My Favorite Things – Premium Steel Die – Picture Window
My Favorite Things – Premium Steel Die – Potted Plants
My Favorite Things – Premium Steel Die – Room Decor
My Favorite Things – Premium Steel Die – Take A Seat
It’s time for the July 2024 Karen Burniston Design Team Challenge with the theme of SET SAIL.
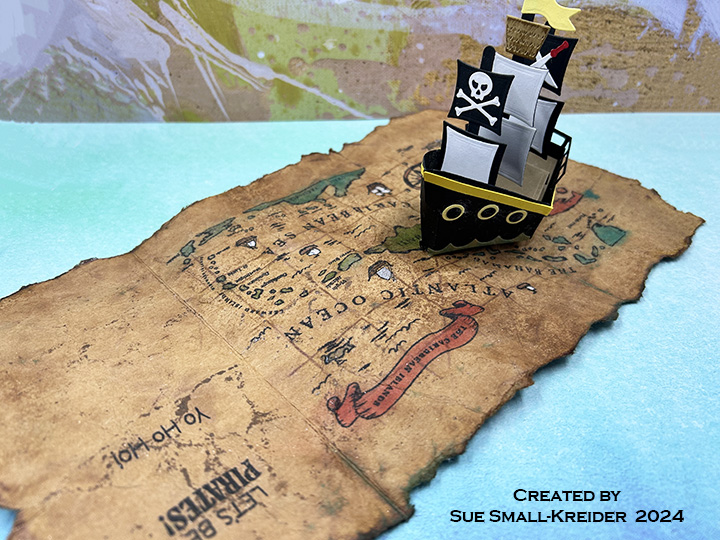
“Let’s Be Pirates” is the theme of this card made withKaren Burniston’s June 2024 release ofnew dies andclear stamps. For this card (which could be used for birthdays, Father’s Day, and just for fun), I used several of the new sets including: Pirate Borders, Pirate Ship Add-Ons and Boat Pop-Up die sets and Pirate Sentiments clear stamp set.
Cardbase: Cut a piece of kraft card stock 7-inches x 12-inches. Score and fold at 3 1/2-inches and 8 1/2-inches to form a gate fold cardbase with overlapping flaps. Stamp map onto cardbase. Use map’s stencils to ink in map. Stamp sentiments using the new Pirate Sentiments stamp set. Tear off and distress the card edges. Crumple up the cardbase flatten and crumple again. Spritz the cardbase with water. Lightly spray brown inks and splatter watercolor paint onto cardbase. Spritz again to allow inks to soak into the cardstock. Crumble cardbase while still damp. Dry flat over paper towel. (You may want to practice all the distressing with ink and water on scrap kraft cardstock before distressing your cardbase. I sprayed water to the back of the map as it was colored with Distress Inks which would run.)
Pirate Characters: Watch the video above to see how the pirate characters were made. The pirate captain’s hat was switched out with one from the new Pirate Borders. The treasure chest and captain hat borders are also from the Pirate Bordersset.
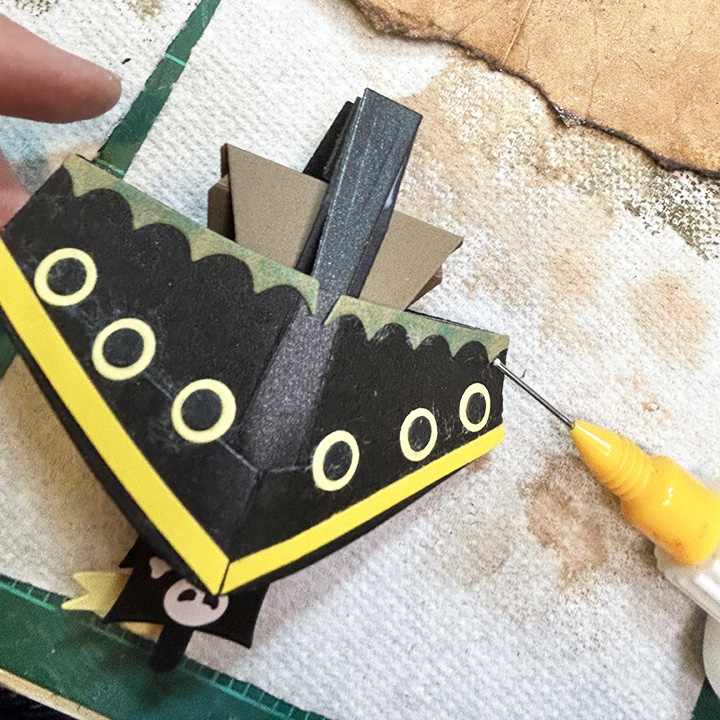
Train the folds on the ship’s body piece cut from the Boat Pop-Up die set in black. Glue the small side tab while the piece is folded flat. All of the following pieces are cut using the Pirate Ship Add-Ons set. Cut the boomerang shaped bow piece from black. Glue to the narrow-tabbed front of the ship while folded flat. Cut the back railing from black and glue to inside of ship back while folded flat. Cut 10 of the small circles in black and 10 of the larger circles in pale yellow. Glue small circles on top of large circles and attach them to ship body as show in photos.
Cut two sets of wave pieces. Ink blue. Glue to the sides of ship body, but not to the front or back flat panels. (The waves stick out in front to a point while the back jut out two wave points.) The tiny edge of the wave pieces match-up at the center side folds.
Cut the deck and seat pieces from the Boat Pop-Up die set in brown. Train folds. Trim off the front edge of the seat piece. (See red circle in photo.)
Cut two of the u-brace pieces from the Boat Pop-Up die set in black. Train folds and fold edges of tabs to fit through slots in the deck piece as shown in photos.
Cut two sets of masts from the Pirate Ship Add-Ons set in a thick back cardstock. Glue the mast pieces together matching up the different sizes to form two smaller masts and one taller mast. Slide the tallest mast through the center slot of the deck down between the two u-braces. (See red circled photo.) Glue to one of the u-brace sides. Add the second mast through one of the end slots and check alignment of the two masts in the folded position. Glue to u-brace. Repeat with third mast.
Test placement of seat (referred to as deck in photos) between center mast and back mast. Glue the deck front tab between the center tab and the mast. Glue back deck tab to back mast tab.
Cut three sets of the two sail dies from the Pirate Ship Add-Ons set in black. Cut three of the smaller sails from white and one of the large sail from white. Attach one of the small white sails to cover one small black sail. Do the same with the large white and black sails. Center the remaining two small white sails to the remaining two large black sails. (I used white label paper that had adhesive on the back.) Cut the sail decorations also from white and use the stencil feature of the skull die. Color the sword handles red. Attach decorations to smaller sails. Cut two of the crow’s nest basket from brown. Ink them brown. Cut the two flags from yellow. Starting with the tallest center mast, glue the flag at the top of the mast, the mast between the two pieces of flag then attach the basket in the same manner. Next attach the all-white small sail followed by the all-white large sail. For the smaller masts glue a decorated sail at the top and then a large sail.
Fold the deck up and add glue just to the front u-brace bottom. Slide folded deck into flatten ship body matching the front body narrow tab with u-brace. Repeat with back u-brace and body tab.
Test opening ship. You may have to help train it opening all the way. Flatten to glue into the cardbase. Add glue to one of the ship body tabs and attach with end of tab being in the cardbase fold. Add glue to other ship body tab and fold cardbase flap over to attach. Wait until glue has dried to open.
Sentiments: Stamp all sentiments before distressing the cardbase using Pirate Sentiments stamp set. On the front flaps are “It’s A Great Day to be a Pirate!” and “You arrr an absolute treasure.” Inside is “Let’s Be Pirates” and “Yo Ho Ho!” There is space inside for either a personal message or a die-cut sentiment such as Happy Birthday or Happy Father’s Day.
Envelope: This card will fit into an A7 (5 x 7-inch) envelope. (I choose to hand deliver the card because of the wax seal on the back of it.)
If you’ve read this far click here to go to yesterday’s Blog Hop Giveaway
This card was made for Craft Roulette #214 whose parameters included for Project – appreciation, candlelight colors, “Leave it to ….” element and retiform.
Cardbase: My finished card only used two rectangles of 9×3 3/4-inches (scored at 1/4-inch) and 8 3/4×3 3/4-inches. (Skip making the small panel.) After decorating front of tabbed rectangle, glue tab to back of smaller rectangle. Cover the card base in patterned paper.
Dancing Letters Mechanism: (Watch Karen Burniston’s Designer Challenge video for my inspiration for my card.) I did not reverse the Tea and Coffee Pop-Up mechanisms as Karen did. I folded all of my mechanisms as they were designed. My strips of plastic were the equivalent of two of the mechanism arm die glued together. Use glue dots or double-sided tape when attaching items to the plastic.
Sentiments: The front sentiment was computer generated and printed on copy paper. Then fussy cut into two lines of words. And glued in place.
Envelope: This card would fit into a #10 business envelope.