I have been collecting and making oven cards for several years now. Here is a collection of all my ovens blog posts. Click on an image to see details of the oven.
(Images are posted from the earliest release of dies/stamps/kits 2016 to newest 2023.)
____________________________
Thank you for experiencing this blog post.
I hope this inspires you and makes you smile.
Please like and leave comments 😊
___________________________________
Disclaimer: Karen Burniston products are provided free of charge by the manufacturer for review and use. All other items were personally purchased. Compensated affiliate links used where or when possible, meaning I will receive a small percentage commission from these manufacturers at no cost to you. This will allow me to add more content to my YouTube channel and help out a lot. Thank you.
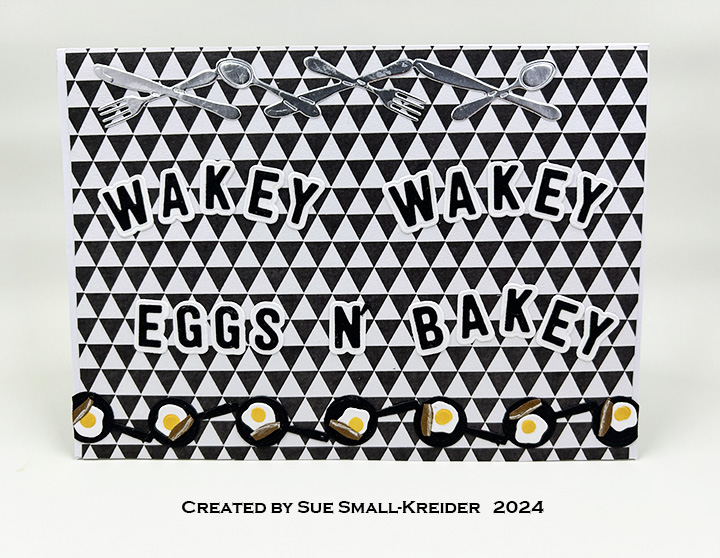
This card was made for Craft Roulette #202 whose parameters included a 5×7 inch card, formal & informal colors, warm(s) element and crisscross. Specifically, this card was made for a son starting a new job that requires an early morning wake-up time.
Cardbase: Cover a 5×7-inch wide top-fold cardbase with two patterns of decorative paper – one for card front and inside top (think wallpaper) and another pattern for the back and inside bottom (think flooring.)
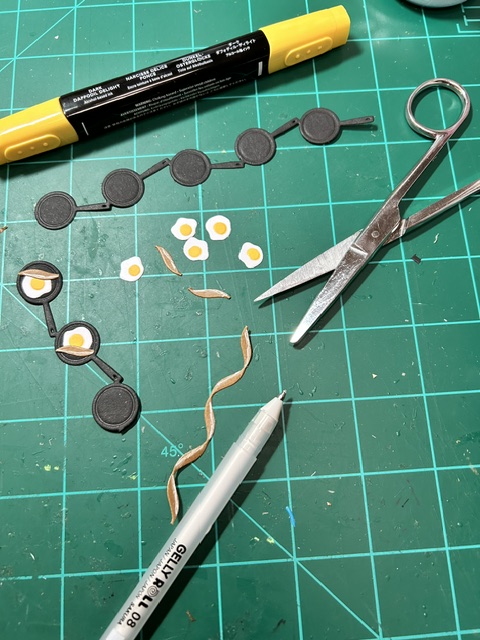
Card Front Decorations: Using the Kitchen Borders die set, cut one silverware border from matte silver cardstock for the top of the front panel. From black cardstock cut the frying pan/skillet border twice and trim one border down to three pans. Glue the two pan borders together by overlapping skillets. (Skillets are 1-inch wide, so should have seven skillets to cover all the way across card panel.)
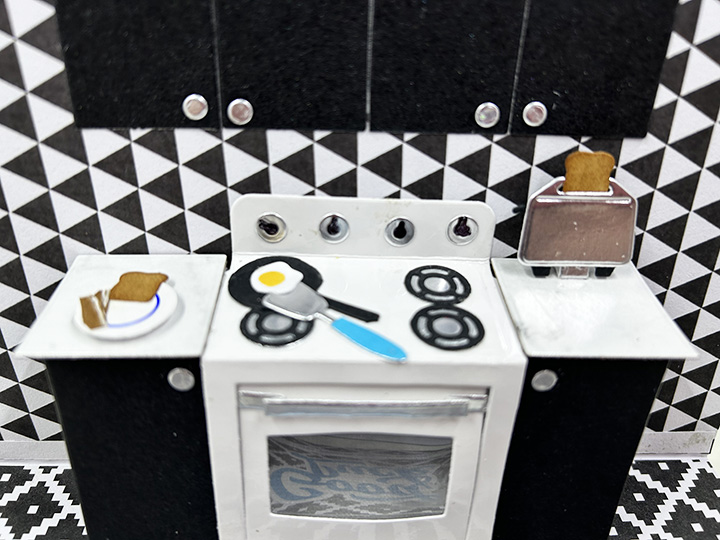
Stove, Cabinets and Counters: Watch assembly video for the Oven Pop-Up at the bottom of the page link before starting. I used glossy white cardstock for the stove with a piece of clear packaging for the oven window. For the oven and cabinet base I used a textured silver cardstock and also cut a square piece to cover the back wall of the oven in textured silver. For the cabinet doors on the uppers and lowers, I used the large door die in the Oven Extras set (cut from a coated black cardstock) with the matte silver knobs from the Oven Pop-Up set.
Food: Using the Kitchen Borders set, cut out 8 eggs from white and use die as stencil to color egg yolks yellow. Using the ribbon border die from the Border Blends – Trims die set, cut one from brown cardstock. Using a white gel pen color the bacon fat along one edge of ribbon. Cut ribbon into strips small enough to fit into skillet.
Using the Kitchen Borders set, Cut two pieces of bread from kraft cardstock and using tweezers to hold, ink the edges to look toasted. For the toaster, cut a toaster border from black cardstock. Cut two of the toaster covers with slots from matte silver cardstock. Cut two of the toasters from the border leaving on the tiny levers that connect the toasters. (I cut the levers off and had to use the tiny waste pieces from the stove burners as toaster levers.) Glue the silver piece atop the black piece and insert bread before glue dries positioning it according to the lever position – up with toast almost out or down with toast mostly inside toaster.
For the plate, I used the circle border piece in the Baking Borders set and cut the plate from glossy white cardstock and used the die as a stencil to draw the blue circle in the center of the plate. The spatula is in the Oven Pop-Up set and is cut twice from different cardstocks and the handle trimmed to fit.
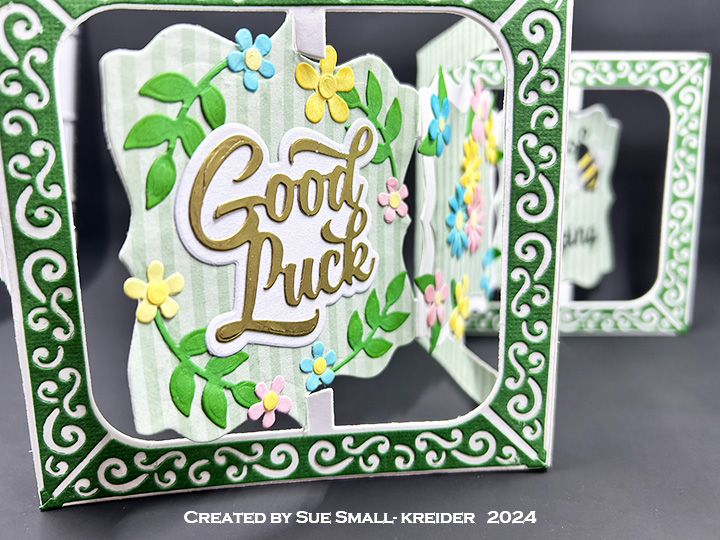
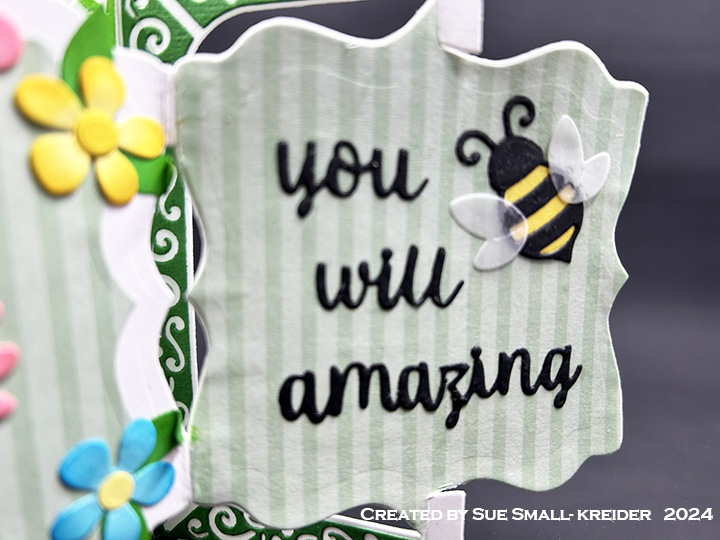
Sentiments: The front sentiment of “Wakey Wakey Eggs N’ Bakey” were cut using the Mini Alphabet set’s shadow and letter dies. Inside the card, The Good Luck die set was used along with a computer generated “On your new job” cut out with the banner in the Lorna Label Pop-Up. On the card back the largest label from the Lorna Label was used for a personalized message space.
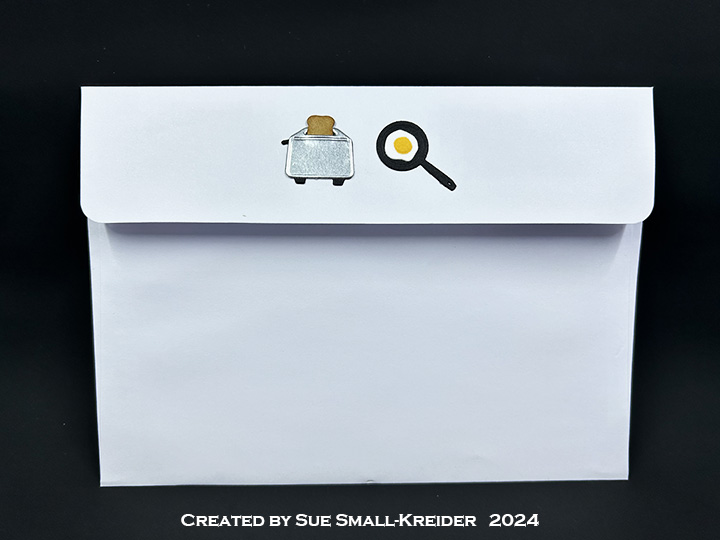
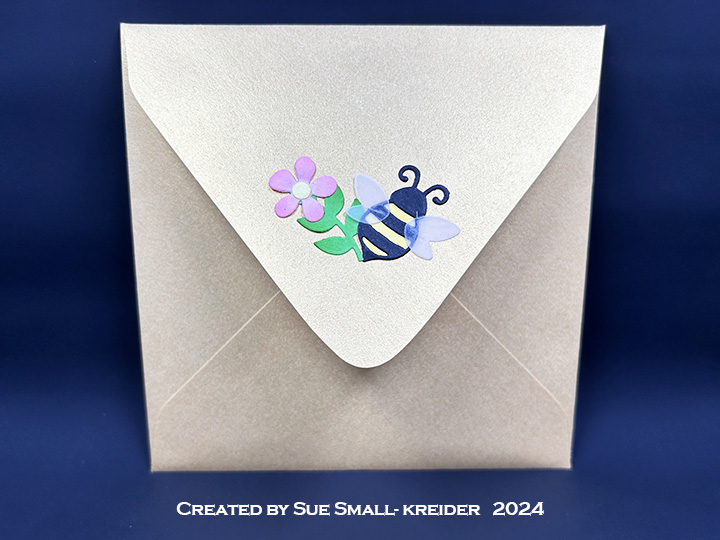
Envelope: Leftover toaster and frying pan are glued to the back of the envelope. (I would put the card and envelope in a padded envelope to mail, but it will be hand delivered.)
Thank you for reading this blog post. I hope this inspires you and makes you smile. Please like and leave comments 😊
It’s Sneak Peek Week for Karen Burniston’s February 2024 release. These dies will be available for purchase on February 19, 2024 on the KB Riley LLC website.
Your co-worker is leaving for a new job and you need a card for others in the office to sign for her. That is the brief for this accordion card.