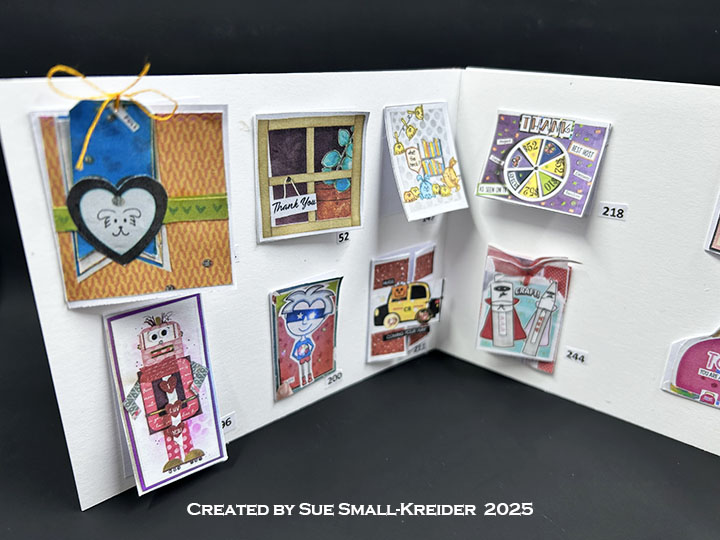
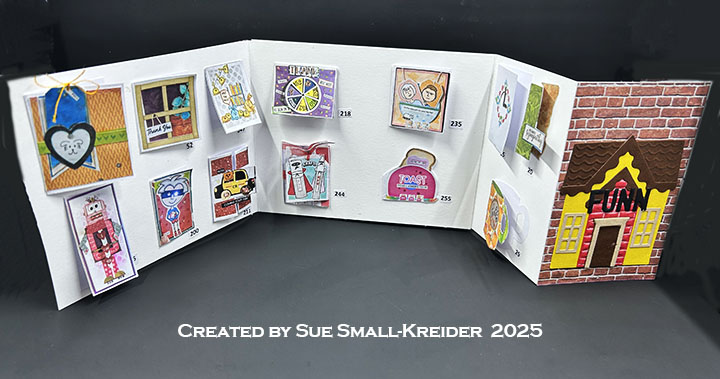
Craft Roulette is the ultimate card making challenge show on YouTube where guest crafters join host Mary Gunn to spin the wheel and get four parameters of project, colors, element and random to make a card or project in about 45 minutes or less.
This card was made for Craft Roulette #264 whose parameters included a card for an influencer, dreamy colors, crafts/crafters, and off center.
Watch the process video to see how I made this card.
Cardbase: Cut an 8.5×11-inch piece of heavy white cardstock into two pieces that at 4.25×11-inches. Score and fold in half at 5.5-inches both pieces. On one piece score and fold at 2.75-inches. Glue the two cards together with the large rectangle panels overlapping as shown in the video. Cards: Because this card is going to Mary Gunn, I used images from her Craft Roulette Community Showcase gallery, picking cards that are iconic to the show. I tried to recreate some of the fun folds and bookmark cards.
Guide Sheet to Cards: This sheet is folded and tucked in a pocket on the back of the card.
Envelope: The card fits into an A2 (4.25x 5.5-inches) size envelope.
________________________________
Thank you for experiencing this blog post.
I hope this inspires you and makes you smile.
Please like and leave comments 😊
______________________________
Disclaimer: Karen Burniston products are provided free of charge by the manufacturer for review and use. All other items were personally purchased. Compensated affiliate links used where or when possible, meaning I will receive a small percentage commission from these manufacturers at no cost to you. This will allow me to add more content to my YouTube channel and help out a lot. Thank you.
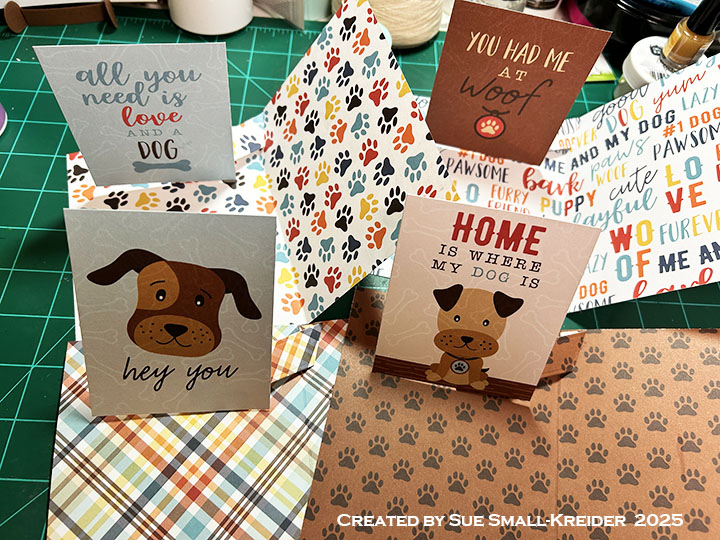
Needing multiples of the same card layout, I made 16 cards for a dog lover’s card swap using one Echo Park Paper Company’s collection kit I Love My Dog and Karen Burniston’sFlip Frame Pop-UpandHellodie sets.
Watch the video for instructions on the construction of the cards.
Read more below on specifics of this card layout.
Cardbase: From each sheet of 12×12-inch cardstock, cut two 5.5×8.5-inch panels. Fold each panel in half to form a 4.5×5.5 cardbase.
Flip Frame Pop-Up: Watch the assembly video for the Flip Frame Pop-Up located at the bottom of the linked page. Cut one mechanism from matching cardstock to the card inside. Cut the journaling card down to 3 .75-inches tall x 3 inches wide. Glue mechanism and journaling card into card base as shown in video above.
Sentiments: The die cut shadow and word “Hello” on the card front are by Karen Burniston. All the flip panels with sentiments are journaling cards from the paper collection. A personalized inside sentiment panel will be added to the inside right panel.
Envelope: These cards fit into an A2 (4.25×5.5-inch) envelope. The envelope flaps have been decorated with stickers from the kit.
___________________________________
Thank you for experiencing this blog post. I hope this inspires you and makes you smile. Please like and leave comments 😊
___________________________________
Disclaimer: Karen Burniston products are provided free of charge by the manufacturer for review and use. All other items were personally purchased. Compensated affiliate links used where or when possible, meaning I will receive a small percentage commission from these manufacturers at no cost to you. This will allow me to add more content to my YouTube channel and help out a lot. Thank you.
Watch the video for instructions on the construction of the card.
Read more below on specifics of this card.
Cardbase: Cut a 10 x7-inch rectangle of green cardstock, score at 5-inches, fold in half and burnish with a bone folder. Cover inside with two 4.5×6.5-inch rectangles of patterned paper. Save scraps of pattern paper to decorate card front. Die cut large frame from Flip Frame Pop-Up die set from red dotted paper. Cut bee and small flower pieces from Flutter Charms die set and assemble as shown in process video above.
Flower Planter Pop-Up: Watch the assembly video for the Purse Pop-Up located at the bottom of the linked page. Cut one large, stitched rectangle from the Flip Frame Pop-Up die set from a journal card. Follow directions in the process video above for how to die cut tabs into red rectangle. Die cut one purse base from striped paper and follow directions in process video above. Using the flower and stem dies in the Flip Frame set, die-cut flowers from patterned paper and stems from green cardstock. (Save patterned paper with flowers cut out for card back.)
Sentiments: Die cut the “Celebrate” once from, orange, red and black. (I use a shiny black piece of junk mail.) From the KB April Zoom class kit use the pre-printed “Happy Birthday” sentiment rectangle label. (Alternative is to stamp the sentiment using Karen Burniston’s Bouquet Sayings clear stamp set on to white cardstock.) Die cut sentiment label with smallest rectangle die from Flip Frame Pop-Up die set. Cut the smallest stitched rectangle from the same set, in pale blue. Glue sentiment label onto blue rectangle.
Envelope: This card fits into an A7 (4.25×5.5-inch) envelope with “Celebrate your big awesome day” stamped in red on the back flap. Stamps is from Karen Burniston’s Photo Memories.
___________________________________
Thank you for experiencing this blog post.
I hope this inspires you and makes you smile.
Please like and leave comments 😊
___________________________________
Disclaimer: Karen Burniston products are provided free of charge by the manufacturer for review and use. All other items were personally purchased. Compensated affiliate links used where or when possible, meaning I will receive a small percentage commission from these manufacturers at no cost to you. This will allow me to add more content to my YouTube channel and help out a lot. Thank you.
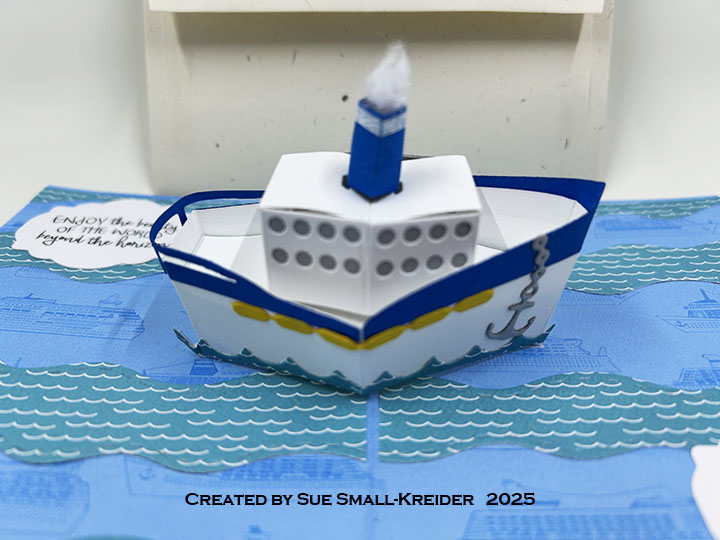
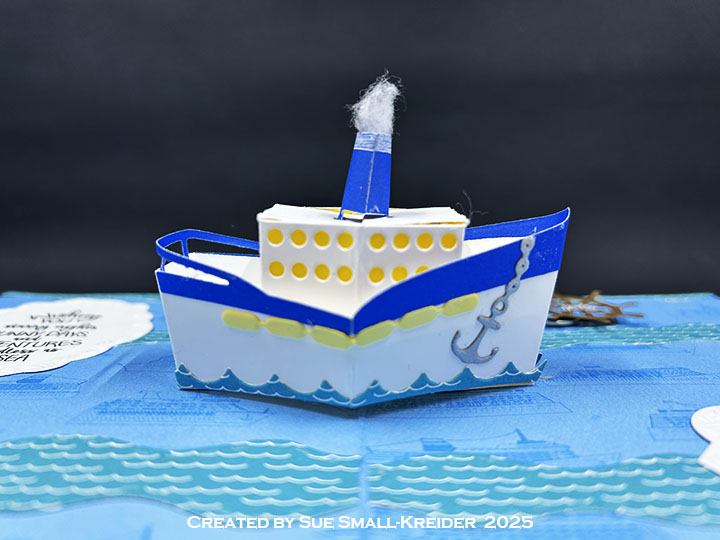
Watch the process video to see how I made this card.
Cardbase: Using a 8.5×5.5-inch rectangle of double-sided patterned cardstock, fold rectangle in half to form a 4.25-inch wide by 5.5-inch tall side fold card. Decorate the inside with wavy ripples using the Ocean Edges dies. (I choose to let the cardbase paper pattern be one shade of the ocean waves while the other waves are cut from decorative cardstock with white water ripples on them. If you make several layers of waves the card will be very thick and hard to close. If this happens use the special die in the Cruise Ship Add-On set to cut two slots on either side of the fold to slide a paper clip through to hold the card open.)
Cruise Ship: Follow the directions to assemble the basic Boat Pop-Up (Assembly video at the bottom of the die set’s linked page.) Watch the video above for how to assemble the Cruise Ship Add-Ons. (I had an issue the first time I glued in the ship to the card. So, there are also tips on how to fix bent U-support pieces and ship’s tabs in the video.)
Sentiments: The inside stamped sentiments are from the Cruise Greetings stamp set and the fancy labels are the smaller label die in the Rectangles and Labels – Crosshatch set. Decorative paper journaling cards are the outside card sentiments.
Envelope: The card fits into an A2 (4.25x 5.5-inches) size envelope with an anchor and chain glued to the back flap. The anchor is from the Cruise Add-Ons die set.
___________________________________
Thank you for experiencing this blog post.
I hope this inspires you and makes you smile.
Please like and leave comments 😊
___________________________________
Disclaimer: Karen Burniston products are provided free of charge by the manufacturer for review and use. All other items were personally purchased. Compensated affiliate links used where or when possible, meaning I will receive a small percentage commission from these manufacturers at no cost to you. This will allow me to add more content to my YouTube channel and help out a lot. Thank you.
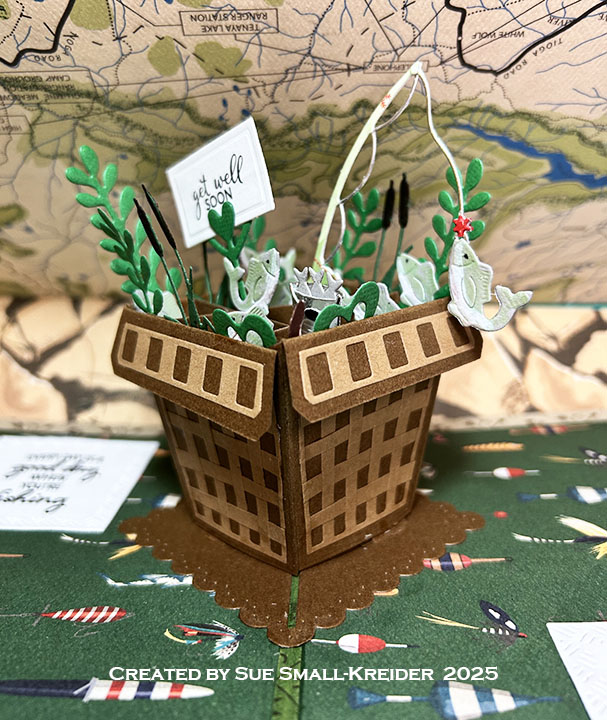
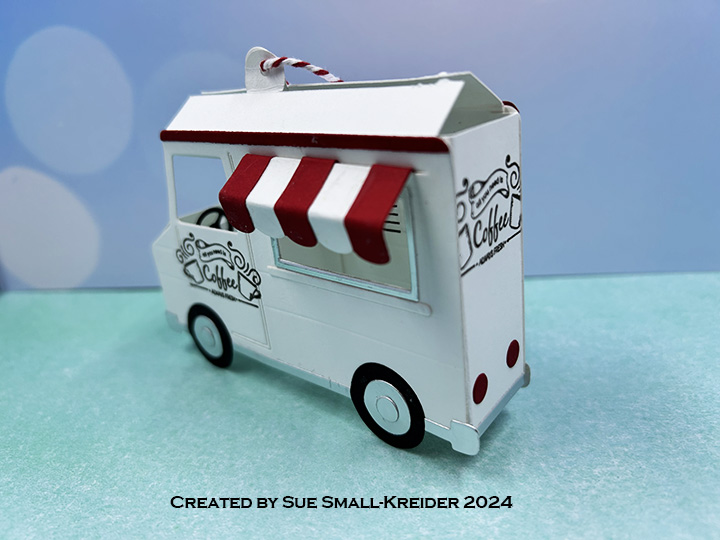
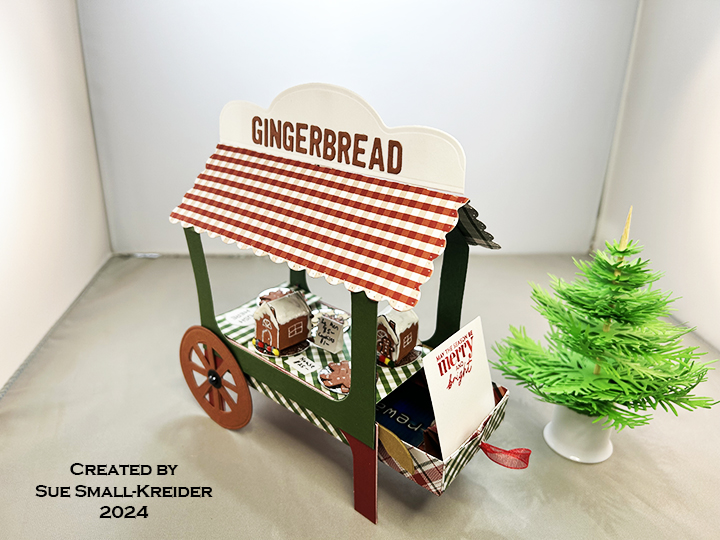
Karen Burniston’sFlower Pot Pop-Up die is so versatile and can be decorated to be many types of containers. Here are just a few that I’ve made recently. She has come out with some add-on dies in her January 2025 release that help transform the Flower Pot Pop-Up into many things.
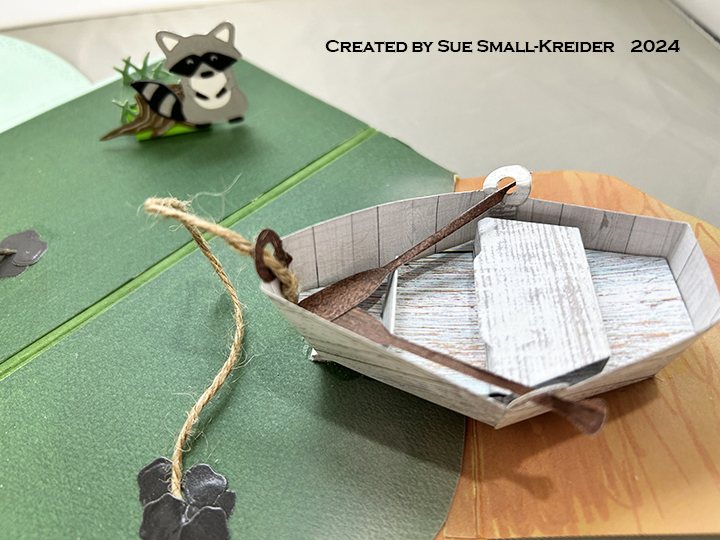
Karen Burniston’s Boat Pop-Up can become many different types of boats and ships using her different add-on sets. In her January 2025 there are two new add-on sets – Fishing Boat Add-Ons and Cruise Ship Add-Ons. There is also a new Paper People so you can add people to your cards.
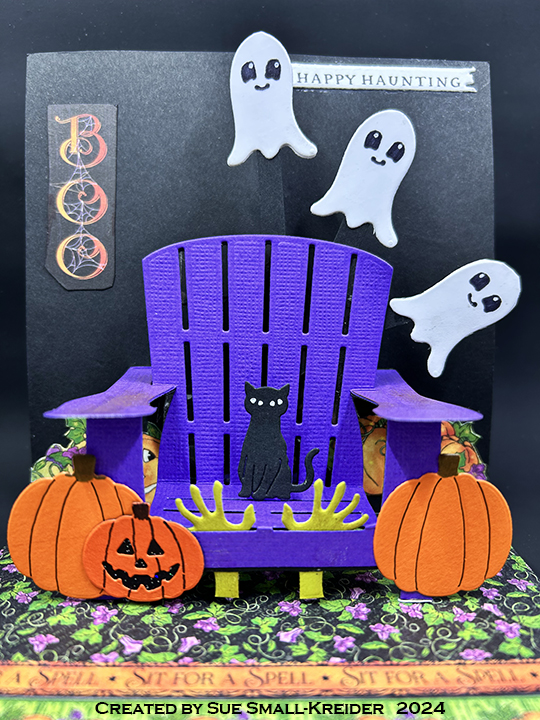
Click on the pictures to see their posts. The last image will have will be posted in March.
I’m going to be one of the crafting guests on the first Craft Roulette Community Showcasespecial event which will be live on YouTube on Saturday, January 4, 2025 at 1:00 pm EST. (It will be recorded in case you miss it live.)
Don’t forget to hit the notify me button on the YouTube page so you’ll get a notification when it goes live!
In 2024 there have been 142 blog posts on this website. The most viewed 2024 post was Trimming the Christmas Tree
2024 saw the launch of my YouTube channel for process videos. I made 121 videos in 2024. The most viewed video of the year was Trimming the Tree Pop-Up Room Scene Christmas Card.