It’s the start of SNEAK PEEK Week for Karen Burniston’s December 2023 Release. Today we’ll focus on the Mini Gift Bag and the Candy Heart Box die sets.
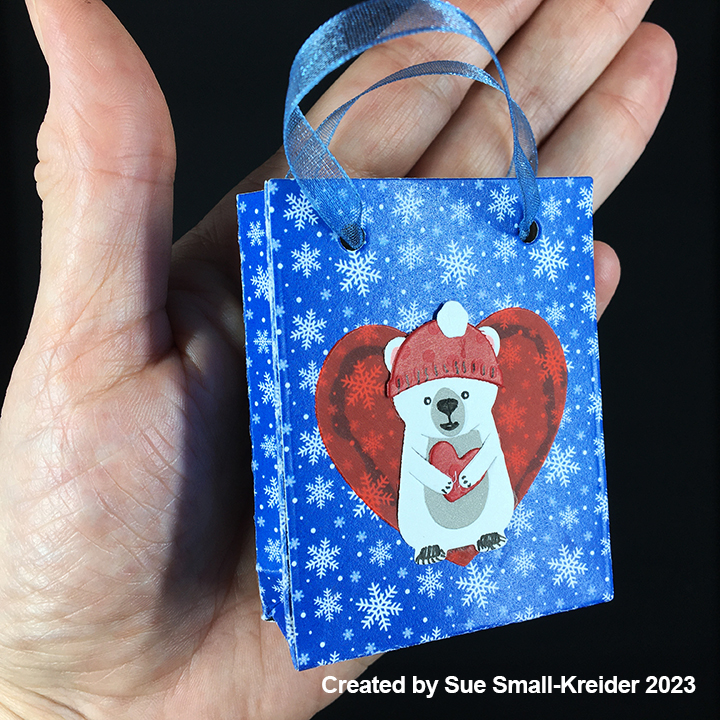
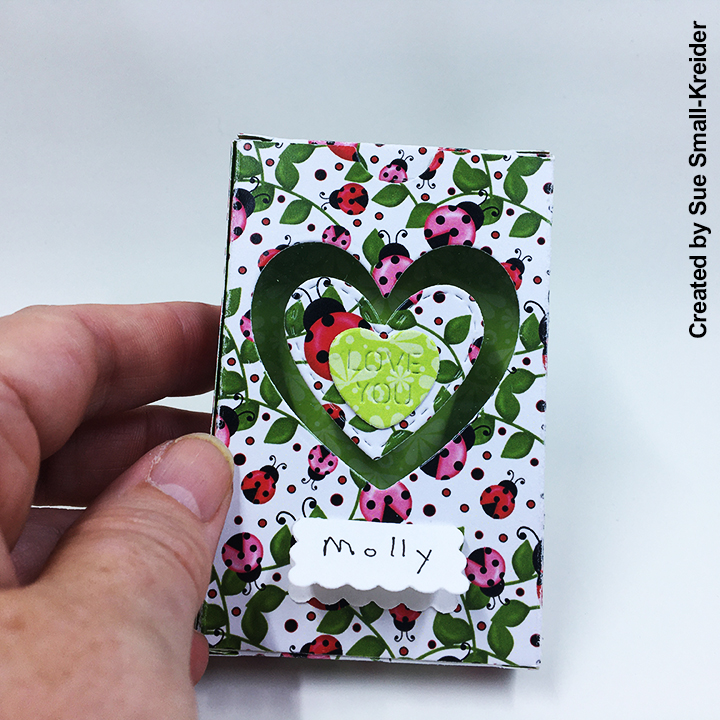
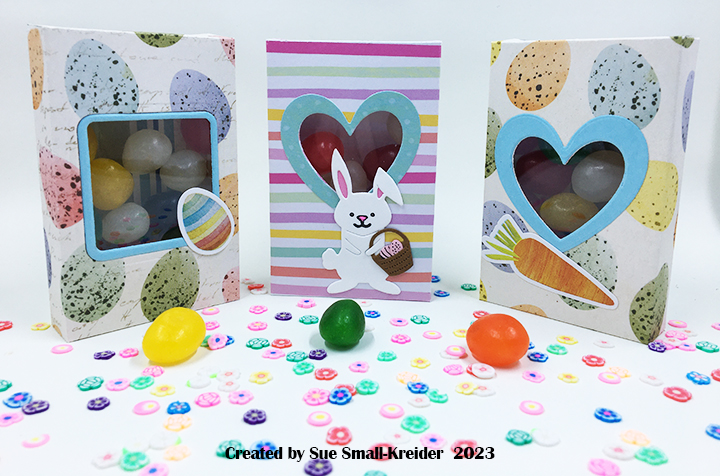
These bags and boxes go together quickly and have two main surfaces that allow for creative decorations. It doesn’t matter whether you use solid colored cardstock or decorative patterned papers, the bags are great fun for tucking in gift cards and other small items like jewelry, small toys, car keys, candy, or crafting supplies.
12 Days of Christmas Gift Tree
Valentine’s Day Candy Hearts Box and Mini Gift Bag – both fit a gift card
Tag Card with Mini Gift Bag to hold a gift card
Look for tutorials on these projects in the coming weeks.
Thank you for reading this blog post. I hope this inspires you and makes you smile. Please like and leave comments 😊
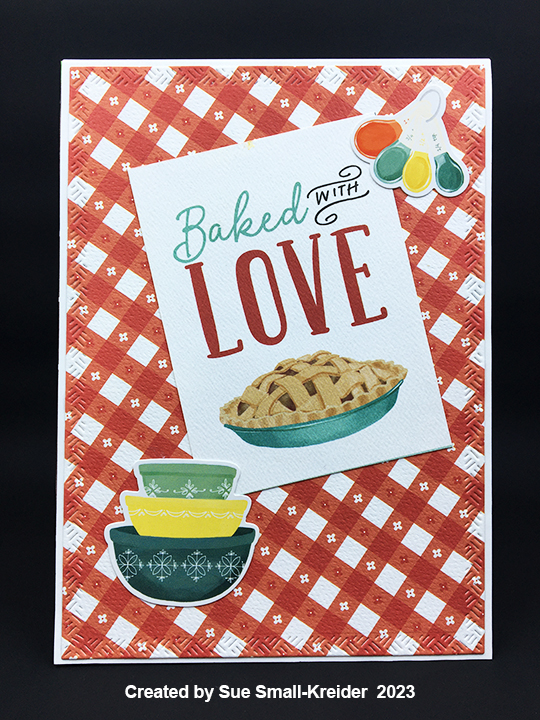
Being grateful for having someone in your life is a good thing. Here is a card to tell that person at Thanksgiving time.
My inspiration for this 4 1/4-inch by 5 1/2-inch (A2) card came from a stamp set by The Greetery called Fall Foodie Phrases. I knew I had a number of pie die sets and ended up using two Spellbinders die sets by Tina Smith – Serve A Slice and Dish It Up. The spice dusted pie top is Nuvo Sparkle Spray in Coco powder.
The tablecloth is a corner of the Karen Burniston scalloped edge die in her Rectangles and Labels – Crosshatch set with 1/8-inch circles in the scallops made with a hole punch.
The stamped sentiments are all from the Fall Foodie Phrases set except for the inside “So grateful for all that you are, and all that you do.” which is from Taylored Expressions’ Inside Scoop – Thanks set. All words were stamped with Stampin’ Up’s Cajun Craze ink except for the word pumpkin which used Pumpkin Pie ink. A banner die from the Spellbinders Mini Everyday Sentiments glimmer plate set was used to cut the card front banner “You’re the spice to my” phrase. I used my stamping platform with a Brutus Monroe Stick & Stamp Mat to hold the small paper scraps that I stamped onto in place.
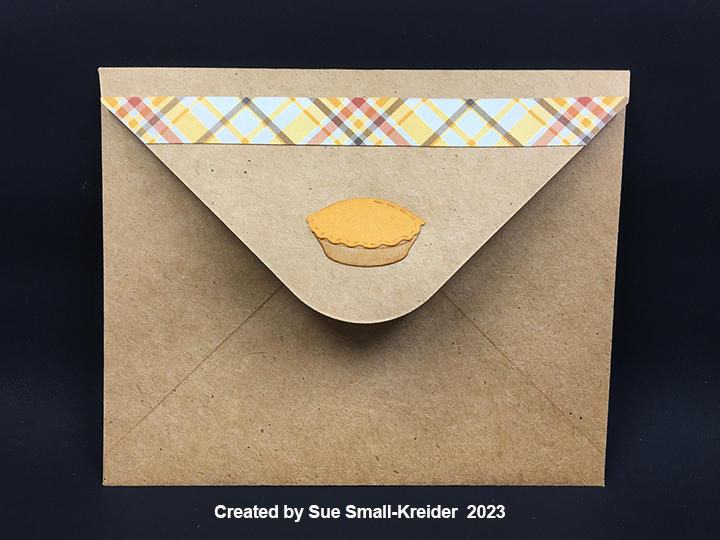
For the envelope flap I used a plaid scrap from Photoplay Say it With Stamps by Becky Moore 6×6 paper pad named Fall Plaids which I used papers from for all of the card. The Whittle Pie die-cut is by Poppystamps, Inc. which was inked with Rusty Hinge Distress Ink.
Thank you for reading this blog post. I hope this inspires you and makes you smile. Please like and leave comments 😊
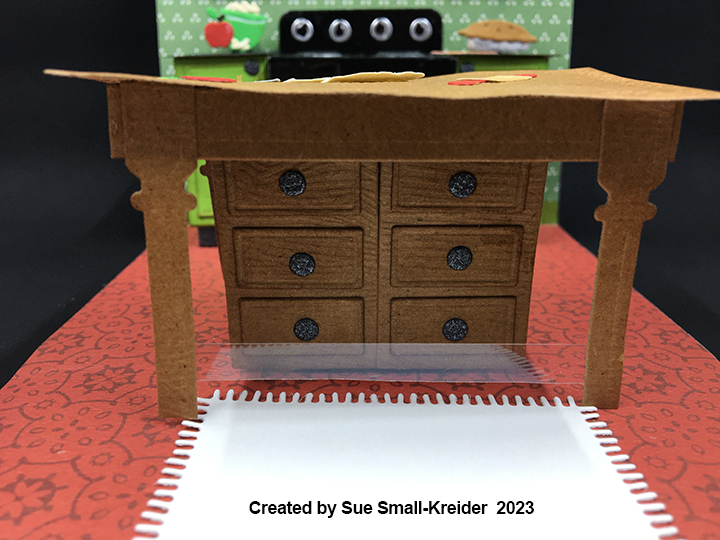
It’s the Karen Burniston design team challenge for November 2023 with the theme of “What’s Cooking” using the Oven Pop-Up die set. I chose to celebrate Pi Day with apple pie making in my card.
Before starting, I recommend watching the assembly videos of the pop-ups which are usually near the bottom of the linked pages for the various dies used.
Cardbase: I started with two rectangles of heavy weight cardstock one piece 5-inches by 7-inches and the second piece 5-inches by 11-inches, scored and folded at 7-inches. The short panel was glued to the back of the 5×7 rectangle to form an A7 top fold card. (The weight of this extra long tab is used to weigh down the floor of the card when open.)
Card Back
I cut a rectangle of the red and white tablecloth paper using the large crosshatch rectangle in the Rectangle and Labels – Crosshatch die set to cover the card front. Because I cut the front decorative paper on an angle, I had some triangles of the paper left over and so I made a table on the back of the card.
Oven/Stove: I followed the basic way to make the oven and cabinets on the assembly video using the cabinet doors from the oven extra’s set. The black mirror cardstock used for the oven can be hard to get glue to stick to, so I often use double-sided tape to stick on the burners, knobs, and window acetate and Glossy Accents to attach the door handle.
Cabinets: Once the stove is attached, you can add the side cabinets. I cut the cabinets from apple green cardstock and then inked them with a brown ink to age them. The upper cabinets and lower cabinet door fronts are cut using the larger rectangle die in the Oven Extras set and then covered with the small rectangle die pieces. Upper cabinets are attached with foam tape to add some dimension to them. A stove hood was cut from silver cardstock and is hidden mostly behind the small upper middle cabinet.
To make the table legs more stable, I added a piece of wood grain cardstock under the tabletop connecting the two legs as well as a thin strip of clear acetate plastic near the bottom of the legs. Tabletop is the second smallest crosshatch rectangle in Rectangles-Crosshatch set. All tabletop parts are cut from woodgrain embossed cardstock and inked with brown ink to bring out the grain. (I think if I made this card again, I would use two layers of cardstock for the tabletop and glue the items on to the tabletop before assembling it so the top would lay flat.)
Decorations: Between the two oven sets are lots of fun pieces that add dimension and realism to the pop-up scene. The Oven Pop-Up set includes the oven mitt, stove burners and knobs, oven rack and door handle. The Oven Extras set includes the cutting board and roasting pan that I used to make a small rolling pin, the knife and the green bowl that holds the apple slices. as well as three pop-up cube strips that I used to pop-up the oven rack, pie inside the oven and the items on the counter.
Apple slices are the leftover bits from cutting two burner plates. Pie crust on table was cut freehand and the burner circle die from the Oven Pop-Up set was rubbed to emboss the pie pan and then cut away to show the trimming of the piecrust. Burner circle is silver pie pan under the crust. The baked pies are cut from silver foil cardstock and brown kraft cardstock using the Picnic Elements set. Brown is inked around the edges of pie crust. The red apples are from the Tree Fruit die set.
Card Front
Sentiments: All the sentiments are either stickers, journaling cards or papers from the paper collection Sunflower Market by Carta Bella. The white rug inside the card is place for a personal message and is cut using the base blanket die in the Picnic Elements set.
Envelope: A strip of pie paper is glued to the back flap of the envelope to set the tone for the card inside and are from the paper collection. Two red apples left over from inside the card were also glued on the flap.
Thank you for reading this blog post. I hope this inspires you and makes you smile. Please like and leave comments 😊
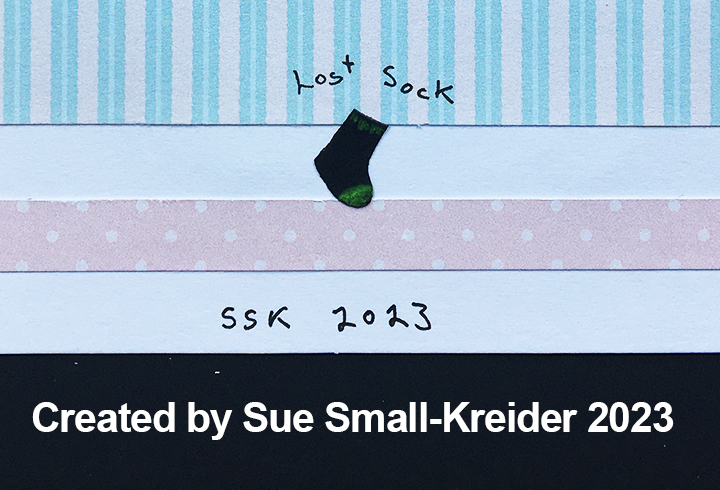
This card was made for Craft Roulette #182 whose parameters included a card with circles, vegetable garden colors, screen element and fuzz.
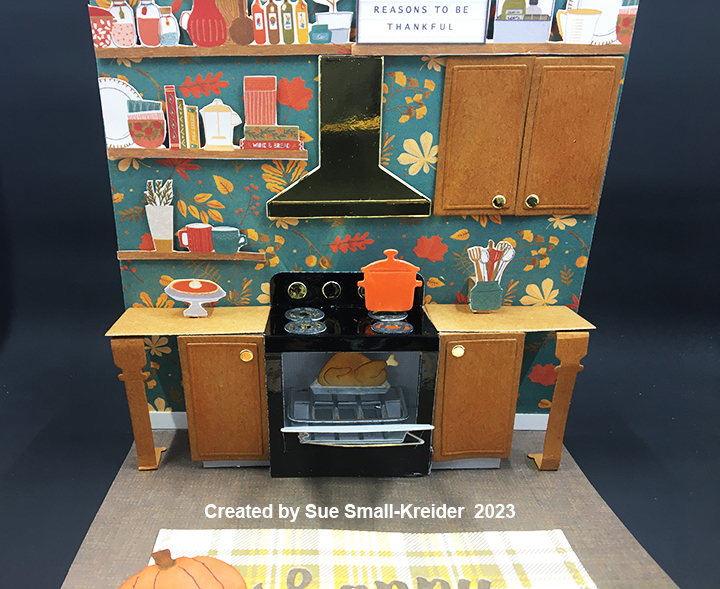
For this pop-up card for a crafting friend, I converted Karen Burniston’s new Oven Pop-Up and Small Script – Christmas, along with along with a number of her previously released dies into a laundry/crafting room.
Cardbase: I used a purchased A7 cardbase. Each of the inside panels are covered with papers from the Cosy Kitchen paper collection. The front of the card has a computer-generated panel while the card back uses scraps from the inside of the card including the lost sock.
Washer/Dryer:Watch the assembly video at the bottom of the linked page before starting the card. Both the washer and dryer are made the same way with different shaker contents and knobs using the Oven Pop-Up.
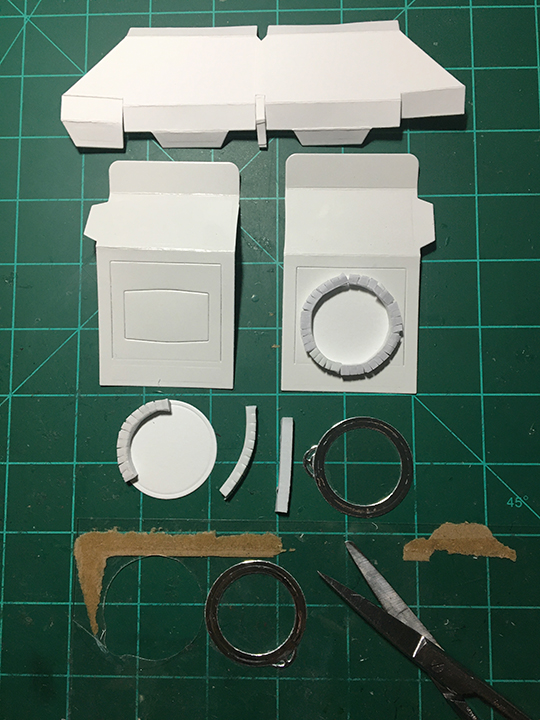
I created a double platform by cutting two oven platforms from white cardstock and trimming the sides that come together to a 1/4 inch or less. These cut sections are glued together making sure the tabs are all aligned straight. (Fold on all the score lines with a bone folder before gluing.)
Mark with a pencil the center point of the card fold. Center the double platform and attach the back tabs with glue. Fold the platform and front tabs as shown in the photo and add glue to tabs, close card to attach the platform to floor of card.
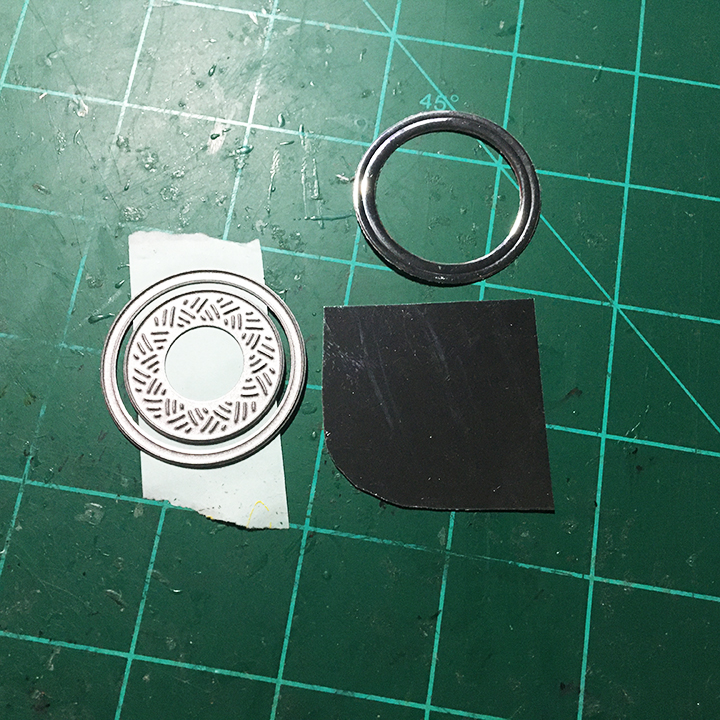
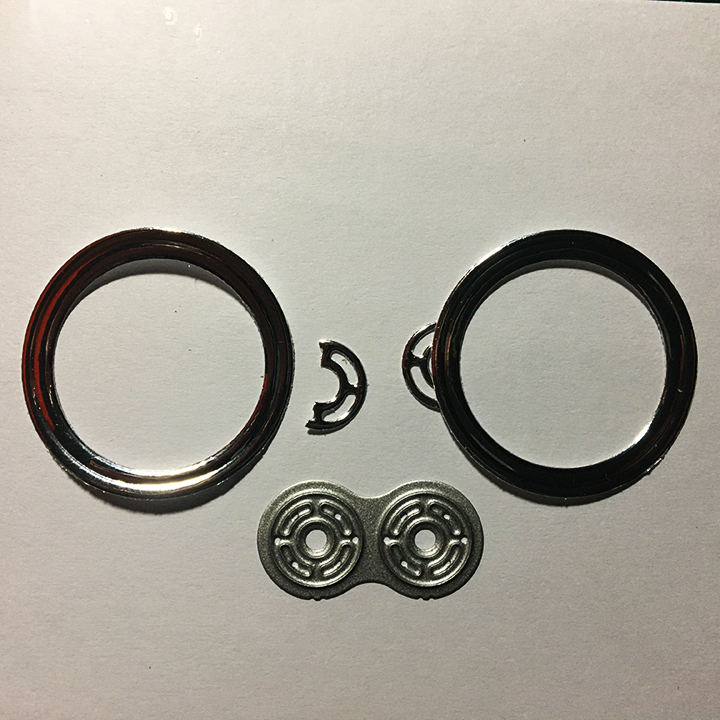
Cut two circle frames by using the smallest circle dies in the Circles – Crosshatch set from silver foil cardstock. Cut one of the stove burners from the Oven Pop-Up set and cut it in half for the clasp on the washer/dryer doors.
Cut two stove pieces from glossy white cardstock. Trim off one of the side tabs from each piece as shown in photo. Tape the oven door and window piece in place using packing tape on the backside. Glue the silver doors with clasps onto clear plastic and cut them out. (I used a piece plastic that had been a window in packaging.) Take foam strips and snip along one edge to make them bend easily. Place the snipped foam strips around the edge of two white circles (cut using the larger of the silver frame dies.) Cut socks from the gnome boots in the Gnome and Santa set. Use gel pens to add details to the socks. Glue four socks to the back of each white circle. Add circle confetti to washer shaker and a single black sock to dryer shaker. Glue the silver framed doors to the shaker circles.
Side Tables:Once the stove is attached, you can add the side tables which are made with the cabinet and drawer dies from the Oven Pop-Up. Cut a narrow rectangle in the middle of the long section of the cabinet piece to create the legs. attach to the stove and platform as normal. Pink ink was lightly sponged onto the tabletops and drawers.
TV:The TV set from the Memory Charms die set has had its antenna and feet trimmed off and Nuvo Drops added for knobs. I screen shot a photo from the Craft Roulette episode #182 and resized it to a 1-inch rectangle, print on white paper and die-cut it with the TV screen die.
Decorations: Actual dryer lint fuzz is glued to the top of the blue trash can cut from the Coffee Charms tall coffee cup. The laundry basket is the picnic basket cut from white cardstock covered with clear packing tape and stenciled with a teal permanent marker. A piece of thin white felt is the folded laundry in the basket. Two wall decorations are threaded needle and scissors from the Sewing Charms set. A tiny sweet pea green birthday card is the right table.
Sentiments: The front of the card sentiment “My Head Says Laundry” is computer generated. Inside the “my heart says Craft!” is a combination of die cut letters and tomato red heart with a computer generated “Craft!” (For “my” and “says,” I did word surgery using the words “merry christmas.”) The oval rug with its white label for a personal message come from the Crosshatch Ovals set. Blue ink was used on the die-cut letters and rug to make them standout from their backgrounds.
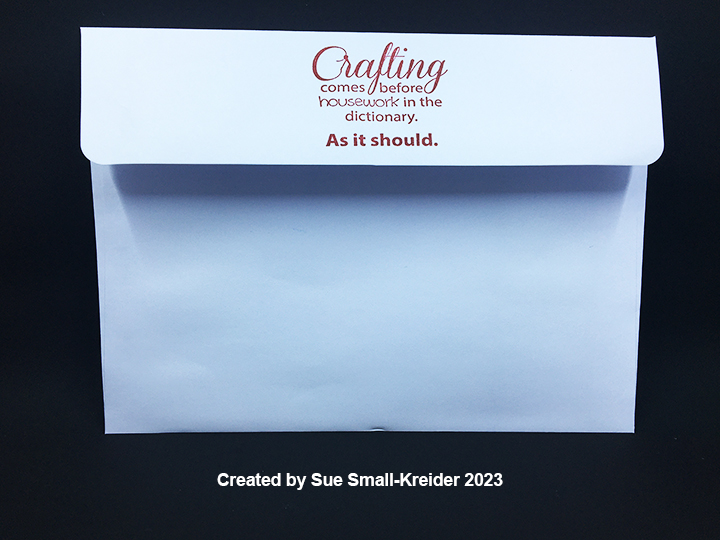
Envelope: To hint at what’s inside, the sentiment stamp of “Crafting comes before housework in the dictionary. As it should” is stamped in red on the back flap.
Thank you for reading this blog post. I hope this inspires you and makes you smile. Please like and leave comments 😊
Karen Burniston’sSeptember 2023 release will be available on September 18. Here is a sneak peek at the two word sets which are smaller and in a new script for Christmas and Halloween. Look for tutorial posts on these cards next week.
Karen Burniston’sSeptember 2023 release will be available on September 18. Here is a sneak peek at two of the die sets – Oven Pop-Up and Oven Extras. Look for tutorial posts on these cards next week.
It’s time for the Karen Burniston design team challenge for July 2023 with the theme of “COLLECTION PACK CREATIONS” – using papers from collection packs of papers plus at least one die from the June 2023 release.
The collection pack that I chose to work with was Echo Park’s Best Summer Ever designed by Jen Allyson. The stickers reminded me of summers spent in the backyard with a blow-up pool, Dad grilling burgers, lots of watermelon and friends and family all around.
Cardbase: I used a purchased A6 (4 1/2 x 6 1/4-inch) card base and cut papers to cover the four panels of the card.
Fence: The new fence add-on is a versatile die set. I cut one fence from a woodgrain embossed cardstock and did a partial die-cut to get one large post with the same die and cardstock. (I like the look the embossed cardstock gives to a white fence better than printed woodgrain paper which often has dark lines in it that makes the fence look pieced together.) Leave the tabs on the extra post and use them to glue to the fence so that it has three posts.
To make the fence pop-up I used the small strip pop-up mechanism in the Fireplace Pop-Up die set behind each of the three fence posts. Once the mechanisms are glued in place add grass from the fence set to the front of the fence.
Grill: I adhered the sticker to a piece of yellow cardstock and fussy cut it out. Next, I made bam box from the Small Scenes Bam Box die set. (See assembly video.) This smaller bam box is the perfect size for the grill sticker. I figured out which way I wanted the box to fold flat in the card and glued it in place. Grass (from fence set) was glued to the front of the bam box and then the grill over the grass.
Pool: I used two stickers to make the unicorn float in the pool. They were stuck together and then glued as one piece to yellow cardstock and fussy cut. I had a small bam box already made which was used behind the pool. (The key to installing bam boxes is to play with the positioning of the box and its attached element in both the open and folded positions.)
Decorations: There are lots of small stickers in the collection pack which makes decorating easy. I make some bluebell flowers to go behind the fence. Tweezers were needed to place the flowers after they were assembled. I ended up adding the pink flamingos because they were taller than the fence.
The string of lights was created using the circle banner dies in the Paper Frames Pop-Up set glued over a piece of baker’s twine glued to the corners of the card.
Sentiments: All the sentiments are either stickers or a journaling card which was used on the front of the card with sticker sunglasses added. A pink label was cut from the Paper Frames Pop-Up set for a personal message.
Envelope: The card fits into an A6 envelope with a slice of watermelon sticker on its back flap.
Thank you for reading this blog post. I hope this inspires you and makes you smile. Please like and leave comments 😊
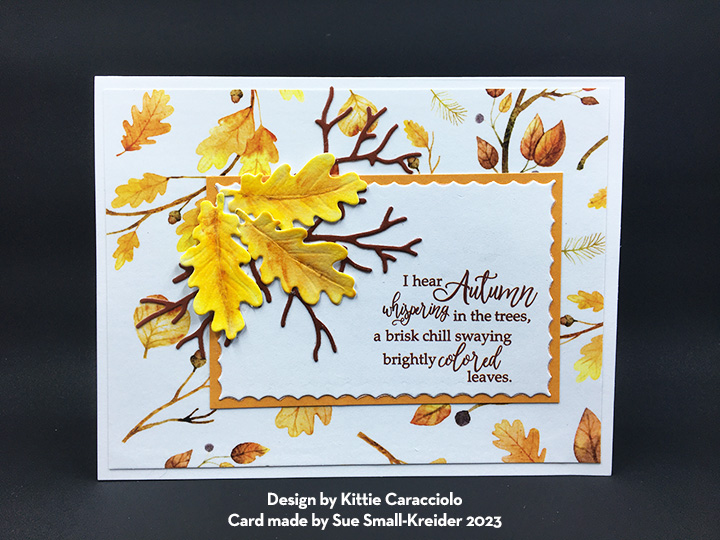
Recently, I had the honor of attending a workshop taught by Kittie Caracciolo who makes wonderful and detailed dimensional cards using Rubbernecker Stamps products. The workshop was part of the Stamp and Scrapbook EXPO – Orlando.
Rubbernecker Stamps makes some wonderful dies to create scenes that fit an A2 size card (4 1/4 x 5 1/2-inches). Using a sponge tool similar to an eye shadow applicator, Kittie showed us how to color our die-cuts using Color Fuse Inks to create shading that rounded objects and gave dimension to animals. Foam strips helped with the physical layering on the snowy scene and to make the white scalloped rectangle stand out on the pink flowers in the watering can.
I added eyes to both deer and a nose with a ultra fine tipped black pen and white spots to the fawn with a gel pen.
I added yellow Nuvo Crystal Drops to the flower centers.
As Kittie suggested, I went home and heat embossed the leaves with clear embossing powder to give them some shine.