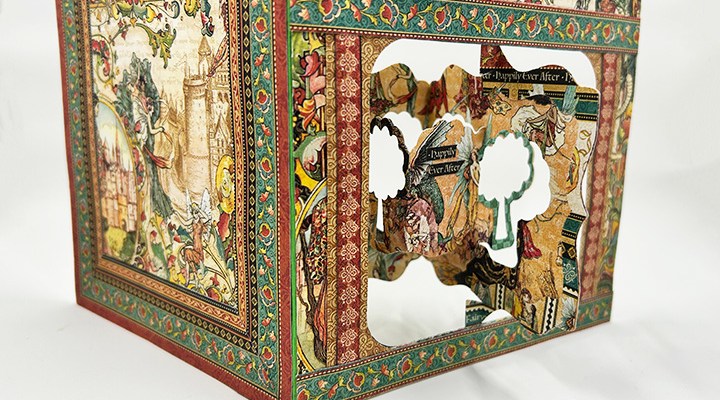
Enchanted Forest Pop-up Card

It’s Sneak Peek Week for Karen Burniston’s June 2024 release of new dies.

For this card, I used one of the new sets – Tree Add-Ons along with a previously released die set – Fancy Label Accordion. This card is based on a card design that Karen Burniston had taught in a class with the Hearts Add-Ons die set. (Click on link to get a PDF of the instructions.)

Cardbase:   Cut an 11x 6-inches rectangle of lightweight cardstock and fold in half to create a 5 1/2 x 6-inches card base with a side fold. Cover with decorative paper on the outside and inside of front panel before cutting with largest square die from the Squares – Crosshatch. Once the square has been cut, attach inside back decorative paper matching front design.

Accordion Frame: Die-cut two Fancy Label Accordion frames from a decorative print cardstock as directed in PDF instructions. Make sure you add the decorative label die inside the pivot panel before you die cut, so that you will make the pivot panel into a frame.

Attach to card base as directed in PDF instructions. Use tree trunk and hearts dies to decorate tree panel.

Tree-Add-On Panel: Replace the Trees Add-Ons for the Hearts Add-Ons in the PDF instructions. I cut out tree frames on the first and third panels by first die cutting the whole panel and then die cutting twice more with the cloud shaped tree leaves dies and tree trunk dies in the Trees Add-Ons set. I cut two more of the tree shaped frames to cover and reinforce the back side of the tree panel.

Attach to pivot panel and card as shown in PDF instructions.
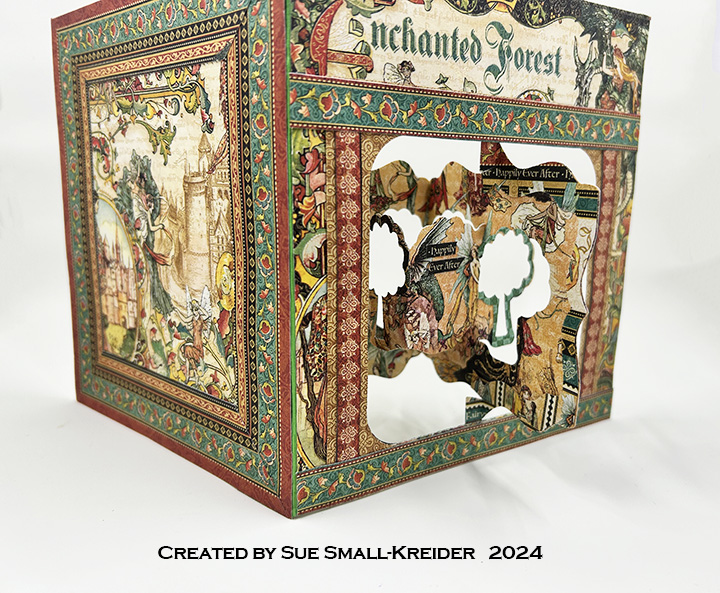
Sentiments & Decorations: I used printed sentiments and border strips from the paper collection to finish decorating the card covering all of the green cardbase.

Envelope:  Fits into a 6×9 catalog envelope with a back flap decorated with decorative paper strip.

___________________________________

Thank you for reading this blog post.

I hope this inspires you and makes you smile.

Please like and leave comments 😊

___________________________________

Materials Used:

Dies

Papers

  • Graphic45 – 8×8 Double-Sided Papers Collection Pack – Enchanted Forest
  • 6×9-inch Catalog Envelope – White

Ink

  • Pigma – Mircon 01 Fine Tip Pen – Black

Adhesives

Tools

  • Die Cutting Machine
  • Stamping Blocks used as paperweights
  • Scissors

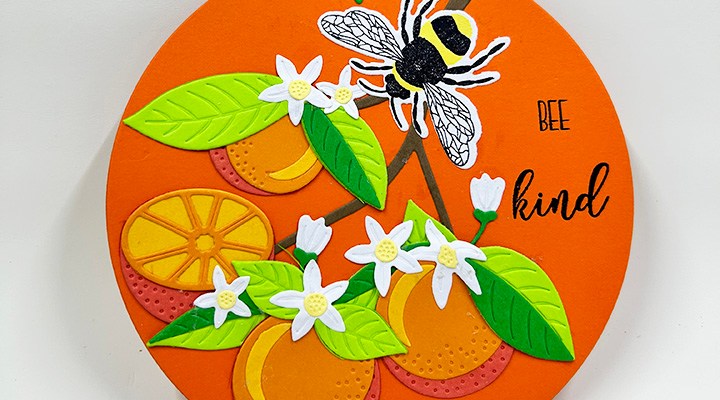
Orange Ornament Card

This card was made for Craft Roulette #219 whose parameters included an anniversary project, salad colors, “new” element and a folded corner.

___________________________________

Thank you for experiencing this blog post.

I hope this inspires you and makes you smile.

Please like and leave comments 😊

___________________________________

Materials Used:

Dies

  • Altenew – Die Set – Orange Blossom
  • Spellbinders – Cutting Dies – Fluted Classics Circles

Stamps

  • Altenew – Clear Stamp and Die – Mini Delight: Bee Kind
  • Craft Roulette – Clear Stamps – The Basics
  • Riley & Co – Funny Bones – Rubber Stamp – Creativity is Intelligence Having Fun

Papers

  • Greens, Oranges and White Cardstock

Ink & Embossing Powder

  • Simon Says Stamp – Pawsitivity Saturated Ink – Sunbeam
  • StazOn – Solvent Ink – Jet Black
  • Pigma – Mircon 01 Fine Tip Pen – Black

Adhesives

Tools

  • Die Cutting Machine
  • Stamping Platform
  • Stamping Blocks used as paperweights
  • Scissors
  • We R Memories – QuickStick

Miscellaneous

  • Green and White Gingham Ribbon
  • Florist Wire

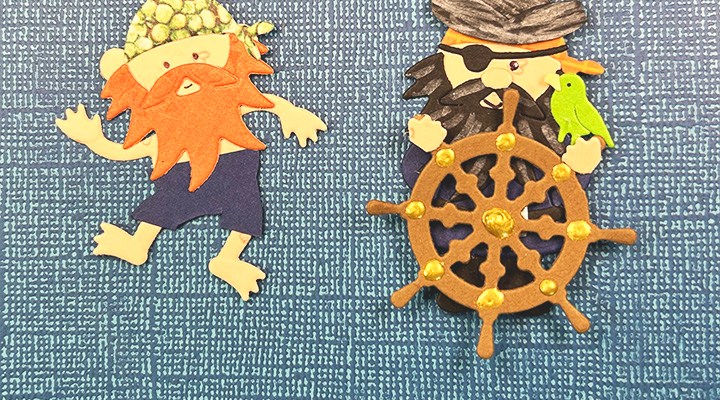
Pirate Characters

Making characters for cards can be fun. Several people have asked for a video on how I made the pirate characters on my 2023 pirate ship birthday card. These characters were inspired by ones John Watterson had made and shown on Karen Burniston’s Facebook Pop-Up Peeps page. Here is a video showing how I made them.

___________________________________

Thank you for experiencing this blog post.

I hope this inspires you and makes you smile.

Please subscribe, like and leave comments.

Follow my YouTube channel, Instagram and Pinterest as well.

___________________________________

Supplies Used:

Dies

Papers

  • Colored Cardstock and Packaging Scraps

Pens

Adhesives

Tools

Miscellaneous

  • Nuvo Crystal Drops – Bright Gold

Watermelon Pop-Up Card

Watermelon Pop-Up Card

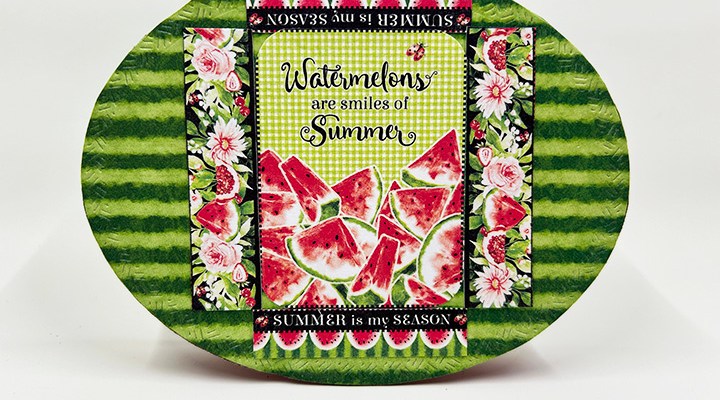
Inspired by a new Graphic 45 paper collection – Sunshine On My Mind that features watermelon papers, I created this A2 (4.25×5.5-inches) sized card using Karen Burniston’s Ovals and Heart Collage Pop-Up die sets.

Cardbase: Fold an 8.5 x 5.5-inch rectangle of card stock in half to form a top fold 4.24 x 5.5-inch card (or use a purchased A2 cardbase.) Tape the largest oval die so that the top of the die overhangs the fold. Die cut to form an oval folded cardbase. With a red marker color the inside edges of the cardbase. Repeat with green marker to the outside edges.

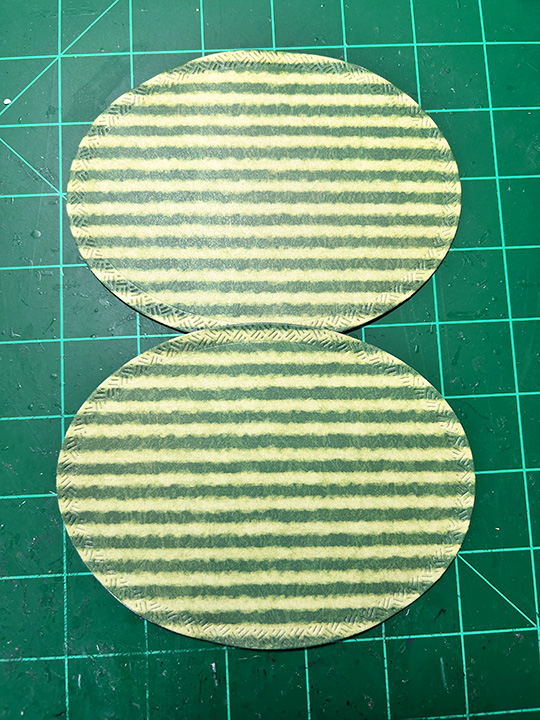
Using the same oval die, cut two ovals from green watermelon rind paper and two more ovals from red and black watermelon paper. Glue one of the red ovals inside the cardbase, fold cardbase in half and trim off red paper at fold. Repeat with the second red piece. Glue one green oval to the back side of cardbase. Trim at fold. Glue the last green oval to front of card.

The card front will be the only complete oval. All other panels should have been trimmed to allow the cardbase to fold. (Note in photo that a hint of red shows on the back of the card.)

Decorate the outside of the cardbase with sentiments cut from the collection pack papers.

Collage Mechanism: (Watch the assembly video for the Heart Collage Pop-Up located at the bottom of the linked page.) Cut the mechanism from red cardstock. Train folds and glue inside the cardbase. Allow the glue to dry before connecting the locking tabs. Cut sentiment panels from paper collection. Round the corners. Play with positioning of the panels onto the mechanism before permanently gluing in place. (I found that my side arms needed to be thin pieces and the top and bottom arms could handle larger panels.) Take the largest panel and fold in half before gluing over locking mechanism tabs.

Add other decorations to cardbase always checking for catchpoints to avoid.

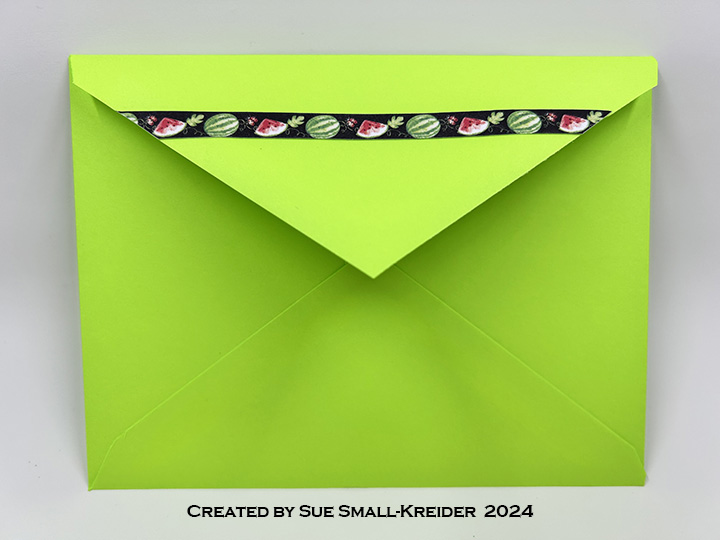
Envelope: Decorated the back envelope flap with decorative strips from paper collection.

__________________________________

Thank you for reading this blog post.

I hope this inspires you and makes you smile.

Please like and leave comments 😊

__________________________________

Materials Used:

Dies

Papers

  • Graphic 45 – 8×8 Double-Sided Collection Pack – Sunshine On My Mind
  • Red Cardstock
  • A2 (4.25×5.5-inches) Cardbase
  • A2 Envelope – Neon Green

Ink

  • Pigma – Mircon 01 Fine Tip Pen – Black
  • Scrapbook.com – Glitter Brush Marker – Red Shimmer
  • Sharpie – Permanent Marker – Fine Tip – Green
  • Sharpie – Permanent Marker – Fine Tip – Red

Adhesives

Tools

  • Die Cutting Machine
  • Bone Folder
  • Stamping Blocks used as paperweights
  • Scissors
  • Tweezers
  • Corner Punch

Happy Meowther’s Day from the Cats

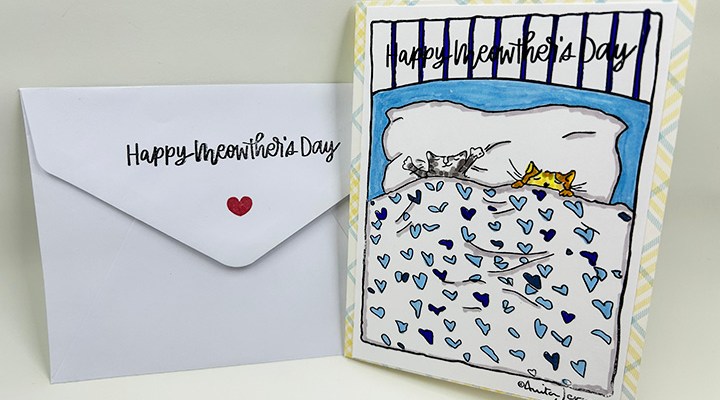
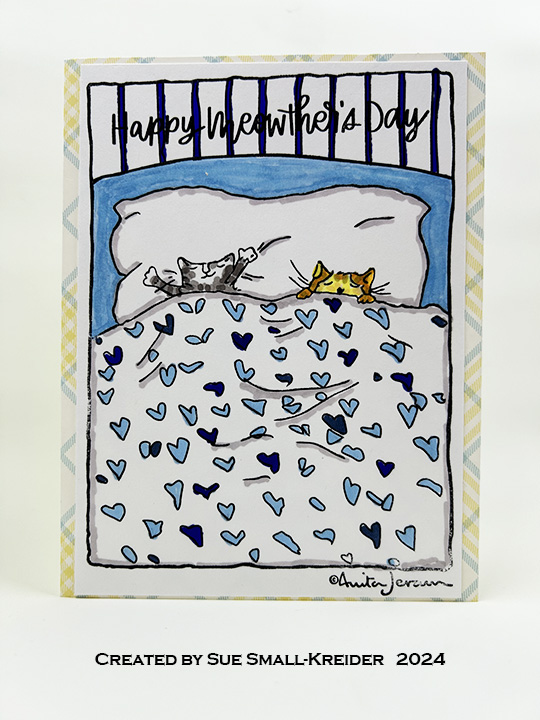
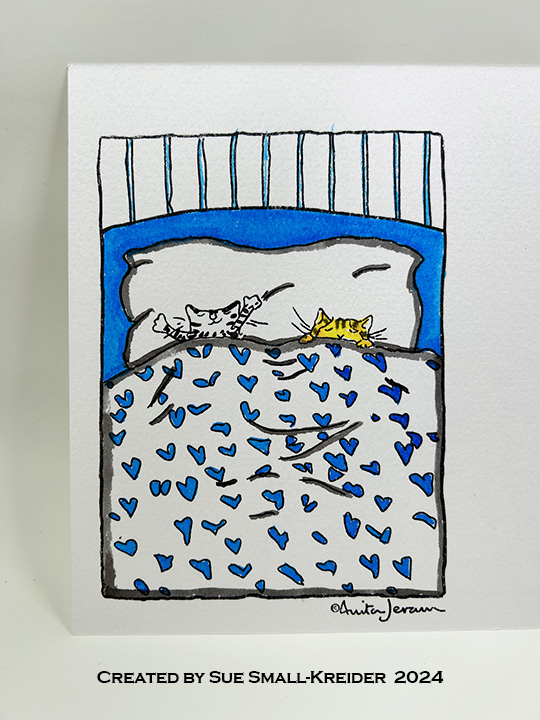
A few times a year, I get commissions from a pair of cats for cards to their humans. For Mother’s Day this year they picked an Anita Jerem illustration of two cats sleeping in bed under a heart dotted comforter. They like to use every year the sentiments from a Simon Says Stamp set Happy Meowther’s Day.

Cardbase: I used a purchased A2 (4 1/4 x 5 1/2-inch) plaid printed cardbase and matching white envelope. The image panel was adhered with double sided tape and the sentiments were stamped directly onto the image panel or cardbase.

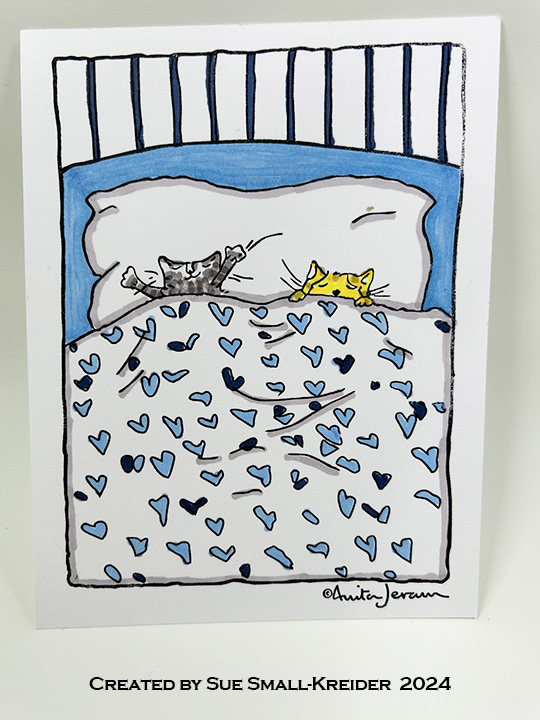
Front Panel: The Snoozing Kitties stamp works best with a stamping platform. Because I used StazOn ink a solvent ink, I only got one chance at stamping the complete image. I stamped the image on three separate pieces of cardstock and watercolor paper. Some images were faint in areas, so I filled them in with a 01 black fine tip pen before coloring. I experimented with watercolor brush markers and alcohol markers. I had more control over the intensity of color with the alcohol markers as well as a wider range of colors to choose (80 alcohol markers to 12 watercolor brush markers.) My chosen panel was the first one I colored with alcohol markers. Yellow cat colored with 37 pastel yellow, 38 pale yellow, 163 green bice and 120 black. Gray striped cat used 120 black, WG3 warm grey and WG5 warm grey. The comforter’s hearts were colored with 70 royal blue, 144 pale baby blue and 185 pale blue light. The shadows on the bedding wrinkles is WG1 warm grey. 70 royal blue was also used for the wallpaper stripes, while 185 pale blue light was used for the headboard. β€œHappy Meowther’s Day” was stamped in black over the wallpaper.

Inside Sentiments: All the sentiments inside the card are from the Happy Meowther’s Day stamp set. They include β€œThank you for feeding me, cleaning up after me, and loving me more than anything else in the world. The feeling is mutual.” And β€œfrom the cats” with tiny paw prints and a heart. The heart is stamped in red while all the words and paw prints are in black.

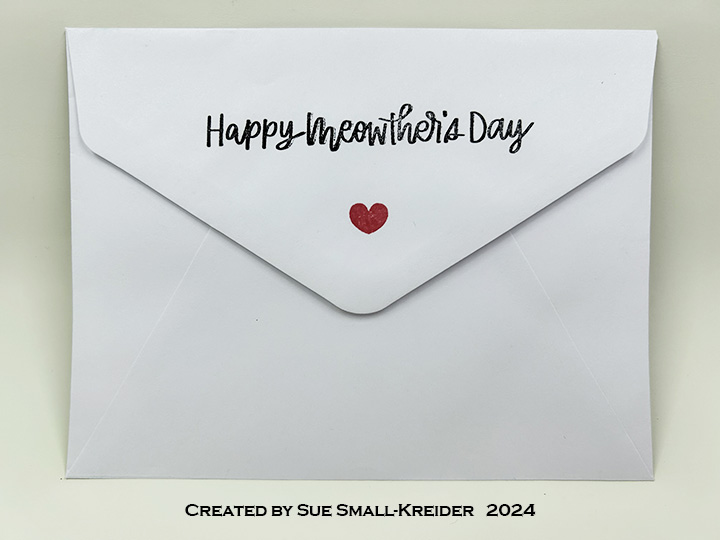
Envelope: β€œHappy Meowther’s Day” is stamped on the back of the envelope flap in black ink with a red heart underneath it.

___________________________________________________________

Thank you for reading this blog post.

I hope this inspires you and makes you smile.

Please like and leave comments 😊

___________________________________________________________

Materials Used:

Stamps

  • Colorado Craft Company – Clear Stamps designed by Anita Jerem – Snoozing Kitties -AJ408
  • Simon Says Stamp – Clear Stamps – Happy Meowther’s Day – sss202293c

Papers

  • White 65lb Cardstock
  • CraftSmart – A2 Printed Cardbase and White Envelope

Ink

  • StazOn – Solvent Ink – Jet Black
  • Pigma – Mircon 01 Fine Tip Pen – Black
  • Ranger – Tim Holtz – Distress Ink- Lumber Jack Plaid
  • Creative Craft Products – Dual Tip Alcohol Markers – 37, 38, 70, 120, 144, 163, 185, WG1, WG3 &WG5
  • Altenew – Watercolor Brush Markers – Spring Garden Set

Adhesives

  • Double-Sided Tape -1/8-inch wide

Tools

  • Stamping Platform
  • LDRS – Stampendable Stamping Tool

Stamp & Scrapbook Expo Cards

Just wanted to share the card fronts and light-up lighthouse card I made at workshops at the Orlando Stamp & Scrapbook Expo last week.

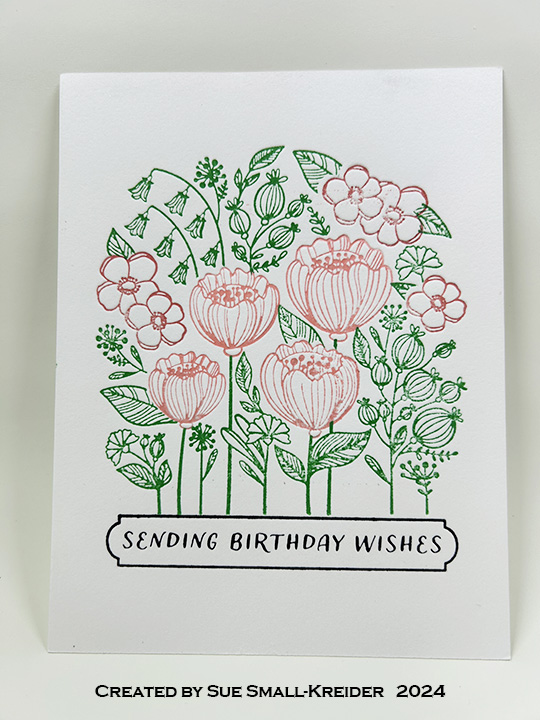
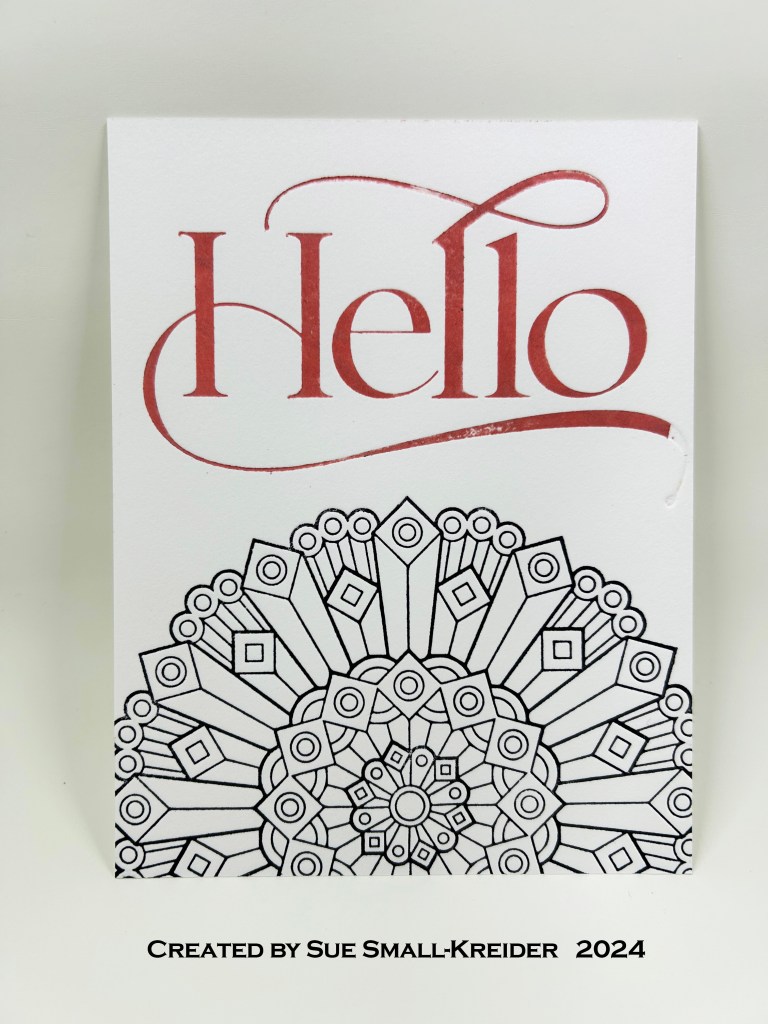
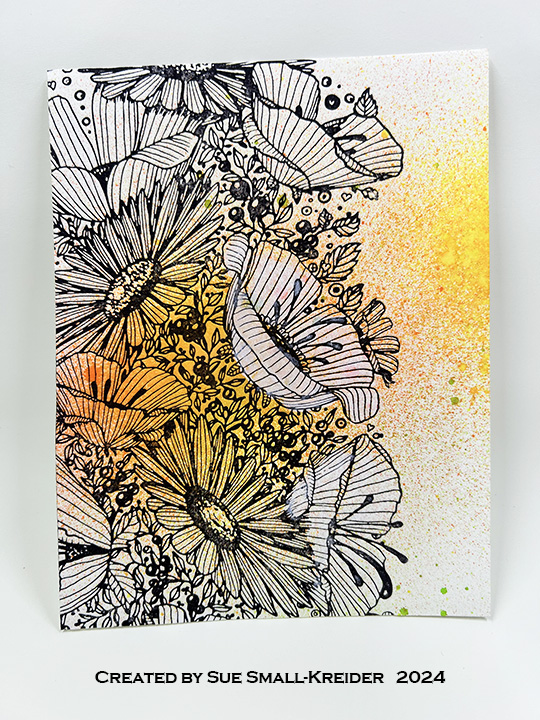
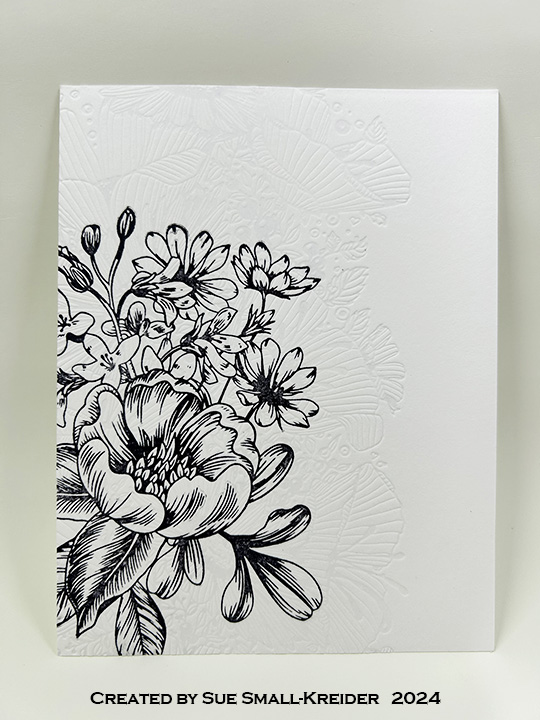
I took a class with Jennifer from Stamplistic on using the Spellbinder’s Better Press. We made a number of card fronts trying different techniques and papers. To get the letterpress look of an embossed plate, you need to use the thick cotton paper such as the Better Press papers. We learned to add sprays to the paper before stamping onto the paper for the crisp imprint and ink coverage of image. You can add a variety of ink colors to one plate, or use one of the new registration plate sets and print different colors in several printing passes. I found the Better Press to be a quick way to get professional and elegant looking images. The cost is more than rubber or clear stamps, but as long as you get enough ink on the plates, you get a professional looking image that you can then watercolor or color with alcohol markers.

Sabrina Leavell of Scrappy Tails taught a quick workshop on making a dimensional lighthouse with a Pear Blossom one light to make it light-up.

Lots of great and friendly vendors at the Expo too.

Caffeinated Fun!

This card was made for Craft Roulette #210 whose parameters included Project must include action, Northern Lights colors, blackboard element(s) and oval(s).

Below is a recorded live video (37 minutes) that demonstrates how the inside-out card is made.

For a shorter experience watch the Craft Roulette process video below.

___________________________________

Thank you for experiencing this blog post.

I hope this inspires you and makes you smile.

Please like and leave comments 😊

__________________________________________

Materials Used:

Dies

Stamps

  • Crackerbox Stamps – Rubber Stamp – Coffee Cup
  • Riley & Co. – Funny Bones Rubber Stamps – Coffeeology
  • Riley & Co. – Funny Bones Rubber Stamps – If Your Eyes Hurt After Drinking Coffee

Papers

  • Memory Box – 8.5×11 Woodgrain Embossed Cardstock – Kraft
  • Black Cardstock

Ink

  • Ranger – Tim Holtz – Distress Ink- Walnut Stain
  • VersaMark – Watermark Ink Pad
  • American Crafts Embossing Pen
  • White Gel Pen
  • Hero Arts – Embossing Powder – White
  • Stampendous! – Glitter Embossing Powers Kit –  Mermaid Sea

Adhesives

Tools

  • Die Cutting Machine
  • Bone Folder
  • Stamping Platform
  • LDRS – Stampendable Stamping Tool
  • Dry Brush
  • Tweezers
  • Craft Mat
  • Stamping Blocks used as paperweights
  • Kat Scrappiness – Anti-Static Tool
  • Heat Tool
  • Craft Knife
  • Scissors
  • T-Ruler
  • Metal Ruler/Straight-Edge
  • Pencil
  • Tombow – Mono – Sand Eraser -512A

A Card For Craft Roulette Fans

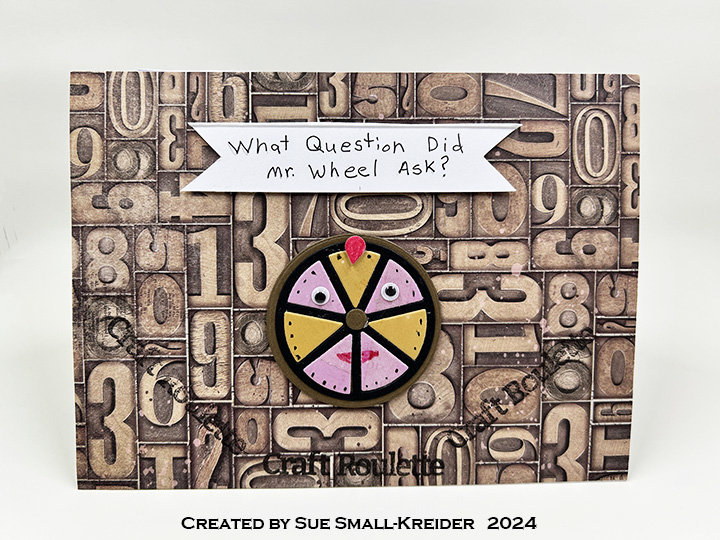
This card was made for Craft Roulette #209 whose parameters included a tri-fold card, sleigh ride colors, joke(s)or funny element and out of proportion. It has a number of insider jokes in it for that Craft Roulette fan to get.

The card uses a purchase A6 cardbase (4.625 in x 6.25 in) as a top fold and two pieces of decorative 6 in x 8 in paper.

_________________________________________________________________

Thank you for experiencing this blog post.

I hope this inspires you and makes you smile.

Please like and leave comments 😊

__________________________________________________________________

Materials Used:

Dies

  • Craft Roulette – Metal Dies – Wheel Factory
  • Sizzix – Tin Holta – Thinlits – Tiny Travel Globe

Stamps

  • Craft Roulette – Clear Stamps – The Basics

Papers

  • BoBunny – 6 in x 8 in Single-Sided Cardstock – Family Heirlooms Collection
  • Park Lane Paperie – A6 Cardbase and Envelope – White
  • Colored and White Cardstock

Ink

  • Hero Arts – Alcohol-Marker Friendly Ink Pad – Intense Black
  • Sharpie – Permanent Marker – Fine Tip – Red
  • Pigma – Mircon 01 Fine Tip Pen – Black

Adhesives

  • Neutral PH Adhesive by LINECO
  • Fine-Tip Glue Bottle
  • Double-Sided Tape -1/2-inch wide
  • Foam Squares

Tools

  • Stamping Blocks
  • Scissors
  • T-Ruler
  • Pencil
  • Tombow – Mono – Sand Eraser -512A
  • Needle Nose Pliers with Wire Cutter

Miscellaneous

  • Tiny Googlie Eyes
  • Striped Paperclip
  • Orange Craft Wire

Camping at the Lake

This card was made for Craft Roulette #208 whose parameters included a joy-fold card, buggy ride colors, sticks and stones element and trim(s) or trimming(s).

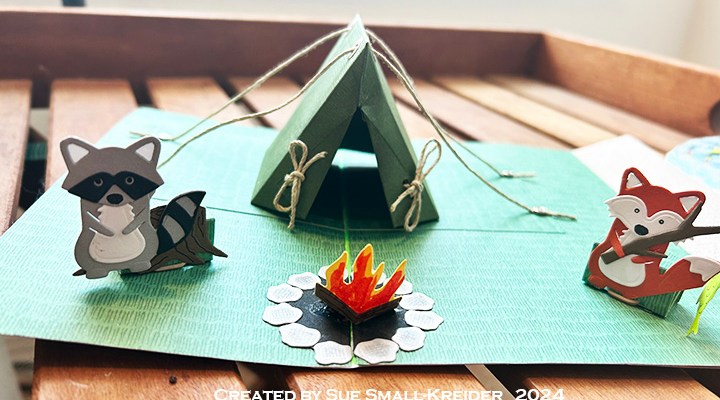
For this joy-fold card I used the colors of a buggy ride to the lake to go camping with a fishing stick and campfire stones. The lake is made of blue rick-rack trim on acetate. All dies used are by Karen Burniston.

Cardbase: A joy-fold is basically a smaller card that interleaves with a larger card. My smaller card is an oval cut from acetate and sandwiched between some kraft splattered cardstock with the cardstock folded and glued into the larger purchased 5×7 cardbase. The larger cardbase had its front panel trimmed to 4-inches wide. The larger cardbase was covered with green grass paper inside (covering over the kraft cardstock) and its front panel covered with blue dotted paper.

Lake: The front of the oval acetate flap was covered with rick-rack using double-sided tape. A kraft cardstock tab was added to make it easier to open the velco fastener that keeps the card close and the bam boxes from popping open. The tab is stamped with β€œLift the flap.” The sentiment of “Hello nature” is cut using the Word Set 6 – Summer set.

Tent: Watch the assembly video at the bottom of the linked page. The tent pop-up can be made with out the cording, but I chose to add the cording using tiny brads on another layer of grass green cardstock to attach it.

Animals: The racoon and fox are made with the Woodland Animals die set. They are glued to small bam boxes to make them pop-up. The fish are from the Camping Charms set and are colored with pink and mint green glitter brush markers. The fishing stick is also in the Camping Charms set.

Campfire: The pop-up campfire is made up of five dies that form the campfire pit and burning logs. It is part of the Tent Pop-Up set.

Thank you for reading this blog post. I hope this inspires you and makes you smile. Please like and leave comments 😊

Materials Used:

Dies

Stamps

  • Lawn Fawn – Photopolymer Clear Stamps – Push Here -LF1415

Papers

  • Bazzill – 8.5×11 Textured Cardstock – Tiara
  • Bazzill – 8.5×11 Textured Cardstock – Rain Forest
  • Keep It Simple – 12×12 Double-Sided Cardstock – Jade Collection Pack-Spearmint Grass
  • Spellbinders – 8.5×11 Textured Cardstock – Terra Cotta
  • The Paper Studio – 8.5×11 Printed Paper – Random Dot – Robin’s Egg Blue
  • Colored Cardstock
  • Mica Spray Splattered Kraft Cardstock
  • Dura-Lar .0005 Clear Film Acetate
  • Park Lane Paperie – A7 Cardbase and Envelope – White

Ink

  • Hero Arts – Intense Black
  • Ranger – Tim Holtz – Distress Ink – Black Soot
  • Scrapbook.com – Glitter Brush Marker – Blush Pink
  • Scrapbook.com – Glitter Brush Marker – Minty Green
  • Scrapbook.com – Glitter Brush Marker – Red
  • Sharpie – Permanent Marker – Fine Tip – Green
  • Pigma – Mircon 01 Fine Tip Pen – Black

Adhesives

Tools

  • Die Cutting Machine
  • Bone Folder
  • Craft Mat
  • We R Memories – QuickStick
  • Craft Clips
  • Sponge Dauber
  • Stamping Blocks used as paperweights
  • Scissors
  • Metal Ruler/Straight-Edge
  • Pencil
  • Tombow – Mono – Sand Eraser -512A

Miscellaneous

  • Velco Fastner Dots
  • Blue Rick-Rack Trim
  • Linen Cord
  • Four Tiny Silver Brads