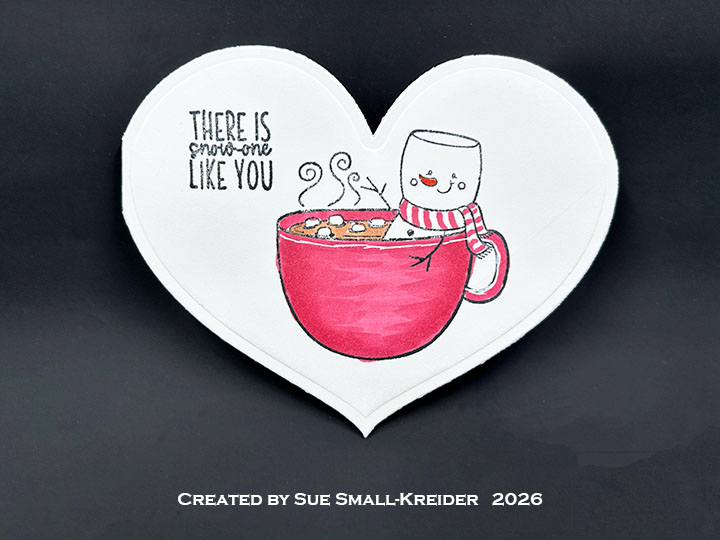
A Valentine for my sweetie! Made with Simon Says Stamp’s collaboration with Pink & Main stamp set called Snow-One Like You and a heart die.
Cardbase: I folded an 8.5×11 sheet of white 65lb. cardstock in half to create a 4.25×5.5-inch rectangle that I cut two heart shaped cardbases from with the left edge of the die slightly over the folded edge. One cardbase I cut apart to glue over the back sides of the colored images.
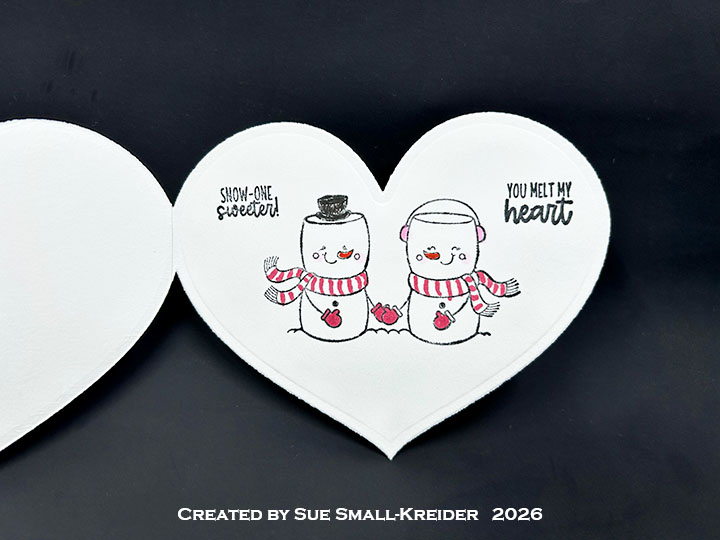
Sentiments: On the front the cocoa cup reads “There is Snow-One Like You” and inside “Snow-one Sweeter!” and You melt my Heart.” All the sentiments come from Snow-One Like You stamp set.
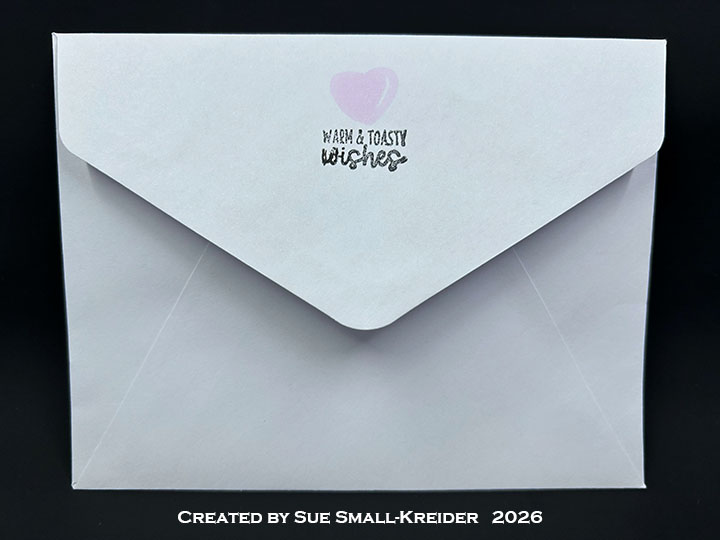
Envelope: The card fits into an A2 (4.25x 5.5-inches) size envelope.
Disclaimer: Karen Burniston products are provided free of charge by the manufacturer for review and use. All other items were personally purchased. Compensated affiliate links used where or when possible, meaning I will receive a small percentage commission from these manufacturers at no cost to you. This will allow me to add more content to my YouTube channel and help out a lot. Thank you.
Materials Used:
Dies
Fun Stampers Journey – Steel Dies – Heart-Felt – DI-0033
Stamps
Simon Says Stamp’s collaboration with Pink & Main – Clear Stamps – Snow-One Like You
Papers
White Cardstock
White A2 Envelope
Ink
Memento – Fade Resistant Dye ink – Tuxedo Black
OLO – Markers – Bubble Gum, Cotton Candy, Dragon Fruit
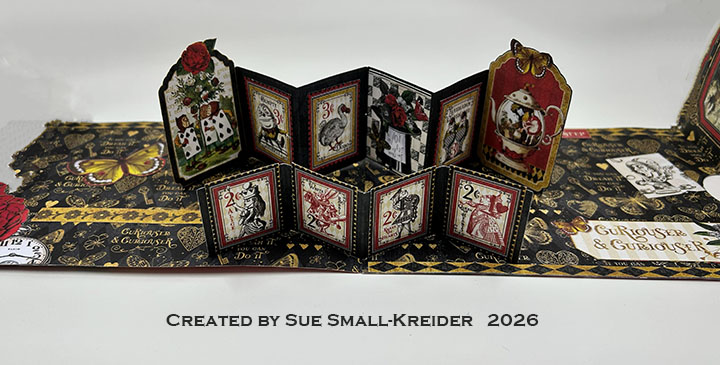
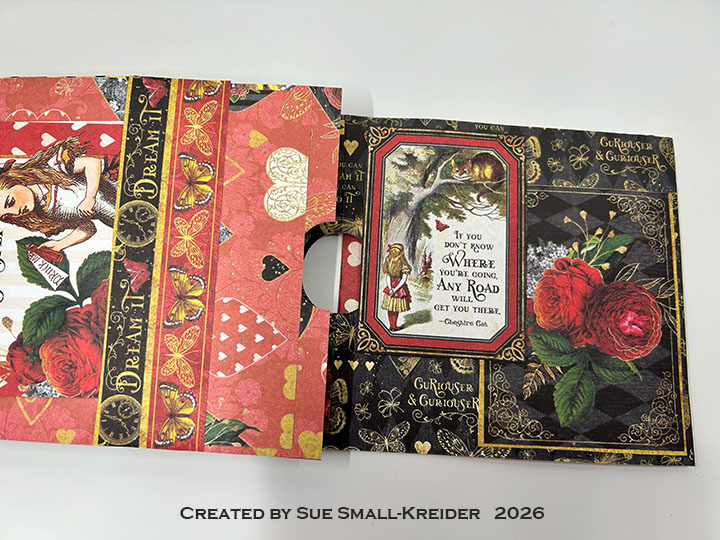
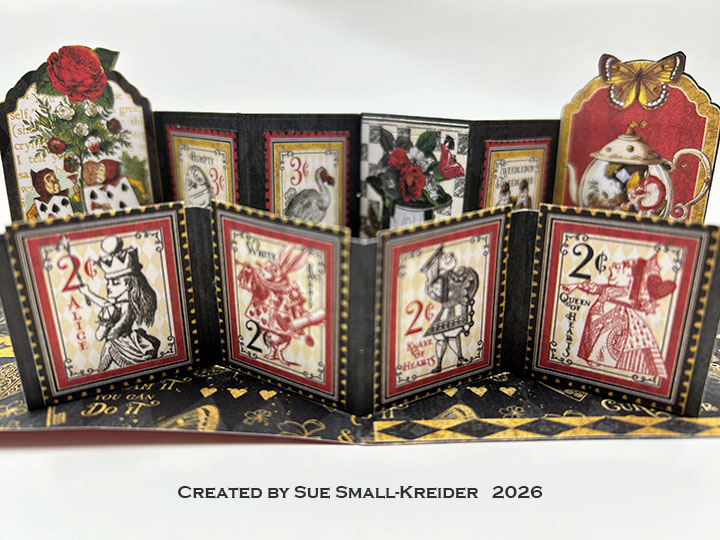
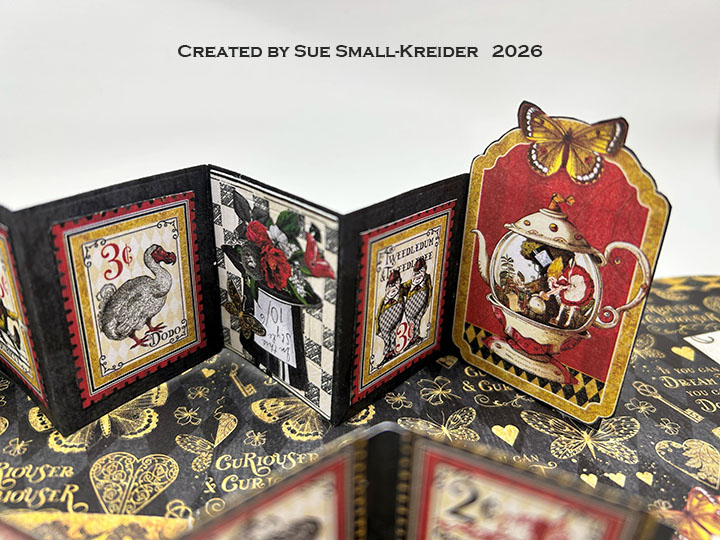
Wanting to make a project with the Graphic 45 Curiouser & Curiouser paper collection, I used the new Karen BurnistonPhoto Gallery Pop-Up die set along with her previously released Waterfall Card dies to make this Alice in Wonderland themed junk journal folio card.
Watch the process video to see how I made this card.
Cardbase: (Watch the video above for assembly instructions.) Cut a 5×12-inch rectangle from double-sided cardstock. Cut another rectangle at 5×7 1/4-inches from the same cardstock. Score both pieces at 6 7/8-inches. Glue tab of short piece to long piece on the 7-inch side to form a 19-inches long trifold cardbase.
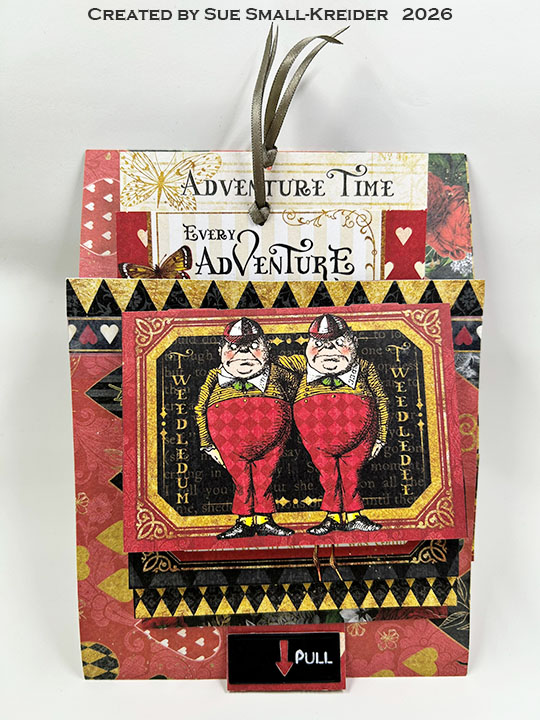
Waterfall Card Front: (Watch the video above for assembly instructions.) on the 5×12-inches cardbase piece, using the half-circle die in the Waterfall Card set, cut the thumb hole in the center of the fold. Cut the waterfall pull strip and base piece from the same patterned cardstock, train the folds and glue the smiley face tabs together. Centering the pull strip over the thumb hole, staple the base piece in place at the bottom corners.Cut four images from the double-sided papers so that they are 2 3/4-inches tall and less than 4-inches wide. Glue images to waterfall base as shown in the video. Attach the “pull” arrow rectangle die cut from the Waterfall Card set to the end of the pull strip.
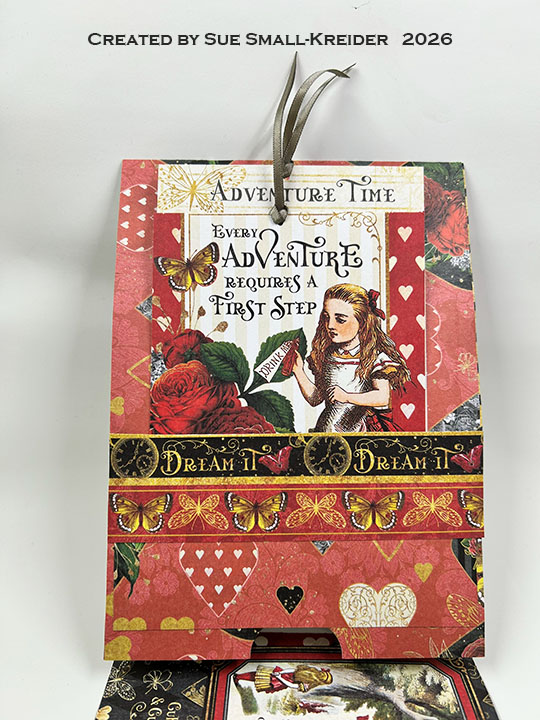
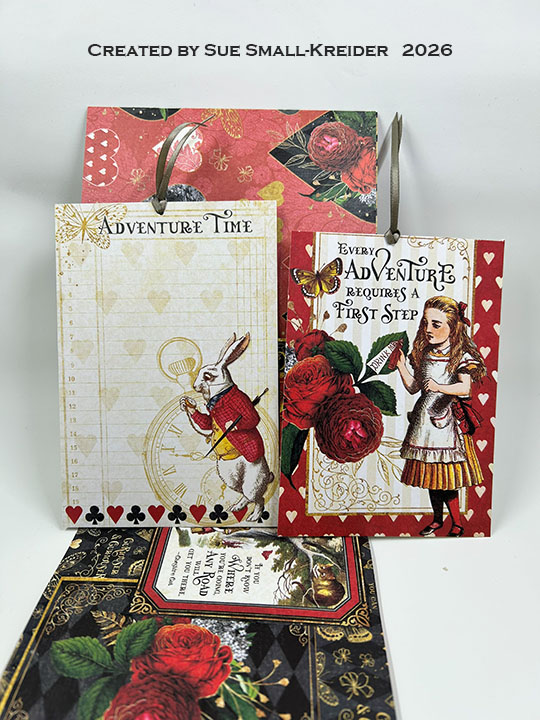
Pocket Tags: Cut one or two images to be tags for the second cardbase panel (My images are 3 3/4×5-inches and 3 3/4×5 1/2-inches.) Punch holes and thread through ribbon as pull strings. Cut and decorate a 2 1/5×4 3/4-inch piece of the same cardstock as the cardbase and glue on three sides to make the tags’ pocket.
Photo Gallery Pop-Up: (Watch the video above for assembly instructions.) Using the Photo Gallery Pop-Up die set, cut two of the large gallery pieces matching the direction of the pattern paper so that when glued together the pattern is all going the same way. Cut the two triangle tabs from the same paper as the cardbase. Cut one of the smaller galley piece. From the patterned paper cut enough images to fit the two gallery pieces. (Note that many of my images stick up over the top edge of the gallery pieces.) Attach the gallery pieces as shown in the video above. Decorate the cardbase with extra images taking care to not cover folds or create catchpoints.
Envelope: This junk journal folio card fits into an A7 (5×7-inches) envelope.
Disclaimer:Karen Burniston products are provided free of charge by the manufacturer for review and use. All other items were personally purchased. Compensated affiliate links used where or when possible, meaning I will receive a small percentage commission from these manufacturers at no cost to you. This will allow me to add more content to my YouTube channel and help out a lot. Thank you.
Watch the process video to see how I made this card.
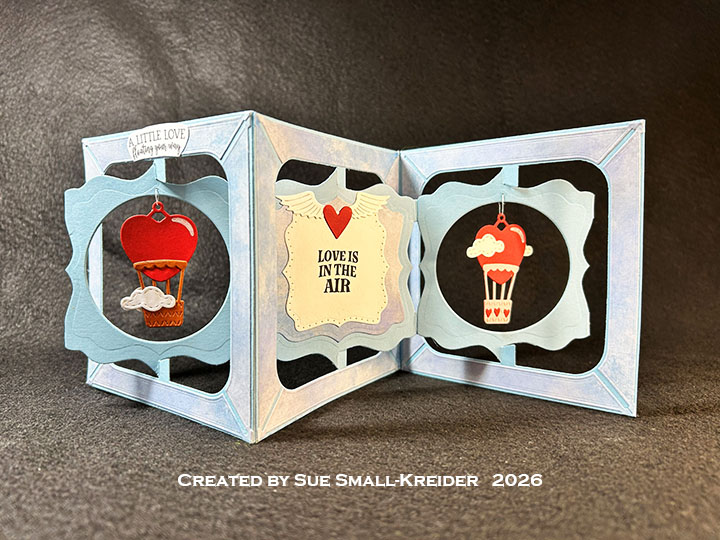
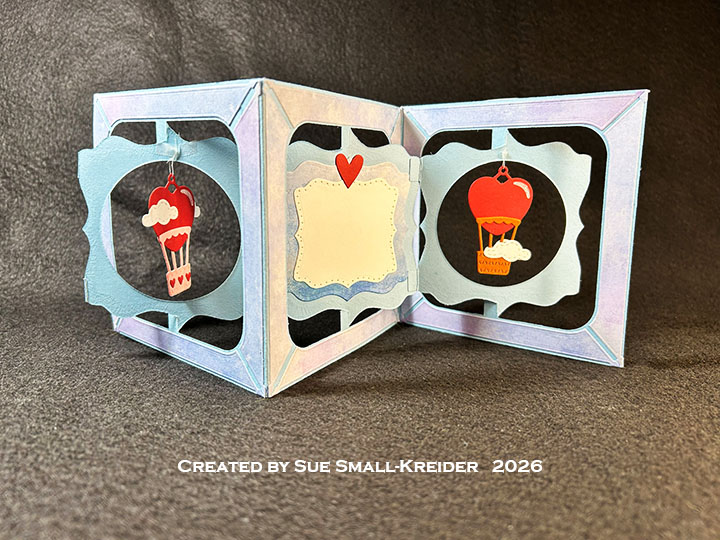
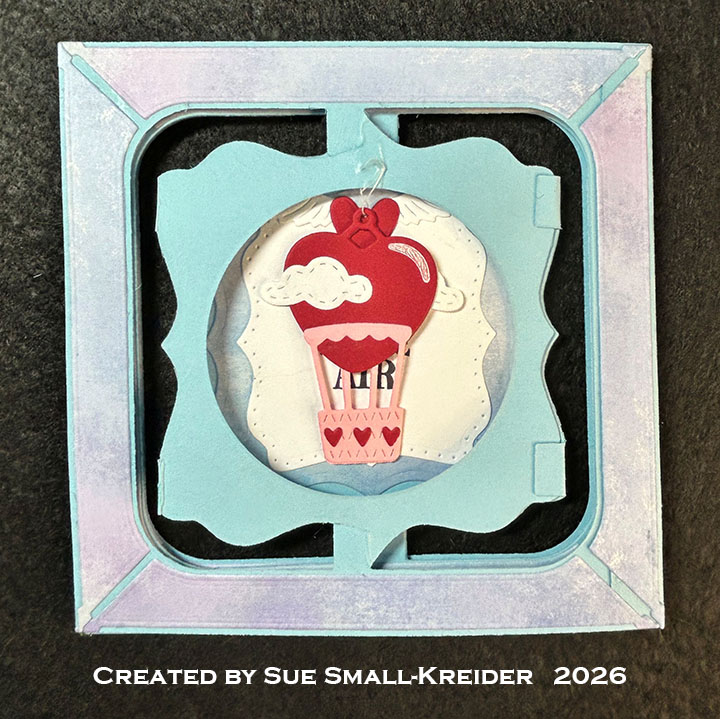
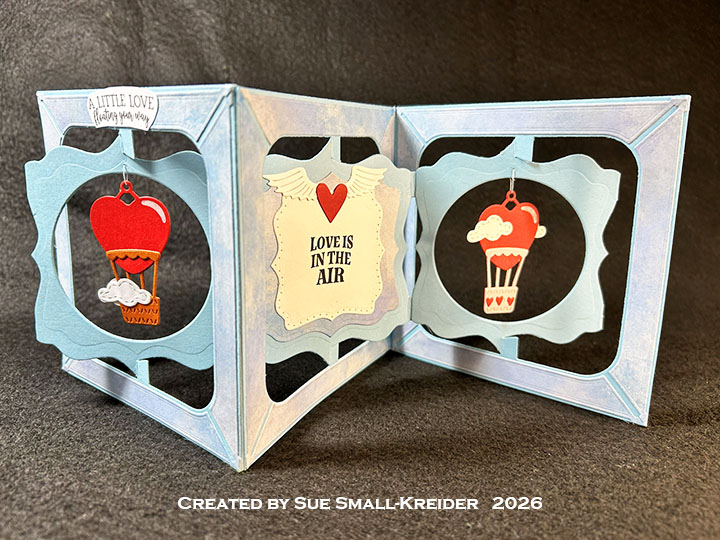
Accordion Cardbase:Watch the assembly video located at the bottom of the linked page for the Fancy Label Accordion. Cut three Fancy Label Accordion frames from a heavy weight blue cardstock. Using the 2.4-inch die in the Circles – Crosshatch, cut openings in the label portion of TWO of the three accordion frames. Glue the three frames together with the circle frames on the ends. Cut six sets of Fancy Solid Frame from patterned paper. Glue decorative frames on to both sides of the accordion frames. (Watch this assembly video for adding frames to accordion cards.) Finish assembling the card as shown in the video above.
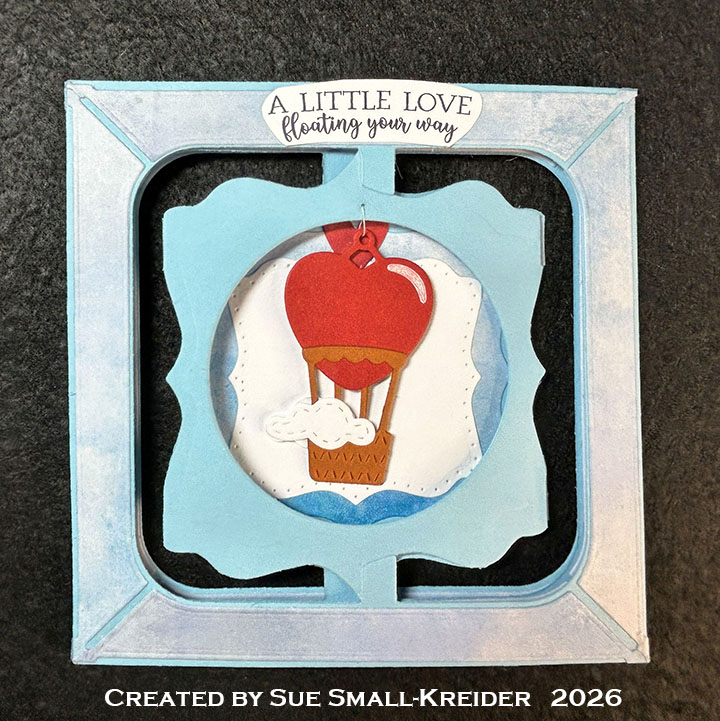
Hot Air Balloons: Cut four red heart charms from the Love Is In The Air Charms die set. Use the stencil feature and a white gel pen to add the highlights. Cut a total of four baskets. (I cut two brown and two pink.) Cut four white clouds and one set of tiny hearts in red. Assemble as shown in the video above. Using a thin sewing needle and cotton thread, pierce a hole into the top of the circle frame label and then thread the balloon charm onto the thread. Tie off the thread loop using a square knot. Push the knot to the back side of frame and add a drop of liquid glue to secure it to the frame. (I like theNeutral PH Adhesive by LINECO.)
Sentiments: The sentiments are stamped onto white cardstock and then cut out. On the card front is “A little love floating your way” is from the Stage Scenes. Fussy cut to fit on the card frame. Using the Fancy Label Accordion decorator dies, cut the “Love is in the air” from the Love Notes stamp set.
Envelope: The closed card fits into an A7 (5×7-inch) size envelope stamped with “Love is in the air” from the Love Notes stamp set.
Disclaimer: Karen Burniston products are provided free of charge by the manufacturer for review and use. All other items were personally purchased. Compensated affiliate links used where or when possible, meaning I will receive a small percentage commission from these manufacturers at no cost to you. This will allow me to add more content to my YouTube channel and help out a lot. Thank you.
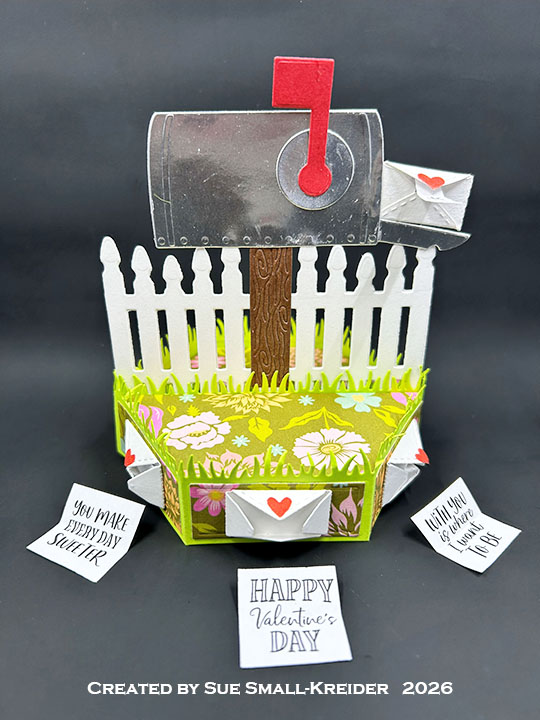
IT’S TIME for the Karen Burniston Products – KB Riley LLC January 2026 Release Blog Hop. (See GIVEAWAY details at the end of this post for blog hop list.) The Design Team have come together with Karen today for a fun blog hop to celebrate the release of 10 new dies and 5 new stamp sets. Sneak peeks of the new release started last week, and the dies are available to pre-order NOW!
Watch the process video to see how I made these cards.
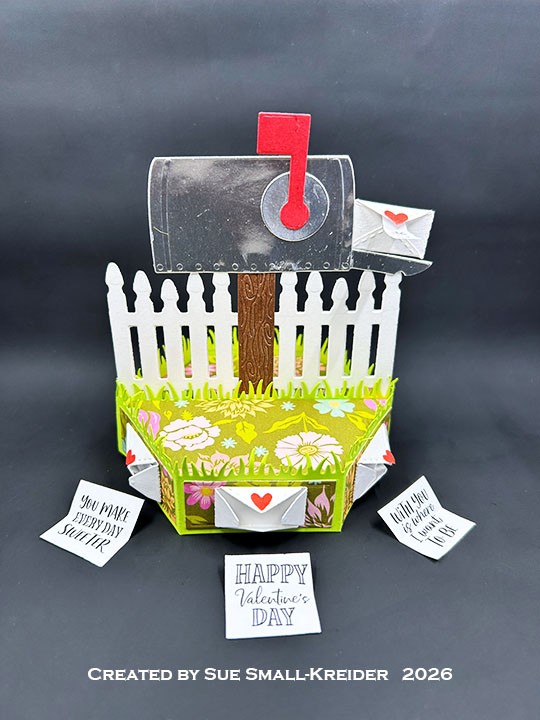
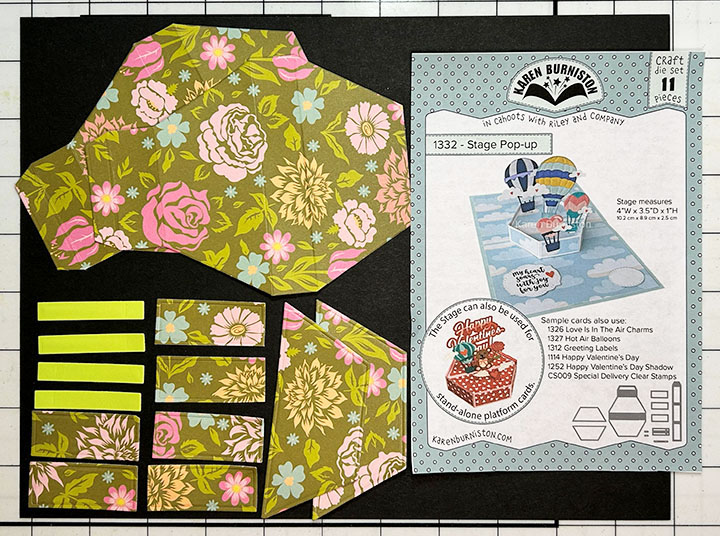
Stage Pop-Up Base: Using the Stage Pop-Up die set, cut two of the largest die from patterned cardstock. Cut six of the rectangle decorator dies from the same patterned paper. From green cardstock cut two of the grassy stage-side strips and two of the smaller grass strip from the Grass Stage Add-Onsdie set. Glue the decorator rectangles on to the front panels of the grassy stage-side strips. Assemble the stage platform as shown above in the video.
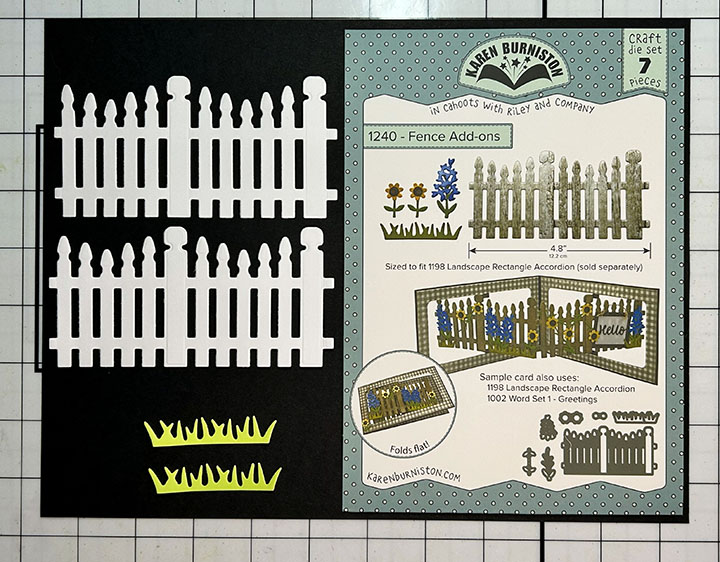
Fence: Cut two of the fence pieces from the Fence Add-Ons die set. Trim off the right end large post and small tabs on each end to create a symmetrical fence with a large center post that is 4-inches wide. Repeat with second piece. Glue the pieces together matching up the fence pickets.
From green cut twice the short grass die from the Mailbox Pop-Up set and then cut each of them in the middle. Glue these pieces to the ends of the grass strips cut from the Grass Stage Add-Ons. Center and adhere the grass strips on the bottom edge of both sides of the fence. Trim the grass flush with the fence edge.
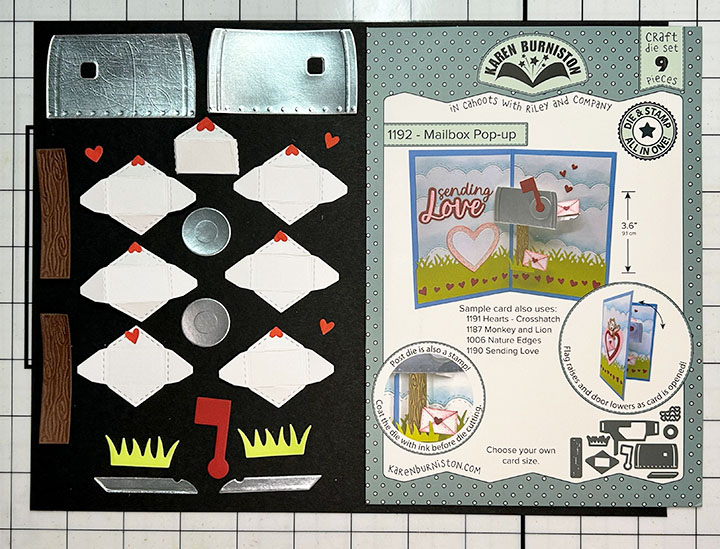
Mailbox: Cut the mailbox, lid and circle dies in the Mailbox Pop-Upset from silver cardstock. Cut the same pieces from the back side of the silver cardstock so you will have the reverse set of pieces. (A suggestion that I should have done when I cut my reverse pieces, is to lay a thin piece of paper on your cutting mat then then the sliver cardstock silver side down. Then the dies and top plate. This will help eliminate all the scratches that will be embossed onto the reverse silver side.)
Cut from brown, two mailbox posts and glue them to the center post of the fence on each side. Glue the Two lid pieces back-to-back. Glue the front mailbox piece onto the top of the brown post. Adhere the back mailbox piece back-to-back with the front mailbox with no glue on the front edge where the lid will be slid into it. Trim if necessary and glue the lid into the mailbox. Add silver circles to the mailbox sides to cover the holes. Add the red flag to the front.
Tiny Envelopes: Cut seven of the envelopes in the Mailbox Pop-Up set from thin white cardstock. Fold on the side stitch lines. Glue one envelope together as shown in the video above. Cut one set of the tiny hearts in the same die set from red. Glue hearts to envelopes top flaps with a dot of glue.
Sentiments: Stamp seven of the Love Notes sentiments on thin paper and cut out with a square die and trim to fit into the envelopes. (I used the stitched 1 1/8-inch square die in theGreeting Labelsset and trimmed on the stitched lines to get a 1-inch square.) Add a ¼-inch strip of thin paper to the back of the note to go in the mailbox envelope as shown in the video. Write “Lift” on one side and “Pull” on the other side of the strip. From Stage Scenes the “Push” with arrows was stamped on white and glued to the bottom of the stage to help the card recipient know how to open the stage card.
Envelope: The card fits into an A7 (5x 7-inches) size envelope with one of the Love Notes sentiments stamped on the back flap.
___________________________________
Thank you for experiencing this blog post. I hope this inspires you and makes you smile.
Disclaimer: Karen Burniston products are provided free of charge by the manufacturer for review and use. All other items were personally purchased. Compensated affiliate links used where or when possible, meaning I will receive a small percentage commission from these manufacturers at no cost to you. This will allow me to add more content to my YouTube channel and help out a lot. Thank you.
To celebrate the release Karen Burniston and each of the Karen Burniston – KB Riley LLC Design Team members will be giving away a $25 Gift Certificate to some lucky person who comments on our blog posts, so make sure you join the hop and comment on everyone’s blog post. Winners will be randomly chosen from ALL of the blog hop comments received on our blog posts by Monday, February 9, 2026. Lots of chances to win some goodies, so just leave a comment on this post or any other blog hop posts to enter! Don’t forget to leave some way for us to contact you, in case you are a lucky winner!
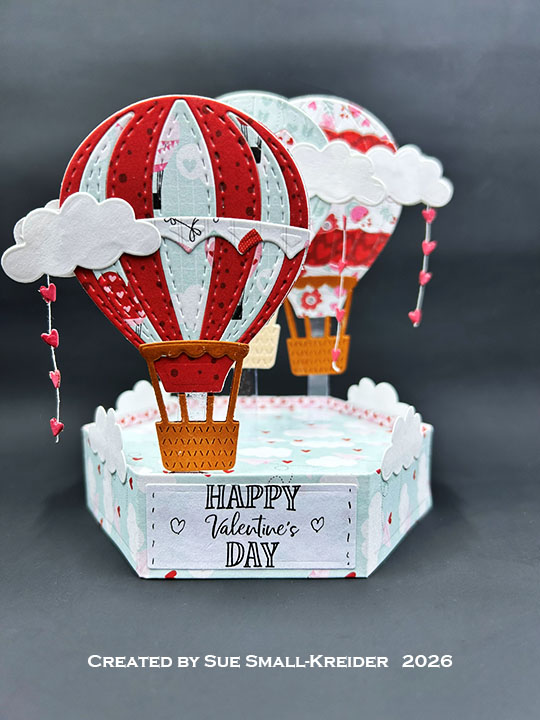
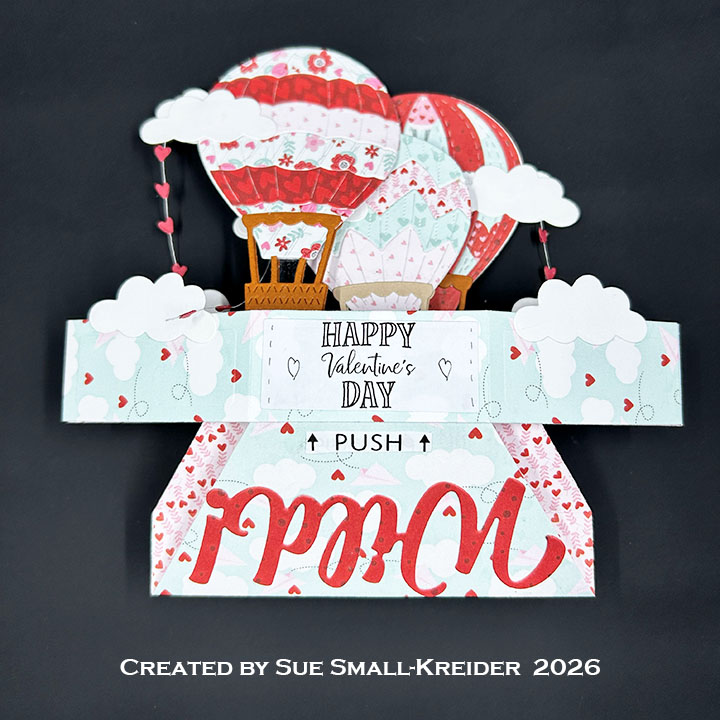
This card was made for Craft Roulette #304 whose parameters were: drop down project, mahjong colors, go wild element and hand drawn border. I used new Karen Burniston dies and stamps for this airy, pop-up Valentine. (Dies will be available for sale on February 2, 2026)
Watch the process video to see how I made this card.
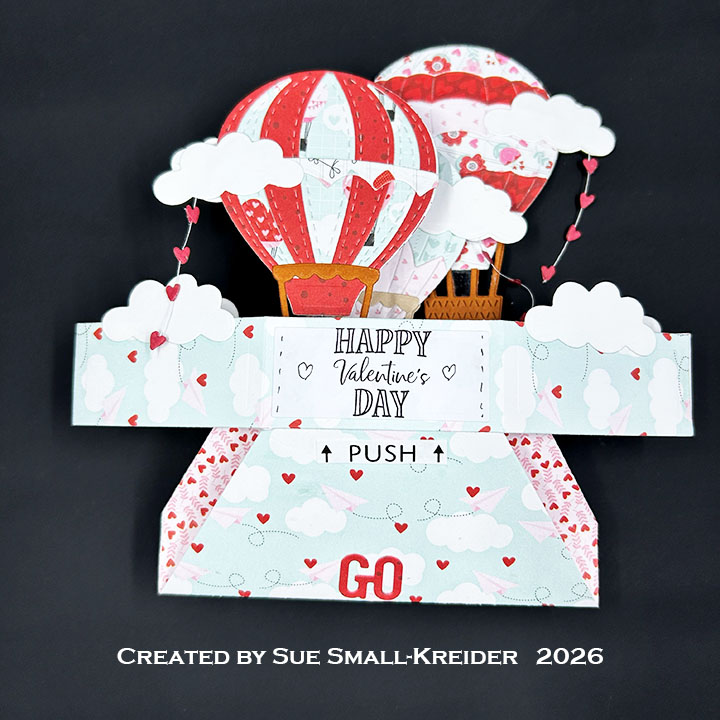
Pop-Up Stage Base: (Watch the video above for assembly instructions.) Cut two base pieces and two side strips from the Stage Pop-Updie set.
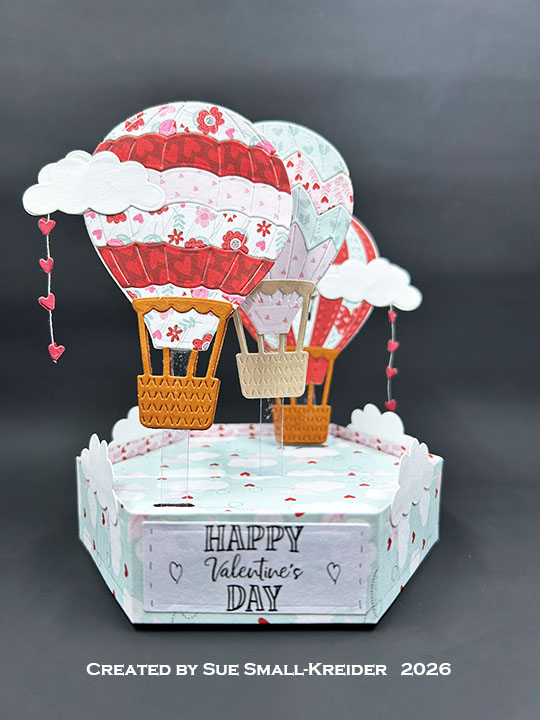
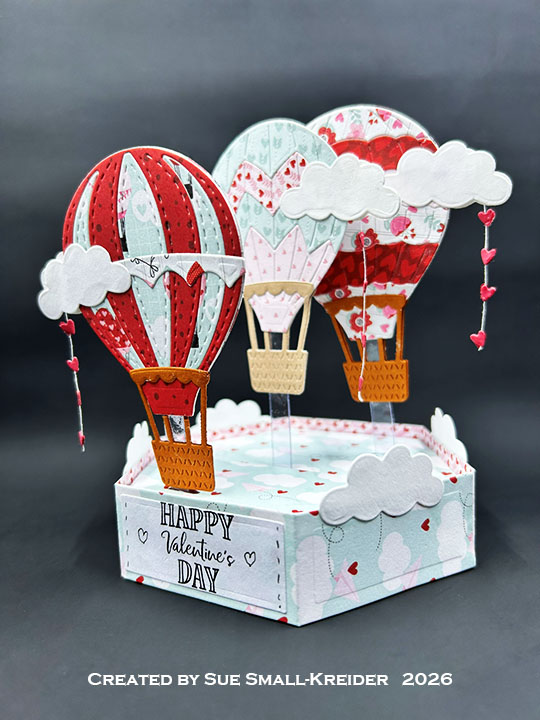
Hot Air Balloons and Raining Hearts: (Watch the video above for assembly instructions.)The Hot Air Balloonsdie set along with the tiny hearts from the Love Is In The Air Charms set are the key dies used. The hearts are sandwiched with dots of glue to pieces of cotton thread. The cloud die used is the largest one in the Hot Air Balloons set. Cut the different balloon designs several times from different patterned papers to get the different colored stripes.
Sentiments: “Go Wild!” is a previously released Karen Burniston die cut in red patterned paper. The “Happy Valentine’s Day” is part of the new Love Notes clear stamp.The stitching and hearts were hand-drawn onto the label. Stage Scenes stamps set was used for the “Push” on the bottom of the stage.
Envelope: The card fits into a 6×9-inches envelope.
Disclaimer:Karen Burniston products are provided free of charge by the manufacturer for review and use. All other items were personally purchased. Compensated affiliate links used where or when possible, meaning I will receive a small percentage commission from these manufacturers at no cost to you. This will allow me to add more content to my YouTube channel and help out a lot. Thank you.
Watch the process video to see how I made this card.
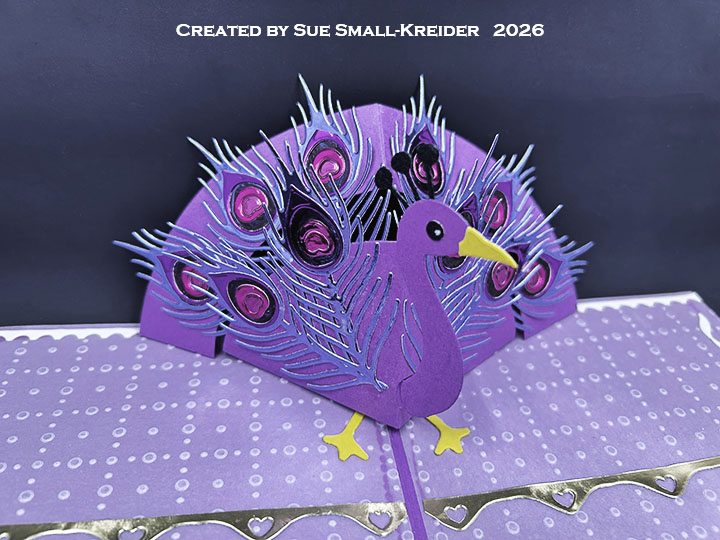
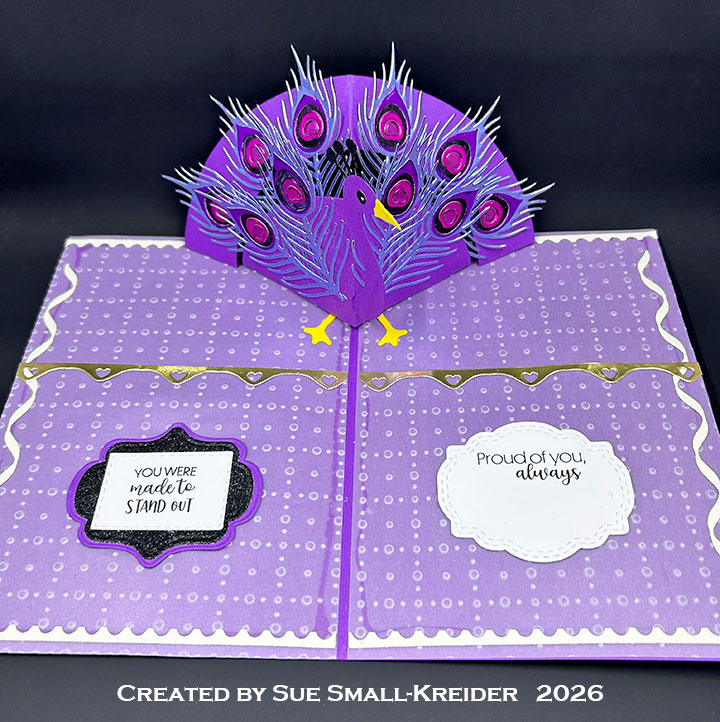
Cardbase: I used a 10×7-inch rectangle of purple cardstock scored and folded in half to form a 5×7-inch side fold A7 size cardbase. I covered the front and inside with 5×7 rectangles of embossed pink vellum. I used a square scrap of the vellum to decorate the back. Decorate with Border Blend – Trims and other leftover decoration bits as shown in video.
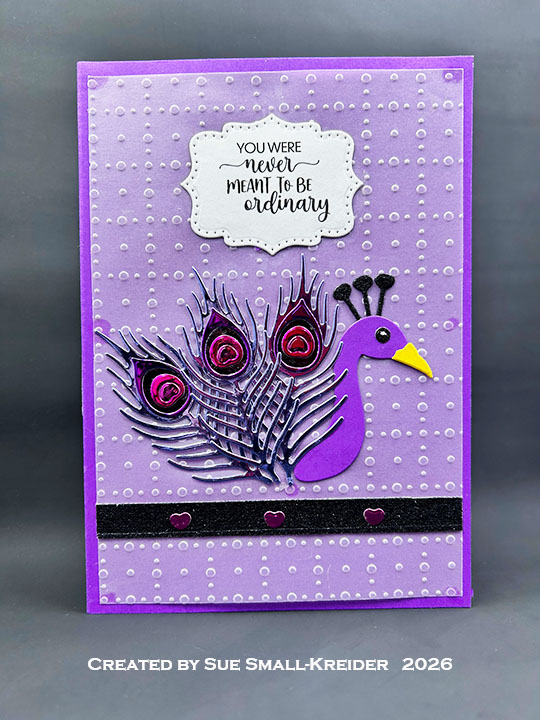
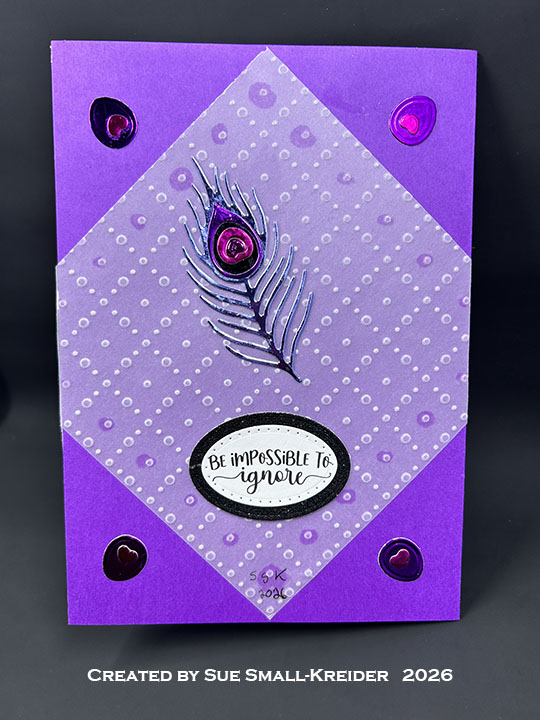
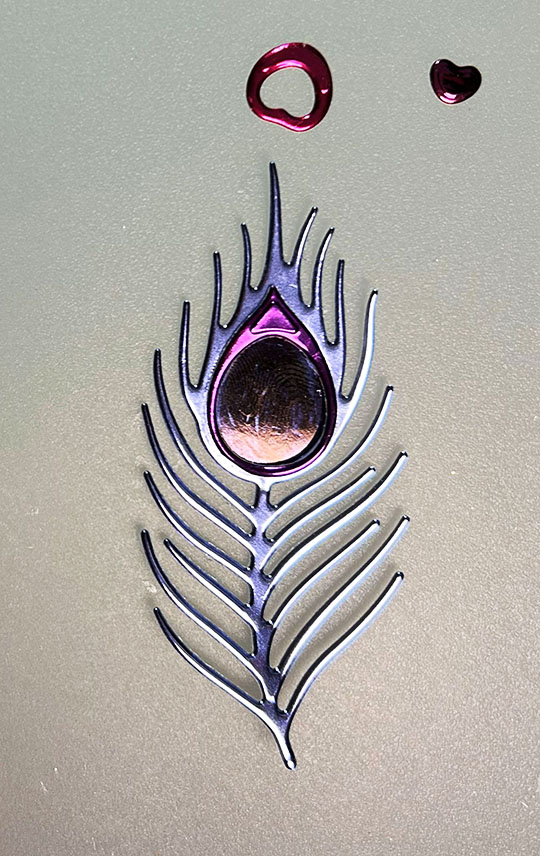
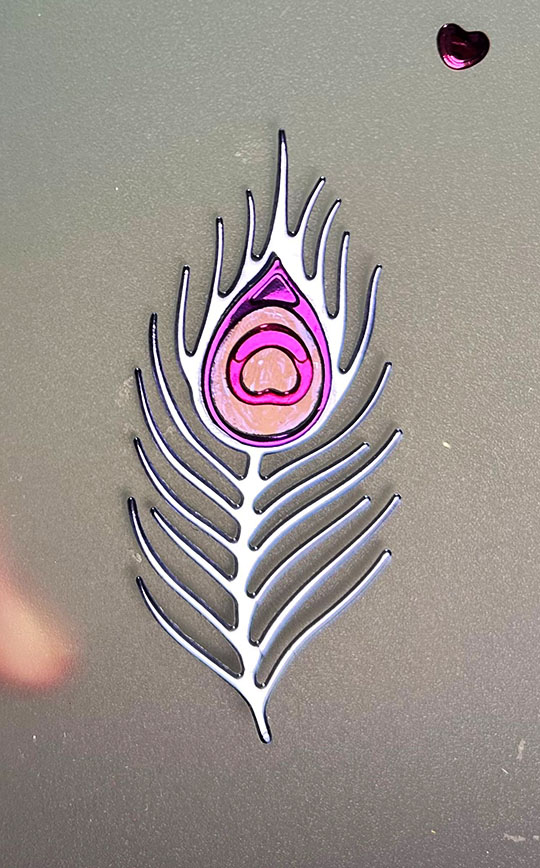
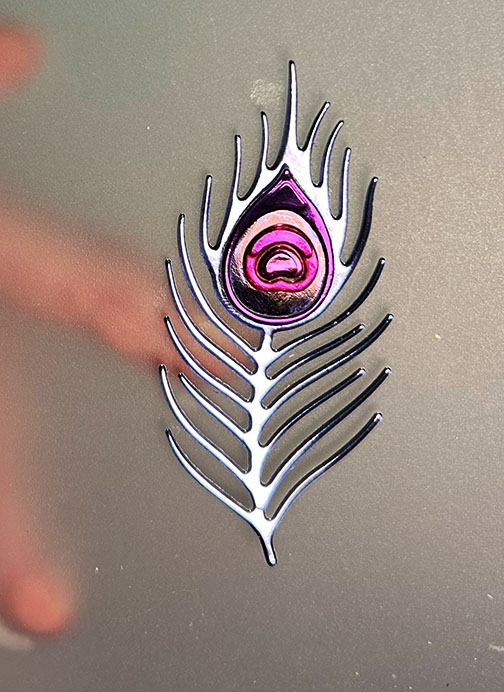
Peacock Pop-Up: Using the Arch Pop-Up set, cut one of the two arch pieces from purple cardstock. From the Peacock Add-Ons die set, cut the head and large fan-shaped pieces from purple. From the same die set, cut fourteen feathers, and fourteen of the feather’s “eye” decorations in three other colors than the feather. (I used four shades of blue/purple/pink mirror foil cardstock and a black permanent marker to color the foiled cardstock.) Cut the eye and peacock’s “crown” or corona from black cardstock. (I used some glitter black cardstock.) Eye highlights were added with a white gel pen. From yellow cardstock cut the feet and beak. Follow the video above and photos to assemble the pop-up peacock using ten of the feathers. (I cut a second set of pieces to make another head and used three of the feathers to make a flat peacock on the card front.The final feather I placed on the card back.)
Sentiments: The sentiments from the Strut Your Stuff set were stamped in black ink on white cardstock and cut out using the Greeting Labels die set. The inside label for “You were made to stand out” also uses a label die from the Lorna Label Pop-Up set to cut the black glitter label.
Envelope: The card fits into an A7 (5×7-inches) size envelope with a tiny heart leftover from the feather decorations.
Disclaimer: Karen Burniston products are provided free of charge by the manufacturer for review and use. All other items were personally purchased. Compensated affiliate links used where or when possible, meaning I will receive a small percentage commission from these manufacturers at no cost to you. This will allow me to add more content to my YouTube channel and help out a lot. Thank you.
Watch the process video to see how I made this card.
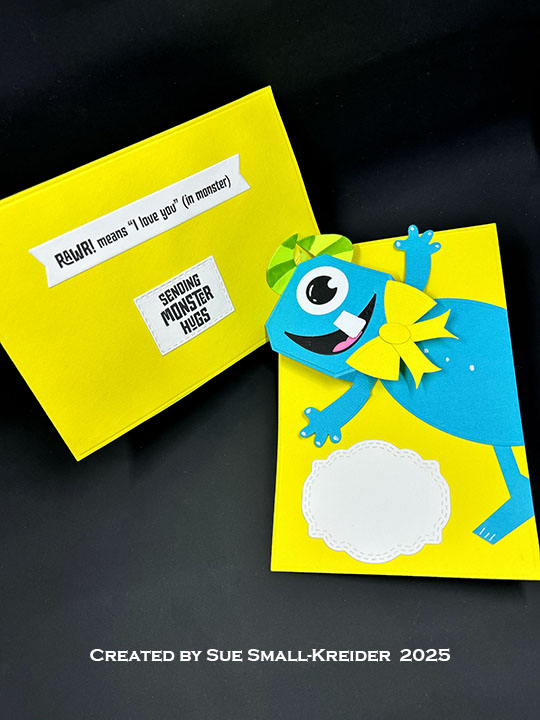
Cardbase: I used a 12×12-inch sheet of yellow cardstock folded in half and used the largest plain rectangle die from the Rectangles and Labels – Crosshatch set placed with one corner over the fold to get a diagonal opening card base. Assemble card as shown in video.
Monster Pop-Up: Using the Playful Pop-Up set, cut one of the largest die, the decorative notched square and the “Y” piece die from blue cardstock. From the Monster Playful Add-Ons die set, cut the large eye and tooth from white. Cut the arms from blue. Cut the eye center and mouth with tongue from black. Cut the horns from green and stencil on the stripes. Follow the video above and photos to assemble.
Monster Body: The body is an oval from the Ovals – Crosshatchdie set. The leg is the “Y” piece die from the Playful Pop-Up set cut down. Eye highlights, finger nails and toe nails along with buttons were added with a white gel pen.
Bow: From the Dog and Cat Playful Add-Onsdie set, cut from yellow cardstock – the largest eyeball, the largest cat ears and the paw arms. Trim off the paw end of the arms to make a fish tail ribbon ends and assemble as shown in the video above.
Sentiments:Rawr! Is die cut into the green panel before being glued onto the yellow cardbase. The blue shadow was cut with the word die taped inside the shadow die and the tiny pieces from the centers of the R’s and A glued in place onto the yellow. Inside the sentiments were stamped using the Monster Sayings set and cut out using the Greeting Labels die set. A white label cut from the same labels set is for a personal message. The card back has an eyeball and “I only have eye for you.”
Envelope: The card fits into an A6 (6 1/2×4 3/4-inches) size envelope.
Disclaimer: Karen Burniston products are provided free of charge by the manufacturer for review and use. All other items were personally purchased. Compensated affiliate links used where or when possible, meaning I will receive a small percentage commission from these manufacturers at no cost to you. This will allow me to add more content to my YouTube channel and help out a lot. Thank you.
It’s Sneak Peek Week for Karen Burniston’s November 2025 release of new dies and stamps.
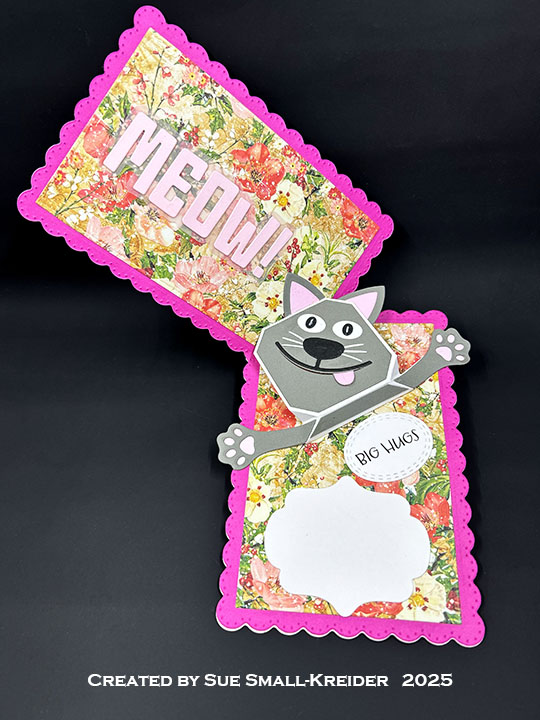
Today’s card uses the new dies of Playful Pop-Up, Dog and Cat Playful Add-Ons, Greeting Labels and Meow! As well as Rectangles – Crosshatch and Sending Love. The dies and stamps will be available for pre-order starting November 24, 2025.
Watch the process video to see how I made this card. (I apologize for the video quality. I was having some technical issues while recording it.)
Cardbase: I used a 12×12-inch sheet of dark pink cardstock folded in half and used the scalloped rectangle die from the Rectangles – Crosshatchset placed with one corner over the fold to get a diagonal opening card base. Cut two full scalloped rectangles from light pink cardstock and four smaller rectangles from flower patterned paper. Glue flower panels to the inside of the dark pink cardbase trimming of diagonal corners. Glue remaining two panels to light pink pieces. Assemble card as show in video.
Cat Pop-Up: Using the Playful Pop-Up set, cut one of the largest die and the “Y” piece die from white cardstock. From gray cardstock, cut the decorative notched square die in the Playful Pop-Up set, and from the Dog and Cat Playful Add-Ons, the paws, and large cat ears . From pink cardstock, cut two of the paw backing die, the small cat ears and tongue. From black, cut one nose-mouth piece and one set of small eyeballs. From white, cut one set of large eyeballs and whiskers. Follow the video above and photos to assemble.
Sentiments: The die-cut sentiments of Sending Loveand the tiny hearts are from the die set of the same name. MEOW! is cut from light pink cardstock using the die of the same name. The shadows behind “Love” and MEOW! are cut from pink vellum. Pink sparkle heart embellishments finish the card front. “Big Hugs” is from the Cat Sayings stamp set. The labels are cut using dies from the Greeting Labels. The paw on the card back comes from MEOW!
Envelope: The card fits into an A6 (6 1/2×4 3/4-inches) size envelope.
Disclaimer: Karen Burniston products are provided free of charge by the manufacturer for review and use. All other items were personally purchased. Compensated affiliate links used where or when possible, meaning I will receive a small percentage commission from these manufacturers at no cost to you. This will allow me to add more content to my YouTube channel and help out a lot. Thank you.
Materials Used:
Dies
Karen Burniston in cahoots with Riley and Company – Meow! – 1317
Karen Burniston in cahoots with Riley and Company – Dog and Cat Playful Add-Ons – 1314
Karen Burniston in cahoots with Riley and Company – Playful Pop-Up – 1313
Karen Burniston in cahoots with Riley and Company – Greeting Labels – 1312
This card was made for Craft Roulette #250 whose parameters included a funn fold card, nostalgic colors, blanket element and buttons.
Watch the process video to see how I made this card.
Details and supplies used are below.
Cardbase: Cut a 5.5×12-inch piece of light pink cardstock. Score at 2-inches, 4-inches, 8-inches and 10-inches. Fold as shown in video. On the gate fold panels, place heart die with center points over the fold and die-cut. Repeat on other side lining up the die to make a mirror image. I used the third largest die in Karen Burniston’s Hearts – Crosshatch set.
Buttons: I cut 70 buttons from four shades of pink cardstock. Using thin cotton string, thread the buttons’ holes and hand-tied knots to all of the card front buttons. The buttons were cut using Karen Burniston’s Sewing Charms die set.
Sentiments: All sentiments stamped in black ink on two rectangular panels cut using Karen Burniston’s Rectangles Crosshatch die set. “Happy Birthday is by Rubbernecker Stamps and the other two sentiments are Riley and Company’s Funny Bones stamps.
Envelope: The card fits into an A2 (4.25×5.5-inch) size envelope. A die-cut button was glued to back flap to hint at whats to come.
___________________________________
Thank you for experiencing this blog post.
I hope this inspires you and makes you smile.
Please like and leave comments 😊
___________________________________
Disclaimer: Karen Burniston products are provided free of charge by the manufacturer for review and use. All other items were personally purchased. Compensated affiliate links used where or when possible, meaning I will receive a small percentage commission from these manufacturers at no cost to you. This will allow me to add more content to my YouTube channel and help out a lot. Thank you.