Welcome to our Karen Burniston Products – KB Riley LLC December 2023 Release Blog Hop. (See details at the end of this post for blog list.) The Design Team have come together with Karen today for a fun blog hop to celebrate the release of 7 new dies. Sneak peeks of the new release started last week, and the dies are available to order NOW!
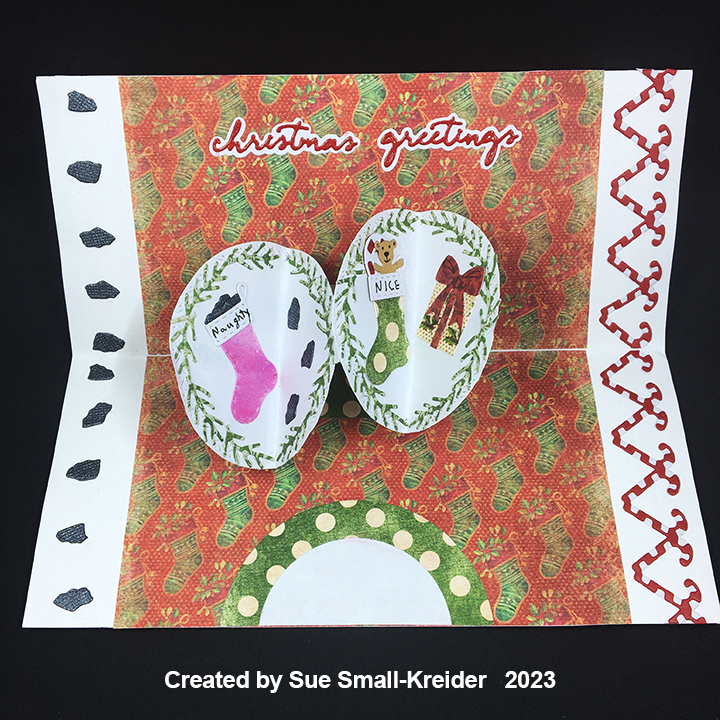
For this fun and interactive Christmas card with two mini ornaments that can go on the recipient’s own Christmas tree, I combined two of the new die sets in Karen Burniston’s December 2023 release – Topper Tags and Raising Platform Pop-Up. I also used previously released sets – Small Script -Christmas, Pattern Plate – Holly and Holiday Charms – to decorate the card.
(PLEASE NOTE: While the video shows both the raising platform installed going up and a second card with it going down, this tutorial will focus only on the assembly of the platform raising UP. You can create a down version by turning the mechanism so the points of the mechanism arms point down.)

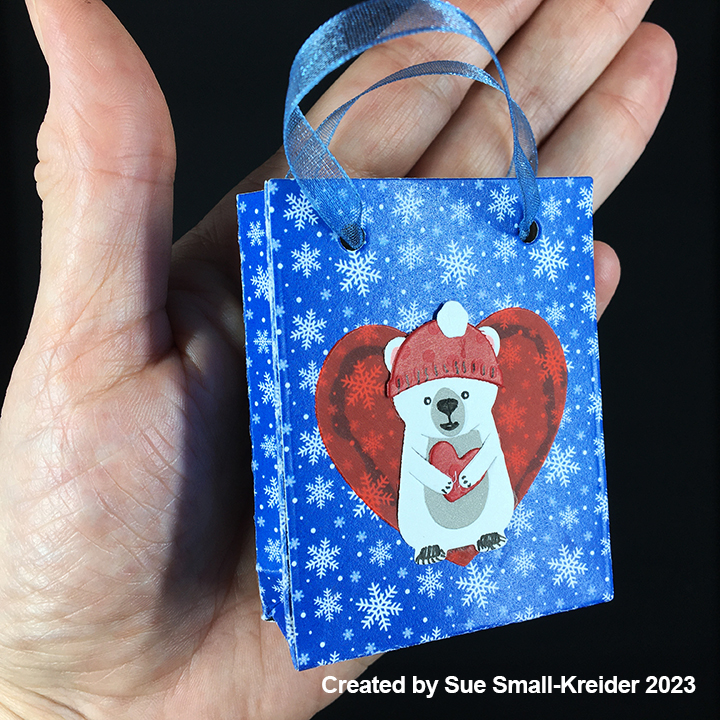
Cardbase: Cut two of the largest tags from the Topper Tags set from decorative paper that you want for your card outside. Repeat with another paper for the card inside. (Note: I had to piece one of my card fronts because I was shy about an inch with the red paper.) Cut a strip of decorative outside paper 1/2-inch by 2-inches, fold lengthwise in half and glue inside the front card tags to form a hinge. Glue the inside pieces over the hinge and match-up the tag edges.


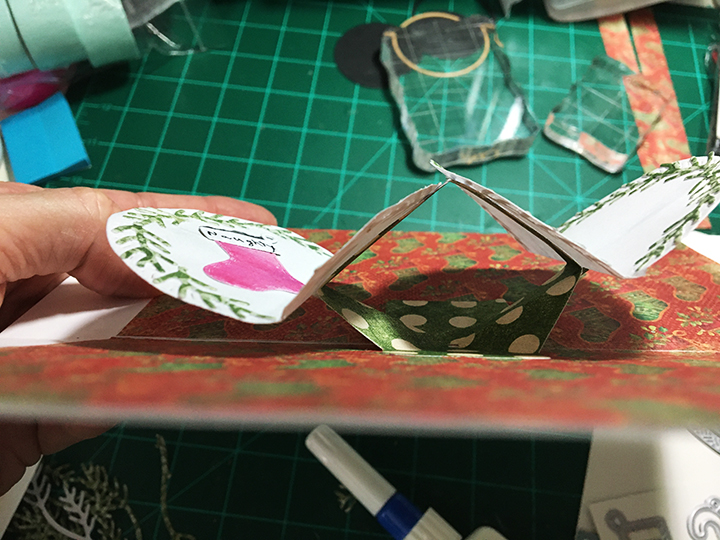
Raising Platform: The Raising Platform Pop-Up has two main pieces – the mechanism and the label. Cut one of the L-shaped mechanism pieces from decorative paper. (I cut two diamond shaped pieces to cover the inside of back arm.) Train all the folds and follow the package directions only putting glue on the triangle I marked with an “x.”


Cut from white cardstock the largest of the labels in the set. Fold in half and burnish with a bone folder for a crisp fold. Glue the folded label into the mechanism. (This can be a fiddly bit making sure the mechanism’s triangular tab edges are matching the label’s folded edge.) Test the opening of the mechanism to see if all is aligned and opening as desired before gluing into the card. Be sure to point the tips of the mechanism arms up when installing in the card, as they point to the direction that the platform will move. (Please note this method of installing the mechanism will not allow the mechanism to open totally flat. Karen’s assembly video has an alternate installation method that will allow for a flat opening of the card.)


Tree Branches: Cut two 1-inch by 2 1/4-inch rectangles from a green paper. Fold the rectangles in half lengthwise and glue together. Glue the strips to either side of the white label’s back. Cut six branches from the Holiday Charms Set from a green paper (I used a green and white patterned paper that gives the effect of snow on the branches.) Glue two branches to each strip making sure they don’t extend outside of the card when closed. Snip the remaining two branches into smaller pieces to decorate the top of the label.


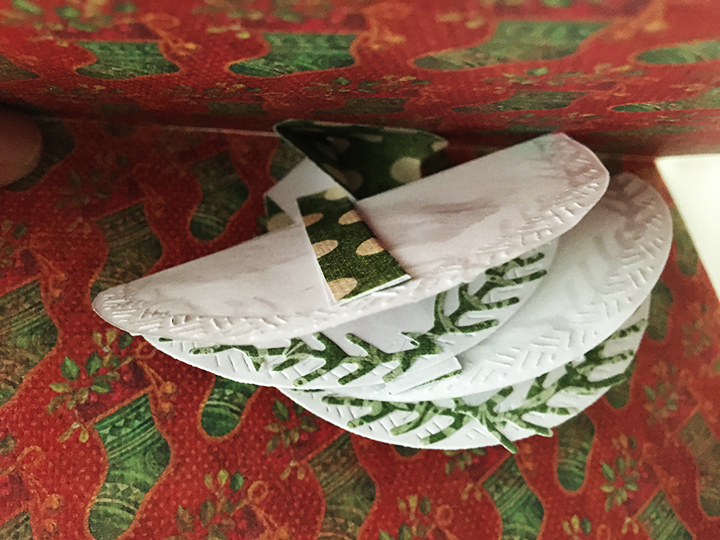
Ornaments: The ornaments come from the Holiday Charms set. Cut two of both the circle and ornament topper piece for each ornament from foil cardstock Glue the circles back-to-back and then attach the ornament toppers onto the circle with them connecting back-to-back at their upper loop. You can add the snow flake decoration as I did on the one card or leave the shiny ornaments as they are.

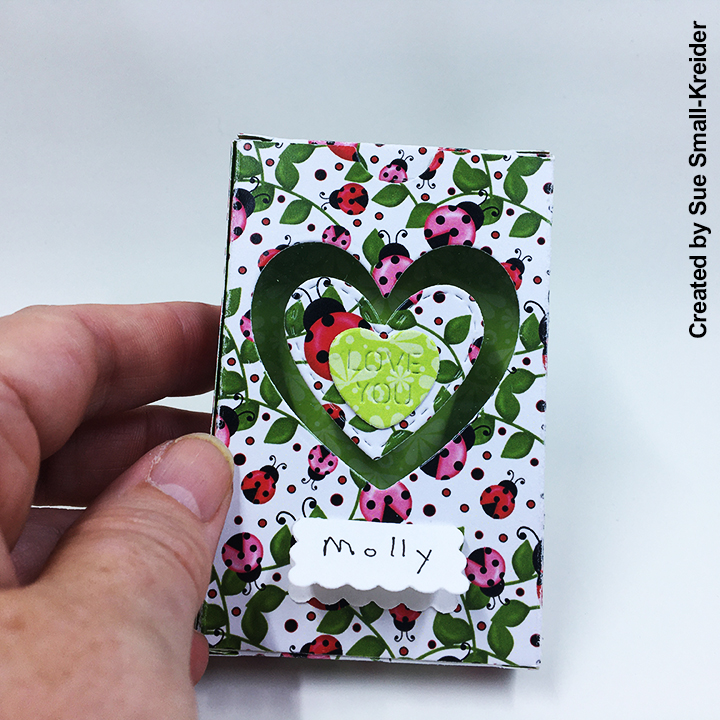
Decorations: When using patterned paper collections that have journaling cards and other cut-out decorative elements, I use them to decorate. From the Topper Tags set I used the flower hole protectors both inside and out. The foiled holly leaves and berries comes from the Holly Pattern Plate trimmed regrouped.
Sentiments: Using the Small Script – Christmas word set, cut just the words “Christmas greetings” from red foil cardstock and adhere to the white label. (While you could adhere the words to the label before folding it. I find the mechanism works better when applying the words over the fold.)
Envelope: These large tag cards with their tied ribbons will fit nicely into #10 business envelopes.
Thank you for reading this blog post. I hope this inspires you and makes you smile. Please like and leave comments 😊
Materials Used:
Dies
- Karen Burniston in cahoots with Riley and Company – Raising Platform Pop-Up – 1254
- Karen Burniston in cahoots with Riley and Company – Topper Tags – 1253
- Karen Burniston in cahoots with Riley and Company – Small Script – Christmas – 1244
- Karen Burniston in cahoots with Riley and Company – Pattern Plate – Holly – 1149
- Karen Burniston in cahoots with Riley and Company – Holiday Charms – 1143
Papers
- Graphic 45 – 8×8 Double-Sided Paper Collection – ‘Twas The Night Before Christmas
- The Paper Studio – 4.5in x 6.5in Single-Sided Textured Paper Pad – Old World Winter
- Silver, Gold, Red and Green Foil Cardstock
- White Cardstock
- #10 Business Envelopes – White
Adhesives
Tools
- Die Cutting Machine
- We R Memories – QuickStick
- Scissors
Miscellaneous
- Red Organza Ribbon – 1/4-Inch Wide
- Red and Green Bakers Twine

GIVEAWAY:
To celebrate the release Karen Burniston and each of the Karen Burniston – KB Riley LLC Design Team members will be giving away a $25 Gift Certificate to some lucky person who comments on our blog posts, so make sure you join the hop and comment on everyone’s blog post. Winners will be randomly chosen from ALL of the blog hop comments received on our blog posts by Monday,18th December 2023. Lots of chances to win some goodies, so just leave a comment on this post or any other blog hop posts to enter! Don’t forget to leave some way for us to contact you, in case you are a lucky winner!
Karen Burniston – https://karenburniston.typepad.com/i_am_not_lefthanded/2023/12/karen-burniston-december-2023-blog-hop.html
Lois Bak – https://clownmomcreations.blogspot.com/2023/12/karen-burniston-new-release.html
Sue Small-Kreider – YOU ARE HERE
Frances Byrne – https://stampowl.blogspot.com/2023/12/karen-burniston-kb-riley-llc-december.html
Jennifer Webster – https://www.jlwebstercreations.com/2023/12/karen-burniston-kb-riley-llc-december.html
Fran Sabad – https://fransabad.com/cards/december-release-blog-hop-and-give-away/
Suzanne Smit – https://knutselsuus.blogspot.com/2023/12/kb-riley-llc-december-2023-release-blog.html
Nicky Foden – https://mymessycraftroomme.wordpress.com/?p=6397&preview=true
Sandy Diller – https://sandydiller.blogspot.com/2023/12/new-release-blog-hop.html