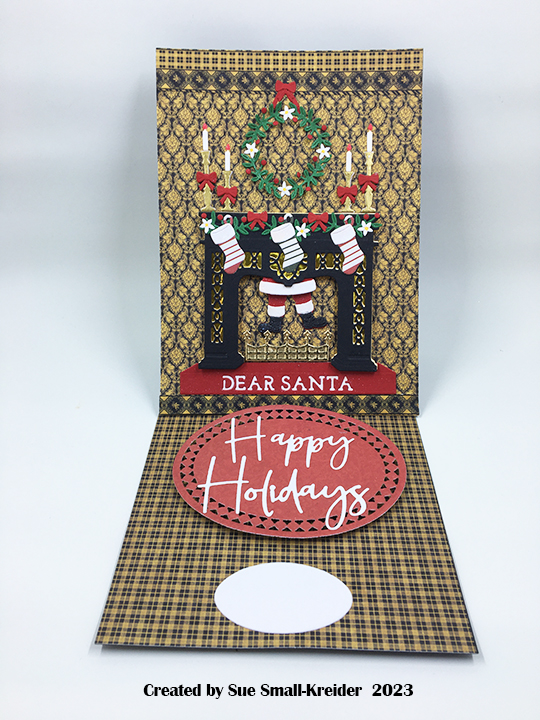
This card was inspired by Craft Roulette episode #191 whose parameters were a drop-down card, supper table colors, seasons element (Christmas), and shiny.
With Santa shimmering down the chimney with his legs swinging left and right, this card became my submission for Craft Roulette episode #191 whose parameters were a drop-down card, supper table colors, seasons element, and shiny.
Cardbase: Cut one 5×7-inch rectangle from heavy black cardstock. Cut another piece from black using the template pictured below. Train the folds of the larger piece. This will be the bottom base with easel arm. Glue the tab on the easel arm to the back of the 5×7 piece making sure when the card is folded shut that the top 5×7’s edges are aligned with the bottom piece. Cover the card front with decorative paper as well as the bottom panel. I added decorative borders for quarter floor molding and picture rail near the ceiling top.
Fireplace and Santa: Watch the assembly video. I used two layers of cardstock for the fireplace and four layers for the candlesticks. The foam dot I used was thick, so I used two layers of foam tape to keep the fireplace higher than Santa. Glitter gloss was brushed over all of Santa as well as the fur on the stockings’ tops. The gold foil in the fireplace decorative panels is from an envelope liner.
Decorations: The set comes with dies for the greenery, tiny flowers and berries as well as the bow. I used a red glitter pen for the candle flames and a yellow marker for the flower centers.
Sentiments: The fireplace set comes with four messages. I choose “Dear Santa” to die-cut into the red hearth piece which is backed with a solid white hearth piece. Glitter gloss was applied to the red hearth. To create the easel stopper, cut an oval rug and pop it up on foam dots. Glue die-cut “Happy Holidays” onto oval. Because of my dark background paper, I added a smaller white oval for a personal message.
Envelope: I decorated the back flap of the envelope and the card back with decorative paper scraps.
Thank you for reading this blog post. I hope this inspires you and makes you smile. Please like and leave comments 😊
This card was made for Craft Roulette #189 whose parameters included an A2 sized card using forest colours, elements starting with “H” and postage stamp(s) and/or cancellation mark(s).
I used Woodware’s Christmas Robin stamp set designed by Francoise Read as well as her Christmas Postmarks set for this A2 (4.25×5.5-inch) side-fold card with matching envelope.
The robin image was stamped on green cardstock with watermark ink and heat embossed with clear powder. I stamped a second image on white cardstock and heat embossed it with red powder. The red image, I fussy cut leaving the cancellation marks attached to the robin’s leg. The “R” tag I cut out and popped-up with foam squares as well as tying a red string to it.
The red robin was glued over the green one and red Nuvo Drops were used to add dimension to the berries.
The green card front was mounted on a fern and white flower printed paper before being attached to the kraft cardstock cardbase.
The sentiment included in the robin stamp set of “Wishing you a wonderful Christmas full of joy,” was stamped in black inside the card with a snowflake.
Christmas Postmark stamps were inked in green ink to the card back and envelope flap.
Thank you for reading this blog post. I hope this inspires you and makes you smile. Please like and leave comments 😊
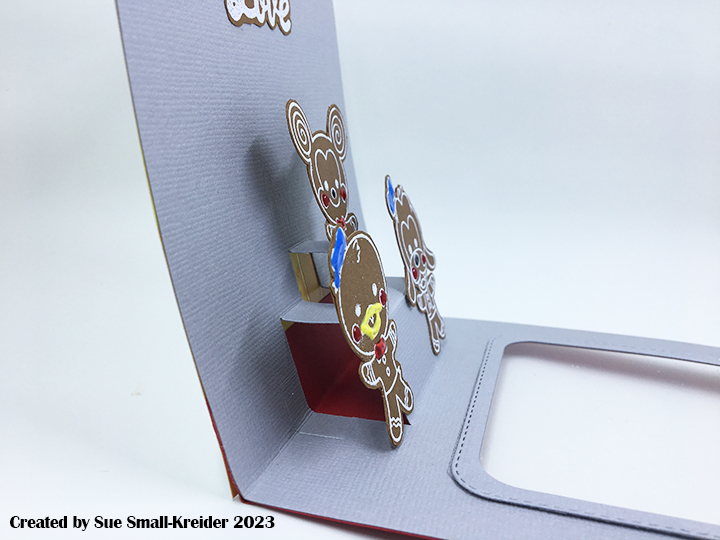
This card was made for Craft Roulette #190 whose parameters included a fancy fold card, aquarium colors, November element and 3-item cluster.
My first thought with these parameters was to a card I had made may years ago featuring a cat looking through a goldfish bowl using Karen Burniston dies. My next thought was how to incorporate a November element. Turkey instead of cat was my answer. While the accordion/pivot card is a fiddly sort of card to assemble, I wanted a quicker version, hence the Z-fold cardbase with squares cut into them and fish with sequin shells and stars sandwiched in between sheets of acetate.
Cardbase: cut one 5 1/2-inch by 8 1/2-inch rectangle of blue cardstock and another rectangle from the same cardstock that is 5 1/2-inch by 4 3/4-inch. Score and fold the large rectangle in half to a 5 1/2-inch by 4 1/4-inch side fold card. Score and fold a 1/2-inch tab along the long edge of the smaller rectangle. Adhere the tab to one of the long edges of the other piece to form a z-fold three panel card.
Windows: Keeping the large rectangle piece of the card base fold in half, I used a 2.4-inch square die to cut through the first panel and mark where I needed to place the die to cut the second panel. I unfolded the cardbase and folded the tabbed panel back against the middle panel that had the markings of where the square die should go. Using the markings to place the die I cut the second panel’s window and made markings for where the die should be placed for the third panel’s window. After cutting the third panel, I took the square die and the next largest die with crosshatching and taped them together to form a die that would cut a frame to go around the windows. Cut six of these frames from darker blue cardstock.
Cut six squares of clear acetate or plastic film and adhere them with thin double-sided tape to the backsides of the frames. Attach frames to one side of the card base. Flip cardbase and adhere fish and decorations with glue dots to acetate making sure the placement works when the card is folded closed. When happy with the placement of aquarium items, attach the remaining three frames to sandwich the items inside the aquarium windows.
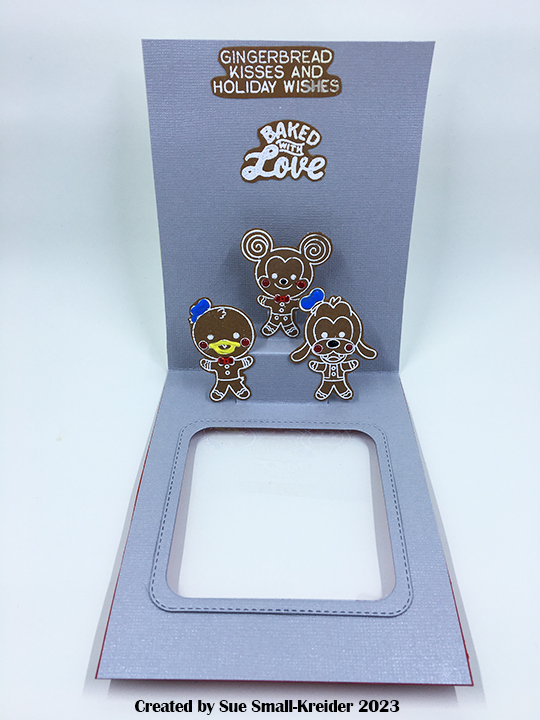
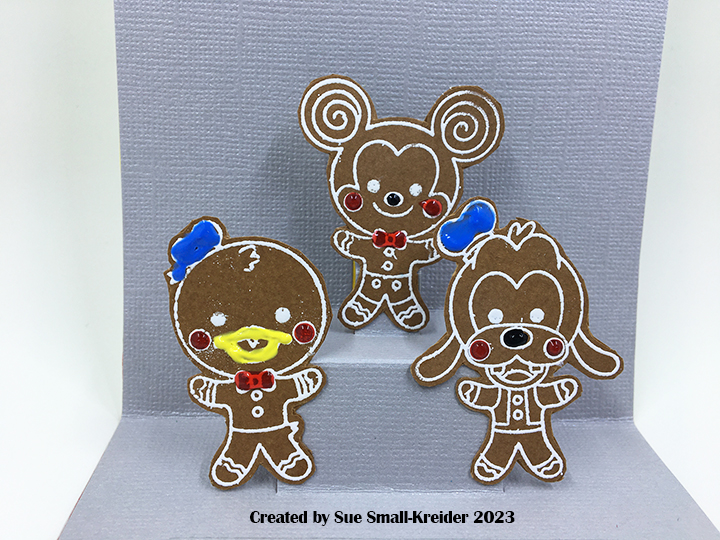
Fish: I used the fish from the Camping Charms to cut two fish from green cardstock. Then I traced their fins and scales with a green marker on both sides and then finished each side with a coat of glitter gloss. For the headwear I free-hand cut the yamaka from black and die cut the Santa hat from the Christmas Animals set.
Turkey: Because the turkey is seen from both the front and the back, I made sure to use colored cardstock that was the same on both the front and back. I only had to cut two of the decorative feather arch pieces. The beak and wattle are all cut with the same die, so I cut from orange and colored the wattle red with a marker. Textured metallic cardstock was used for the body, head and beak and wattle.
Lights: Since my family starts putting up Christmas light on Thanksgiving weekend, the light strands above the turkey and the fish with a Santa hat have multicolored lights while the lights above the fish with a black yamaka on his head has blue and white lights commonly used for Hanukkah in America. I used the light strand die from the Christmas Borders 1 set cutting the die in a variety of colors and using the black and green ones as my base strands and then snipping off other colors light blub part and gluing to the base strand. Finally, I covered the bulbs with Glossy Accents to make them look light glass blubs.
Sentiment: The sentiment is from Spellbinders and cuts in five separate pieces -H ol idays and H appy. The two words are on the front and back of each panel so that the is a continuous “Happy Holidays” being read. Thanksgiving panel in brown, Hanukkah in blue and Christmas in red.
Thank you for reading this blog post. I hope this inspires you and makes you smile. Please like and leave comments 😊
Being grateful for having someone in your life is a good thing. Here is a card to tell that person at Thanksgiving time.
My inspiration for this 4 1/4-inch by 5 1/2-inch (A2) card came from a stamp set by The Greetery called Fall Foodie Phrases. I knew I had a number of pie die sets and ended up using two Spellbinders die sets by Tina Smith – Serve A Slice and Dish It Up. The spice dusted pie top is Nuvo Sparkle Spray in Coco powder.
The tablecloth is a corner of the Karen Burniston scalloped edge die in her Rectangles and Labels – Crosshatch set with 1/8-inch circles in the scallops made with a hole punch.
The stamped sentiments are all from the Fall Foodie Phrases set except for the inside “So grateful for all that you are, and all that you do.” which is from Taylored Expressions’ Inside Scoop – Thanks set. All words were stamped with Stampin’ Up’s Cajun Craze ink except for the word pumpkin which used Pumpkin Pie ink. A banner die from the Spellbinders Mini Everyday Sentiments glimmer plate set was used to cut the card front banner “You’re the spice to my” phrase. I used my stamping platform with a Brutus Monroe Stick & Stamp Mat to hold the small paper scraps that I stamped onto in place.
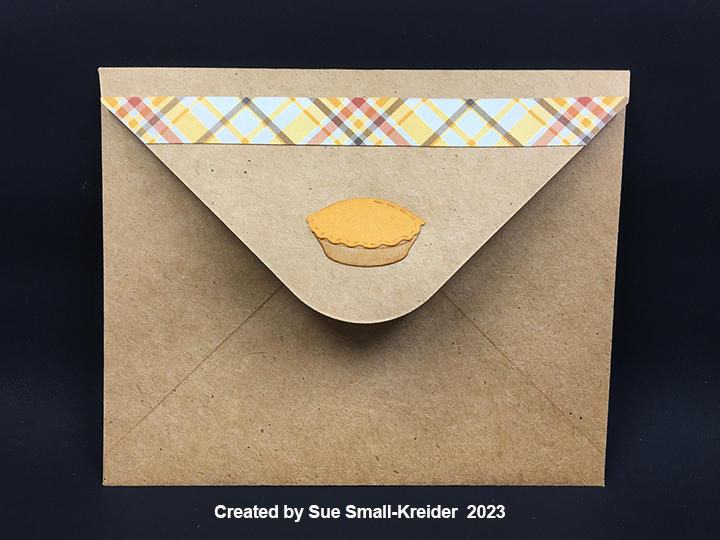
For the envelope flap I used a plaid scrap from Photoplay Say it With Stamps by Becky Moore 6×6 paper pad named Fall Plaids which I used papers from for all of the card. The Whittle Pie die-cut is by Poppystamps, Inc. which was inked with Rusty Hinge Distress Ink.
Thank you for reading this blog post. I hope this inspires you and makes you smile. Please like and leave comments 😊
This card was made for Craft Roulette. #188 whose parameters included a gift card, coffee shop colors, go wild element and number(s).
Have a friend who finds it hard to get going without coffee? This is the card for them complete with a coffee gift card.
It is made with Karen Burniston’s Coffee Cup Pop-Up that includes tabs to hold a gift card on the back side of the cup. The sweet dragon having his morning cuppa on the card front and the knight in shiny armor atop the coffee cup are also Karen Burniston dies.
Cardbase: Cut from green cardstock one 5×7-inch rectangle and one 5×7.5-inch rectangle. Score and fold 1/2-inch on the 5×7.5-inch rectangle to have a 5×7-inch rectangle with a tab. Glue the tab to the other green piece to make a 5×7-inch top fold card. Cut decorative papers to cover panels inside and out.
Dragon: (Watch the assembly video for the Knight and Dragon die set first.) I cut the dragon from two shades of green cardstock and inked some shading on him. I used the die stencil feature for his eyes, mouth and wings. His red cup is from the Coffee Charms die set.
Knight: (Watch the assembly video for the Knight and Dragon die set first.) I cut two bodies for the knight gluing them back-to-back but sandwiching the red plume behind the helmet first. Add his shield and sword before gluing on his gloves.
Coffee Cup: (Watch the assembly video towards the bottom of the link page Coffee Cup Pop-Up before starting.) I chose to use patterned paper with names of coffee drinks for the body of the cup, white cardstock for the cup lid and kraft cardstock for the cup band. The band die embossed the ridges on it, and I enhanced the ridges with brown ink. Yellow ink was used to shade the cup lid. I used the circle dies in the die set for the logo.
Sentiments: The “Go Wild!” is cut from brown paper using the die set of the same name by Karen Burniston. Th yellow banner inside says “and Slay the Day with Excalibur coffee,” which was computer generated.
Thank you for reading this blog post. I hope this inspires you and makes you smile. Please like and leave comments 😊
It’s the Karen Burniston design team challenge for November 2023 with the theme of “What’s Cooking” using the Oven Pop-Up die set. I chose to celebrate Pi Day with apple pie making in my card.
Before starting, I recommend watching the assembly videos of the pop-ups which are usually near the bottom of the linked pages for the various dies used.
Cardbase: I started with two rectangles of heavy weight cardstock one piece 5-inches by 7-inches and the second piece 5-inches by 11-inches, scored and folded at 7-inches. The short panel was glued to the back of the 5×7 rectangle to form an A7 top fold card. (The weight of this extra long tab is used to weigh down the floor of the card when open.)
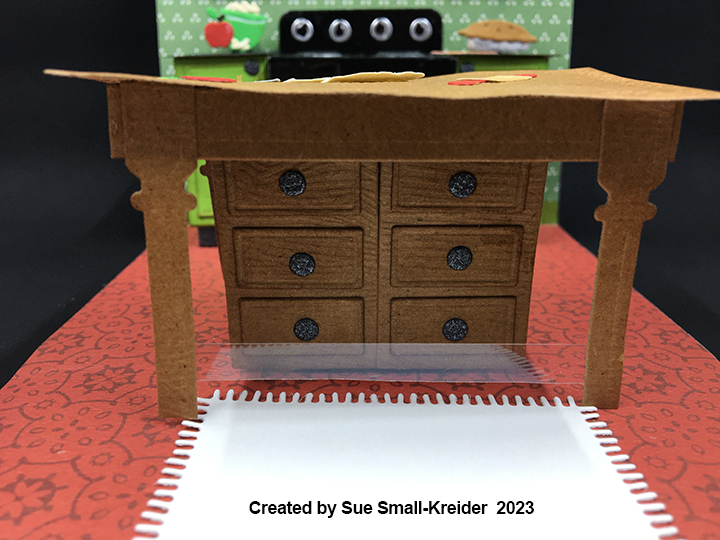
Card Back
I cut a rectangle of the red and white tablecloth paper using the large crosshatch rectangle in the Rectangle and Labels – Crosshatch die set to cover the card front. Because I cut the front decorative paper on an angle, I had some triangles of the paper left over and so I made a table on the back of the card.
Oven/Stove: I followed the basic way to make the oven and cabinets on the assembly video using the cabinet doors from the oven extra’s set. The black mirror cardstock used for the oven can be hard to get glue to stick to, so I often use double-sided tape to stick on the burners, knobs, and window acetate and Glossy Accents to attach the door handle.
Cabinets: Once the stove is attached, you can add the side cabinets. I cut the cabinets from apple green cardstock and then inked them with a brown ink to age them. The upper cabinets and lower cabinet door fronts are cut using the larger rectangle die in the Oven Extras set and then covered with the small rectangle die pieces. Upper cabinets are attached with foam tape to add some dimension to them. A stove hood was cut from silver cardstock and is hidden mostly behind the small upper middle cabinet.
To make the table legs more stable, I added a piece of wood grain cardstock under the tabletop connecting the two legs as well as a thin strip of clear acetate plastic near the bottom of the legs. Tabletop is the second smallest crosshatch rectangle in Rectangles-Crosshatch set. All tabletop parts are cut from woodgrain embossed cardstock and inked with brown ink to bring out the grain. (I think if I made this card again, I would use two layers of cardstock for the tabletop and glue the items on to the tabletop before assembling it so the top would lay flat.)
Decorations: Between the two oven sets are lots of fun pieces that add dimension and realism to the pop-up scene. The Oven Pop-Up set includes the oven mitt, stove burners and knobs, oven rack and door handle. The Oven Extras set includes the cutting board and roasting pan that I used to make a small rolling pin, the knife and the green bowl that holds the apple slices. as well as three pop-up cube strips that I used to pop-up the oven rack, pie inside the oven and the items on the counter.
Apple slices are the leftover bits from cutting two burner plates. Pie crust on table was cut freehand and the burner circle die from the Oven Pop-Up set was rubbed to emboss the pie pan and then cut away to show the trimming of the piecrust. Burner circle is silver pie pan under the crust. The baked pies are cut from silver foil cardstock and brown kraft cardstock using the Picnic Elements set. Brown is inked around the edges of pie crust. The red apples are from the Tree Fruit die set.
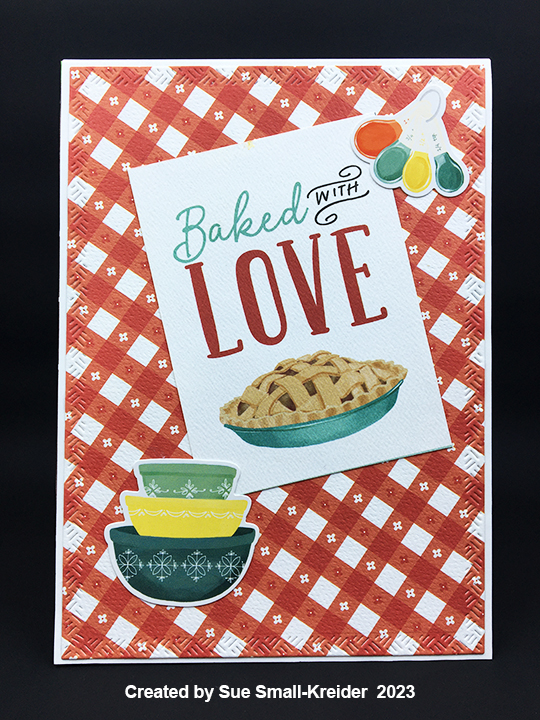
Card Front
Sentiments: All the sentiments are either stickers, journaling cards or papers from the paper collection Sunflower Market by Carta Bella. The white rug inside the card is place for a personal message and is cut using the base blanket die in the Picnic Elements set.
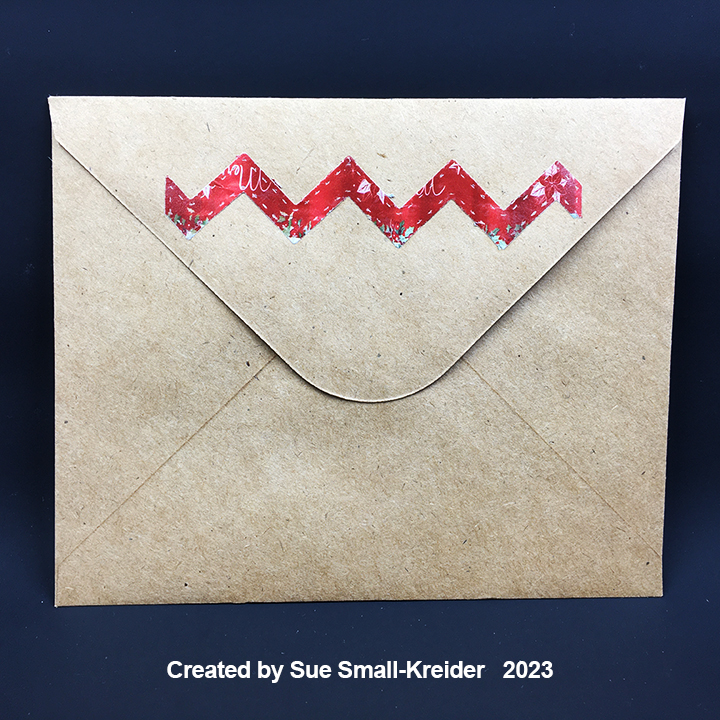
Envelope: A strip of pie paper is glued to the back flap of the envelope to set the tone for the card inside and are from the paper collection. Two red apples left over from inside the card were also glued on the flap.
Thank you for reading this blog post. I hope this inspires you and makes you smile. Please like and leave comments 😊
Flickering candles in a dimly light room, people singing along with the guitar man, these are the cues for this birthday card for a musician.
Using Paper Discovery dies and stamps designed by another musician, Olga Direktorenko, this was a quick card to make. The large guitar face die cuts a shaped folded card base using an 8.5-inch by 11-inch piece of kraft cardstock folded in half and then cut with the long straight edge of the die jutting out slightly over the fold. Using a specialty paper-backed wood, I cut an additional card front and adhered it to the shaped cardbase with double-sided tape. The details of the pick guard, bridge and soundhole are die-cut from cardstock with the six strings cut from pearlescent vellum.
Sentiments from two different stamp sets by Olga were used inside the card. “Life is a song. Sing it” and ”Happy Birthday.” Musical notes were also used from both sets on the envelope flap.
Thank you for reading this blog post. I hope this inspires you and makes you smile. Please like and leave comments 😊
Materials Used:
Dies
Paper Discovery by Olga Direktorenko – Music -play On – Guitar & Violin Card Front
Stamps
Paper Discovery by Olga Direktorenko – Music -play On – Sentiments
Papercraft Society Box 9 – Paper Discovery by Olga Direktorenko – Music
Papers
American Crafts – 12×12 Specialty Paper Backed Wood
This card was made for Craft Roulette #187 whose parameters included a card made with cardstock and not-cardstock, Santa’s workshop colors, collar(s) element and zig-zags.
As a simple Christmas card with a pieced paper background and sentiments from the paper pad. This was a quick card to make in less than two hours. I started with the Carta Bella Letters to Santa paper pad and a mail-order catalog page of a red Christmas shower curtain to die cut three different colors of chevron background die. After separating all the pieces into a tray, I took the woodgrain frame and glued it to an A2 (4.25-inches by 5.5-inches) kraft card base. Alternating the colors, I filled in the frame.
The two sentiment cards or toppers were cut from the paper pad. Santa’s helpers with their collars was popped-up on the card front with foam dots. Small dots of translucent red Nuvo Drops were added to the elves’ shoe and hat tips. Santa’s face with “Merry Christmas” greeting were added to the card inside.
An extra red zig-zag stripe of red decorates the envelope flap.
Thank you for reading this blog post. I hope this inspires you and makes you smile. Please like and leave comments 😊
Materials Used:
Dies
Divinity Designs – Metal Die – Chevron Background – CBD474
Papers
Carta Bella – 6×6 Double-Sided Paper Pad – Letters To Santa