Glitter and Unicorns to Celebrate Your Birthday!

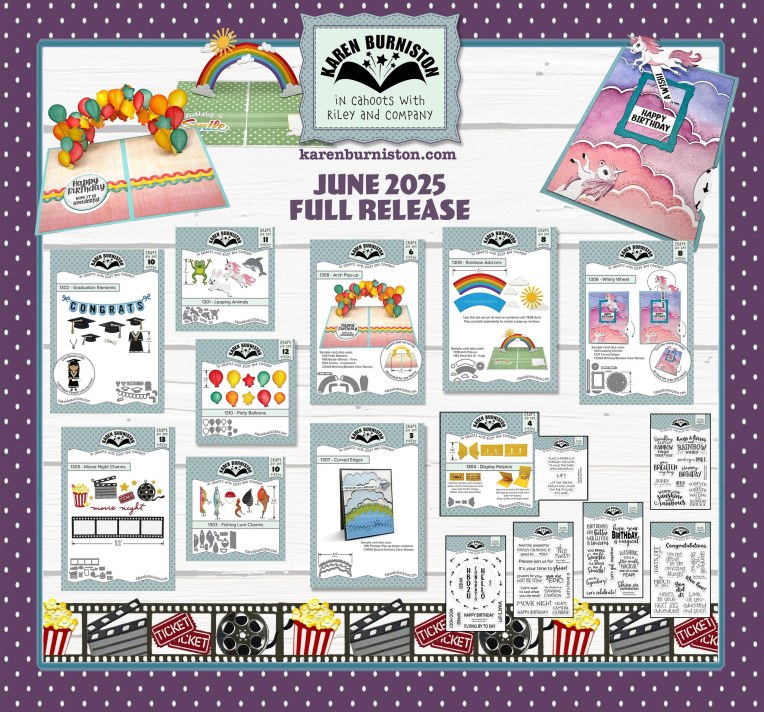
It’s Sneak Peek Week for Karen Burniston’s June 2025 release of ten new die sets and five new clear stamp sets. For this interactive glitter unicorn birthday card, I used several of the new dies including the Leaping Animals, Display Helpers, Whirly Wheel and Rainbow Add-Ons as well as the stamps in Birthday Magic and Movie Night sets.

Watch the process video to see how I made this card.

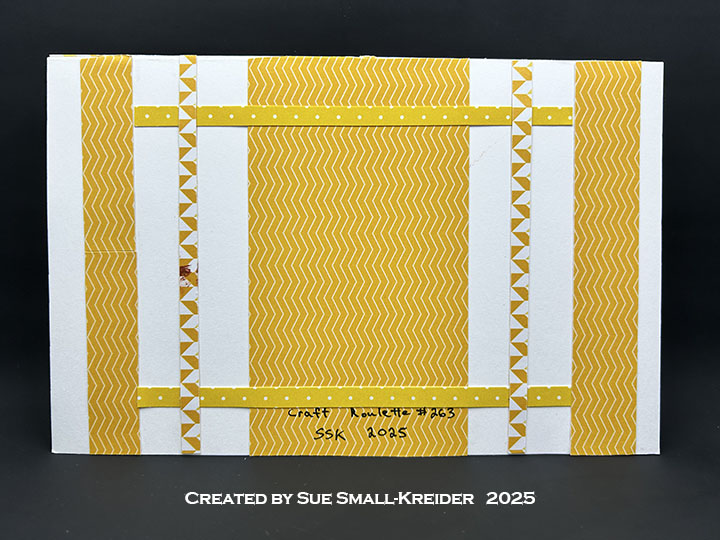
Cardbase: An 5.5×8.5-inch sheet of light weight white cardstock was scored and folded into a side-fold 4.5×5.5 size card. Watch the video above to see how I cut the half circle into the card and cut my decorator panels of patterned cardstock using the Rectangles – Crosshatch dies.

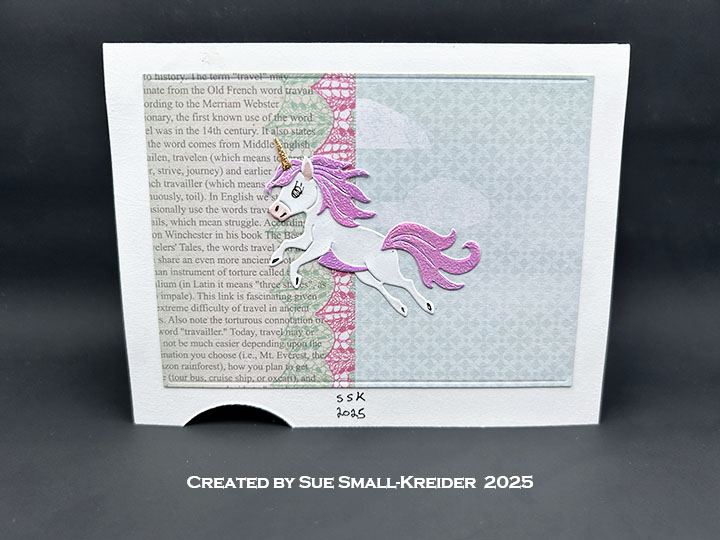
Unicorns: I used four unicorns on the card made with the Leaping Animals die set. Watch the video above to see how to assemble the animals. There are five dies needed for the unicorn – body, underbelly, horn, mane and tail. Cut the tail, mane and underbelly from pink, horn from gold and body from white.

Whirly Wheel: Cut one wheel and one large thermometer from sturdy pink cardstock using the Whirly Wheel die set. Cut one washer from a sturdy cardstock. (Color doesn’t matter as it will be hidden.) Using stencil feature, ink in arrows on the wheel (or use the Whirly Wheel Words stamp set.) Assemble wheel as shown in video above.

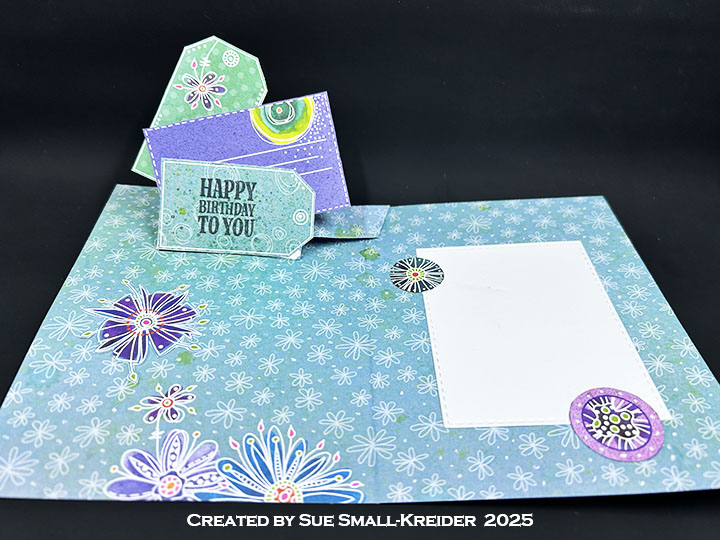
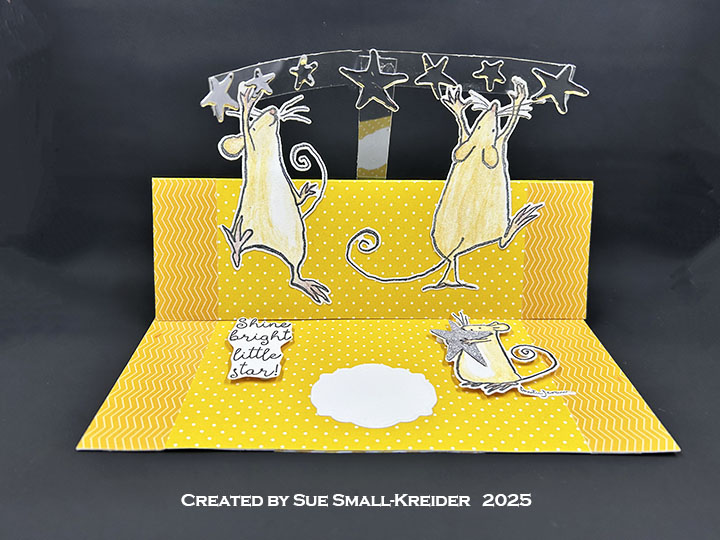
Lorna Label Pop-Up: Watch either the video above or the assembly video located at the bottom of the page linked to the Lorna Label Pop-Up.

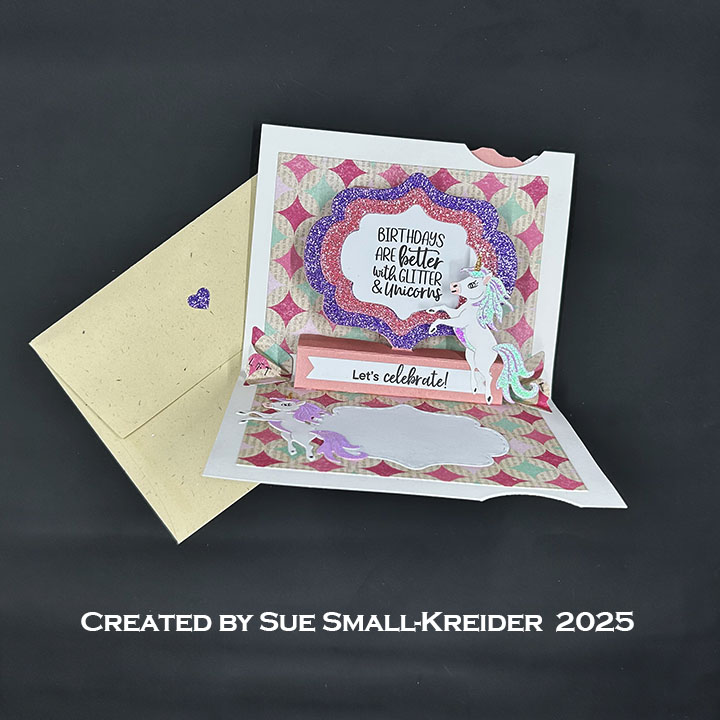
Sentiments: The sentiments were stamped using the glitter and unicorns sentiment and “Let’s celebrate!” from the Birthday Magic stamp set. The β€œHappy Birthday” from the Movie Night set.

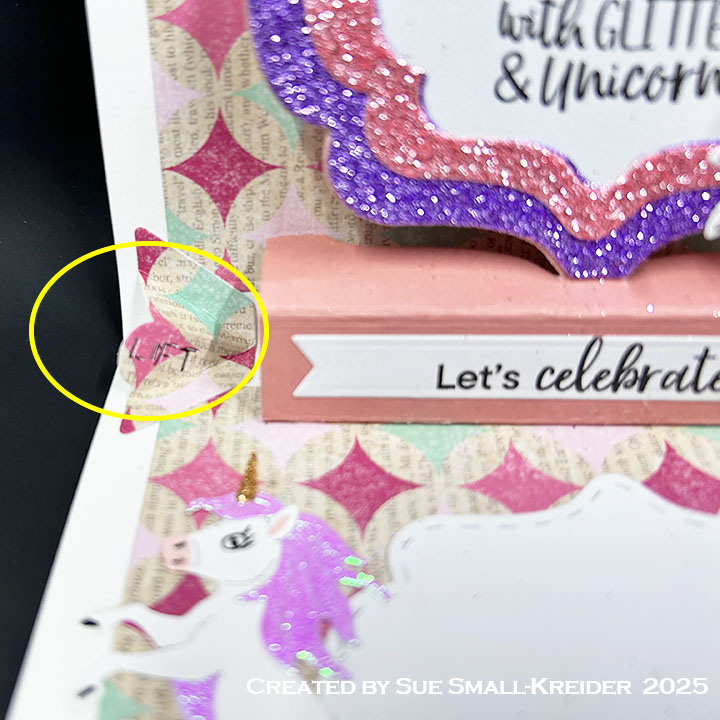
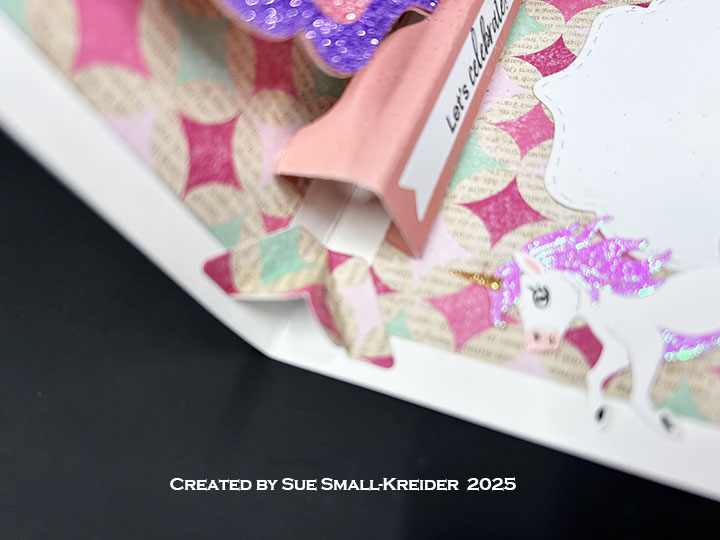
Display Helpers: Using the lift dies from the Display Helpers, install at either side of the Lorna Label Pop-Up following the video above. (Using the Display Helpers stamp set, you can stamp out a note to include in your card that says “Lift the tab for display and lower the tab to close the card.”)

Envelope: The card fits into an A2 (4.25x 5.5-inches) size envelope with a die-cut heart from the Lorna Label Pop-Up set glued to the back flap.

________________________________

Thank you for experiencing this blog post.

I hope this inspires you and makes you smile.

Please like and leave comments 😊

________________________________

Disclaimer: Karen Burniston products are provided free of charge by the manufacturer for review and use. All other items were personally purchased. Compensated affiliate links used where or when possible, meaning I will receive a small percentage commission from these manufacturers at no cost to you. This will allow me to add more content to my YouTube channel and help out a lot. Thank you.

________________________________

Materials Used:

Dies
β€’ Karen Burniston in cahoots with Riley and Company – Rainbow Add-Ons – 1309
β€’ Karen Burniston in cahoots with Riley and Company – Whirly Wheel – 1306
β€’ Karen Burniston in cahoots with Riley and Company – Display Helpers – 1304
β€’ Karen Burniston in cahoots with Riley and Company – Leaping Animals – 1301
β€’ Karen Burniston in cahoots with Riley and Company – Lorna Label Pop-Up – 1266
β€’ Karen Burniston in cahoots with Riley and Company – Rectangles – Crosshatch – 1054

Stamps
β€’ Karen Burniston in cahoots with Riley and Company – Clear Stamps – Birthday Magic
β€’ Karen Burniston in cahoots with Riley and Company – Clear Stamps – Display Helpers
β€’ Karen Burniston in cahoots with Riley and Company – Clear Stamps – Movie Night
β€’ Karen Burniston in cahoots with Riley and Company – Clear Stamps – Whirly Wheel Words

Papers
β€’
Craftwork Cards – 8Γ—8 Solid Colors and Printed Papers – Flying High Collection
β€’ Pink Holographic Non-Shedding Glitter Cardstock
β€’ Gold, Pink and Purple Glitter Cardstock
β€’ White Cardstock
β€’ Fraser Papers for William House – A2 Envelope – Genesis Text Husk Smooth

Ink
β€’ Memento – Fade Resistant Dye ink – Tuxedo Black
β€’ Nuvo – Aqua Shimmer – Glitter Gloss
β€’ Pigma – Mircon 05 Fine Tip Pen – Black
β€’ Scrapbook.com – Glitter Brush Marker –Pretty Pink

Adhesives
β€’ Neutral PH Adhesive by LINECO
β€’ Fine-Tip Glue Bottle
β€’ Foam Squares

Tools
β€’ Die Cutting Machine
β€’ Paper Trimmer
β€’ Bone Folder
β€’ Score Board
β€’ Stamping Platform
β€’ LDRS – Stampendable Stamping Tool
β€’ Stamping Block
β€’ Scissors
β€’ Pencil
β€’ Paper Masking Tape
β€’ We R Memories – QuickStick

Square Pop-Up Birthday Card

This card was made for Craft Roulette #269 whose parameters included a square card, butterfly colors, cloud element, and tied.

Front of Card

Watch the process video to see how I made this card.

Back of Card

Cardbase: Start with a 4 x 8-inch piece of double-sided patterned cardstock and fold in half to form a top-fold 4-inch square card.

Pop-Up: Β Watch the assembly videos for the Little Twist Panel Pop-Up. Cut from double-sided patterned paper one of the pop-up base, two large, rounded corners panel, one of the strip panel and the two flag banner pieces. Add flag banner pieces to strip panel before attaching the strip panel to pop-up base arms. Stamp and decorate large panels before attaching them to strip panel.

Sentiments: Β All the sentiments used on the card come from the Bouquet Sayings stamp set except for the card front’s β€œCelebrate your big awesome super day” which is from the Photo Memories set. All are stamped in black ink. Clouds and hearts come from the Long Nature Edges 2 die set.

Envelope: Β The card fits into an A2 (4.25x 5.5-inches) size envelope. A piece of decorative paper and stamps from the Craft Roulette Basics stamp set decorate the back of the envelope.

___________________________________

Thank you for experiencing this blog post.

I hope this inspires you and makes you smile.

Please like and leave comments 😊

___________________________________

Disclaimer: Karen Burniston products are provided free of charge by the manufacturer for review and use. All other items were personally purchased. Compensated affiliate links used where or when possible, meaning I will receive a small percentage commission from these manufacturers at no cost to you. This will allow me to add more content to my YouTube channel and help out a lot. Thank you.

___________________________________

Materials Used:

Dies

Stamps

Papers

  • Carabelle Studio – 12Γ—12 Double-Sided Cardstock – Sorbet designed by Azoline
  • Pale Gray Cardstock
  • Fraser Papers for William House – A2 Envelope – Genesis Text Milkweed Smooth

Ink

  • Memento – Fade Resistant Dye ink – Gray Flannel and Tuxedo Black
  • Pigma – Mircon 01 Fine Tip Pen – Black

Adhesives

Tools

  • Die Cutting Machine
  • Paper Trimmer
  • Bone Folder
  • Score Board
  • Stamping Blocks
  • Scissors
  • Pencil
  • Paper Masking Tape
  • We R Memories – QuickStick
  • We R Memories – Piercing Tool
  • Pear Blossom Press – Cardmaker’s T-Square A2 Ruler

Miscellaneous

  • Yellow Satin Ribbon Bow

Dress-Shaped Card

This card was made for Craft Roulette #268 whose parameters included a card for a student, modern colors, clothing element, and abstract blob(s). I made an A9  shaped-card of encouragement for a student of life.

Watch the process video to see how I made this card.

Cardbase:  Using a 5.5×8.5 sheet of paper fold in half- long ways and draw one side of a dress. Cut the dress out and use as a pattern to trace for two dresses on an 8.5×11 sheet of cardstock. Add tabs to shoulders of one dress as hinges to create the shaped card.   

Sentiments:  All the sentiments are stamped using rubber stamps from Riley & Company’s Funny Bones collection, except for the β€œGo Girl Go” which was die cut using Karen Burniston’s Mini Alphabet die set.

Envelope:  The card fits into a catalog envelope (6×9-inches).

___________________________________

Thank you for experiencing this blog post.

I hope this inspires you and makes you smile.

Please like and leave comments 😊

___________________________________

Disclaimer: Karen Burniston products are provided free of charge by the manufacturer for review and use. All other items were personally purchased. Compensated affiliate links used where or when possible, meaning I will receive a small percentage commission from these manufacturers at no cost to you. This will allow me to add more content to my YouTube channel and help out a lot. Thank you.

Materials Used:

Dies

Stamps

  • Riley & Co. – Funny Bones – Rubber Stamp – Whatever You Do – RWD-822
  • Riley & Co. – Funny Bones – Rubber Stamp – Life is Better – RWD-464

Stencils

  • Honey Bee Stamps – Stencil set – Winter Wonder Scene Builder – HBSL-11

Papers

  • White 80lb. Cardstock

Ink

  • Sunbird Spark – Velvety Dye Ink – Ochre, Olive Grove, Puya

Adhesives

Tools

  • Die Cutting Machine

Miscellaneous

  • Mint Green Ribbon

Small Quilt Themed Pop-Up Birthday Card

This card was made for Craft Roulette #267whose parameters included a 4 Bar card, craft store colors, se(s)/(ing)/sewn element, and stencil. I made a birthday card using dies by Karen Burniston and PinkFresh and sentiment stripes by Waffle Flower

Watch the process video to see how I made this card.

Cardbase:  Score and fold a 7×5-inch piece of heavy white cardstock into 3.5×5-inch side fold card. 

Stenciled Quilt Top Background:  Follow directions in video to stencil the background. To create the stencils use 6×8.5-inch sheets of 100lb cardstock that have the stitched diamond die cut into the center of each of the four sheets. Using the stitch marks as your guide, cut the stencils using a craft knife and a metal straight edge or ruler.

Pop-up Twist Panel:Β  Watch the assembly video at the bottom of the linked page. Stamp the quilt stamp onto medium weight cardstock. Die-cut the large mechanism from the Little Twist Panel Pop-Up set out of the stamped cardstock. Cut the panel from white cardstock. Cut decorative panels using the dies in set with your stamped cardstock.

Sewing Charms: Β Assemble as directed in Karen’s assembly video located at the bottom of the linked page for the Sewing Charms.

Envelope:  The card fits into an A2 (4.25x 5.5-inches) size envelope.

___________________________________

Thank you for experiencing this blog post.

I hope this inspires you and makes you smile.

Please like and leave comments 😊

___________________________________

Disclaimer: Karen Burniston products are provided free of charge by the manufacturer for review and use. All other items were personally purchased. Compensated affiliate links used where or when possible, meaning I will receive a small percentage commission from these manufacturers at no cost to you. This will allow me to add more content to my YouTube channel and help out a lot. Thank you.

___________________________________

Materials Used:

Dies

Stamps

  • Spellbinders – Cling Stamp Set – Stephanie Low – Designer Series – Cool Vibes – SBS-150

Papers

  • Waffle Flower – Sentiments – Birthday Die Cut– SCP240
  • Waffle Flower – Sentiments  – View Die Cut – SCP253
  • White 100lb. Cardstock

Ink

  • Ranger – Tim Holtz – Distress Ink – Blueprint Sketch, Dried Marigold, Saltwater taffy, Salvaged Patina

Adhesives

Tools

  • Die Cutting Machine
  • Paper Trimmer
  • Scissors
  • Paper Masking Tape
  • Tweezers
  • Blending Brushes
  • Craft Knife
  • Metal Ruler or Straight Edge

Four Pop-Up Birthday Cards

Here is a quick way to get four pop-up birthday cards using just three sheets of double-sided patterned cardstock.


Watch the process video to see how I made this card.


Cardbase: Start with a 8.5×5.5-inch piece of double-sided patterned cardstock and fold in half to form a side-fold A2 (4.25×5.5-inch) card.


Flip Frame Pop-Up: Watch the assembly video for the Flip Frame Pop-Up located at the bottom of the linked page. Cut out one of the mechanism from cardstock matching the inside of each cardbase. Use the journaling or tags in the paper collection for the piece that flips up on the mechanism. Decorate with cutout pieces and scraps from the paper collection.


Sentiments: All the sentiments were stamped in black ink using Karen Burniston’s Birthday Belated and Photo Memories stamp sets. The stitched white rectangles are cut from white cardstock using a die from the Flip Frame Pop-Up die set.


Envelope: The cards fit into A2 (4.25x 5.5-inches) size envelopes.

_______________________________________


Thank you for experiencing this blog post.

I hope this inspires you and makes you smile.

Please like and leave comments 😊

_______________________________________


Disclaimer: Karen Burniston products are provided free of charge by the manufacturer for review and use. All other items were personally purchased. Compensated affiliate links used where or when possible, meaning I will receive a small percentage commission from these manufacturers at no cost to you. This will allow me to add more content to my YouTube channel and help out a lot. Thank you.

_______________________________________


Materials Used:


Dies
β€’ Karen Burniston in cahoots with Riley and Company – Flip Frame Pop-Up – 1134

Stamps
β€’ Karen Burniston in cahoots with Riley and Company – Clear Stamps – Birthday Belated
β€’ Karen Burniston in cahoots with Riley and Company – Clear Stamps – Photo Memories

Papers
β€’ Carabelle Studio – 12×12 Double-Sided Cardstock – Sorbet designed by Azoline
β€’ White Cardstock
β€’ Fraser Papers for William House – A2 Envelope – Genesis Text Husk Smooth


Ink
β€’ Memento – Fade Resistant Dye ink – Tuxedo Black
β€’ Sakura – Gelly Roll Pen – Medium – White
β€’ Sharpie – Permanent Marker – Fine Tip – Red

Adhesives
β€’ Neutral PH Adhesive by LINECO
β€’ Fine-Tip Glue Bottle

Tools
β€’ Die Cutting Machine
β€’ Paper Trimmer
β€’ Bone Folder
β€’ Score Board
β€’ Stamping Platform
β€’ LDRS – Stampendable Stamping Tool
β€’ Scissors
β€’ Pencil
β€’ Paper Masking Tape
β€’ We R Memories – QuickStick

Oval Flip Birthday Card

This card was made for Craft Roulette #265 whose parameters included an A7 card, floral wreath colors, lyrics element, and cinco (5). I used a Funny Bone Stamps by Riley & Co. along with a Karen Burniston die set released by Elizabeth Craft Designs.

Watch the process video to see how I made this card.

___________________________________

Thank you for experiencing this blog post.

I hope this inspires you and makes you smile.

Please like and leave comments

___________________________________

Disclaimer: Karen Burniston products are provided free of charge by the manufacturer for review and use. All other items were personally purchased. Compensated affiliate links used where or when possible, meaning I will receive a small percentage commission from these manufacturers at no cost to you. This will allow me to add more content to my YouTube channel and help out a lot. Thank you.

Materials Used:

Dies

  • Elizabeth Craft Designs – Karen Burniston Pop It Ups – Oval Pull Card – 1109

Stamps

  • Riley & Co. – Funny Bones – Clear Stamp – A Year Older – RWD-1144
  • Riley & Co. – Funny Bones – Rubber Stamp – Happy Birthday To You – RWD-1251

Papers

  • Stampin’Up – 12Γ—12-inch Designer Series Paper – Masterfully Made
  • White Cardstock

Ink

  • Memento – Fade Resistant Dye ink – Espresso Truffle
  • Pigma – Mircon 05 Fine Tip Pen – Black

Adhesives

Tools

  • Spellbinders – Platinum Die Cutting Machine
  • Scrapbook.com – Magic Mat
  • i-crafter – Shim
  • Paper Trimmer
  • Stamping Platform
  • LDRS – Stampendable Stamping Tool
  • Scissors
  • Paper Masking Tape
  • We R Memories – QuickStick

Miscellaneous

  • Two Satin Ribbon Bows
  • Five Gold Gems

Pop-Out Birthday Tag Card

This card was made for Craft Roulette #265 whose parameters included gift card, train colors, science element, and add a flower. I used a Craft Roulette stamp set and three Karen Burniston dies die sets.

Watch the process video to see how I made this card.

Cardbase: Β Using Karen Burniston’s Tag Book Pop-Up die set, I cut two of the large tag frames from oxidized blue mirror cardstock and two more from oxidized copper-colored mirror cardstock. The rectangular hinge die I cut once from white cardstock.

Pop-Up Panels: I glued my thin decorated paper to a piece of thin white cardstock and let dry before cutting out the Flower Pivot Panels piece. (Follow the assembly instructions in her video on the die set’s linked page.) The six small flowers are cut from solid colored cardstock scraps using the dies from the same die set as the panels.

Sentiments: Β  The framed β€œHappy Birthday” on the tag front is from the Happy Birthday Lorna Add-Ons die set. The stamped “itty bitty gift” on the back tag pocket is in brown ink using the Craft Roulette Funn Sentiments #01 stamp set.

Envelope: Β The card fits into a purchased A6 (4.5x 6-inches) size envelope or larger.

___________________________________

Thank you for experiencing this blog post.

I hope this inspires you and makes you smile.

Please like and leave comments

___________________________________

Disclaimer: Karen Burniston products are provided free of charge by the manufacturer for review and use. All other items were personally purchased. Compensated affiliate links used where or when possible, meaning I will receive a small percentage commission from these manufacturers at no cost to you. This will allow me to add more content to my YouTube channel and help out a lot. Thank you.

Materials Used:

Dies

Stamps

  • Craft Roulette – Funn Sentiments Clear Stamps – #01

Papers

  • Hunkydory – A4 Mirri Sheets of Cardstock – Oxidised Metals Collection
  • Hot Off The Press – Paper Pizazz – 12Γ—12 Single-Sided Paper – Burgundy Collage
  • My Favorite Things – 8.5Γ—11 65 lb. Cardstock – White
  • Green, Orange, Red and Yellow Cardstock

Ink

  • Memento – Fade Resistant Dye ink – Rich Cocoa
  • Pigma – Mircon 005 Fine Tip Pen – Black
  • Sharpie – Permanent Marker – Fine Tip – Black

Adhesives

Tools

  • Spellbinders – Platinum Die Cutting Machine
  • Scrapbook.com – Magic Mat
  • i-crafter – Shim
  • Paper Trimmer
  • Stamping Platform
  • LDRS – Stampendable Stamping Tool
  • Stamping Blocks used as paperweights
  • Scissors
  • Paper Masking Tape
  • Tweezers
  • We R Memories – QuickStick

Miscellaneous

  • Cording or Twine 8-inches long

FUNN Museum of Cards Zoyfold Card

This card was made for Craft Roulette #264 whose parameters included a card for an influencer, dreamy colors, crafts/crafters, and off center.

Watch the process video to see how I made this card.


Cardbase: Cut an 8.5×11-inch piece of heavy white cardstock into two pieces that at 4.25×11-inches. Score and fold in half at 5.5-inches both pieces. On one piece score and fold at 2.75-inches. Glue the two cards together with the large rectangle panels overlapping as shown in the video.
Cards: Because this card is going to Mary Gunn, I used images from her Craft Roulette Community Showcase gallery, picking cards that are iconic to the show. I tried to recreate some of the fun folds and bookmark cards.


Guide Sheet to Cards: This sheet is folded and tucked in a pocket on the back of the card.


Envelope: The card fits into an A2 (4.25x 5.5-inches) size envelope.

________________________________


Thank you for experiencing this blog post.

I hope this inspires you and makes you smile.

Please like and leave comments 😊

______________________________


Disclaimer: Karen Burniston products are provided free of charge by the manufacturer for review and use. All other items were personally purchased. Compensated affiliate links used where or when possible, meaning I will receive a small percentage commission from these manufacturers at no cost to you. This will allow me to add more content to my YouTube channel and help out a lot. Thank you.

____________________________


Materials Used:
Dies

β€’ Karen Burniston in cahoots with Riley and Company – Holiday House – 1144
β€’ Karen Burniston in cahoots with Riley and Company – Mini Alphabet and Numbers – 1197
β€’ Riley and Company – Cool Dies – Speech Bubbles


Papers
β€’ Craft Consortium – 6×6 Double-Sided Cardstock – Brick Texture
β€’ Brown, Red, Tan and Yellow Cardstock
β€’ White 100lb. Cardstock
β€’ White Computer Printer Paper


Adhesives
β€’ Neutral PH Adhesive by LINECO
β€’ Fine-Tip Glue Bottle
β€’ Foam Dots


Tools
β€’ Die Cutting Machine
β€’ Paper Trimmer
β€’ Scissors
β€’ Paper Masking Tape
β€’ Tweezers

Catch A Falling Star – An Easel Card

This card was made for Craft Roulette #263 whose parameters included a sending sunshine card, spring colors, rodent(s), and shiny.

Watch the process video to see how I made this card.

Back of Card

Cardbase: Start with an 8.5×11-inch sheet of white cardstock. Score and fold at 5.5-inches and at 2.75-inches. Cover the large inside panel with decorative papers as well as the two long and narrow front panels. use scraps to decorate the back panel.

Mice: Stamp The two large mice and one small mouse holding a star from the two Colorado Craft Company stamp sets – A Star is Born and Falling Star. Color with watercolor pencils and smooth coloring with a water brush. let dry before gluing large mice to bottom half of easel. Stamp a second small mouse to cut out star as a pattern to cut star from silver glitter paper. Cut out small mouse’s hand to slide silver star under it. Glue star in place. Attach mouse to card base with foam dots.


Stars: Using two pieces of clear plastic cut from packaging, make a T or cross shape using glue dots. Cut stars from silver foil cardstock using coordinating dies from the stamp sets and attach with glue dots to plastic. Attach cross to back of card easel base with double-sided tape. Glue on three stars to decorate front of card.


Sentiments: The sentiments were all stamped in black ink using the two Colorado Craft Company stamp sets and fussy cut around. The small fancy label was cut from white cardstock using Karen Burnston’s Rectangles and Labels – Crosshatch die set.


Envelope: The card fits into a catalog (6×9-inch) size envelope stamped with a sentiment and stars from the Colorado Craft Company’s A Star Is Born stamp set.

_______________________________________


Thank you for experiencing this blog post.

I hope this inspires you and makes you smile.

Please like and leave comments 😊


____________________________________

Disclaimer: Karen Burniston products are provided free of charge by the manufacturer for review and use. All other items were personally purchased. Compensated affiliate links used where or when possible, meaning I will receive a small percentage commission from these manufacturers at no cost to you. This will allow me to add more content to my YouTube channel and help out a lot. Thank you.

_____________________________________


Materials Used:
Dies

β€’ Karen Burniston in cahoots with Riley and Company – Rectangles and Labels – Crosshatch – 1233

Stamps
β€’ Colorado Craft Company – Clear Stamps & Metal Dies by Anita Jarem – A Star Is Born – AJ587
β€’ Colorado Craft Company – Clear Stamps & Metal Dies by Anita Jarem – Falling Star – AJ585

Papers
β€’ Impression Obsession – 6×6-inch Double-Sided Paper Pack – Basics 1 – Yellows
β€’ Silver Foil and Glitter Cardstock
β€’ White Cardstock
β€’ Catalog Envelope – White
β€’ Clear Plastic Packaging

Ink
β€’ Memento – Fade Resistant Dye ink – Tuxedo Black
β€’ Sharpie – Permanent Marker – Ultra Fine Tip – Black
β€’ Sharpie – Permanent Marker –Fine Tip – Yellow
β€’ Nuvo – Watercolour Pencils – Hair & Skin Tones

Adhesives
β€’ Neutral PH Adhesive by LINECO
β€’ Fine-Tip Glue Bottle
β€’ Double-Sided Tape – 1/4″ wide
β€’ Foam Dots
β€’ Glue Dots

Tools
β€’ Die Cutting Machine
β€’ Paper Trimmer
β€’ Stamping Platform
β€’ Scissors
β€’ Paper Masking Tape
β€’ Stamping Blocks
β€’ Water Brush