I have been collecting and making oven cards for several years now. Here is a collection of all my ovens blog posts. Click on an image to see details of the oven.
(Images are posted from the earliest release of dies/stamps/kits 2016 to newest 2023.)
____________________________
Thank you for experiencing this blog post.
I hope this inspires you and makes you smile.
Please like and leave comments 😊
___________________________________
Disclaimer: Karen Burniston products are provided free of charge by the manufacturer for review and use. All other items were personally purchased. Compensated affiliate links used where or when possible, meaning I will receive a small percentage commission from these manufacturers at no cost to you. This will allow me to add more content to my YouTube channel and help out a lot. Thank you.
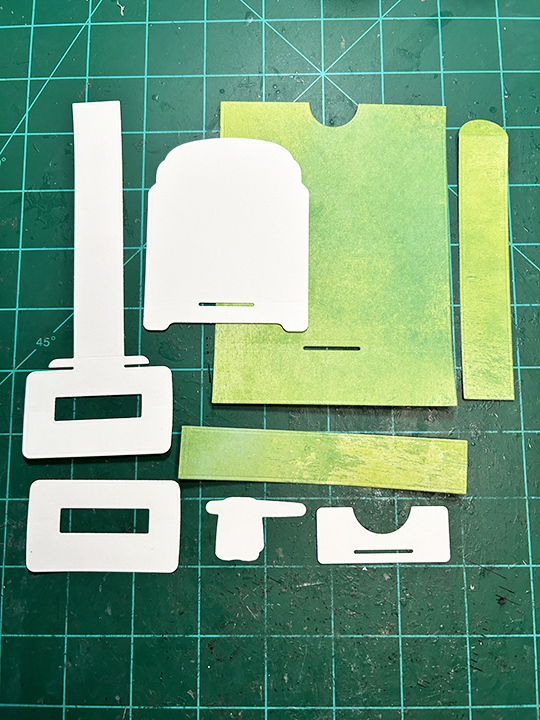
I’m using a stamp and die set by Diamond Press to create this interactive card that lets you pull the tab to open the oven door and reveal a Christmas turkey. (Because this kit doesn’t include any holiday sentiments, I had to use ones by other sources.)
Watch video above for a tutorial on how to make the card.
Cardbase: I used a purchased top-fold A2 size (2.25 x5.5-inch) gray cardbase and punched a half circle opening in the top center for a thumb hole to help with the pull tab. To help with the weight of the front, I added a 4×5.25-inch piece of the same green cardstock I had used for the front matching ups the thumb hole notches.
Oven: I watched an assembly video before I started my card. Then I cut the pieces I needed from green colored cardstock and white 65 lb. white cardstock.
Sentiments: For my original card, the outside “Merry Christmas” sentiment, I cut the words from a commercial Christmas card. For the card in my process video, I used stamps from the Greetery saying “Warmest Winter Wishes.” Inside both cards is “Happy Holidays, a die-cut sentiment by Karen Burniston in black.
Envelope: The card fits into an A2 envelope.
___________________________________
Thank you for experiencing this blog post.
I hope this inspires you and makes you smile.
Please like and leave comments 😊
___________________________________
Disclaimer: Karen Burniston products are provided free of charge by the manufacturer for review and use. All other items were personally purchased. Compensated affiliate links used where or when possible, meaning I will receive a small percentage commission from these manufacturers at no cost to you. This will allow me to add more content to my YouTube channel and help out a lot. Thank you.