
A favorite leather bag has a certain smell and memories of all the fun times with friends and family. This little faux tooled leather bag can add to those memories.
Made with the tote die set by Divinity Designs, a crafting company based out of Ohio, the bag goes together relatively easily. I looked at the assembly video before making, but I assembled the bag mesh pockets a little differently.
Cut two each of the front/back, side, mesh pocket, handle, pocket pleat, front/back layer and handle layer from brown Kraft cardstock. Cut one each of front pocket flap, front pocket flap layer, pocket layer, and stitched belt buckle set from brown Kraft cardstock. Cut two front/back layers from brown paper. Cut one each of the buckle and pin from orange foil cardstock.
Using the tote embossing insert plate and your embossing sandwich for your die-cutting machine emboss the two front/back layers and pocket flap and pocket layers.
With an ink blending sponge, darken the edges of all pieces, especially the stitched areas with brown ink. Rub the embossed layering pieces to highlight the “tooled” design. Glue the layers onto their base pieces.

To assemble, I glued the mesh pocket tabs on to the side tabs first, bowing out the mesh pocket. Next, I adhered the bottom side tabs to the bottom rectangle of one of the front/back pieces. Glue the other bottom rectangle over the top of the first rectangle to hide the side tabs. Next adhere the side tabs to the front/back pieces. Take your time to hold the tabs in place until the glue sets.
Shape the handles by running them through your fingers to bend them into an arch shape. Glue rounded ends of on handle to the front of the bag. Repeat with handle for the back side of bag.
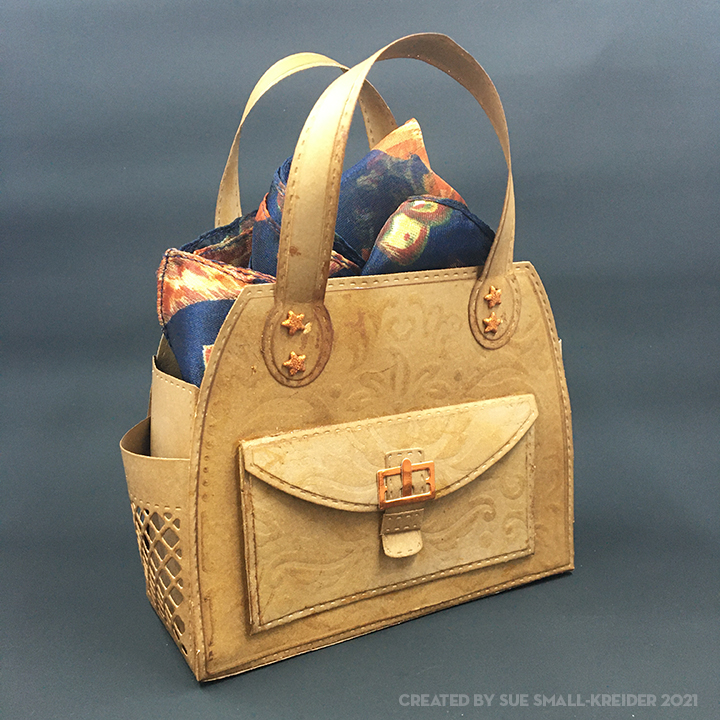
To assemble the front pocket, pleat the two pocket pleats and glue one tab to the inside of the front pocket tab. Repeat with the other pocket pleat. Fold the bottom tab of Front pocket over the ends of pleats and glue corners. Fold over the front pocket flap tab and glue its corners to the top pleat corners. Glue assembled pocket to front of bag. Thread large brown stitched belt piece through foil buckle and glue pin in place. Fold tiny stitched brown piece around larger piece as the loop that holds the belt tongue in place. Glue top of belt piece to pocket flap and loop tabs to pocket. This belt with hold the pocket flap securely closed.
I used some tiny star brads that I had in my stash to reinforce the handles to the bag. I punched the starter holds with an old ice pick or awl and a sanding block inside the bag. Once the brads were in place, I glued the front/back layer over the inside of the bag to hide the brads and side tabs.
All of the glued layers make for a study bag that measures 6 ¼ inches high x 5 inches wide and 2 inches deep. I plan to gift a lovely scarf and earrings in this bag.
Thank you for reading. If you enjoyed this blog post, please like it and follow the blog. 😊
Dies
- Divinity Designs – Timeless Tote with Layers – CBD396-397
- Divinity Designs –Tote Embossed Inset – CBD405
Ink
- Ranger – Tim Holtz’s Distress Ink – Vintage Photo
Papers
- Heavy weight 8 ½ inches x 11 inches brown cardstock
- Brown kraft paper
- Orange foil cardstock scraps
Additional Supplies:
- Cosmic Shimmer – Specialist Acrylic Glue – 125ml
- Sizzix – Big Shot PLUS die cutting Machine
- Bone folder
- Kraft mat
- Ink blending sponges
- 8 orange sparkle star brads


