A Dog Themed Tri-fold Birthday Card

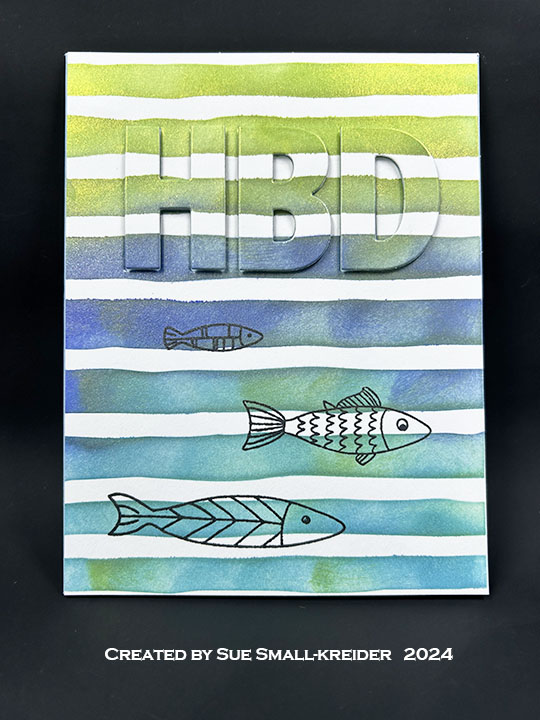
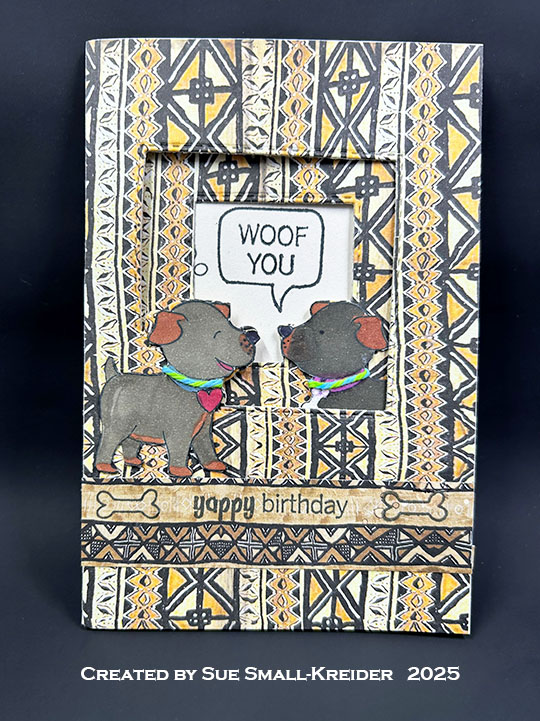
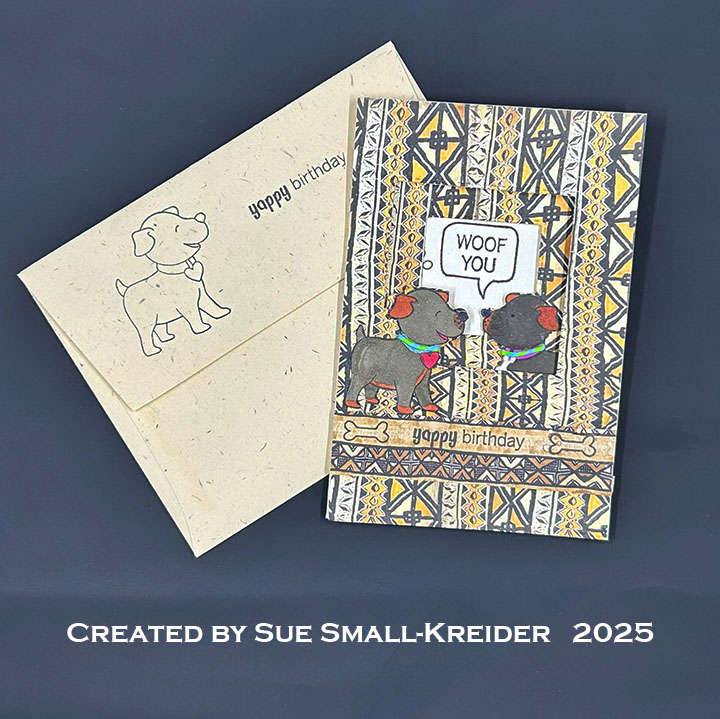
This card was made for CRAFT ROULETTE #292 whose parameters included an encouragement card, sophisticated colors, Β house pet(s) element, and thread or twine. I used the Crafter’s Companion stamp & die set called Best Buddy and Graphic 45 paper to make this card.

Watch the process video to see how I made these cards.

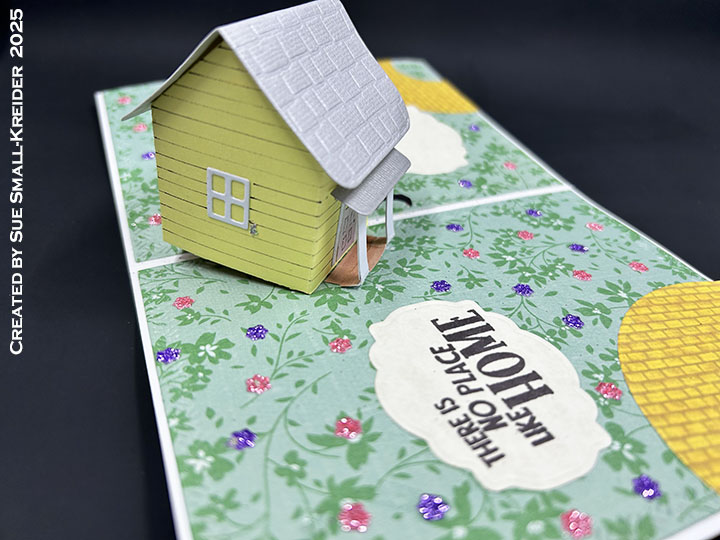
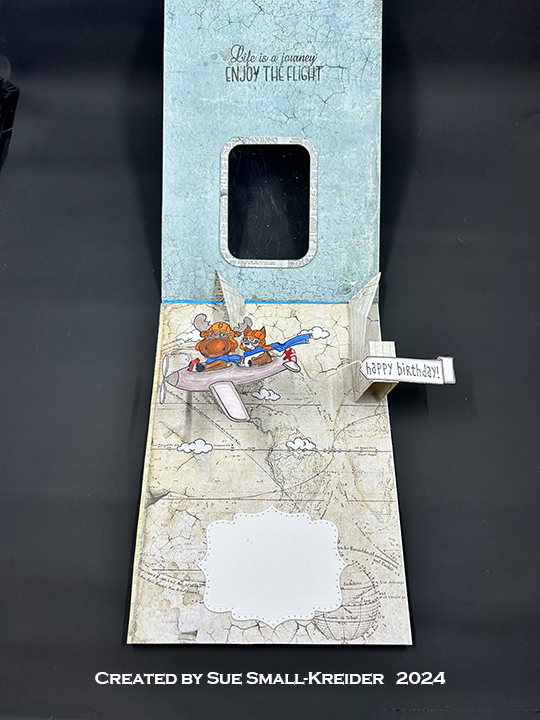
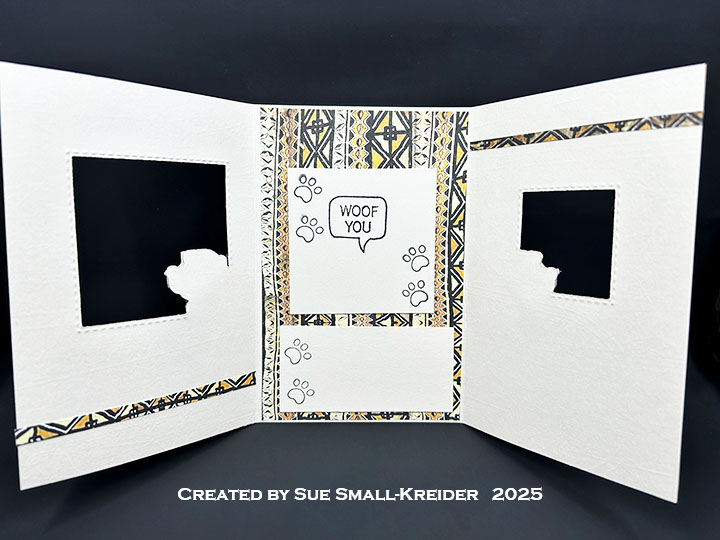
Cardbase: I started with a 5 1/2×11-inch rectangle of heavyweight ivory cardstock. After trimming 1/4-inch from the short side (5 1/2 x10 7/8-inches) I scored and folded the panel at 3 5/8-inches and 7 1/4-inches. Front panel is 1/8-inch wider than the other two panels to help with the opening of card. Follow the directions in the video for decorating and cutting out the two window apertures in the card base.

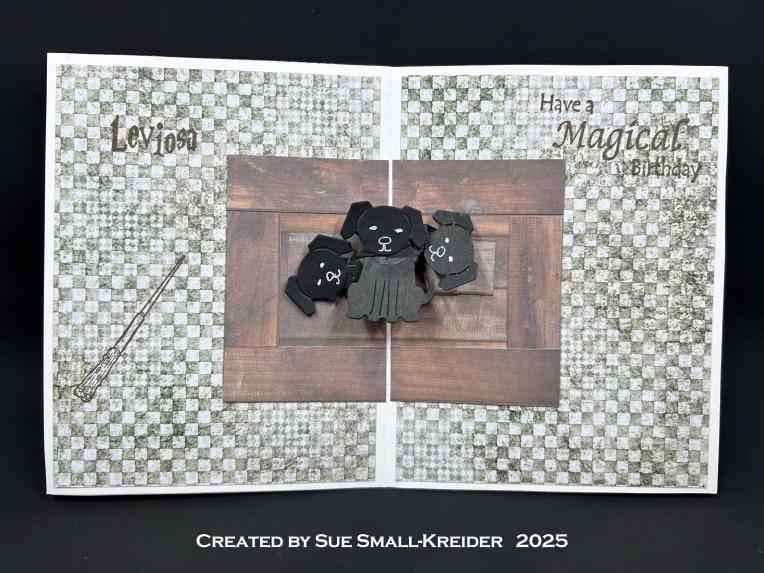
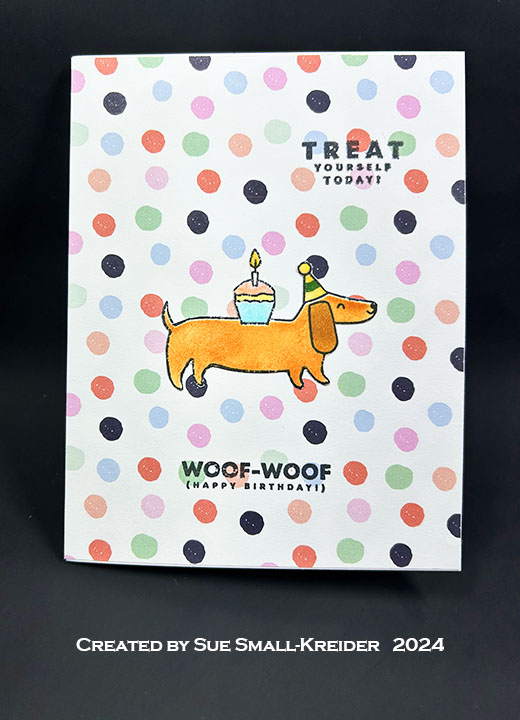
Dogs: I colored the dogs using various shades of brown and black. For the twine parameter, I glued some green/blue twine as the dogs collars.

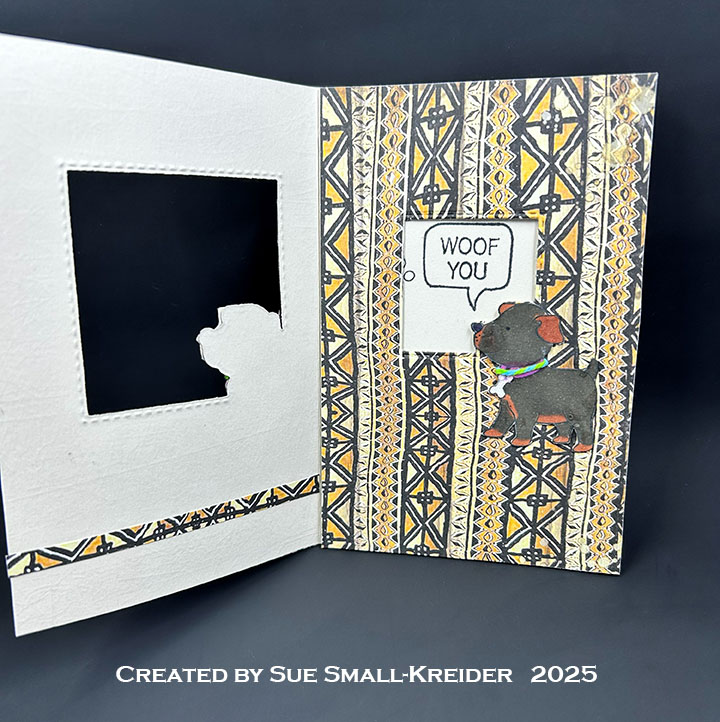
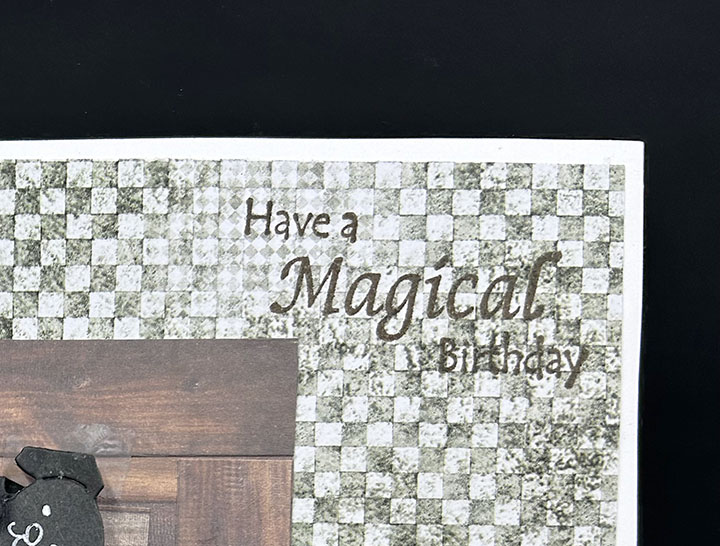
Sentiments: “Yappy Birthday” and “Woof You” are from the Best Buddy‘s stamps as is the speech bubble and paw prints.

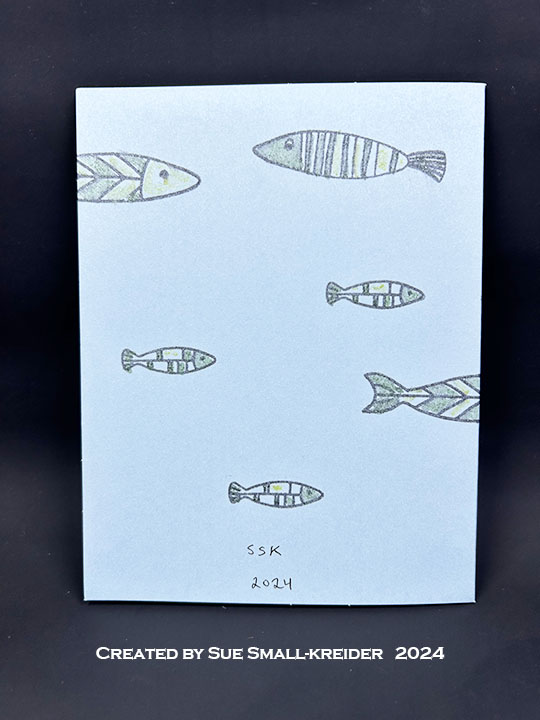
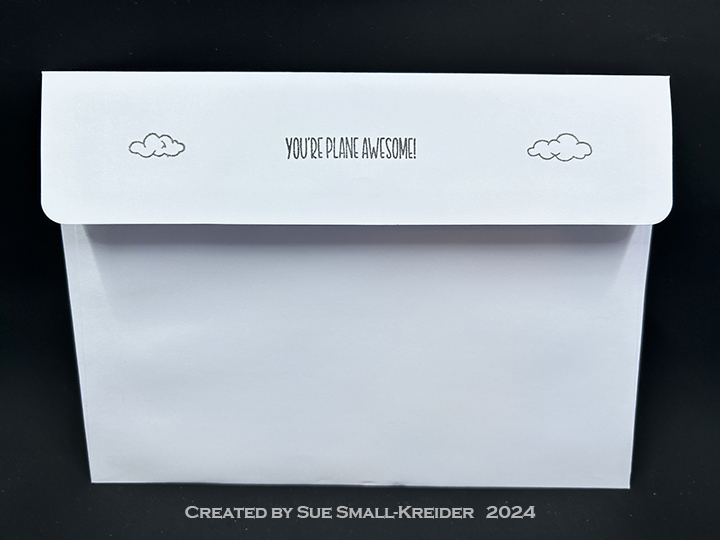
Envelope: The card fits into an A2 (5x 7-inch) size envelope with a dog and “”Yappy Birthday” stamped on the back flap.

___________________________________

Thank you for experiencing this blog post.

I hope this inspires you and makes you smile.

Please subscribe, like and leave comments 😊

___________________________________

Disclaimer: Karen Burniston products are provided free of charge by the manufacturer for review and use. All other items were personally purchased. Compensated affiliate links used where or when possible, meaning I will receive a small percentage commission from these manufacturers at no cost to you. This will allow me to add more content to my YouTube channel and help out a lot. Thank you.

Materials Used:

Stamps & Dies

  • Crafter’s Companion – Gemini – Best Buddy

Paper

  • Recollections-8.5×11-inch 100 lb. Cardstock – Ivory
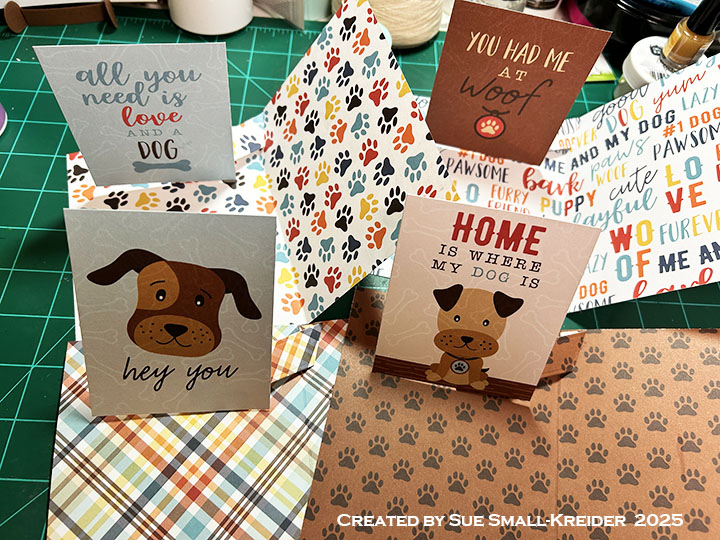
  • Stamperia – 12×12-inch Double-Sided Paper – Savana

Ink

  • Memento – Fade Resistant Dye ink – Tuxedo Black
  • OLO – Marker – Dragon Fruit
  • Pigma – Mircon 01 Fine Tip Pen – Black
  • Sharpie – Permanent Marker – Fine Point – Black
  • Sharpie – Permanent Marker – Ultra Fine Point – Black
  • Sakura – Gelly Roll Pen – Medium – White
  • Stampin’ Up – Stampin’ Blends Marker – Dual Tip – Dark Pebbled Path, Light Copper Clay, Light Pebbled Path

Tools

Miscellaneous

  • Blue/Green Baker’s Twine

Getting Skinny

This card was made to celebrate Simon Says Stamp! Stamptember with Riley & Company’s The Dog Life stamp set and coordinating dies. It also uses pop-up dies by Karen Burniston.

Watch the video to see how this card was made.

Woven Basket: The base of this basket card that can fold flat, is Karen Burniston’s Woven Basket Box Card. The grass inside is also from the same set. For assemble see video above. A black alcohol marker was used on the coated gold cardstock to make the nail heads on the basket frame.

Sentiments: The main sentiment on the card was stamped in black ink and die cut using the coordinating dies in The Dog Life stamp set. It is on the round stem piece from the Bouquet Bits die set. The white fancy label on the basket back is for a personal message and is cut using the fancy label die in the Triple Platform Pop-Up set.

Tree: The tree was cut from some doubled-sided scrap patterned papers using the Tree Pop-Up die set.

___________________________________

Thank you for experiencing this blog post.

I hope this inspires you and makes you smile.

Please subscribe to the email notices, like and leave comments 😊

___________________________________

Disclaimer: Riley & Company and Karen Burniston products are provided free of charge by the manufacturer for review and use. All other items were personally purchased. Compensated affiliate links used where or when possible, meaning I will receive a small percentage commission from these manufacturers at no cost to you. This will allow me to add more content to my YouTube channel and help out a lot. Thank you.

Materials Used:

Dies

Stamps

  • Simon Says Stamp! – Riley and Company – Clear Stamps – The Dog Life -3319ssc

Papers

  • Brown and Green Patterned Cardstock Scraps
  • Green and White Cardstock
  • Park Lane – 8.5×11 Cardstock – Gold Shimmer Sheets
  • White 4×6-inch Catalog Envelope

Ink

  • American Crafts – Metallic Marker – Silver
  • Memento – Fade Resistant Dye ink – Tuxedo Black
  • Nuvo – Highly Pigmented Watercolour Pencils – Brilliantly Vibrant and Hair & Skin Tones
  • Pigma – Mircon 01Fine Tip Pen – Black
  • Sharpie – Permanent Marker – Ultra Fine Tip – Black

Adhesives

Tools

  • Die Cutting Machine
  • Stamping Platform
  • Brutus Monroe – Stick & Stamp Mat
  • LDRS – Stampendable Stamping Tool
  • Stamp Shammy
  • Scissors
  • Pencil
  • Paper Masking Tape
  • Waterbrush

It’s Who You Meet Along The Way

It’s the Karen Burniston design team challenge for June 2025 using the theme of Animals and Characters. I chose to make a Wizard of Oz themed card using a variety of die sets. (See Materials Used for the list of dies used located at the bottom of this post.)

Watch the process video to see how I made this card.

Cardbase: Start with a 8.5×5.5-inch piece of single-sided patterned cardstock and fold in half to form a side-fold A2 (4.25×5.5-inch) card. Cover the two inside panels with decorative papers cut with the largest die in the Rectangles – Crosshatch die set.

House Pop-Up: (Watch the assembly video for Tiny House Pop-Up located at the bottom of the linked page.) Follow the directions in the process video above for the modifications made to the Tiny House Pop-Up using the Beach Bar Tiny House Add-Ons to add a porch to the house.

Characters: (Watch the assembly videos for Paper People, Knight and Dragon, and Monkey and Lion located at the bottom of the linked pages.) Follow the directions in the process video above for the modifications made to these die sets for the specific characters. For the Witch’s legs cut two strips of white cardstock 1/8-inch thick and draw red strips on them. Die cut shoes from the Witch and Cauldron die set in red glitter cardstock.

Sentiments:  All the sentiments used on the card are stamped using brown ink and Riley and Company Wizard of Oz Dress-Up stamps.

Envelope:  The card fits into an A2 (4.25x 5.5-inches) size envelope stamped with a sentiment from Riley and Company on the back flap in brown ink.

___________________________________

Thank you for experiencing this blog post.

I hope this inspires you and makes you smile.

Please like and leave comments 😊

___________________________________

Disclaimer: Karen Burniston products are provided free of charge by the manufacturer for review and use. All other items were personally purchased. Compensated affiliate links used where or when possible, meaning I will receive a small percentage commission from these manufacturers at no cost to you. This will allow me to add more content to my YouTube channel and help out a lot. Thank you.

Materials Used:

Dies

Stamps

  • Riley and Company – Clear Stamps & Dies – Dress-Up Riley – Oz 1 & Oz 2

Papers

  • Bazzill – 8.5Γ—11 Cardstock – Tiara -18-1002
  • Concord & 9th – 8.5×11-inch Solid 80 lb Cardstock – Poppy, Buttercup, Peacock
  • DCWV – 6×6 Mat Stack of Glitter Cardstock – Pink, Purple, Ruby
  • Hunkydory – A2 Mirri Card – Oxidised Metals
  • Keep It Simple – 12×12 Double-Sided Paper –Back To Basics – Jade Collection Pack – Meadow: Floral
  • Recollections – 8.5×11-inch Solid 100 lb Cardstock – Flesh Tones
  • Whimzwhirled – Digital papers – Yellow Brick Road
  • Brown and Tan Cardstock
  • White Copier Paper
  • Blue Checked Cardstock
  • Fraser Papers for William House – A2 Envelope – Genesis Text Husk Smooth

Ink

  • Creative Craft Products – Dual Tipped Alcohol Markers – BG1 Blue Grey, 95 Burnt Sienna, WG1 Warm Grey
  • Memento – Fade Resistant Dye ink – Espresso Truffle and Tuxedo Black
  • Pigma – Mircon 01 Fine Tip Pen – Black
  • Sakura – Gelly Roll Pen – Medium – White
  • Scrapbook.com – Glitter Brush Marker – Red
  • Sharpie – Permanent Marker – Ultra Fine Tip – Black, Red
  • StazOn -Solvent Ink – Jet Black

Adhesives

Tools

  • Die Cutting Machine
  • Paper Trimmer
  • Bone Folder
  • Score Board
  • Stamping Platform
  • LDRS – Stampendable Stamping Tool
  • Stamping Blocks
  • Scissors
  • Pencil
  • Paper Masking Tape
  • We R Memories – QuickStick
  • Tweezers
  • Ruler

Letting Sleeping Dogs Lie

It’s the Karen Burniston design team challenge for May 2025 using the theme of fluffy. I chose to make a card celebrating the three-headed dog, Fluffy, from the book and movie Harry Potter and the Sorcerer’s Stone using the Heart Collage Pop-Up, Cat and Dog as well as the Paper People die sets.


Watch the process video to see how I made this card.

Cardbase: Start with a 8.5×5.5-inch piece of cardstock and fold in half to form a side-fold A2 (4.25×5.5-inch) card. Cover the four panels with decorative papers. (I used Ciao Bella’s Wizard Academy paper pad.)


Fluffy Pop-Up: Watch the assembly video for the Heart Collage Pop-Up. Cut out one of the collage mechanism from black cardstock as well as three dogs using the Cat and Dog die set. Assemble as instructed in the video above. Use a white gel pen to add eyes, nose and mouth to the dog’s heads before attaching.

Ron, Harry & Hermione: Watch the video above to see how I transformed the Paper People into these well-known characters. Harry’s glasses come from the Tiny Accessories 1 die set. (My academic robe pattern is pictured above.)


Sentiments: All the sentiments used on the card are stamped using brown ink and Crackerbox Stamps.


Envelope: The card fits into an A2 (4.25x 5.5-inches) size envelope stamped with a Crackerbox Stamps castle and an owl post stamp on the back in brown ink.

_________________________________________


Thank you for experiencing this blog post.

I hope this inspires you and makes you smile.

Please like and leave comments 😊


________________________________________

Disclaimer: Karen Burniston products are provided free of charge by the manufacturer for review and use. All other items were personally purchased. Compensated affiliate links used where or when possible, meaning I will receive a small percentage commission from these manufacturers at no cost to you. This will allow me to add more content to my YouTube channel and help out a lot. Thank you.

______________________________________


Materials Used:
Dies
β€’ Karen Burniston in cahoots with Riley and Company – Paper People – 1299
β€’ Karen Burniston in cahoots with Riley and Company – Heart Collage Pop-Up – 1193
β€’ Karen Burniston in cahoots with Riley and Company – Tiny Accessories 1 – 1025
β€’ Karen Burniston in cahoots with Riley and Company – Cat and Dog – 1024


Stamps
β€’ Crackerbox Stamps – Rubber Stamps – Harry Potter Collection


Papers
β€’ Bazzill – 8.5Γ—11 Cardstock – Tiara -18-1002
β€’ Ciao Bella – 8×8-inch Double-Sided Paper –Wizard Academy
β€’ Concord & 9th – 8.5Γ—11 Cardstock – Dove
β€’ Craft Consortium -6×6-inch Double-Sided Paper – Wood textures
β€’ Black, Blush, Browns, Orange and White Cardstock
β€’ Fraser Papers for William House – A2 Envelope – Genesis Text Husk Smooth


Ink
β€’ Memento – Fade Resistant Dye ink – Rich Cocoa
β€’ Pigma – Mircon 005 Fine Tip Pen – Black
β€’ Sakura – Gelly Roll Pen – Medium – White
β€’ Sharpie – Permanent Marker – Ultra Fine Tip – Green, Red, Yellow


Adhesives
β€’ Neutral PH Adhesive by LINECO
β€’ Fine-Tip Glue Bottle
β€’ Temporary runner dot tape


Tools
β€’ Die Cutting Machine
β€’ Paper Trimmer
β€’ Bone Folder
β€’ Score Board
β€’ Stamping Platform
β€’ LDRS – Stampendable Stamping Tool
β€’ Stamping Blocks
β€’ Scissors
β€’ Pencil
β€’ Paper Masking Tape
β€’ We R Memories – QuickStick

Cards For A Dog Lover

Needing multiples of the same card layout, I made 16 cards for a dog lover’s card swap using one Echo Park Paper Company’s collection kit I Love My Dog and Karen Burniston’s Flip Frame Pop-Up and Hello die sets.

Watch the video for instructions on the construction of the cards.

Read more below on specifics of this card layout.

Cardbase:  From each sheet of 12×12-inch cardstock, cut two 5.5×8.5-inch panels. Fold each panel in half to form a 4.5×5.5 cardbase.

Flip Frame Pop-Up:  Watch the assembly video for the Flip Frame Pop-Up located at the bottom of the linked page. Cut one mechanism from matching cardstock to the card inside. Cut the journaling card down to 3 .75-inches tall x 3 inches wide. Glue mechanism and journaling card into card base as shown in video above.

Sentiments:  The die cut shadow and word β€œHello” on the card front are by Karen Burniston. All the flip panels with sentiments are journaling cards from the paper collection. A personalized inside sentiment panel will be added to the inside right panel.

Envelope:  These cards fit into an A2 (4.25×5.5-inch) envelope. The envelope flaps have been decorated with stickers from the kit.

___________________________________

Thank you for experiencing this blog post. I hope this inspires you and makes you smile. Please like and leave comments 😊

___________________________________

Disclaimer: Karen Burniston products are provided free of charge by the manufacturer for review and use. All other items were personally purchased. Compensated affiliate links used where or when possible, meaning I will receive a small percentage commission from these manufacturers at no cost to you. This will allow me to add more content to my YouTube channel and help out a lot. Thank you.

Materials Used:

Dies

Papers

  • Echo Park – 12×12-inch Double-Sided Cardstock – I Love My Dog

Ink

  • Pigma – Mircon 08 Fine Tip Pen – Black
  • Stampin’ Up – Stampin’ Write Double Tip MarkerΒ  -Chocolate Chip

Adhesives

Tools

  • Die Cutting Machine
  • Paper Trimmer
  • Bone Folder
  • Scissors
  • Paper Masking Tape

A Fishy Birthday Card

I needed a birthday card for a fisherman, so I used a stenciled background I had previously made along with some cute fish stamps and Craft Roulette’s Funn Sentiments #01 stamp set and coordinating dies.

Watch the process video to see how I made this card.

Cardbase: I used a purchased A2 (4.25×5.5-inch) blue cardbase. (Note that I made multiples of this basic card with the stenciled front panel and die cut letters.)

Stenciling and Fish: For the card front, I used a 4.25×5.5-inch rectangle of 65 lb. white cardstock and stenciled the lines using Spellbinders’ Dynamic Backgrounds stencil and Spectrum Noir Shimmer inks. The fish stamps are Paper Rose Studio – Fish Family 1 and Fish Family 2. They are colored with glitter brush markers.

Sentiments: The Front sentiment is die cut using the coordinating dies from Craft Roulette’s Funn Sentiments #01 stamp set. The inside sentiments come from Craft Roulette’s Funn Sentiments #01 stamp set as does the envelope’s sentiment.

Envelope:  The card fits into an A2 (4.25x 5.5-inches) size envelope.

___________________________________

Thank you for experiencing this blog post.

I hope this inspires you and makes you smile.

Please like and leave comments 😊

___________________________________

Disclaimer: Karen Burniston products are provided free of charge by the manufacturer for review and use. All other items were personally purchased. Compensated affiliate links used where or when possible, meaning I will receive a small percentage commission from these manufacturers at no cost to you. This will allow me to add more content to my YouTube channel and help out a lot. Thank you.

Materials Used:

Dies

  • Craft Roulette – Metal Dies – Funn Sentiments #01

Stamps

  • Craft Roulette – Clear Stamps – Funn Sentiments #01
  • Paper Rose Studio – Clear Stamps – Fish Family 1
  • Paper Rose Studio – Clear Stamps – Fish Family 2

Stencil

  • Spellbinders – Stencil of the Month –Β  Dynamic Backgrounds

Papers

  • Recollections – 8.5×11 65 lb. Cardstock – White
  • The Paper Studio – A2 Cardbase and Envelope – Blue Card & White Envelope

Ink

  • Memento – Fade Resistant Dye ink – Tuxedo Black
  • Pigma – Mircon 01 Fine Tip Pen – Black
  • Scrapbook.com – Shimmer Glitter Brush Marker – Sunshine Yellow, Key Lime Green & Frosty Blue
  • Spectrum Noir – Shimmer Gold Series Pearlescent Pigment Ink – Secret Garden
  • Spectrum Noir – Shimmer Silver Series Pearlescent Pigment Ink – Frosty Mint & Starlight Sky

Adhesives

Tools

  • Paper Trimmer
  • Stamping Platform
  • LDRS – Stampendable Stamping Tool
  • Stamping Blocks
  • Scissors
  • Sponge Daubers
  • Gel Plate
  • Paper Masking Tape

Dog Gone Cute Birthday Cards

I needed some birthday cards for dog lovers quickly, so I used Waffle Flower’s Birthday Puppies stamps and stencil sets along with Craft Roulette’s Funn Sentiments #01 stamp set and some patterned paper.

Watch the process video to see how I made these cards.

Cardbase: I cut an 8.5×11 sheet of white 65lb. cardstock in half to create two 5.5×8.5-inch rectangles that I fold in half to make side-fold A2 cardbases.

Sentiments: The front sentiments β€œTreat yourself today!” and β€œWoof-Woof (Happy Birthday)” are part of Waffle Flower’s Birthday Puppies stamps. The inside sentiments come from Craft Roulette’s Funn Sentiments #01 stamp set.

Envelope:  The card fits into an A2 (4.25x 5.5-inches) size envelope.

___________________________________

Thank you for experiencing this blog post.

I hope this inspires you and makes you smile.

Please like and leave comments 😊

___________________________________

Disclaimer: Karen Burniston products are provided free of charge by the manufacturer for review and use. All other items were personally purchased. Compensated affiliate links used where or when possible, meaning I will receive a small percentage commission from these manufacturers at no cost to you. This will allow me to add more content to my YouTube channel and help out a lot. Thank you.

Materials Used:

Stamps

  • Craft Roulette – Clear Stamps – Funn Sentiments #01
  • Fairy Hugs – Clear Stamps – Paw Prints
  • Waffle Flower – Clear Stamps –  Birthday Puppies

Stencil

  • Waffle Flower – Plastic –  Birthday Puppies

Papers

  • Recollections – 8.5×11 65 lb. Cardstock – White
  • Simple Stories – 6×8 Double-Sided Cardstock – Winter Wonder
  • Fraser Papers for William House – A2 Envelope – Genesis Text Milkweed Smooth

Ink

  • Memento – Fade Resistant Dye ink – Tuxedo Black
  • Ranger – Tim Holtz – Distress Ink- Black Soot, Dried Marigold, Fossilized Amber, Rusty Hinge, Saltwater Taffy, Salvaged Patina, Walnut Stain
  • Nuvo – Aqua Shimmer Brush – Glitter Gloss
  • Pigma – Mircon 005 Fine Tip Pen – Black
  • Sharpie – Permanent Marker – Ultra Fine Tip – Green and Red
  • Stampin’ Up – Stampin’ Blends Marker – Light Daffodil Delight

Adhesives

Tools

  • Paper Trimmer
  • Stamping Platform
  • LDRS – Stampendable Stamping Tool
  • Stamping Blocks
  • Scissors
  • Sponge Daubers
  • Gel Plate
  • Paper Masking Tape

World Card Making Day Card

This card was made to celebrate World Card Making Day and Craft Roulette episode #235 whose parameters were: not a single-fold A2 size card, mood board colors, world element and star.

I cased a card I had previously made and posted back on September 30, 2024 changing the patterned papers, scarf/steering wheel colors and adding a star to the plane’s tail. This card uses Simon Says Stamp! Stamptember with Riley & Company’s Fly By stamp set. (The Simon Says Stamp! Fly BY is sold out, but you can use this Riley & Co. Airplane Riley stamp set instead.) It also uses pop-up dies by Karen Burniston.

Watch the video to see how this card was made.

INSIDE: Plane and banner are interactive because they are on Karen Burniston’s Katherine Label Pop-Ups. The plane moves left and the banner moves right as the card is opened. The window frames on the card front panel were created from dies in Karen Burniston’s Twist Panel Pop-Up.

SENTIMENTS are all from the Riley & Company’s Fly By stamp set. “Flying by to say…Happy Birthday” and “Life is a journey. Enjoy the flight.”

CARD BACK: Signature and Craft Roulette inspired for World Card Making Day stamp with aviator’s cap.

ENVELOPE: Card fits into an A7 5×7-inch envelope stamped with “Your plane awesome: and some clouds.

___________________________________

Thank you for experiencing this blog post.

I hope this inspires you and makes you smile.

Please like and leave comments 😊

___________________________________

Disclaimer: Riley & Company and Karen Burniston products are provided free of charge by the manufacturer for review and use. All other items were personally purchased. Compensated affiliate links used where or when possible, meaning I will receive a small percentage commission from these manufacturers at no cost to you. This will allow me to add more content to my YouTube channel and help out a lot. Thank you.

Materials Used:

Dies

Stamps

Papers

  • Stamperia – 8×8 Double-Sided Cardstock – Land of Pharaohs
  • Stamperia – 8×8 Double-Sided Cardstock – Voyages Fantastiques – Backgrounds Selection
  • Clear Plastic Packaging
  • White Cardstock
  • White A7 Envelope

Ink

  • Hero Arts – Alcohol-Marker friendly Ink – Intense Black
  • Creative Craft Products – Alcohol Markers – Dual Tipped – 15 Geranium, 95 Burnt Sienna, 97 Rose Beige, WG1 Warm Grey, WG3 Warm Grey
  • Mont Marte – Dual Tip Art marker – E2 Raw Sienna
  • Nuvo – Alcohol-Marker – 428 Blueprint
  • Pigma – Mircon 005 Fine Tip Pen – Black
  • Sharpie – Permanent Marker – Ultra Fine Tip – Black

Adhesives

Tools

  • Die Cutting Machine
  • Scoring Board
  • Bone Folder
  • Paperweight
  • Stamping Platform
  • Brutus Monroe – Stick & Stamp Mat
  • LDRS – Stampendable Stamping Tool
  • Stamp Shammy
  • Scissors
  • Pencil
  • T-Ruler
  • Paper Masking Tape
  • Large Needle

Miscellaneous

  • Thin Cotton String/Thread

Flying By Pop-up Birthday Card

This card was made to celebrate Simon Says Stamp! Stamptember with Riley & Company’s Fly By stamp set. (The Simon Says Stamp! Fly BY is sold out, but you can use this Riley & Co. Airplane Riley stamp set instead.) It also uses pop-up dies by Karen Burniston.

Watch the video to see how this card was made.

___________________________________

Thank you for experiencing this blog post. I hope this inspires you and makes you smile. Please like and leave comments 😊

___________________________________

Disclaimer: Riley & Company and Karen Burniston products are provided free of charge by the manufacturer for review and use. All other items were personally purchased. Compensated affiliate links used where or when possible, meaning I will receive a small percentage commission from these manufacturers at no cost to you. This will allow me to add more content to my YouTube channel and help out a lot. Thank you.

Materials Used:

Dies

Stamps

Papers

  • Stamperia – 8×8 Double-Sided Cardstock – Land of Pharaohs
  • Stamperia – 8×8 Double-Sided Cardstock – Voyages Fantastiques – Backgrounds Selection
  • Grafix – 8.5Γ—11 Dura-Lar Acetate .005 – Clear Film
  • Silver Matte Paper
  • White Cardstock
  • White A7 Envelope

Ink

  • Hero Arts – Alcohol-Marker friendly Ink – Intense Black
  • StazOn – Solvent Ink – Jet Black
  • American Crafts – Metallic Marker – Silver
  • Creative Craft Products – Alcohol Markers – Dual Tipped – 15 Geranium, 95 Burnt Sienna, 97 Rose Beige, 120 Black, WG1 Warm Grey, WG5 Warm Grey
  • Mont Marte – Dual Tip Art marker – E2 Raw Sienna, E5 Burnt Sienna
  • Pigma – Mircon 005 Fine Tip Pen – Black

Adhesives

Tools

  • Die Cutting Machine
  • Scoring Board
  • Bone Folder
  • Paperweight
  • Stamping Platform
  • Brutus Monroe – Stick & Stamp Mat
  • LDRS – Stampendable Stamping Tool
  • Stamp Shammy
  • Scissors
  • Pencil
  • T-Ruler
  • Paper Masking Tape
  • Large Needle

Miscellaneous

  • Thin Cotton String/Thread