Paris in Springtime

IMG_5767IMG_5742

What a romantic image of Paris !  When I received the two dies that I used on this card, I looked at the packaging images for ideas for colors and layout and then did some modification to the easel mechanism.

IMG_5763

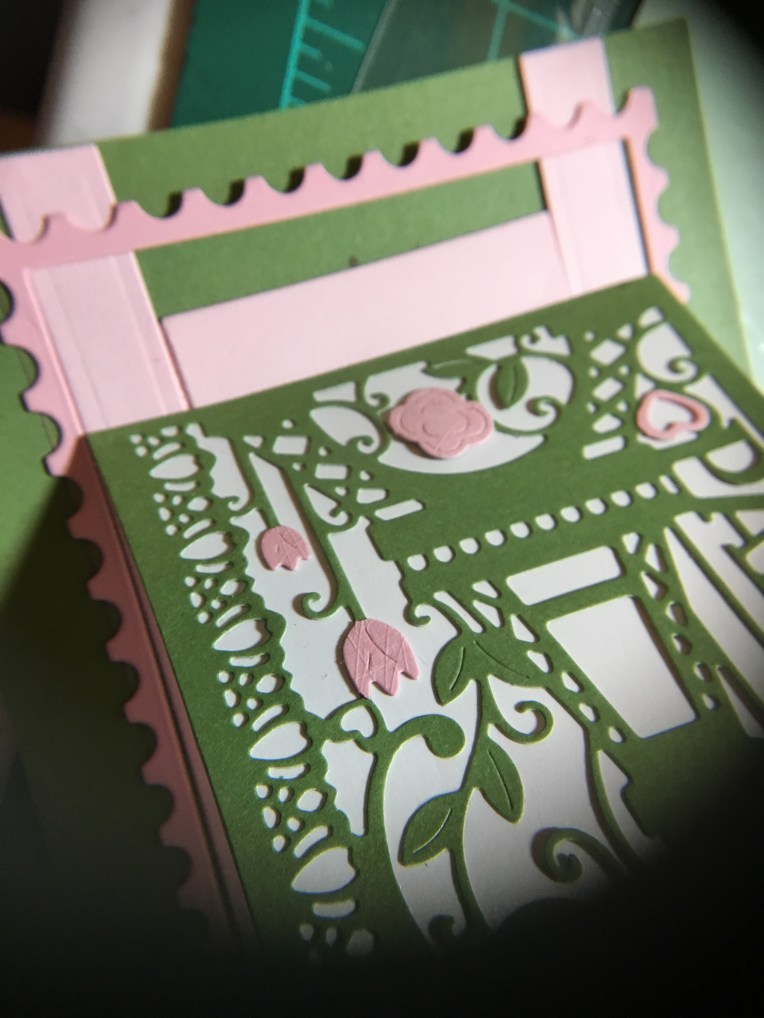
Changing the frame from a hanging charm to a larger flat panel on an easel was as simple as using ½ inch wide, red-sticky-permanent double-sided tape to hold in place the rectangle piece that was cut out for the frame.  And adhering the flat panel to the easel.

57797289798__0923E463-C45B-4C12-95BB-A64D3D2307D1

Because the flat panel is larger than the original frame pull tab, I had to add an extension tab. I used clear removable tape to smooth over the catching point where the extension level changes. In order to be able to fit the card in an A2 envelope, I punched a hole and tied a ribbon to the tab as a pull grip.

Pull Here

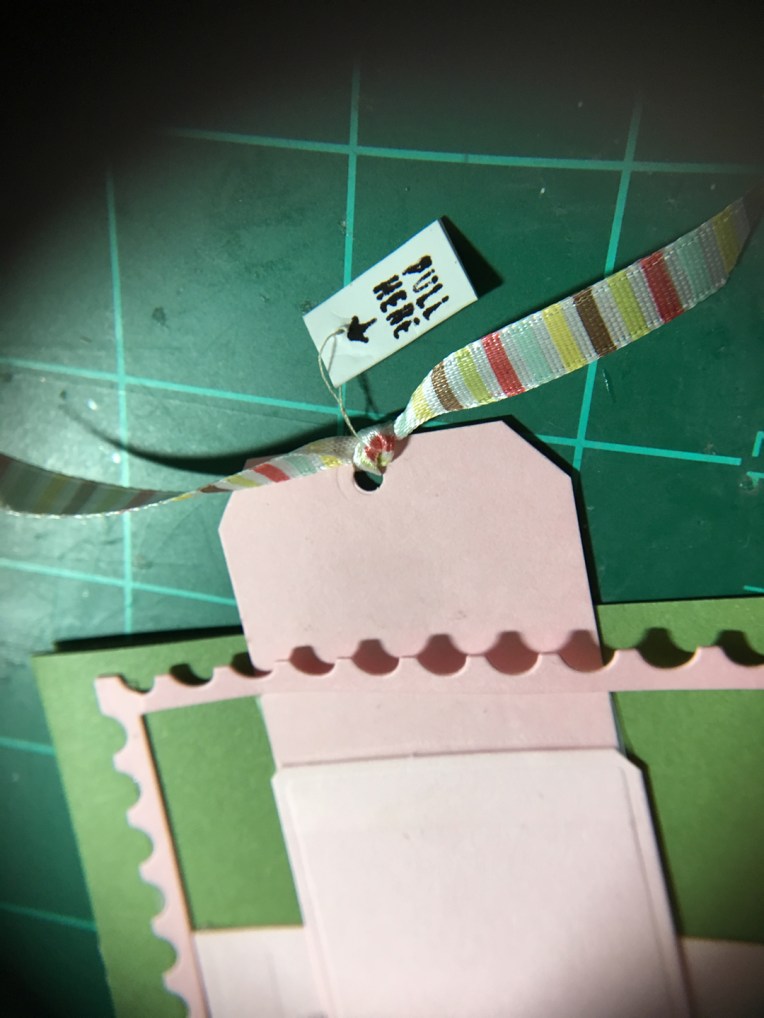
But how does the card recipient know to pull the ribbon?  Read my last post on CRX.

IMG_5767

Paris Easel Card

Paris in the Springtime Die set from Die Cutting essentials  issue 49

Karen Burniston’s Pop It Ups for Elizabeth Craft Designs 1104-Hanging Charm Pull Tab die set

“Pull Here” stamp from Concord and Ninth’s Mail Drop Stamp Collection


Flowers for the Pretty Lady

I love creating buildings and 3-dimentional cards. This being said, when I saw the Hero Arts January 2019 My Monthly Hero kit I knew I had to have it.  I looked at all the videos and blogs using the kit while waiting for the kit to arrive. Then I developed an idea for a stand-alone flower booth card.

IMG_3694

I ended up using a fan-fold of about 1.25 inches wide to made the sides of the booth. I used 1/8 inch wide double sided tape to adhere the three brown shelves to the inside of the folds. (See YouTube video from Crafter’s Companion that shows how to do the fan-fold sides and attach shelves.) I cut the striped awning about 1 inch taller than the stamp so I could color it and glue it to the inside back to give the booth a roof.

IMG_3690

Coloring the entire card with watercolor pencils and using a waterbrush to spread the color was a lot of fun.  The “Valentine’s” was stamped and embossed with black sparkle powder and fussy cut. All the flowers and cans where shaped around a fat marker pen to add some dimension. I used foam squares and tape to add more layers and depth.

IMG_3691

The back sentiment was computer generated and cut to look like a poster on the back of the booth. (If I had to choose the adhesive I used to adhere the poster again, I would use glue rather than the doubled-sided tape which shows through the thin copier paper I printed the sentiment on, but I was afraid the ink would run if I used water-based glue. I also could have repositioned the poster more squarely on the back.)

Supplies used:

  • Hero Arts January 2019 My Monthly Hero kit
  • White and green premium cardstock from Darice
  • VersaMark Watermark Stamp Pad
  • Ranger Black Sparkle Embossing Powder
  • Scotch White Foam Squares and Tape
  • Prima Marketing Inc. Watercolor Pencils -The Basics
  • Tim Holtz-Ranger Waterbrush -Detailer Tip
  • Stampabilities Black Dye Ink Pad
  • Poster cut from Lawn Fawn Scalloped Box Pop-Up Die


Card Ministry

I wanted to share some of the cards I’ve made for a card ministry that sends cards to those who may need a word of encouragement or thanks. Letting people know that someone cares about them is what greeting cards are about, especially handmade ones.  I encourage anyone reading this to think about making at least one card for someone you don’t know, but might appreciate being told they count as a human being.IMG_3882


Both cards were created from many scrap pieces left from other projects as well as flowers and leaves cut from food boxes.   I have tried my best to remember all the dies used to produce these pieces.
Window Box Card:
  • Window & Flower Box – Crafter’s Companion “Window” CC-MD-E-WINDOW
  • Layered flowers – “Card Making Magic” by Christina Griffiths from Die-cutting Essentials Issue 37
  • Hello, Hugs, Smile – Recollections 10 piece word set
  • Cardstock – “The Pier” boxed cards from American Crafts
  • Blue Window Blind – Build-A-Scene Dies Xcut-Docrafts, “Shadow Box Dies – Seaside” XCU 503272
  • White Gel Pen – Gelly Roll 08
  • Scotch Foam Tape
  • Tombow Mono Aqua Liquid Glue
Thank You Card:
  • Thank You Banner – Computer generated sentiment die cut using Uchi’s Design Animation Die Cut Set DC101
  • Blue Paisley Swirls – Tonic Studios “Paisley Edge” designed exclusively for Scrapbook.com 2486e Paisley Edge Dot & Drop Die
  • Yellow & Orange Swirls – Crafter’s Companion “Swirl with Leaves” CC_MD-E-SWIRL
  • Green Leaves & Flower – “Card Making Magic” by Christina Griffiths from Die-cutting Essentials Issue 37
  • White Hearts & Bottom White Bar – Crafter’s Companion “Garden Bench” CC-MD-E-BENCH
  • Yellow House – Build-A-Scene Dies Xcut-Docrafts, “Shadow Box Dies – Seaside” XCU 503272
  • Home Hobby by 3L Premium Double-Sided tape
  • Ms. Sparkle & Co. Red Permanent Double-Sided Tape
  • Tombow Mono Aqua Liquid Glue