Wizard Themed Pop-Up Birthday Card

It’s the Karen Burniston design team challenge for September 2025 using the theme of letter. I chose to make a card celebrating the Owl Post in the Harry Potter world using the Feathered Animals, Postage Pop-Up, Arch Pop, Rainbow Add-Ons, and Paper People die sets.

Watch the process video to see how I made this card.

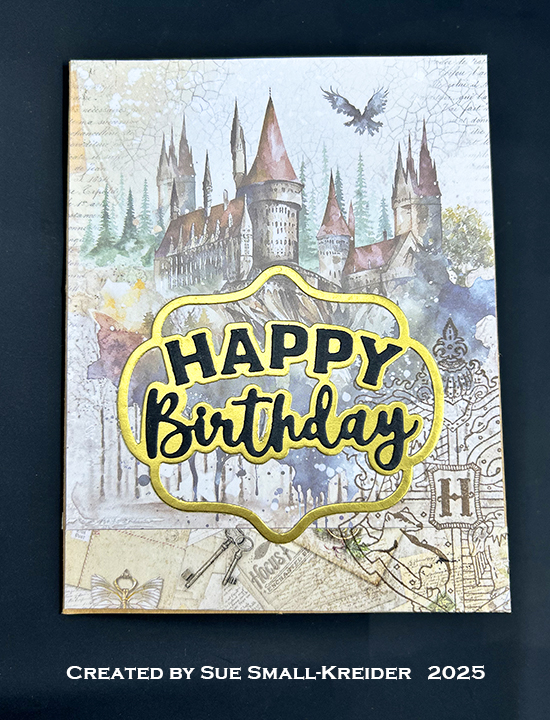
Cardbase: Start with a purchased A2 (4.25×5.5-inch) cardbase of brown kraft paper. Cover the four panels with decorative papers. (I used Ciao Bella’s Wizard Academy paper pad.)

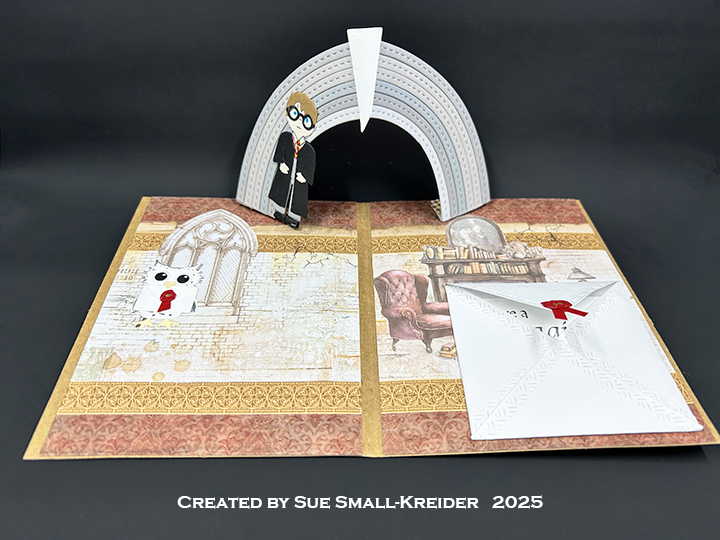
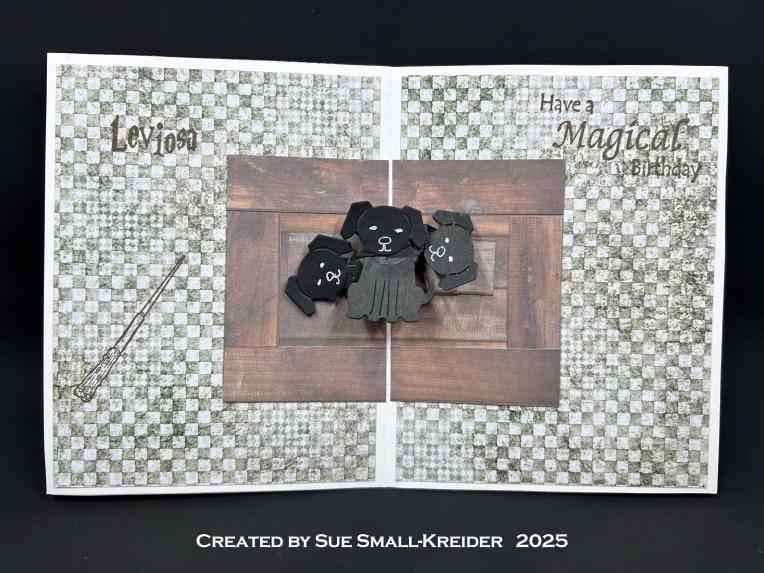
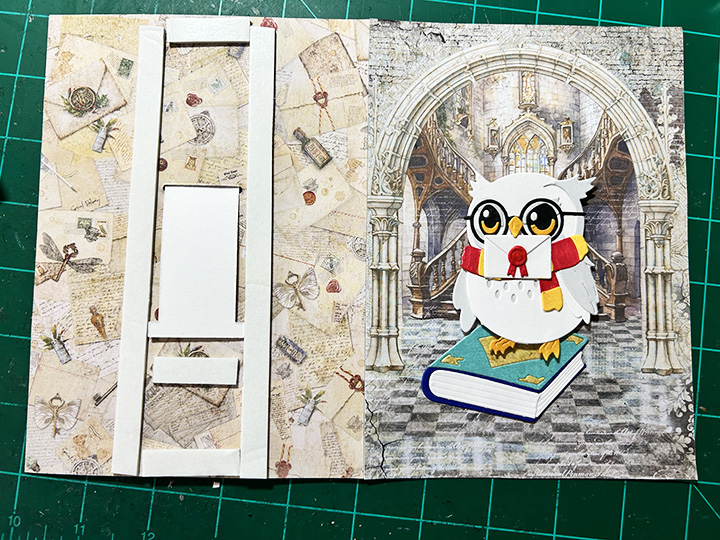
Arch Pop-Up: Watch the assembly videos (located at the bottom of the linked die set pages) for the Arch Pop-Up and Rainbow Add-Ons. Use different shades of gray to build up the stone archway. The keystone of the arch is a decorator die in the Photo Fan Pop-Up.

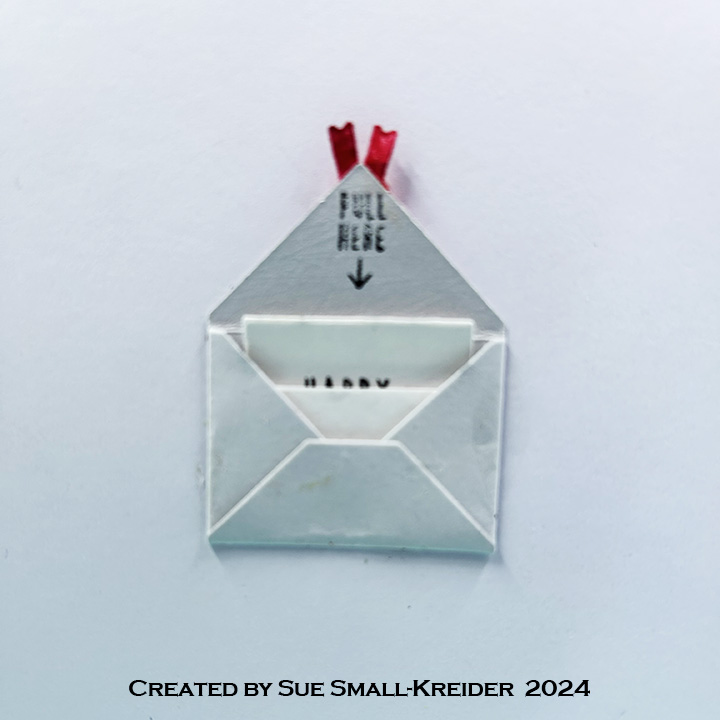
Harry and Hedwig: Harry is made using three die sets – Paper People, Tiny Accessories 1 and Graduation Elements. Hedwig is made using the Feathered Animals set using white card stock and a gray brush tipped marker. (Watch the video above for assembly. Also watch this video for more details on the Hogwarts uniform.) The envelope Hedwig carries is from the Postage Pop-Up set. Watch the video above to learn how the red seal is made.

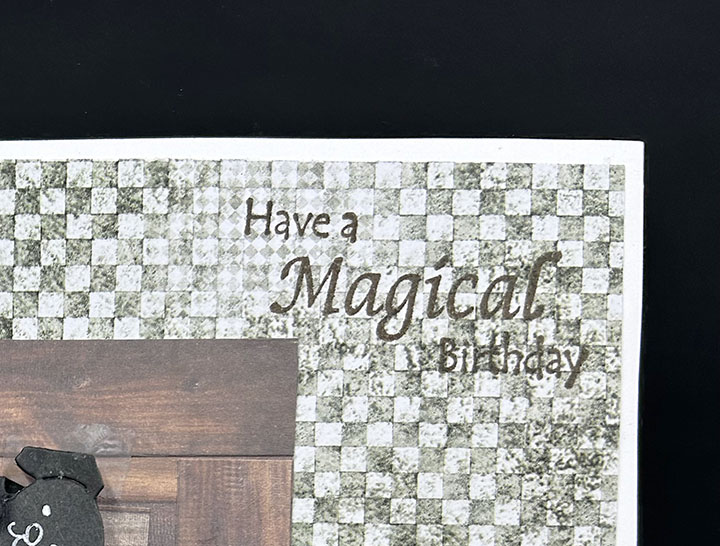
Sentiments: All the sentiments and Hogwarts crest used on the card are stamped using brown ink and Crackerbox Stamps. Watch the video above for how the large envelope and message card are made from the Squares – Crosshatch die set. “Happy birthday” on the card front is the Happy Birthday Lorna Add-Ons.

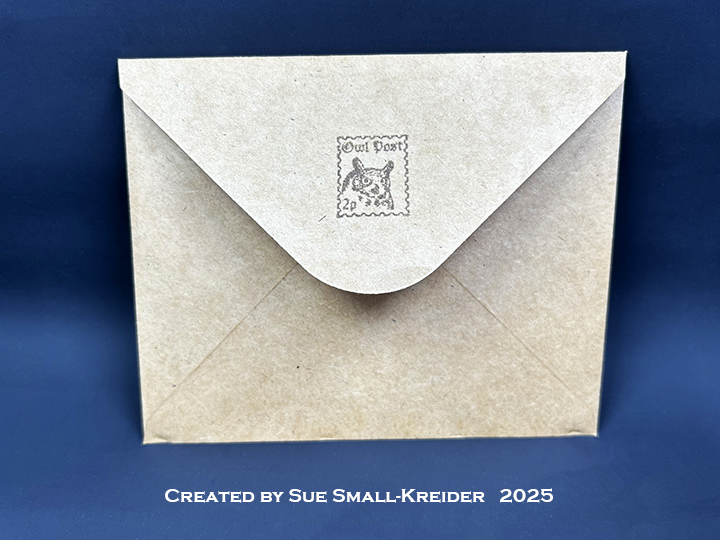
Envelope: The card fits into a brown kraft paper A2 (4.25x 5.5-inches) size envelope stamped with a castle and an owl post stamp on the back flap in brown ink.

___________________________________

Thank you for experiencing this blog post.

I hope this inspires you and makes you smile.

Please subscribe to the email notices, like and leave comments 😊

___________________________________

Disclaimer: Karen Burniston products are provided free of charge by the manufacturer for review and use. All other items were personally purchased. Compensated affiliate links used where or when possible, meaning I will receive a small percentage commission from these manufacturers at no cost to you. This will allow me to add more content to my YouTube channel and help out a lot. Thank you.

Materials Used:


Dies


Stamps

  • Crackerbox Stamps – Rubber Stamps – Harry Potter Collection


Papers

  • Bazzill – 8.5×11 Cardstock – Tiara -18-1002
  • Ciao Bella – 8×8-inch Double-Sided Paper –Wizard Academy
  • Concord & 9th – 8.5×11 Cardstock – Dove
  • Fun Stampers Journey – 8.5×11 Cardstock – Tin Pail
  • My Favorite Things – 8.5×11 Cardstock – Cement Gray
  • Black, Blush, Browns, White and Yellow Cardstock
  • A2 Cardbase and Envelope – Brown Kraft


Ink

  • Cricut – Marker Medium  Tip 1.0 – Gold
  • Gel Pen – Blue
  • Simply Lettering – Dual Tipped Marker – Gray
  • Memento – Fade Resistant Dye ink – Rich Cocoa
  • Pigma – Mircon 01Fine Tip Pen – Black
  • Sakura – Gelly Roll Pen – Medium – White
  • Sharpie – Permanent Marker – Ultra Fine Tip –Red, Yellow

Adhesives

  • Neutral PH Adhesive by LINECO
  • Fine-Tip Glue Bottle
  • Scrapbook.com – Double-Sided Tape – 4-inch wide

Tools

  • Die Cutting Machine
  • Paper Trimmer
  • Stamping Blocks
  • Scissors
  • Pencil
  • Paper Masking Tape
  • Riley and Company – Pick & Poke Tool
  • Hole Punches – 1/4 & 1/8-inch
  • Ruler


Letting Sleeping Dogs Lie

It’s the Karen Burniston design team challenge for May 2025 using the theme of fluffy. I chose to make a card celebrating the three-headed dog, Fluffy, from the book and movie Harry Potter and the Sorcerer’s Stone using the Heart Collage Pop-Up, Cat and Dog as well as the Paper People die sets.


Watch the process video to see how I made this card.

Cardbase: Start with a 8.5×5.5-inch piece of cardstock and fold in half to form a side-fold A2 (4.25×5.5-inch) card. Cover the four panels with decorative papers. (I used Ciao Bella’s Wizard Academy paper pad.)


Fluffy Pop-Up: Watch the assembly video for the Heart Collage Pop-Up. Cut out one of the collage mechanism from black cardstock as well as three dogs using the Cat and Dog die set. Assemble as instructed in the video above. Use a white gel pen to add eyes, nose and mouth to the dog’s heads before attaching.

Ron, Harry & Hermione: Watch the video above to see how I transformed the Paper People into these well-known characters. Harry’s glasses come from the Tiny Accessories 1 die set. (My academic robe pattern is pictured above.)


Sentiments: All the sentiments used on the card are stamped using brown ink and Crackerbox Stamps.


Envelope: The card fits into an A2 (4.25x 5.5-inches) size envelope stamped with a Crackerbox Stamps castle and an owl post stamp on the back in brown ink.

_________________________________________


Thank you for experiencing this blog post.

I hope this inspires you and makes you smile.

Please like and leave comments 😊


________________________________________

Disclaimer: Karen Burniston products are provided free of charge by the manufacturer for review and use. All other items were personally purchased. Compensated affiliate links used where or when possible, meaning I will receive a small percentage commission from these manufacturers at no cost to you. This will allow me to add more content to my YouTube channel and help out a lot. Thank you.

______________________________________


Materials Used:
Dies
Karen Burniston in cahoots with Riley and Company – Paper People – 1299
Karen Burniston in cahoots with Riley and Company – Heart Collage Pop-Up – 1193
Karen Burniston in cahoots with Riley and Company – Tiny Accessories 1 – 1025
Karen Burniston in cahoots with Riley and Company – Cat and Dog – 1024


Stamps
• Crackerbox Stamps – Rubber Stamps – Harry Potter Collection


Papers
• Bazzill – 8.5×11 Cardstock – Tiara -18-1002
• Ciao Bella – 8×8-inch Double-Sided Paper –Wizard Academy
• Concord & 9th – 8.5×11 Cardstock – Dove
• Craft Consortium -6×6-inch Double-Sided Paper – Wood textures
• Black, Blush, Browns, Orange and White Cardstock
• Fraser Papers for William House – A2 Envelope – Genesis Text Husk Smooth


Ink
• Memento – Fade Resistant Dye ink – Rich Cocoa
• Pigma – Mircon 005 Fine Tip Pen – Black
• Sakura – Gelly Roll Pen – Medium – White
• Sharpie – Permanent Marker – Ultra Fine Tip – Green, Red, Yellow


Adhesives
• Neutral PH Adhesive by LINECO
• Fine-Tip Glue Bottle
• Temporary runner dot tape


Tools
• Die Cutting Machine
• Paper Trimmer
• Bone Folder
• Score Board
• Stamping Platform
• LDRS – Stampendable Stamping Tool
• Stamping Blocks
• Scissors
• Pencil
• Paper Masking Tape
• We R Memories – QuickStick

Owl Post Birthday Message

Who doesn’t enjoy receiving mail, but mail by Owl Post is special. This Harry Potter themed birthday card was a commissioned card for a Potter fan.

I used a new die set from Spellbinders for the owl on top of the book and an older die and stamp set from Concord & 9th for the envelope with pull out birthday wishes.

Cardbase: A purchased A7 (5×7-inch) cardbase and envelope was covered on the outside panels with patterned paper from Ciao Bella’ Wizard Academy paper pad. A leftover strip from the back of the card was saved for the small envelope step.

Owl and Book: (Watch assembly video first.) I found it easier to place the glasses on after adding the eyebrows and then adding the eyes. (I cut the black piece of the eyes out of white and colored the bottom “U” shapes yellow and then glued them inside the black pieces.) The beak is popped up on a tiny piece of foam tape so the envelope can fit under it. I cut the scarf from white cardstock and colored the various pieces yellow and red to create the striped scarf. To get the beak, envelope seal and book cover to sparkle, I used glitter brush pens. The book is glued flat to the card front and the owl is popped up on foam tape squares.

Small Envelope and Message: (Watch assembly video first.) Using the small envelope die in the Concord and 9th cut one from light grey cardstock. Fold envelope on score marks and open back up. Using the small slot die in the set cut a slot in the bottom center of envelope for the message piece to slide through. (I made the mistake of putting the slot at the top of the envelope center and had to cover the grey inside of the envelope below the slot with white.) Figure out the placement of the envelope inside the card and mark with a pencil where the slot goes and die cut it. Using the wide “T” shaped die in the set, cut one from white cardstock. Use the birthday sentiment stamp from the coordinating stamp set to get the message onto the strip.

Glue envelope center back onto inside of card panel matching up the slots. Thread message strip through the slot so that the bottom of the strip is on the back side of the card.  Stamp the “Pull Here” on the top of the inside of the envelope just above the white strip. Glue the envelop bottom to its sides making sure that the white strip can move freely though the envelope. Push the white strip so that the envelope can close and on the back side of the card, place a strip of foam tape just below the “T” of the white stripe to act as a stopper for the strip. Add foam tape along the sides of the white stripe to be the channel it will follow. Peel the backing paper from foam. tape Place extra strip of pattern paper over the foam tape. Test message stripe coming out of envelope. Add red ribbon seal from the Spellbinder’s owl set to top flap of envelope.

Card Envelope: The black glasses frame is cut using the owl die set and glued onto the back envelope flap.

Personalization: The recipient’s name was placed above the owl in the archway using Karen Burniston’s Mini Alphabet.

__________________________________________

Thank you for reading this blog post. I hope this inspires you and makes you smile.

Please like and leave comments 😊

__________________________________________

Materials Used:

Dies

Stamps

  • Concord & 9th  – Mail Drop Stamp Set

Papers

  • Ciao Bell Paper Company – 8×8 Double-Sided Paper Pad  – Wizard Academy – CBH071
  • Fun Stampers Journey  – 8.5×11 Cardstock – Tin Pail
  • Blacks, Blues, White and Yellow Cardstock
  • Park Lane Paperie – A7 Cardbase and Envelope – White

Ink

  • StazOn – Solvent Ink – Jet Black
  • Stampin’ Up – Stampin’ Blends Markers – Light and Dark Daffodil Delight
  • Scrapbook.com – Glitter Brush Marker – Yellow
  • Scrapbook.com – Glitter Brush Marker – Red
  • Sharpie – Permanent Marker – Fine Tip – Red
  • Pigma – Mircon 01 Fine Tip Pen – Black

Adhesives

Tools

  • Die Cutting Machine
  • Bone Folder
  • Stamping Platform
  • LDRS – Stampendable Stamping Tool
  • We R Memories – QuickStick
  • Tweezers
  • Stamping Blocks
  • Scissors
  • T-Ruler
  • Pencil
  • Tombow – Mono – Sand Eraser -512A