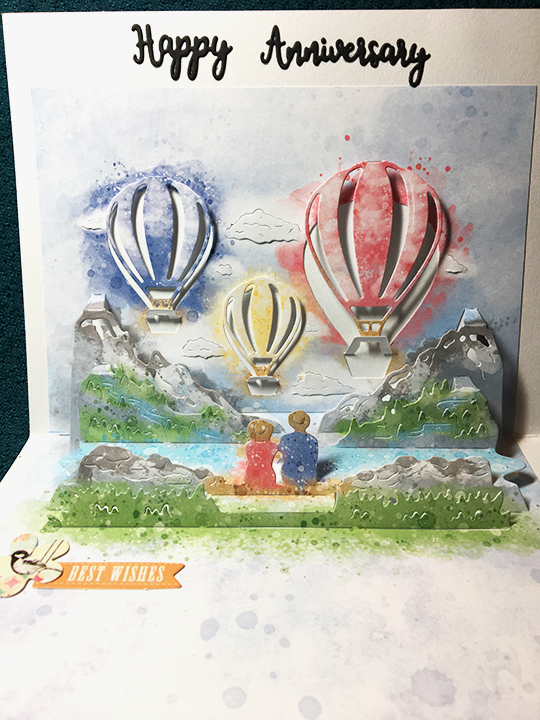
It’s time for the Karen Burniston Design Team February 2026 Challenge whose theme is “Love is in the air” – something flying.
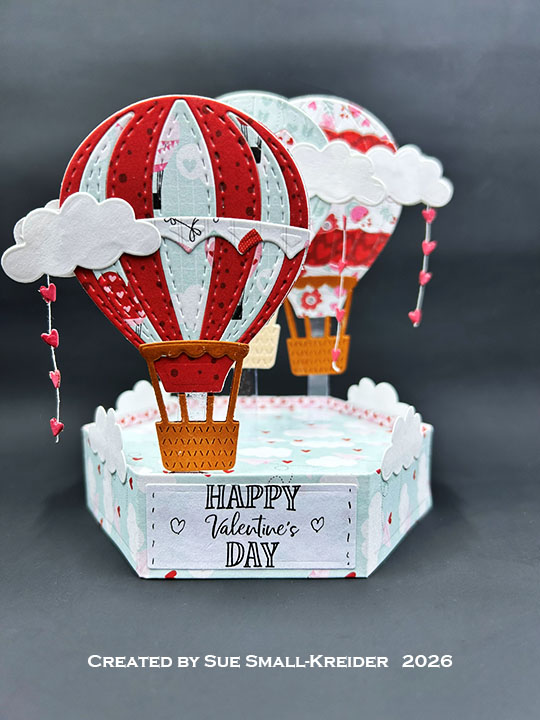
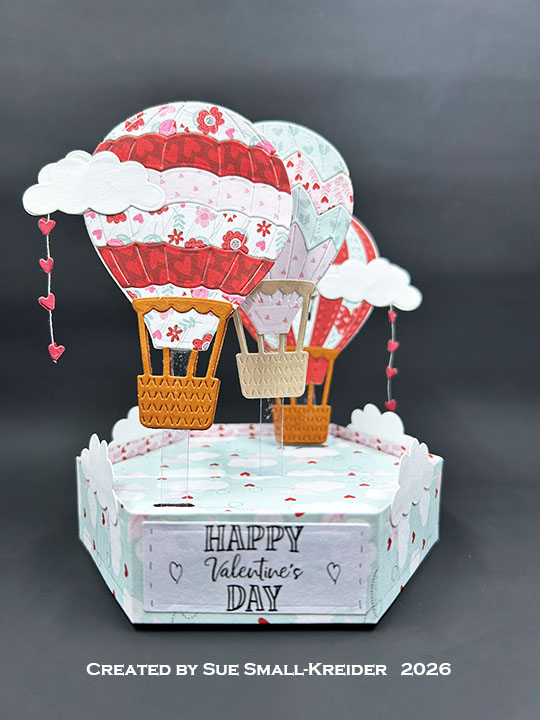
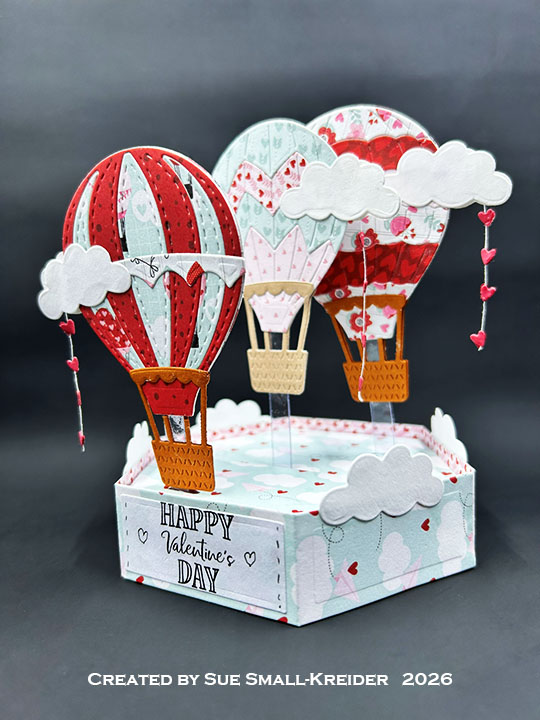
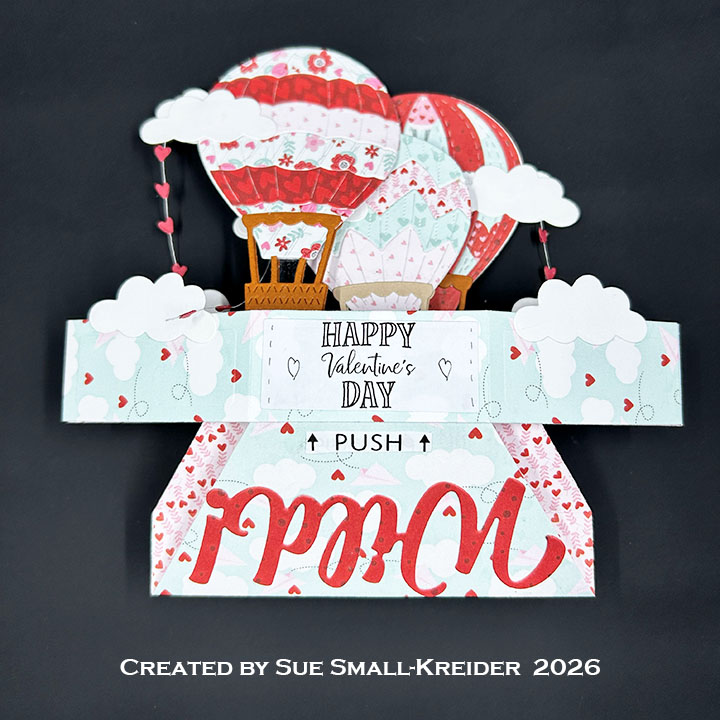
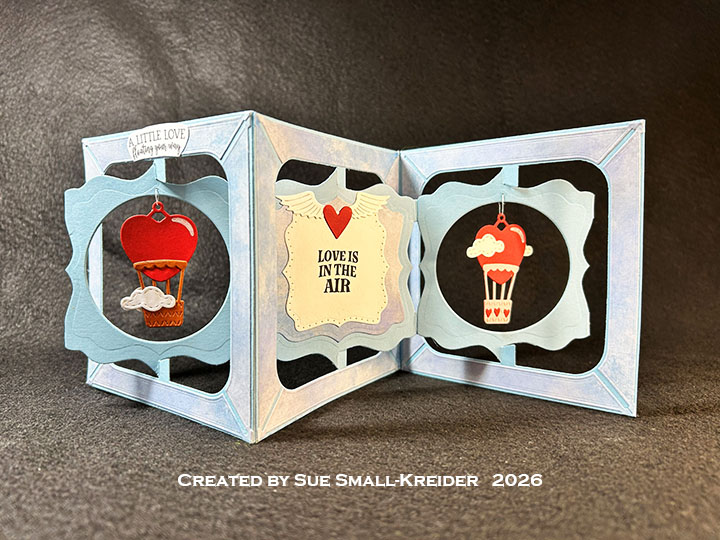
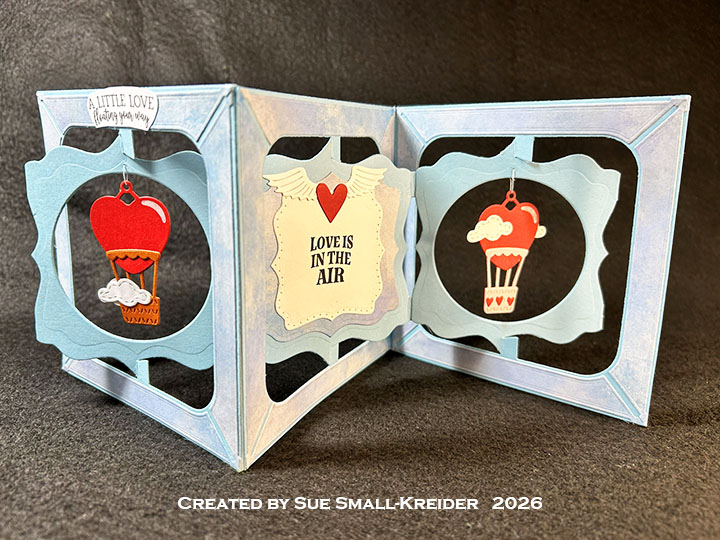
I made an accordion card using the new Love Is In The Air Charms die set – along with the previously released Fancy Label Accordion, Circles – Crosshatch and Fancy Solid Frame sets. Two new stamp sets were used – Stage Scenes and Love Notes.
Watch the process video to see how I made this card.
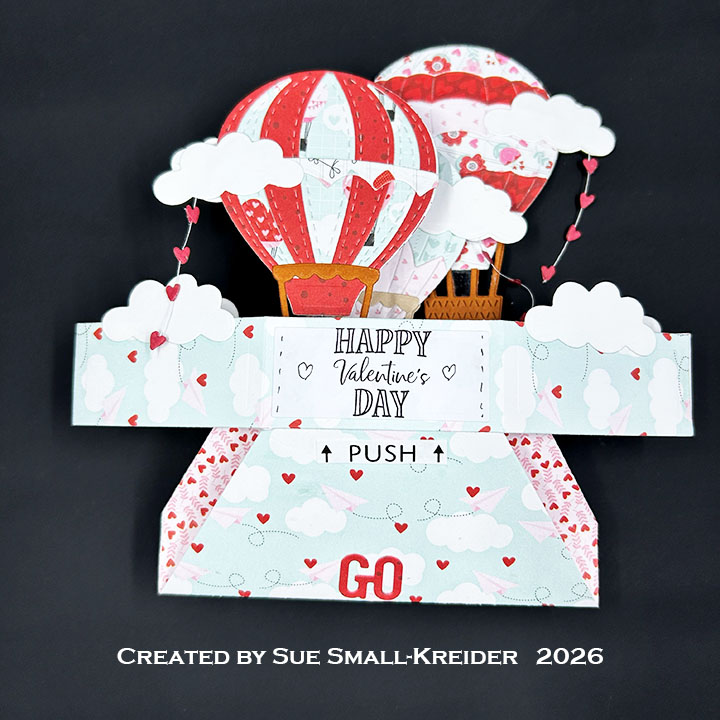
Accordion Cardbase: Watch the assembly video located at the bottom of the linked page for the Fancy Label Accordion. Cut three Fancy Label Accordion frames from a heavy weight blue cardstock. Using the 2.4-inch die in the Circles – Crosshatch, cut openings in the label portion of TWO of the three accordion frames. Glue the three frames together with the circle frames on the ends. Cut six sets of Fancy Solid Frame from patterned paper. Glue decorative frames on to both sides of the accordion frames. (Watch this assembly video for adding frames to accordion cards.) Finish assembling the card as shown in the video above.
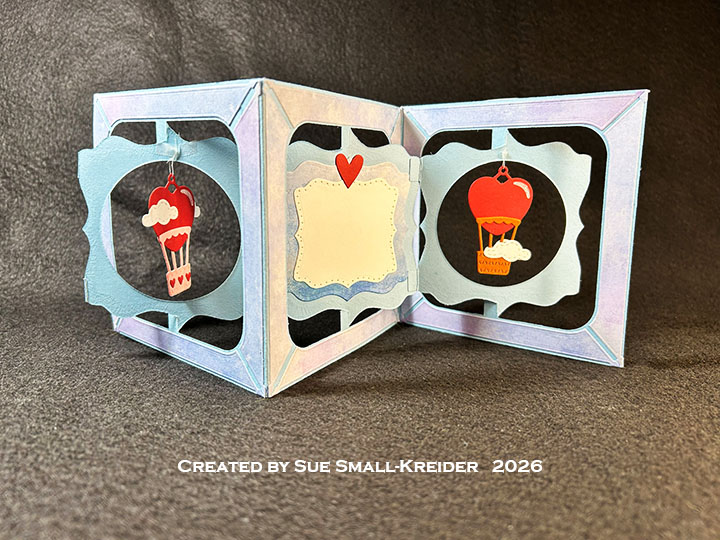
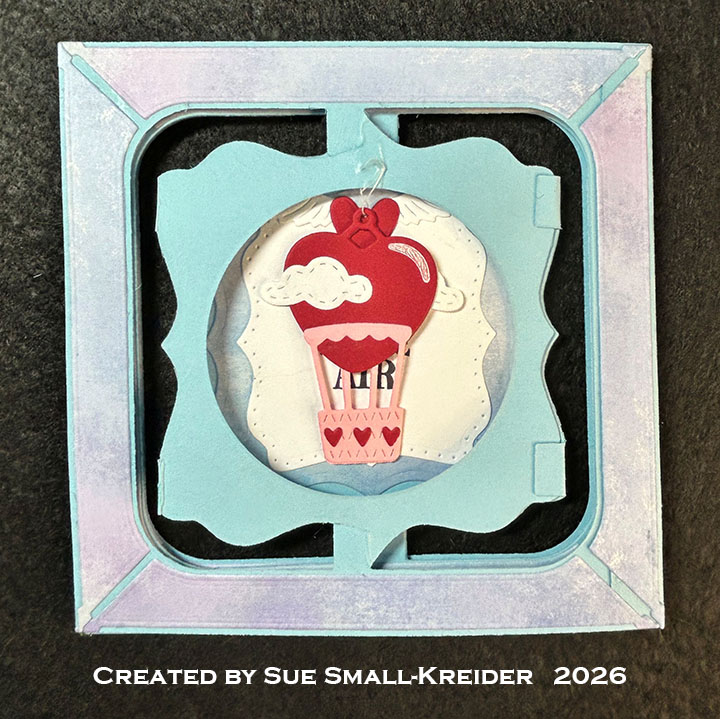
Hot Air Balloons: Cut four red heart charms from the Love Is In The Air Charms die set. Use the stencil feature and a white gel pen to add the highlights. Cut a total of four baskets. (I cut two brown and two pink.) Cut four white clouds and one set of tiny hearts in red. Assemble as shown in the video above. Using a thin sewing needle and cotton thread, pierce a hole into the top of the circle frame label and then thread the balloon charm onto the thread. Tie off the thread loop using a square knot. Push the knot to the back side of frame and add a drop of liquid glue to secure it to the frame. (I like the Neutral PH Adhesive by LINECO.)
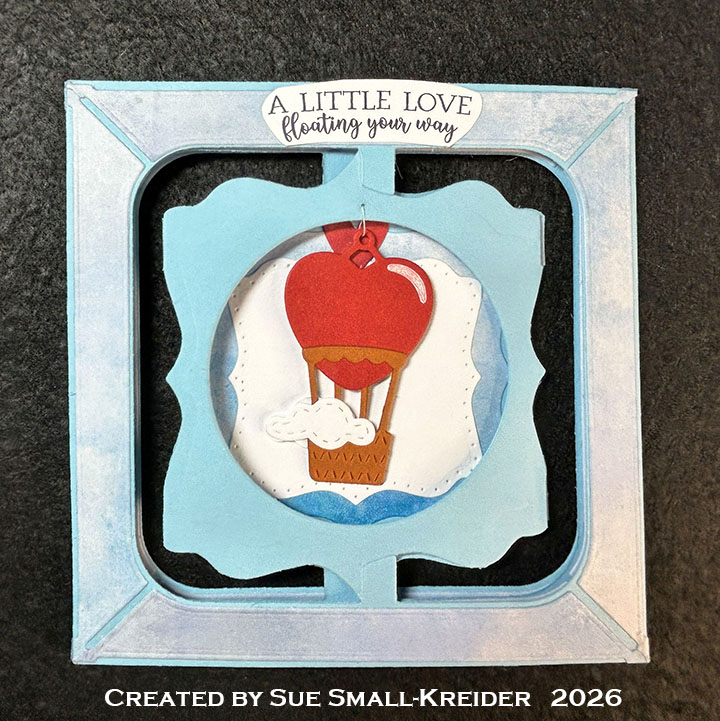
Sentiments: The sentiments are stamped onto white cardstock and then cut out. On the card front is “A little love floating your way” is from the Stage Scenes. Fussy cut to fit on the card frame. Using the Fancy Label Accordion decorator dies, cut the “Love is in the air” from the Love Notes stamp set.
Envelope: The closed card fits into an A7 (5×7-inch) size envelope stamped with “Love is in the air” from the Love Notes stamp set.
___________________________________
Thank you for experiencing this blog post.
I hope this inspires you and makes you smile.
Please subscribe, like and leave comments 😊
Follow my YouTube channel, Instagram and Pinterest as well.
___________________________________
Disclaimer: Karen Burniston products are provided free of charge by the manufacturer for review and use. All other items were personally purchased. Compensated affiliate links used where or when possible, meaning I will receive a small percentage commission from these manufacturers at no cost to you. This will allow me to add more content to my YouTube channel and help out a lot. Thank you.
Materials Used:
Dies
- Karen Burniston in cahoots with Riley and Company – Love Is In The Air Charms – 1326
- Karen Burniston in cahoots with Riley and Company – Fancy Solid Frame – 1272
- Karen Burniston in cahoots with Riley and Company – Circles – Crosshatch – 1057
- Karen Burniston in cahoots with Riley and Company – Fancy Label Accordion – 1043
Stamps
- Karen Burniston in cahoots with Riley and Company – Clear Stamps – Love Notes
- Karen Burniston in cahoots with Riley and Company – Clear Stamps – Stage Scenes
Papers
- Concord & 9th – 8.5×11-inch Solid Colored Cardstock – Harbor
- Craft Consortium – 6×6-inch Double-Sided Cardstock – Over the Rainbow
- Pink, Red and White Cardstock
- A7 (5×7-inch) Envelope – White
Ink
- Memento – Fade-Resistant Dye Ink – Tuxedo Black
- Sakura – Gelly Roll Pen – Medium – White
Adhesives
Tools
- Die Cutting Machine
- Paper Trimmer
- Bone Folder
- Stamping Blocks used as paperweights
- Scissors
- Paper Masking Tape
- Thin Sewing Needle
- Tweezers
- We R Memories – QuickStick
Miscellaneous
- White Cotton Sewing Thread