Pop-Up Chick In A Basket

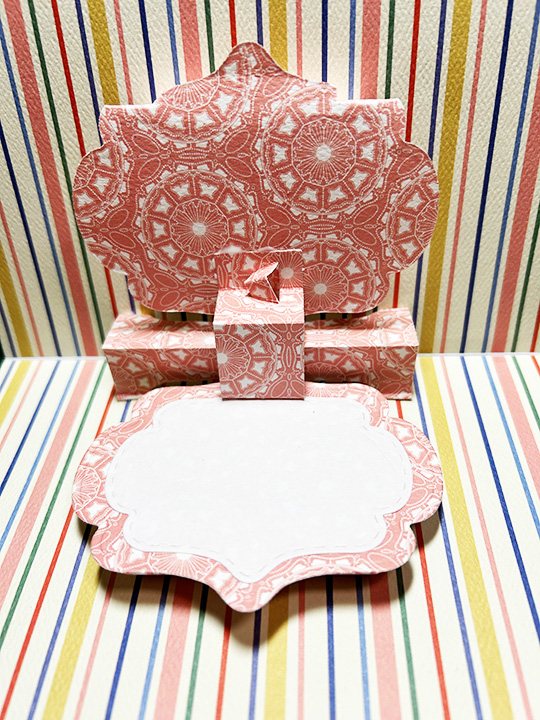
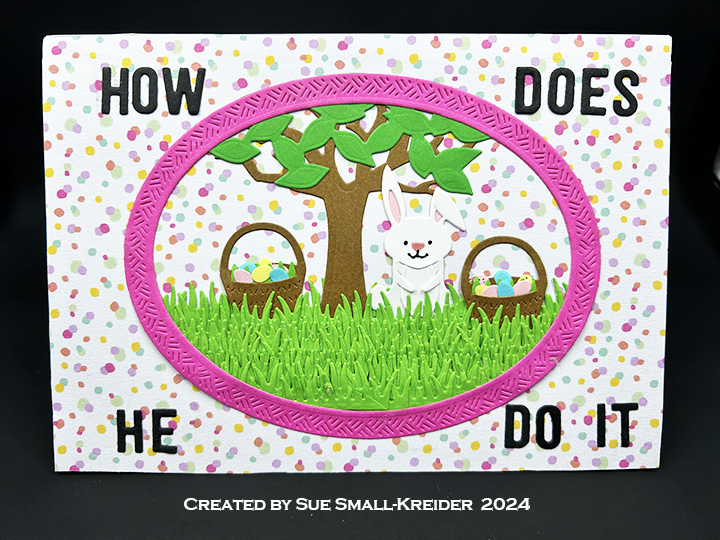
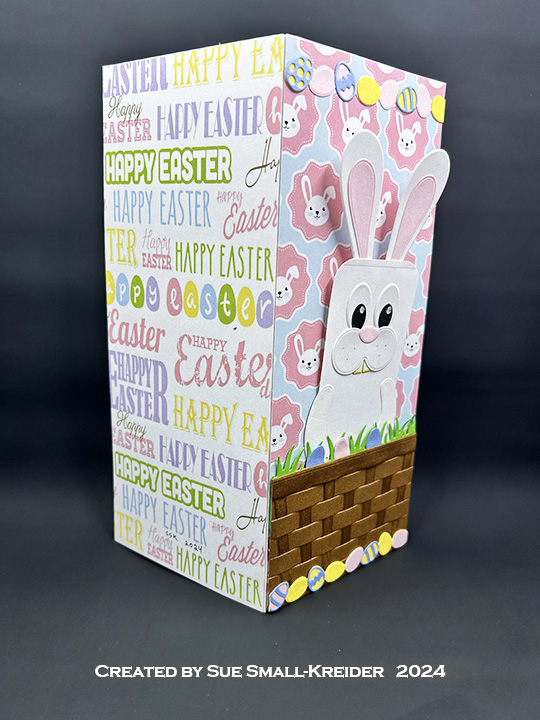
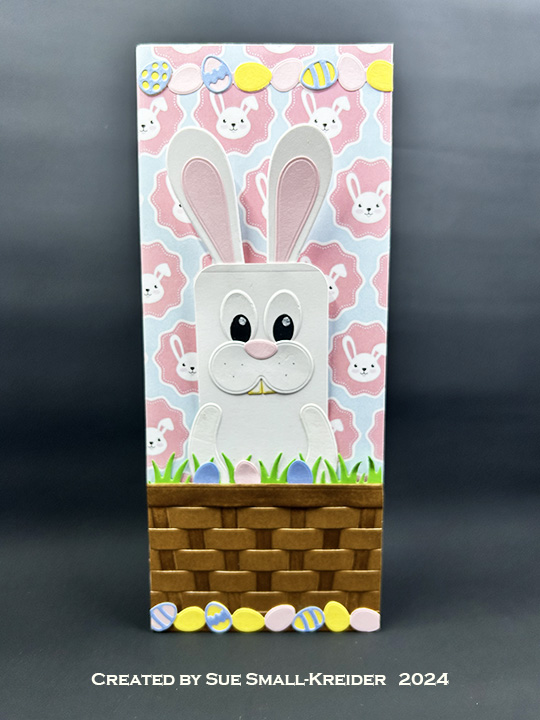
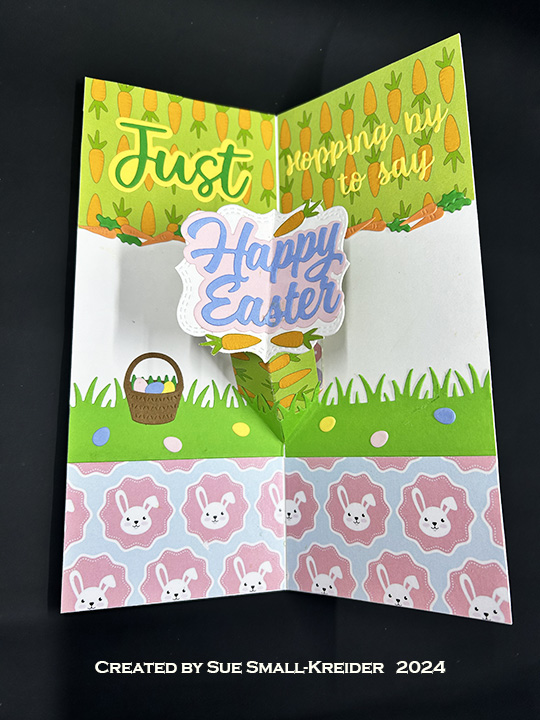
Wanting a basket to put a hatching chick pop-up ball in, I came up with a collapsible basket card for Easter using several of the new die sets in Karen Burniston’s February 2024 release.

How to make this interactive card:

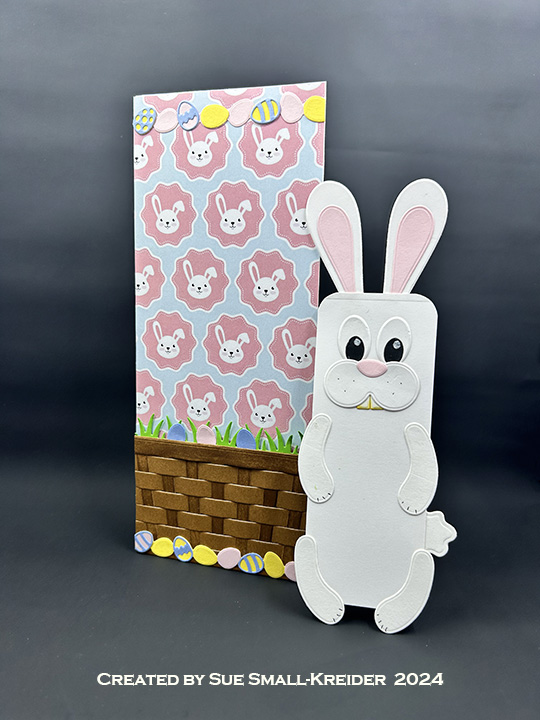
Chick: Make two Mini Pop-up Balls – one entirely yellow and the other half yellow, half white. Assemble chick following Karen Burniston’s assembly video located at the bottom of the Mini Pop-up Balls page. Cut six of the top and bottom eggshell jagged pieces and one hexagon for the top of the egg from white cardstock using the dies from the Animal Add-on 5 die set.

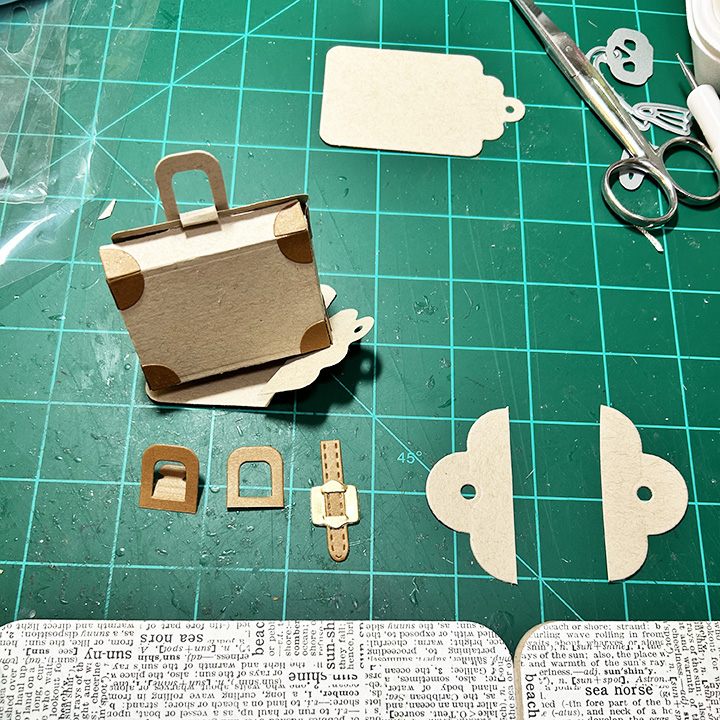
Basket: Cut four of the basket pieces from the Wide Woven Basket Box Card set and assemble as shown in the KB assembly video at the bottom of the linked page. Trim off the side tabs on the four basket pieces. Watch the following video. Cut two of the largest crosshatch squares from brown.

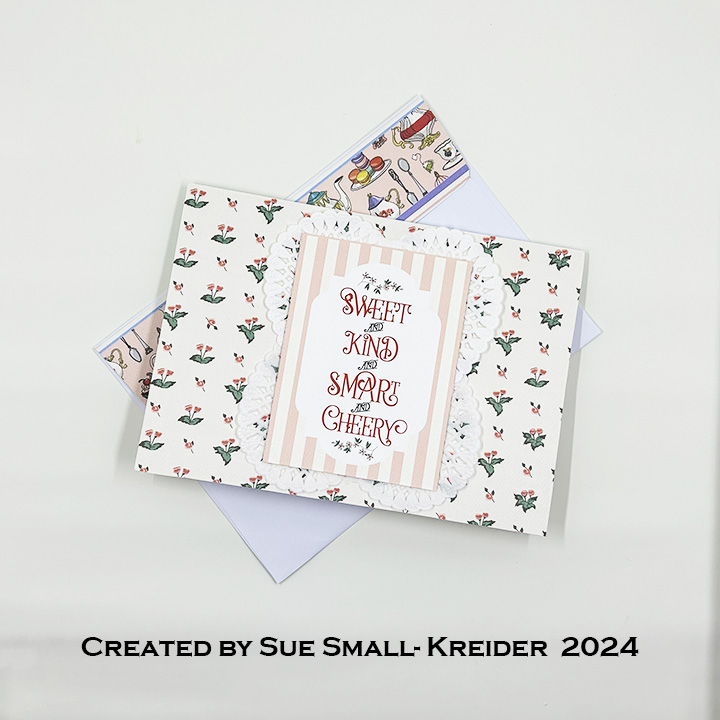
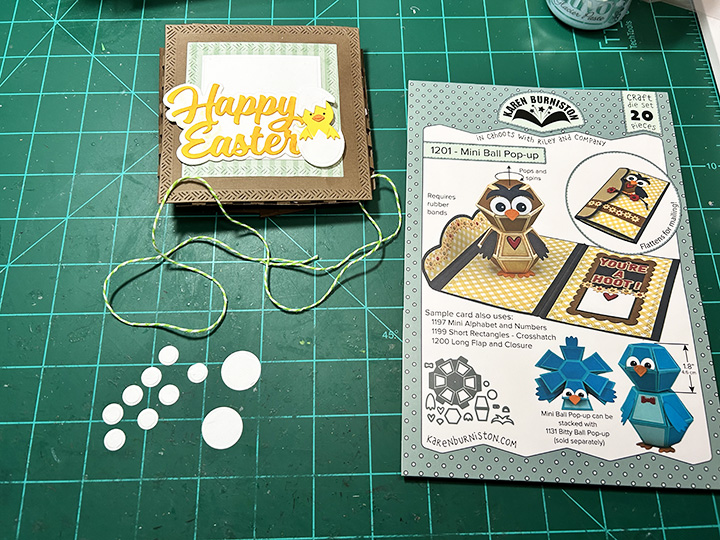
Closure Sentiment: Cut the Shadow from the Happy Easter word set from white. Cur the words from yellow and ink bled to a darker yellow. Die cut eggshell and chick pieces following assembly video for Spring Animals.

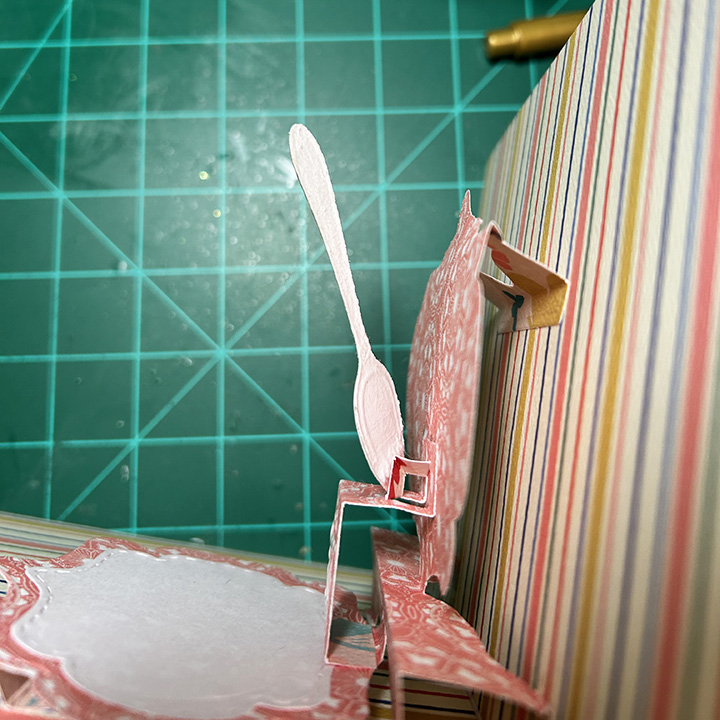
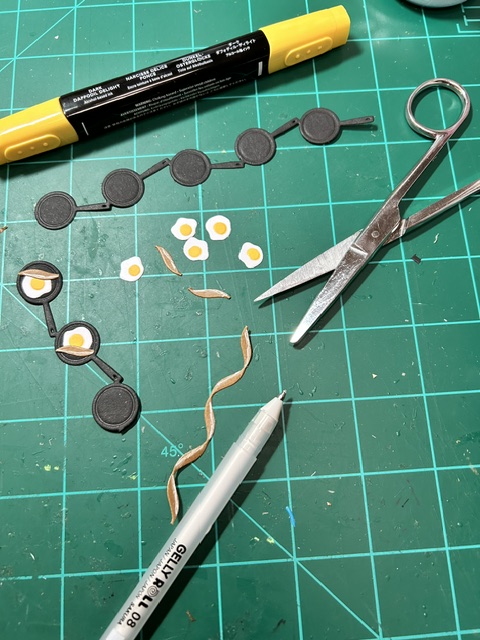
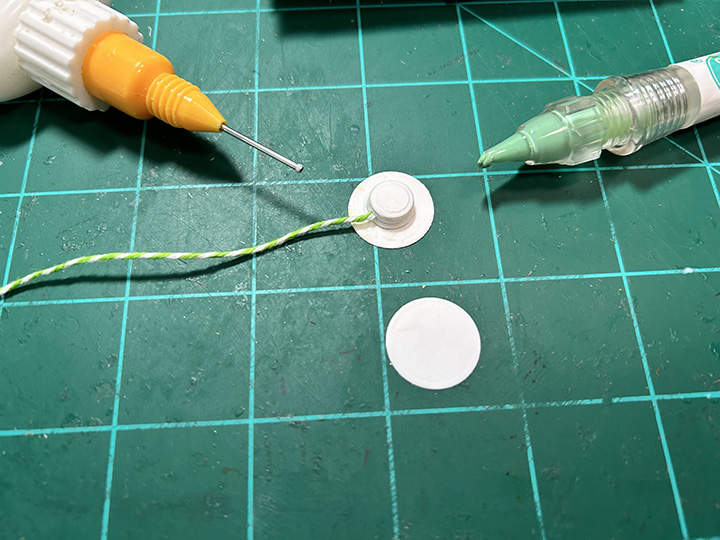
Glue assemble chick to sentiment.  Cut eight of the smaller eye circles and two of the larger eye circles from the Mini Pop-up Balls die set. Glue four of the small circles onto one of the large circles. Cut a piece of string at least 24-inches long and glue one end on top of small circle stack. Glue the last four circles on top of the string end, thus sandwiching the string in center of the small circles stack of eight. Attach to top of stack the last large circle. Once the stack is dry, glue to the back of the sentiment and then onto top basket flap. Let dry with a weight on top of it.

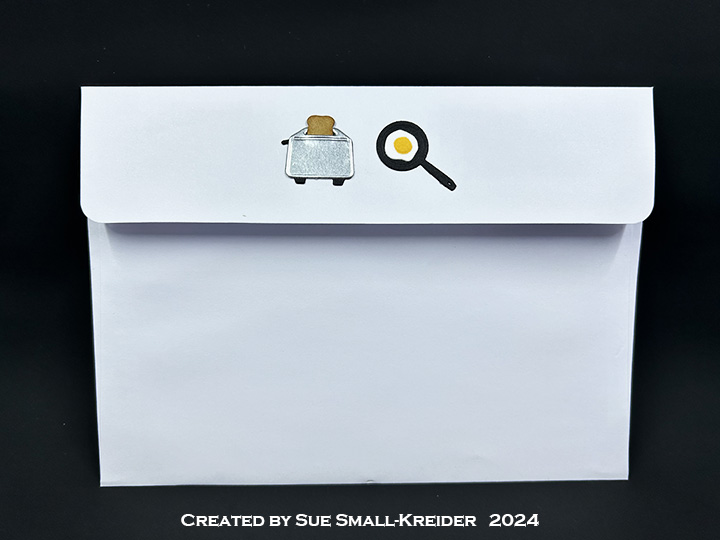
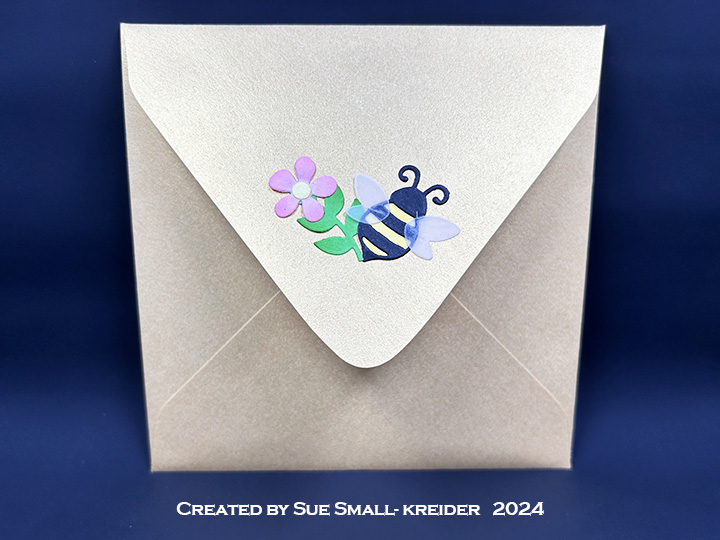
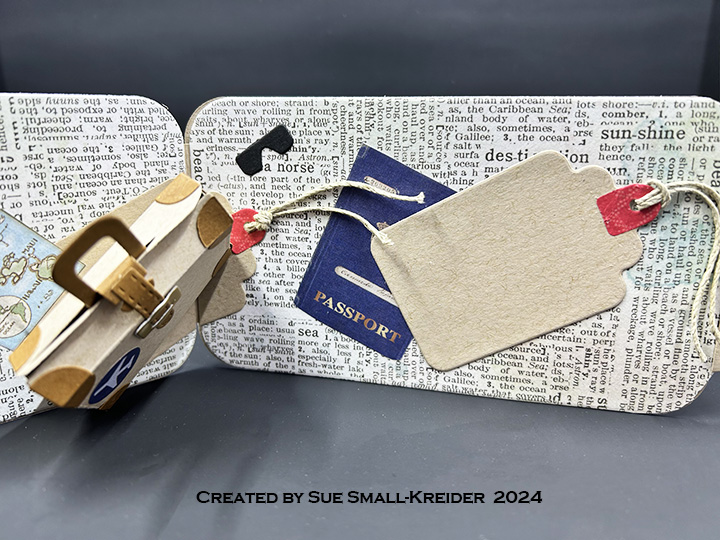
Envelope: This card would either be hand delivered or mailed in a bubble pack envelope.

_______________________________________

Thank you for reading this blog post. I hope this inspires you and makes you smile.

Please like and leave comments 😊

_______________________________________

Materials Used:

Dies

Papers

  • Hot off The Press – Paper Pazazz – 12×12 Single-Sided Paper – Soft Tints Green Stripes
  • Black, Blue, Brown, Orange, White and Yellow Cardstock

Ink

  • Ranger – Tim Holtz – Distress Ink- Fossilized Amber and Vintage Photo
  • Pigma – Mircon 01 Fine Tip Pen – Black

Adhesives

Tools

  • Stamping Blocks used as paperweights
  • Scissors
  • Tombow – Mono – Sand Eraser -512A

Miscellaneous

  • 24-inches of Baker’s Twine

Coffee Loving Couple

Different things bond couples together, but for one couple I know it is coffee. This is a card to celebrate their wedding anniversary.

I used two of Karen Burniston’s new February 2024 release diesTea and Coffee Borders and Tea and Coffee Pop-Up along with several previously released dies – Rectangles and Labels – Crosshatch, Word Set 12 – Anniversary and Cupcake Pop-Up.

Thank you for reading this blog post. I hope this inspires you and makes you smile. Please like and leave comments 😊

Materials Used:

Dies

Papers

  • Carta Bella – 12×12 Double-Sided Textured Cardstock Collection Kit – Gather At Home
  • Bazzill – 12×12 inch Cardstock – Travertine
  • Recollections – 8.5×11 Shimmer Cardstock – White Gold
  • Black, Brown, Pale Green and White Cardstock
  • Clear Vellum
  • #10 Business Envelope – Kraft Brown

Ink

  • Ranger – Tim Holtz – Distress Ink – Black Soot, Gathered Twigs and Saltwater Taffy
  • Pigma – Mircon 01 Fine Tip Pen – Black

Adhesives

Tools

  • Die Cutting Machine
  • Bone Folder
  • Craft Mat
  • Sponge Dauber
  • Stamping Blocks used as paperweights
  • Scissors
  • Ball Tipped Shaping Tool
  • Stiff Foam Mat

A Practically Perfect Birthday Card

It’s time to see more of Karen Burniston’s February 2024 release of new dies.

There is a wonderful scene in the Julie Andrew’s movie Mary Poppins, where she takes measure of the children with her tape measure and when her measure is taken it says “practically perfect.” This is a birthday card for the “practically perfect” person in everyone’s life.

Cardbase: I used a purchased A7 (5×7-inch) cardbase and envelope. Cut four 5×7 panels of decorative paper. (I used a Mary Poppins themed paper collection from Carta Bella.) Glue two to the outside and two to the inside of the cardbase leaving the center fold uncovered. (I used two panels of striped paper inside the card, matching up the stripes at the fold.) Decorate the front and back with journaling cards from the paper collection. (I used two heart paper doilies to go under the front journaling card which was popped-up with foam tape, while the back had a copier paper scalloped border cut using the scalloped rectangle die in the Rectangles and Labels – Crosshatch set and trimmed to fit.)

Double Lorna Platform: Fold a piece of pink decorative cardstock 4×8-inches to form a 4-inch square. Using a bone folder, make the fold crisp. With the paper folded, place the largest die from the Lorna Label Pop-Up set with the open tab above the fold matching the score line with the fold. (I found that I had to use a shim to cut through the double thickness of the cardstock to get the die to cut through both layers. You may have to adjust the sandwich for your die cutting machine. Test first before cutting your decorative cardstock.)

Train the folds. Place the center fold of the double mechanism along the inside center fold of the cardbase. Tuck the tiny tabs on either side of the label base under and glue to the cardbase with both the mechanism and cardbase flat. Close card to train label base to pop-out. (I used a pencil to pop the tube-like base out the first time.) Glue the upper tabs to cardbase as shown on package directions.

Cut a label from white copier paper using the largest stitched label die and glue to the bottom label platform.

Tea Cup and Spoon Mechanism: When gluing the mechanism from the Tea and Coffee Pop-Up set onto the double Lorna platform, a strip the width of the Lorna platform must be cut from the bottom tab of the mechanism.

Spoon: Cut from a heavy silver foil cardstock using the spoon die in the Tea and Coffee Pop-Up set.  (I used some silver packaging.) Glue the back of spoon to angled top mechanism making sure the position will be within the cup when open and within the card when closed.

Tea Cup and Saucer: Emboss the cup and saucer onto lightweight pink cardstock the die cut using the cup and saucer dies in the Tea and Coffee Pop-Up set. Leaving the cup in the die, ink through the stencil feature with pink ink. Remove from die and ink the cup’s handle, base and rim stripe with pink ink. Ink saucer base. With gold marker trace embossed lines on cup and saucer. Glue to front of mechanism.

Sentiments: A journaling card with “Sweet and Kind and Smart and Cheery” and a word tape measure border from the paper collection were used for the front and back of the card. “Happy Birthday” was cut from light blue cardstock using Word Set 2 – Birthday.

Envelope: The back flap of the envelope is covered with a border strip of a tea party.

Thank you for reading this blog post. I hope this inspires you and makes you smile. Please like and leave comments 😊

Materials Used:

Dies

Papers

  • Carta Bella – 12×12 Double-Sided textured Paper Collection Kit – Practically Perfect
  • White Copier Paper
  • Pale Blue and Pink Lightweight Cardstock
  • White Heart Shaped Paper Doilies – 4-inch wide
  • Silver Foil Packaging
  • Park Lane Paperie – A7 Cardbase and Envelope – White

Ink

  • Ranger – Tim Holtz – Distress Ink- Saltwater Taffy
  • Pigma – Mircon 01 Fine Tip Pen – Black
  • Crafter’s Square – Metallic Marker .05 in Point – Gold

Adhesives

Tools

  • Die Cutting Machine
  • Bone Folder
  • Craft Mat
  • Sponge Dauber
  • Stamping Blocks used as paperweights
  • Scissors
  • Pencil

Wakey Wakey Eggs N’ Bakey

This card was made for Craft Roulette #202 whose parameters included a 5×7 inch card, formal & informal colors, warm(s) element and crisscross. Specifically, this card was made for a son starting a new job that requires an early morning wake-up time.

I use several of Karen Burniston’s new food borders and label dies from her February 2024 release including: Kitchen Borders, Baking Borders, Lorna Label Pop-Up and Good Luck word set as well as previously released Oven Pop-Up and Oven Extras.

Cardbase: Cover a 5×7-inch wide top-fold cardbase with two patterns of decorative paper – one for card front and inside top (think wallpaper) and another pattern for the back and inside bottom (think flooring.)

Card Front Decorations: Using the Kitchen Borders die set, cut one silverware border from matte silver cardstock for the top of the front panel. From black cardstock cut the frying pan/skillet border twice and trim one border down to three pans. Glue the two pan borders together by overlapping skillets. (Skillets are 1-inch wide, so should have seven skillets to cover all the way across card panel.)

Stove, Cabinets and Counters: Watch assembly video for the Oven Pop-Up at the bottom of the page link before starting. I used glossy white cardstock for the stove with a piece of clear packaging for the oven window. For the oven and cabinet base I used a textured silver cardstock and also cut a square piece to cover the back wall of the oven in textured silver. For the cabinet doors on the uppers and lowers, I used the large door die in the Oven Extras set (cut from a coated black cardstock) with the matte silver knobs from the Oven Pop-Up set.

Food: Using the Kitchen Borders set, cut out 8 eggs from white and use die as stencil to color egg yolks yellow. Using the ribbon border die from the Border Blends – Trims die set, cut one from brown cardstock. Using a white gel pen color the bacon fat along one edge of ribbon. Cut ribbon into strips small enough to fit into skillet.

Using the Kitchen Borders set, Cut two pieces of bread from kraft cardstock and using tweezers to hold, ink the edges to look toasted. For the toaster, cut a toaster border from black cardstock. Cut two of the toaster covers with slots from matte silver cardstock. Cut two of the toasters from the border leaving on the tiny levers that connect the toasters. (I cut the levers off and had to use the tiny waste pieces from the stove burners as toaster levers.) Glue the silver piece atop the black piece and insert bread before glue dries positioning it according to the lever position – up with toast almost out or down with toast mostly inside toaster.

For the plate, I used the circle border piece in the Baking Borders set and cut the plate from glossy white cardstock and used the die as a stencil to draw the blue circle in the center of the plate. The spatula is in the Oven Pop-Up set and is cut twice from different cardstocks and the handle trimmed to fit.

Sentiments: The front sentiment of “Wakey Wakey Eggs N’ Bakey” were cut using the Mini Alphabet set’s shadow and letter dies. Inside the card, The Good Luck die set was used along with a computer generated “On your new job” cut out with the banner in the Lorna Label Pop-Up. On the card back the largest label from the Lorna Label was used for a personalized message space.

Envelope: Leftover toaster and frying pan are glued to the back of the envelope. (I would put the card and envelope in a padded envelope to mail, but it will be hand delivered.)

Thank you for reading this blog post. I hope this inspires you and makes you smile. Please like and leave comments 😊

Materials Used:

Dies

Papers

  • DCWV – 12×12 Single-Sided Cardstock – Jet Black Stack
  • The Paper Cut – 8.5×11 Glossy Cardstock – White
  • Bazzill – 8.5×11 Textured Cardstock – Tiara -18-1002
  • Black Coated 8.5×11 White-Core Cardstock
  • Matte Silver Cardstock
  • White Marble Cardstock from Tissue Box Packaging
  • Black, Blue, Brown, Kraft and White Cardstock
  • Park Lane Paperie – A7 Cardbase and Envelope – White

Ink

  • Ranger – Tim Holtz – Distress Ink- Vintage Photo
  • Stampin’ Up – Stampin’ Blends Marker – Dark Daffodil Delight
  • Sharpie – Permanent Marker – Ultra Fine Tip – Black
  • Sharpie – Permanent Marker – Ultra Fine Tip – Blue
  • Sakura – Gelly Roll Pen – Medium – White
  • Computer and Printer

Adhesives

Tools

  • Tweezers
  • Sponge Dauber
  • Stamping Blocks used as paperweights
  • Scissors
  • Pencil

How Does the Easter Bunny Do It All?

Hi Crafty Friends,

Welcome to our Karen Burniston Products – KB Riley LLC February 2024 Release Blog Hop. The Design Team have come together with Karen today for a fun blog hop to celebrate the release of 12 new dies. Sneak peeks of the new release started last week, and the dies are available to order NOW! (Click here to go to the GIVEAWAY section.)

Ever wonder how the Easter Bunny gets all those eggs prepared to hide? He uses gnomes of course!

This card uses five of the new release die sets including: Happy Easter, Easter Borders, Animal Add-ons 5, Baking Borders and Kitchen Borders as well as eight previously released die sets by Karen Burniston.

Instructions for how I created this 5×7-inch card with the gnome kitchen are in video above. The card front instructions are in written format only and are below the video. (Sorry I had a camera malfunction.)

Card Front:  To create the scene within the oval frame, I first had to create the scene by gluing the tree, basket and bunny to a strip of grass from the new Easter Borders set. (See assembly videos for tree and bunny on the bottom of their linked pages.)

Next I glued six grassing strips, plus the waste sections between the strip cutouts to form a grassy lawn. The second basket was glued in on a different layer than the bunny.

The oval frame was cut using the two largest dies in the Ovals – Crosshatch set. The scene was glued to the back of the frame and excess bits were trimmed off the oval.

Sentiments: For the card front sentiment of “How does he do it” I cut individual letters from black using the Mini Alphabet and Numbers set. For the “Happy Easter” I cut the shadow from white and the words from yellow cardstock using the new die set Happy Easter. I brushed a coat of glitter gloss over this sentiment to add some magic to the scene.

Thank you for reading this blog post. I hope this inspires you and makes you smile. Please like and leave comments 😊

Materials Used:

Dies

Papers

  • Violet Studio Designs – 8×8 Single-Sided 180gsm Paper Pack – Hoppy Easter
  • The Paper Cut – 8.5×11 Cardstock – 10PT Kromekote -Glossy White
  • Bazzill – 8.5×11 Textured Cardstock – Tiara -18-1002
  • Colored and White Cardstock
  • Park Lane Paperie – A7 Cardbase and Envelope – White

Ink

  • Ranger – Tim Holtz – Distress Ink – Dried Marigold, Frayed Burlap and Salty Ocean
  • Sharpie – Permanent Marker – Fine Tip – Pink
  • Sharpie – Permanent Marker – Ultra Fine Tip – Black
  • Pigma – Mircon 01 Fine Tip Pen – Black
  • Nuvo – Aqua Shimmer – Glitter Gloss

Adhesives

Tools

Dies are available to order NOW on the website.

GIVEAWAY:

To celebrate the release Karen Burniston and each of the Karen Burniston – KB Riley LLC Design Team members will be giving away a $25 Gift Certificate to some lucky person who comments on our blog posts, so make sure you join the hop and comment on everyone’s blog post. Winners will be randomly chosen from ALL of the blog hop comments received on our blog posts by Monday, 26 February 2024. Lots of chances to win some goodies, so just leave a comment on this post or any other blog hop posts to enter! Don’t forget to leave some way for us to contact you, in case you are a lucky winner!

Karen B

Lois Bak

Sue Small-Kreider – YOU ARE HERE

Frances Byrne

Jennifer Webster

Fran Sabad

Suzanne Smit

Nicky Foden

Sandy Diller

Good Luck – You Will Bee Amazing!

It’s Sneak Peek Week for Karen Burniston’s February 2024 release. These dies will be available for purchase on February 19, 2024 on the KB Riley LLC website.

Your co-worker is leaving for a new job and you need a card for others in the office to sign for her. That is the brief for this accordion card.

This card uses two of the new word sets in Karen Burniston’s February 2024 release – Good Luck and Word Set 18 – Connectors – along with previously released dies of Fancy Label Accordion, Fancy Flourish Frames, Flutter Charms and Fun Flowers.

Watch the tutorial video below on YouTube.

Thank you for reading and watching this blog post. I hope this inspires you and makes you smile. Please like and leave comments 😊

Materials Used:

Dies

Papers

  • Hot off The Press – Paper Pazazz – 12×12 Single-Sided Paper – Soft Tints Green Stripes
  • Stampin’ Up – 8.5×11 Thick Cardstock – Basic White
  • Recollections – 8.5×11 Shimmer Cardstock – White Gold
  • American Crafts – 12×12 Weave Textured Cardstock – Evergreen
  • Black, Greens, Light Blue, Pink and Yellows Cardstock
  • Clear Vellum
  • Matte Gold Foil Cardstock
  • 6-inch Square Envelope – Gold

Ink

  • Ranger – Tim Holtz – Distress Ink- Salty Ocean, Mowed Lawn, Fossilized Amber, and Saltwater Taffy
  • Pigma – Mircon 01 Fine Tip Pen – Black

Adhesives

Tools

  • Die Cutting Machine
  • Bone Folder
  • Craft Mat
  • Stamping Blocks used as paperweights
  • Scissors

Pool Mermaid Birthday Card

It’s Sneak Peek Week for Karen Burniston’s February 2024 release. These dies will be available for purchase on February 19, 2024 on the KB Riley LLC website.

Inspired by a little girl who loves to pretend she is a mermaid in her backyard pool, this birthday card features not only mermaids, but also a blow-up flamingo float in a pop-up pool.

This card was made with Karen Burniston dies including the newly released Tiny Accessories 4 set, the previously released dies of Cake Pop-Up, Princess and Mermaid, Beach Borders, Beach Charms, Rectangles and Labels – Crosshatch and a number of word sets.

Cardbase: I used a purchased 5×7 white cardbase that I covered all four panels with polka dot papers- blue on outside and green inside – using the largest rectangle in the Crosshatch Rectangles and Labels die set. This will be a top-fold card.

Mermaids: Using the Princess and Mermaid set to cut three of the mermaid’s body from green glitter cardstock – one was cut on the reserve side of the glitter cardstock. Cut three long hair pieces from pale yellow cardstock and two head and shoulders from a skin shade of cardstock. The mermaid on the inside needs to have both the front and back finished, hence the reverse cut body and extra hair pieces. Ultra fine tipped markers were used to draw on the face and a light blending of pink ink along with a dots of pink glitter gloss to the checks. Sandwich the head and shoulders between the mermaid body pieces and then attach the hairpieces. Add clear glitter gloss to hair. Make mermaid for card front in similar manner, but do not finish the backside. Cut a small shell from the die set and tint with pink ink. Have front mermaid hold the shell.

Flamingo Float: Using the flamingo float dies in the Tiny Accessories 4, cut one float and two wings. Decorate both sides of float and one front of wing and back of wing. Shade the float and wings with pink ink and add white highlights with gel pen. Color the beak with a black marker and add white highlights. Cut two tiny white circles and with black marker make small circles and add a white dot highlight for the eyes. Glue eyes on either side of float. Slip mermaid into float and then attach wings.

Pool: (Watch assembly video above for this modification of the Cake Pop-Up.) Cut two of the largest cake layer in the Cake Pop-Up die set from water patterned paper. Cut another two using the same die piece from a pattern paper that will be the outside of pool. Trim off bottom tab and four-sided trapezoid top flap from each of the outside pool pieces to form a tabbed strip. Using the four-sided trapezoid as a pattern trace and cut out two pieces from water patterned paper. Assemble as directed adding mermaid on flamingo float. Attach to inside of top-fold card. Decorate the inside cardbase with a beach ball from Beach Charms and tiny flamingo from Beach Borders.

Sentiments: The card front sentiments come from two different sets – Word Set 9 – Love and Word Set 5 – Royalty. “Love you” was cut from white patterned paper and brushed with clear glitter gloss. The “My Little” banner has in-laid  letters that are also brushed with glitter gloss. Sequins, acrylic drops and heart are the dimensional accents to the card front.

For the inside sentiment of “Happy Birthday,” both the word set and shadow dies were used with the shadow cut from white patterned paper and the words cut from pink cardstock brushed with pink glitter gloss. The framed label for a personal message has three frames and one label cut using the largest frame die in the Rectangles and Labels – Crosshatch die set. Green sequins were added to the corners of the label.

Thank you for reading this blog post. I hope this inspires you and makes you smile. Please like and leave comments 😊

Materials Used:

Dies

Papers

  • Ink N’ Splatter – 6×6 Paper Pack of Double-Sided Cardstock – Honey Bee Sweet
  • DCWV – 6×6 Glitter Cardstock- Glitter Brights – Green
  • Core’Dinations – 12×12 Textured Printed Cardstock – Light Blue Small Dot – 377877
  • Core’Dinations – 12×12 Textured Printed Cardstock – Light Green Small Dot – 377865
  • Pinks, White and Yellow Cardstock
  • Park Lane Paperie – A7 Cardbase – White

Ink

  • Ranger – Tim Holtz – Distress Ink- Saltwater Taffy
  • Sharpie – Permanent Marker – Ultra Fine Tip – Black
  • Sharpie – Permanent Marker – Ultra Fine Tip – Red
  • Pigma – Mircon 01 Fine Tip Pen – Black
  • Sakura – Gelly Roll Pen – Medium – White
  • Nuvo – Aqua Shimmer – Glitter Gloss
  • Scrapbook.com – Glitter Brush Marker – Pretty Pink

Adhesives

Tools

Miscellaneous

  • Kat Scrappiness – Sparkling Clear Droplets Sampler
  • Queen & Co. – Lovely Hearts -9mm Acrylic Hearts – Green
  • This Calls For Confetti – Crystal Metallic Aqua Violet
  • This Calls For Confetti – Opaque iridescent Celadon

A Pop-Up Cruise Tag Card

It’s Sneak Peek Week for Karen Burniston’s February 2024 release. These dies will be available for purchase on February 19, 2024 on the KB Riley LLC website.

Who doesn’t enjoy a vacation and this tag card is sure to let those going on a cruise vacation know they are in for some fun.

This pop-up tag card uses Karen Burniston dies – specifically the Purse Pop-Up, Topper Tags, Tag Book Pop-Up, Cruise Charms and Tiny Accessories 4.

Tag Cardbase: Cut two of the largest tags in the Topper Tags die set from kraft cardstock. Use the hinge die in the Tag Book Pop-Up or cut a rectangle of 1.5×3.5-inch and fold in half for the card hinge that is glued to the inside of the two tags. Cut two large tags of decorative cardstock and glue over the inside of the tags and hinge. Cut another two large tags of decorative papers and glue to the front and back of the card. (My inside decorative cardstock did not cover the entire tag, so I cut the top scalloped section of the tag from kraft cardstock.)

Pop-Up Suitcase: Follow the assembly video at the bottom of the Purse Pop-Up page link instructions to make the suitcase on a small tag cut from the Tab Book Pop-Up set. I cut the handle again twice, strap once and 20 of the corner pieces from dark brown. Cut the buckle from gold cardstock. (I used a bit of gold foil packaging form some chocolates.) The strap can be glued to the rolled under piece as long as it doesn’t block the movement of the handle as it slides open and closed.

Scuba Gear and Decorations: Using the Tiny Accessories 4 die set, cut the mask and snorkel once from black and once from blue. trim off the top and bottom knobs of the blue snorkel and glue on the black snorkel. Glue the blue mask onto the black mask to give it depth. Save the black center section of the mask to use as sunglasses. Cut a pair of flippers from black. (I had images of a passport and a map of tropical islands that I glued to the inside of the card as well as the airplane sticker on the suitcase. More travel images were added to the back and front of the card.)

Sentiments: The ship and “bon voyage” sentiment on the card from come from the Cruise Charms set while the inside tags come from the Tag Book Pop-Up set. Hemp cord is tied to the tags.

Envelope: The tag card easily fits in a #10 business envelope which I used a paper image to decorate the back flap.

Thank you for reading this blog post. I hope this inspires you and makes you smile. Please like and leave comments 😊

Materials Used:

Dies

Papers

  • 49 and Market – Vintage Artsy Beached 12 x12 Collection
  • Hot Off The Press -Artsy Collage – 240 Paper Art Images – Travel
  • Practical Publishing – So Beautifully Organized April 2019 Box – Travel Paper
  • Fun Stampers Journey – 8.5×11-inch Cardstock – Oatmeal Cookie
  • Red Patterned Paper from Recycle Envelope
  • Gold Foil cardstock from Recycled Candy Packaging
  • Aqua Blue, Black, Brown, Navy Blue and White Cardstock
  • #10 Business Envelope – Kraft Brown

Ink

Adhesives

Tools

Miscellaneous

  • Lawn Fawn – Glow-in-the-Dark Hemp Cord

Bunny Bookmark Pop-Up Easter Card

It’s Sneak Peek Week for Karen Burniston’s February 2024 release. These dies will be available for purchase on February 19, 2024 on the KB Riley LLC website.

Inspired by a bookmark card I recently made, I decided to make a bunny bookmark slimline card using Karen Burniston’s new Animal Add-ons 5, Easter Borders, and Happy Easter.

Cardbase: Start with a 7.25×8.75-inch rectangle of heavy white cardstock and fold to create a slimline card that is slightly larger than 3.5×8.5-inches. (I folded my cardbase crooked and had to even up the sides by trimming off some.) Using decorative Easter papers cover the front and back of the card with full sheets. Use scraps to cover the top and bottom of the inside of the card. Make sure to leave a gap where the card fold is in the inside papers.

Bunny Bookmark: Cut a 2×5-inch rectangle from heavy white cardstock. Round corners with a corner punch. Using the Animal Add-ons 5 set, cut the two large ears, two large oval eyes, one double circle piece, one split square teeth piece, one wavy circle tail piece and four arm pieces from white cardstock. Cut two smaller ear pieces and one triangular nose piece from pink. Cut two smaller eye pieces from black. Using a white gel pen use stencil feature to add white highlight to black portion of eyes. With a fine-tipped black pen add three dots to double circle piece for whiskers. Add three small lines to each paw for nails. Ink the edges of the teeth piece very lightly with a pale yellow ink. Assemble the face of bunny using package picture as a guide onto the top of the rectangle. Glue ears to back of rectangle and arms and hind legs to front of rectangle. (Hint: glue the hind legs to bottom corners of rectangle then glue tail to back side just above the hind leg. Then glue arms so that the paw is just above top of tail.)

Basket Pocket: (Follow directions in assembly video at bottom of linked page.) Make one Wide Woven Basket Box Card panel from brown. Ink the slat pieces with brown ink before weaving into main basket piece and glue in place. Trim off tab. Cut from green cardstock a grassy strip and glue to back side of basket top. Using thin strips of foam tape on the bottom and sides of basket panel, attach to card front to form a pocket. Insert bunny bookmark.

Raising Platform: (Follow directions in assembly video at bottom of linked page the Raising Platform Pop-Up.) Cut one mechanism piece from double-sided decorative cardstock. (I used a carrot and bunny print.) Assemble onto a flattened cardbase. Cut one of the largest fancy label from white cardstock and fold in half. Glue on sentiment. Train the fold with the sentiment. Attach sentiment label to mechanism.

Decorations: Cut two egg borders from Easter Borders set using two different colors of cardstock. Cut two sets of decorative eggs from the same set in a darker color. Trim egg border to width of card and use left over eggs to decorate egg borders along with decorative eggs. Glue to finished borders to bottom and top of card front. Add any extra eggs to basket grass.

Cut two more grass strips from Wide Woven Basket Box Card set and glue to cardbase above bottom decorative paper inside card. Decorate with eggs and basket from the Animal Add-ons 5 set. Cut two of the carrot borders from the Easter Borders set from orange and two sets of carrot tops from green. Assemble carrots using a Quickstik tool or tweezers. Glue carrots to base of carrot paper inside card. (I had to cut the carrot border to cover the edge aesthetically.) Glue extra carrots to the sentiment label. (I cut some carrots from my decorative paper for the label.)

Sentiment: Using the new Happy Easter set, I cut the shadow from pink and the words from blue then cardstock since they are going on top of the platform label and being folded in half. The large “Just” with shadow is from Word Set 15 – Just Because. I had to do minor word surgery using Word Set 4 – Just A Note taking the “H” from “Hooray” and replacing the first “p” in “popping” with it to make “Hopping.” The word “by” comes from words in both word sets. “to say” is from Word Set 4.

Envelope: #10 business envelope back flaps are perfect to use border dies on. I cut the hopping rabbits and grass borders from the Easter Borders set and used fine-tipped pens to add the eyes and noses on the rabbits.

Thank you for reading this blog post. I hope this inspires you and makes you smile. Please like and leave comments 😊

Materials Used:

Dies

Papers

  • Kat Scrappiness –10.75×4-Inches Double-Sided, Slimline Sized Patterned Paper- Easter on Parade
  • Spellbinder’s – 8.5×11 Color Essentials Cardstock – Snowdrift
  • Blue, Brown, Green, Orange, Pink and Yellow Cardstock
  • #10 business Envelope – White

Ink

Adhesives

Tools

  • Die Cutting Machine
  • Scoring Board
  • Bone Folder
  • Craft Mat
  • Sponge Dauber
  • Stamping Blocks used as paperweights
  • Scissors
  • Large Corner Punch